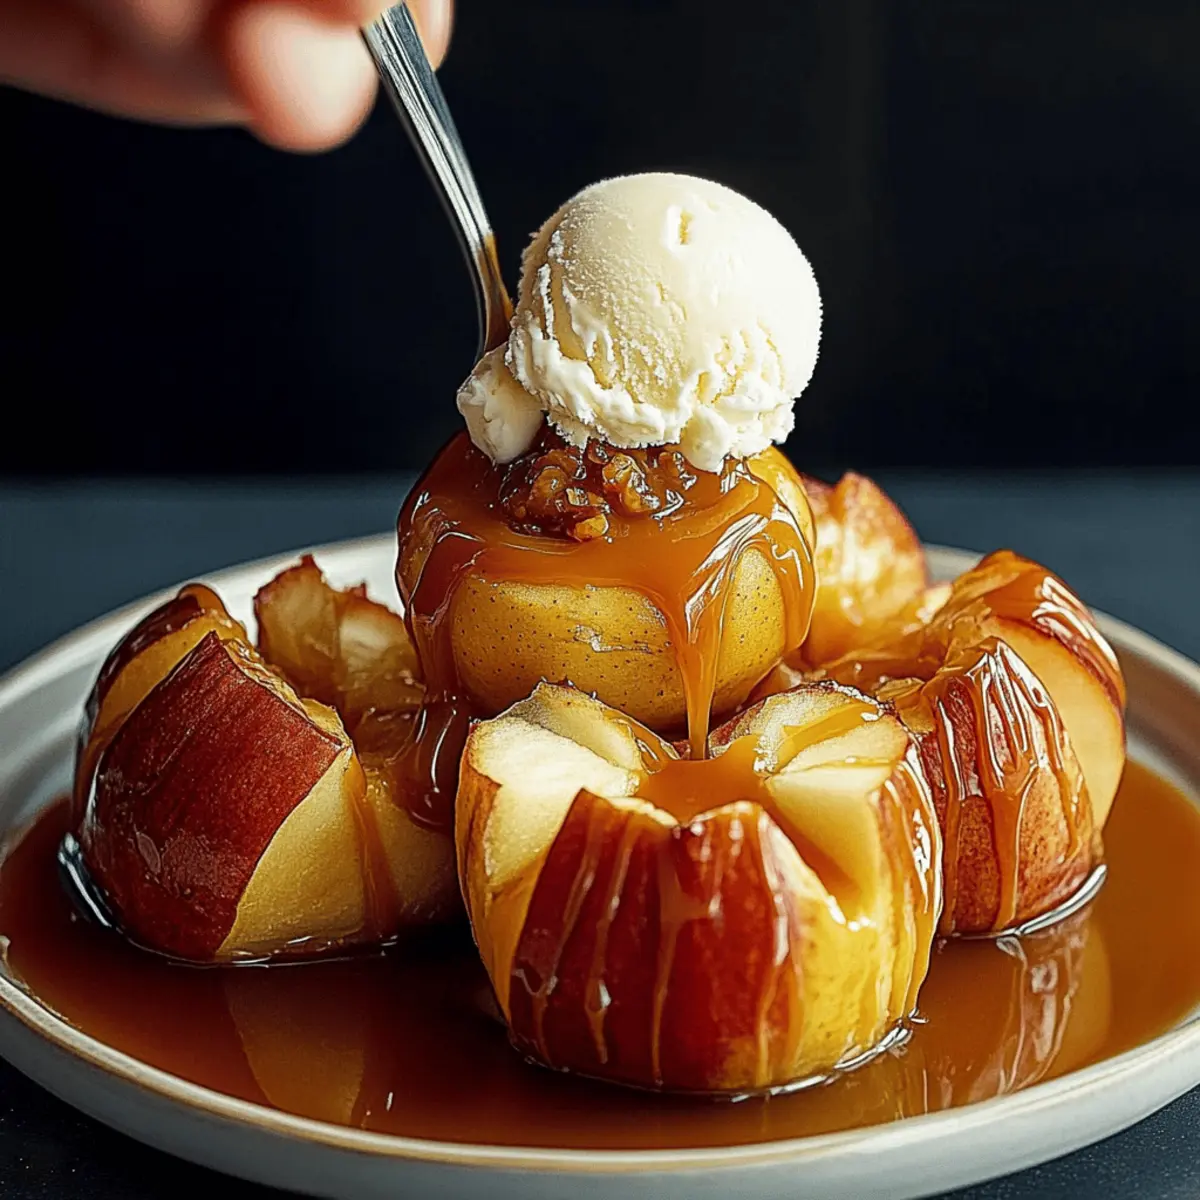
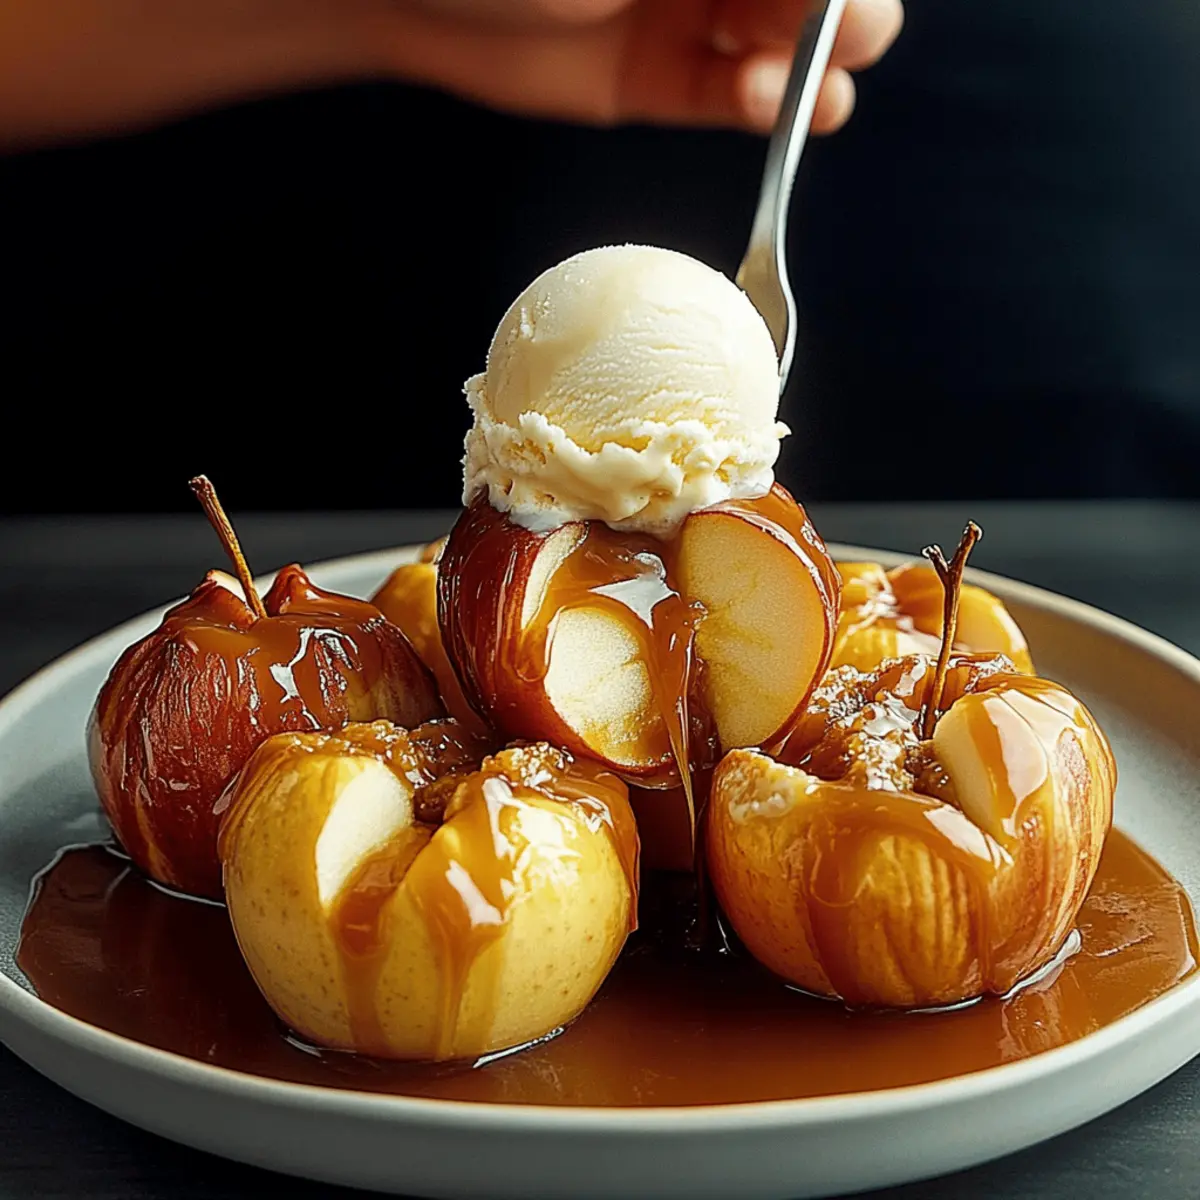
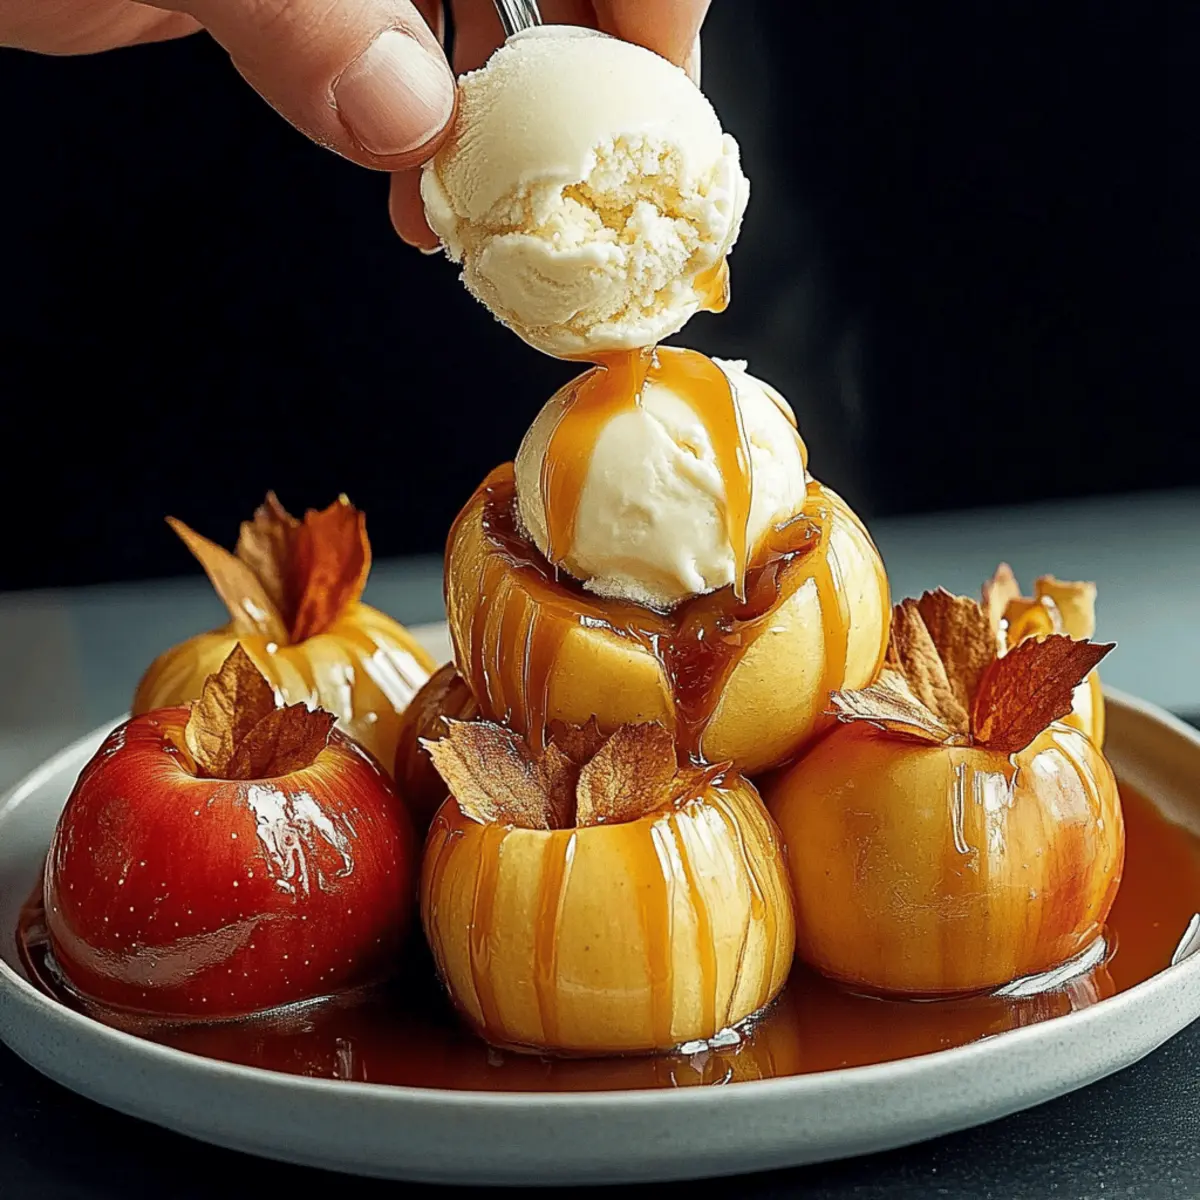
As the leaves start to mingle on the ground and the air turns crisp, my mind drifts to one comforting treat that captures the very essence of fall: the Ultimate Bloomin’ Apples. This stunning dessert transforms simple apples into beautiful, blooming delights, filled with a gooey center of caramel. What I love most is how easy and interactive this recipe is, making it perfect for cozy family gatherings or a sweet evening treat when you need a little pick-me-up. Imagine the tantalizing aroma filling your kitchen, cinnamon wafting through the air as you dig into soft, tender apples paired with creamy vanilla ice cream and a drizzle of warm caramel sauce. Are you ready to bring a little more autumn magic into your home?
Why will you adore Bloomin’ Apples?
Simplicity and Ease: This delightful recipe requires minimal effort, perfect for those busy evenings. Interactive Dessert: Invite friends and family to help assemble the apples, making it a fun kitchen project. Stunning Presentation: You’ll impress everyone with beautifully baked apples that truly look like blooming flowers. Irresistible Aroma: The smell of cinnamon and caramel will fill your home, creating an inviting atmosphere. Plus, pair with a scoop of vanilla ice cream for a rich flavor contrast. If you’re seeking more cozy ideas, be sure to check out our Comfort Food Beef1 or explore Food Tater Tot for more delicious fall favorites!
Ultimate Bloomin’ Apples Ingredients
Get ready to create this cozy fall dessert that will warm your heart!
For the Apples
- Apples – 4 firm varieties like Honeycrisp, Gala, or Granny Smith are best for holding their shape while baking.
- Cooking Spray – Essential for greasing the baking dish and preventing sticking.
For the Filling
- Chewy Caramel Squares – 8 pieces that will melt inside the apples for an irresistible gooey center.
- Melted Butter – 4 Tbsp. to add richness and aid in the caramelization process.
- Brown Sugar – 1 Tbsp. to deepen the flavor and sweetness of the filling.
- Granulated Sugar – 1 Tbsp. to enhance caramelization and sweeten the apples.
- Ground Cinnamon – ½ tsp. for that warm, fall flavor that makes these Ultimate Bloomin’ Apples even more delightful.
For Serving
- Vanilla Ice Cream – Perfect for a creamy contrast to the warm apples.
- Caramel Sauce – Drizzle over the top for extra sweetness and visual appeal.
These ingredients come together to create a fun and interactive experience, perfect for sharing with loved ones. Enjoy the delightful process of crafting your Ultimate Bloomin’ Apples!
Step‑by‑Step Instructions for Ultimate Bloomin’ Apples
Step 1: Preheat the Oven
Begin by preheating your oven to 375°F. If you’re using an air fryer, set it to 350°F. This initial step is crucial to ensure that your Ultimate Bloomin’ Apples bake evenly and come out perfectly tender. While your appliance is warming up, prepare your baking dish by greasing it with cooking spray, which will prevent sticking during the baking process.
Step 2: Prepare the Topping Mixture
In a medium-sized bowl, combine 4 tablespoons of melted butter, 1 tablespoon of brown sugar, 1 tablespoon of granulated sugar, and ½ teaspoon of ground cinnamon. Mix these ingredients until well-blended. The warm aroma of cinnamon will fill your kitchen, setting the stage for the delightful dessert that is the Ultimate Bloomin’ Apples.
Step 3: Get the Apples Ready
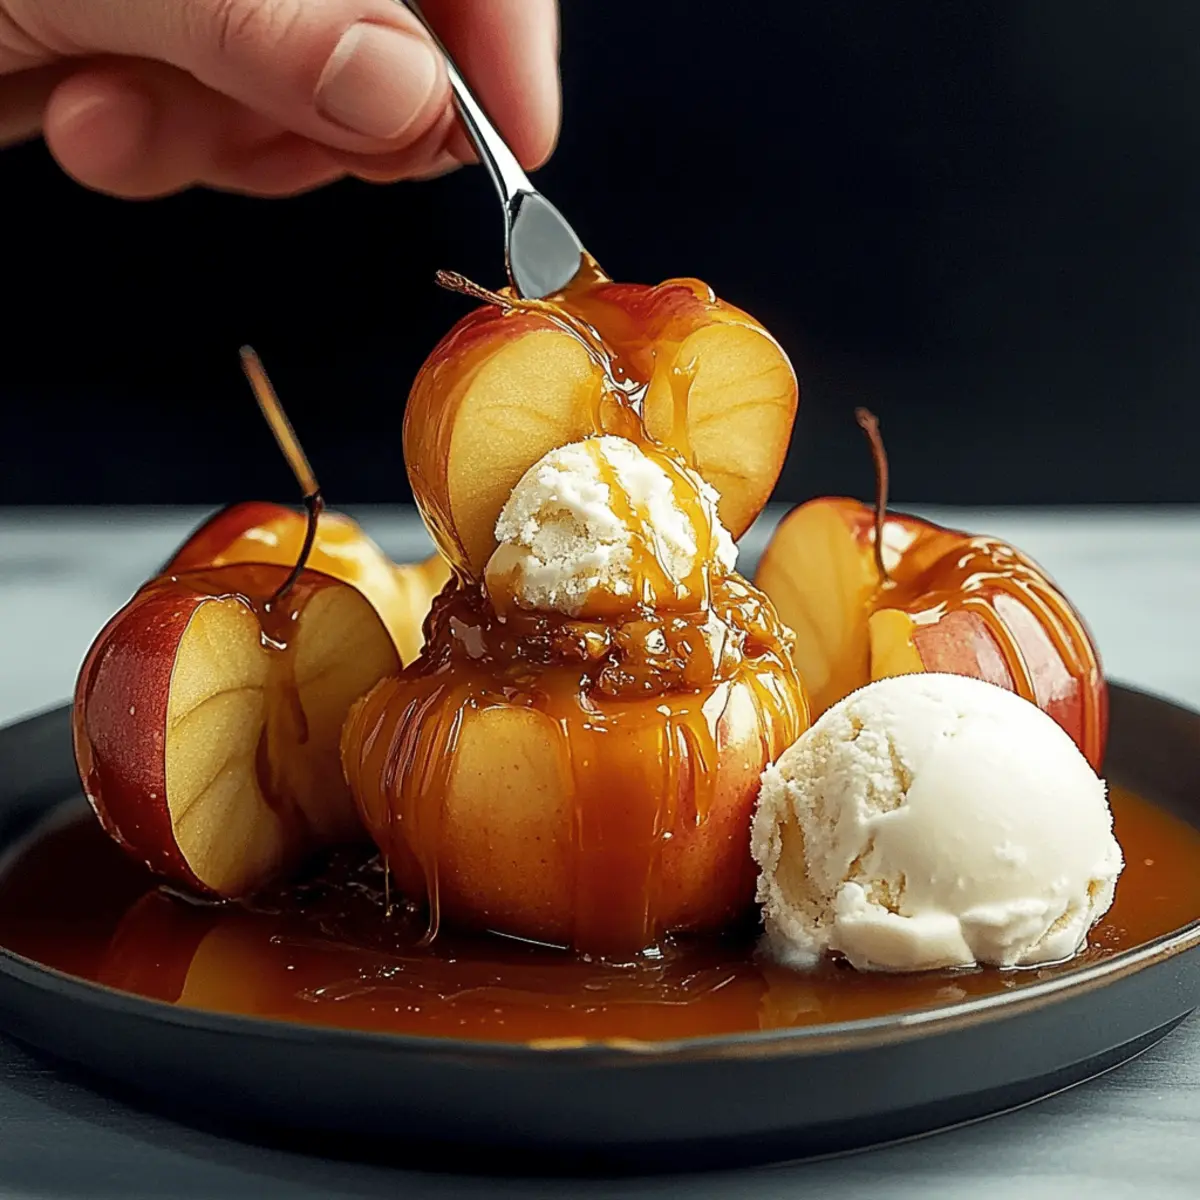
Take your four firm apples and slice off the tops, making sure to create a stable base. Core the apples carefully, ensuring not to cut through the bottom, so they can hold the caramel filling. To create the blooming effect, make thin crosswise cuts about ¾ of the way down, which will allow the apples to fan out beautifully during baking.
Step 4: Fill the Apples
Place two chewy caramel squares into the center of each apple, allowing them to melt into a gooey filling. With a pastry brush, generously apply the prepared butter mixture over and inside the crevices of the apples, ensuring that the mixture seeps into every cut. This step elevates the flavor profile of your Ultimate Bloomin’ Apples.
Step 5: Bake the Apples
Now it’s time to bake your Ultimate Bloomin’ Apples. For oven baking, arrange the filled apples in the greased baking dish and place them in the oven for approximately 30 minutes. If using an air fryer, position them in the basket and bake for about 20 minutes. You’ll know they are done when the apples become tender and slightly golden, releasing the sweet scent of caramel and cinnamon.
Step 6: Serve Warm
Once baked, allow your Ultimate Bloomin’ Apples to cool slightly before serving. Each apple should be fragrant and soft. Serve these delicious creations warm, topped with a generous scoop of creamy vanilla ice cream, and drizzle with caramel sauce for an extra treat. Embrace the warm flavors of fall with every delightful bite!
What to Serve with Ultimate Bloomin’ Apples
Imagine basking in the warmth of fall, savoring every bite of your delightful dessert while exploring the perfect complementing dishes.
- Creamy Vanilla Ice Cream: This classic pairing adds a smooth, cold contrast, enhancing the warmth of the baked apples and caramel.
- Cinnamon Sugar Dusting: A sprinkle of cinnamon sugar on top boosts flavor, providing a sweet and aromatic finish.
- Cozy Spiced Cider: Serving warm spiced cider creates a festive atmosphere, harmonizing beautifully with autumn’s flavors.
- Chopped Nuts: Add a crunch with toasted pecans or walnuts, offering a delightful texture contrast to the soft apples.
- Shortbread Cookies: The buttery richness of shortbread cookies pairs wonderfully, maximizing the indulgence of your dessert experience. Imagine crunching into the cookie while relishing a melty apple filled with caramel!
- Pumpkin Spice Latte: The bold flavors of a pumpkin spice latte blend seamlessly with the dessert, wrapping you in a cozy fall embrace.
- Caramel Drizzle: Drizzling extra caramel sauce enhances sweetness, making each bite feel like a comforting hug from autumn itself.
- Fresh Whipped Cream: A dollop of light, fluffy whipped cream adds creaminess and balances the rich caramel, creating the perfect finishing touch.
How to Store and Freeze Ultimate Bloomin’ Apples
Room Temperature: Enjoy your Ultimate Bloomin’ Apples fresh for the best flavor. If you need to store them, keep them at room temperature for up to 1 day, but they taste best warm.
Fridge: Store leftover baked apples in an airtight container in the fridge for up to 3 days. Make sure to reheat them gently to revive their gooey caramel filling.
Freezer: If you want to freeze them, place the baked apples in a freezer-safe container after they cool completely. They can be frozen for up to 2 months. Thaw overnight in the fridge before reheating.
Reheating: For the best results, reheat in the oven at 350°F for about 10-15 minutes or until warm, serving once again with vanilla ice cream and caramel sauce for a cozy treat!
Expert Tips for Ultimate Bloomin’ Apples
-
Choose Ripe Apples: Selecting firm varieties like Honeycrisp ensures your Ultimate Bloomin’ Apples maintain their shape and texture during baking.
-
Avoid Over-Cutting: Use the chopstick trick to prevent cutting through the bottom of the apples, which helps the filling stay inside during baking.
-
Generous Butter Coating: Don’t skimp on the butter mixture; a hearty brushing enhances flavor and promotes beautiful caramelization.
-
Serve Immediately: For the best experience, serve the apples right out of the oven while the caramel is still gooey, providing a dreamy contrast with ice cream.
-
Experiment with Fillings: Feel free to mix in oats, nuts, or even different sweeteners into the apple filling for a unique twist on this classic dessert.
Make Ahead Options
These Ultimate Bloomin’ Apples are perfect for meal prep and can save you valuable time on busy weeknights! You can prepare and core the apples up to 24 hours in advance, just be sure to toss them with lemon juice to prevent browning. Additionally, you can mix together the melted butter, sugars, and cinnamon ahead of time and refrigerate it until you’re ready to assemble. When you’re set to bake, simply fill the apples with caramel squares, brush them with the butter mixture, and pop them in the oven or air fryer. You’ll enjoy the same delicious flavors and aromas with minimal effort, making this a fantastic option for spontaneous gatherings or cozy family nights!
Ultimate Bloomin’ Apples Variations
Feel free to explore your creativity while making these delightful Bloomin’ Apples—each variation brings a new twist to this cozy dessert!
- Flavor Twist: Add a mix of oats, nuts, and brown sugar in the filling for an “apple crisp” vibe, elevating flavors and textures beautifully.
- Sweetener Options: Swap brown sugar with coconut sugar for a unique taste that adds a hint of caramel flavor, enhancing the apples’ natural sweetness.
- Nutty Delight: Toss in some chopped pecans or walnuts into the caramel filling for a delightful crunch that complements the softness of the baked apples.
- Spiced Up: Mix in a pinch of nutmeg or allspice for an extra layer of warmth and holiday cheer—perfect for those festive gatherings!
- Citrus Zing: Add a touch of lemon zest to the butter mixture for a bright contrast that cuts through the sweetness, adding a refreshing twist.
- Chocolate Drizzle: After baking, drizzle some melted chocolate over the apples for an indulgent treat that chocolate lovers will adore!
- Vegan Version: Use coconut butter and maple syrup instead of regular butter and sugar for a plant-based alternative that still satisfies your sweet tooth.
- Heat It Up: For a spicy kick, mix in a sprinkle of cayenne pepper or chili powder into the sugar mixture. It’ll surprise your taste buds with an unexpected zing!
As you explore these variations, remember to treat yourself to a scoop of creamy vanilla ice cream on the side, and indulge in the warmth of caramel sauce drizzled lovingly over the top. These ideas will make your Ultimate Bloomin’ Apples even more special, so have fun experimenting!
Ultimate Bloomin’ Apples Recipe FAQs
What types of apples work best for Bloomin’ Apples?
Absolutely! You should choose firm varieties like Honeycrisp, Gala, or Granny Smith. These apples hold their shape beautifully while baking, ensuring you get a tender yet structured dessert. Avoid softer varieties as they might break down and become mushy during cooking.
How should I store leftover Bloomin’ Apples?
To enjoy your Ultimate Bloomin’ Apples at their best, store any leftovers in an airtight container in the fridge for up to 3 days. When reheating, I recommend warming them gently in the oven at 350°F for about 10-15 minutes to revive their gooey caramel filling.
Can I freeze Bloomin’ Apples?
Definitely! After allowing the baked apples to cool completely, place them in a freezer-safe container. They can be frozen for up to 2 months. When you’re ready to enjoy them again, simply thaw overnight in the fridge and reheat as directed for the best results.
What should I do if my apples get too mushy while baking?
Very! To prevent mushiness, always select firm apples and avoid overbaking. If you notice your apples getting too soft (perhaps after 25 minutes in the oven), remove them and allow them to cool slightly to help maintain their structure. The aim is tender, not mush!
Is there a way to adapt this recipe for dietary restrictions?
For sure! If you have dietary concerns, consider using coconut sugar instead of brown sugar for a different flavor profile. Additionally, if you’re avoiding dairy, you can serve the caramel-stuffed apples with a dairy-free ice cream alternative or simply enjoy them on their own.
How long do Bloomin’ Apples stay good at room temperature?
While best enjoyed fresh, you can keep them at room temperature for up to 1 day. After that, they taste best when stored in the fridge. When they sit at room temp for too long, the flavor might diminish, so it’s really worth it to keep them cool!
Ultimate Bloomin’ Apples: Your Go-To Cozy Fall Dessert
Ingredients
Equipment
Method
- Preheat the oven to 375°F (350°F for air fryer). Grease a baking dish with cooking spray.
- In a bowl, mix melted butter, brown sugar, granulated sugar, and ground cinnamon until well blended.
- Slice off the tops of the apples and core them, making thin crosswise cuts about ¾ down the sides.
- Fill each apple with two caramel squares and brush the butter mixture over and inside the apples.
- Bake in the oven for about 30 minutes or in the air fryer for about 20 minutes until apples are tender.
- Allow cooling slightly, then serve warm topped with vanilla ice cream and drizzled with caramel sauce.