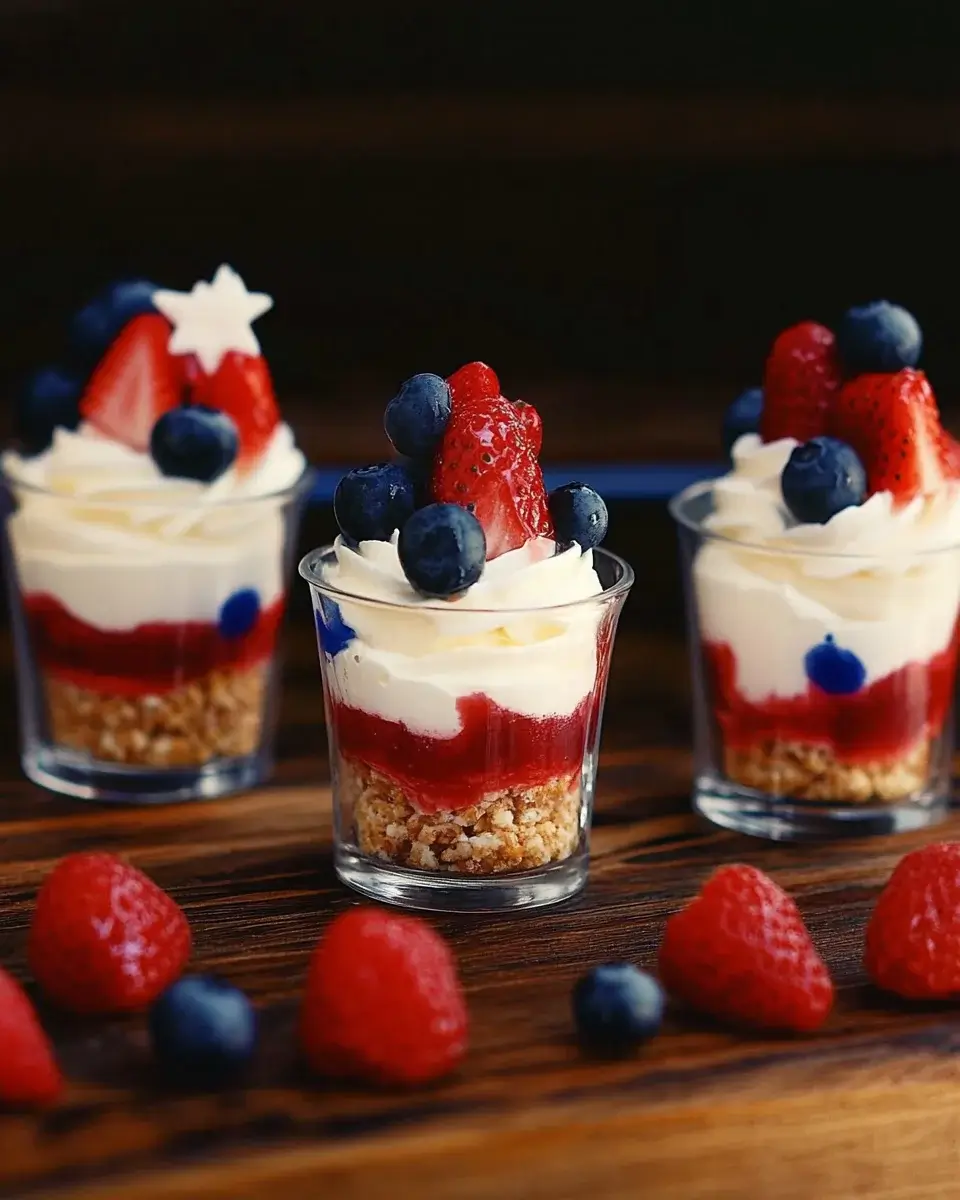
Introduction to Red, White, and Blue Trifle
Summer gatherings are all about vibrant flavors and colorful presentations, and nothing captures that spirit quite like a Red, White, and Blue Trifle. This delightful dessert is not just a feast for the eyes; it’s a quick solution for those busy days when you want to impress your loved ones without spending hours in the kitchen. With layers of pound cake, creamy vanilla pudding, and fresh berries, this trifle is a celebration of summer in every bite. Trust me, once you serve this beauty, you’ll be the star of the barbecue!
Why You’ll Love This Red, White, and Blue Trifle
This Red, White, and Blue Trifle is the ultimate summer dessert, combining ease and flavor in one stunning dish. It’s a no-bake recipe, so you can whip it up in no time, leaving you free to enjoy the sunshine. The layers of sweet berries, creamy pudding, and fluffy whipped cream create a taste explosion that will have everyone coming back for seconds. Plus, it’s a showstopper that looks as good as it tastes!
Ingredients for Red, White, and Blue Trifle
Gathering the right ingredients is the first step to creating your stunning Red, White, and Blue Trifle. Here’s what you’ll need:
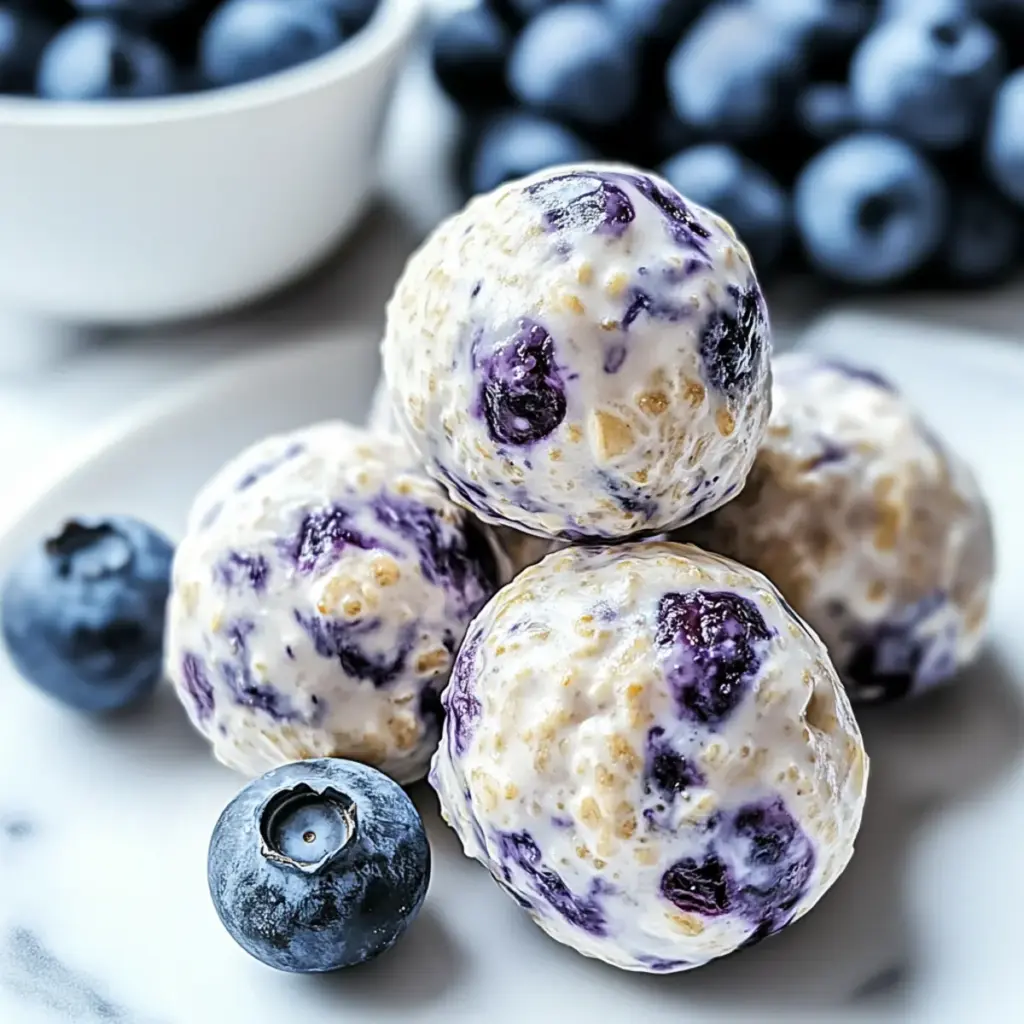
- Strawberries: Fresh, hulled, and sliced strawberries bring a sweet and juicy burst of flavor.
- Blueberries: These little gems add a pop of color and a tangy sweetness that balances the dish.
- Whipped Cream: Whether you go for store-bought or homemade, this fluffy topping is essential for that creamy finish.
- Pound Cake: Cut into cubes, this rich cake forms the base of your trifle, providing a delightful texture.
- Vanilla Pudding: Prepared vanilla pudding adds a smooth, creamy layer that ties all the flavors together.
- Vanilla Extract: A splash of this enhances the pudding’s flavor, making it even more delicious.
- Fresh Mint Leaves: Optional, but these leaves make for a beautiful garnish and add a refreshing touch.
For those looking to mix things up, consider using angel food cake instead of pound cake for a lighter version. You can also swap the berries for other fruits like raspberries or peaches to create your own unique flavor profile. The exact quantities for each ingredient are available at the bottom of the article for easy printing!
How to Make Red, White, and Blue Trifle
Creating a Red, White, and Blue Trifle is as easy as pie—well, easier actually! Follow these simple steps, and you’ll have a stunning dessert that’s sure to impress. Let’s dive into the deliciousness!
Step 1: Prepare the Berries
Start by combining your sliced strawberries and blueberries in a medium bowl. If you want to enhance their sweetness, sprinkle in a teaspoon of sugar. This little trick brings out the natural flavors of the berries. Set them aside to let the juices mingle.
Step 2: Mix the Pudding
In a separate bowl, take your prepared vanilla pudding and mix in the vanilla extract. Stir until well combined. This step is crucial because it adds an extra layer of flavor to your trifle. Trust me, it makes a difference!
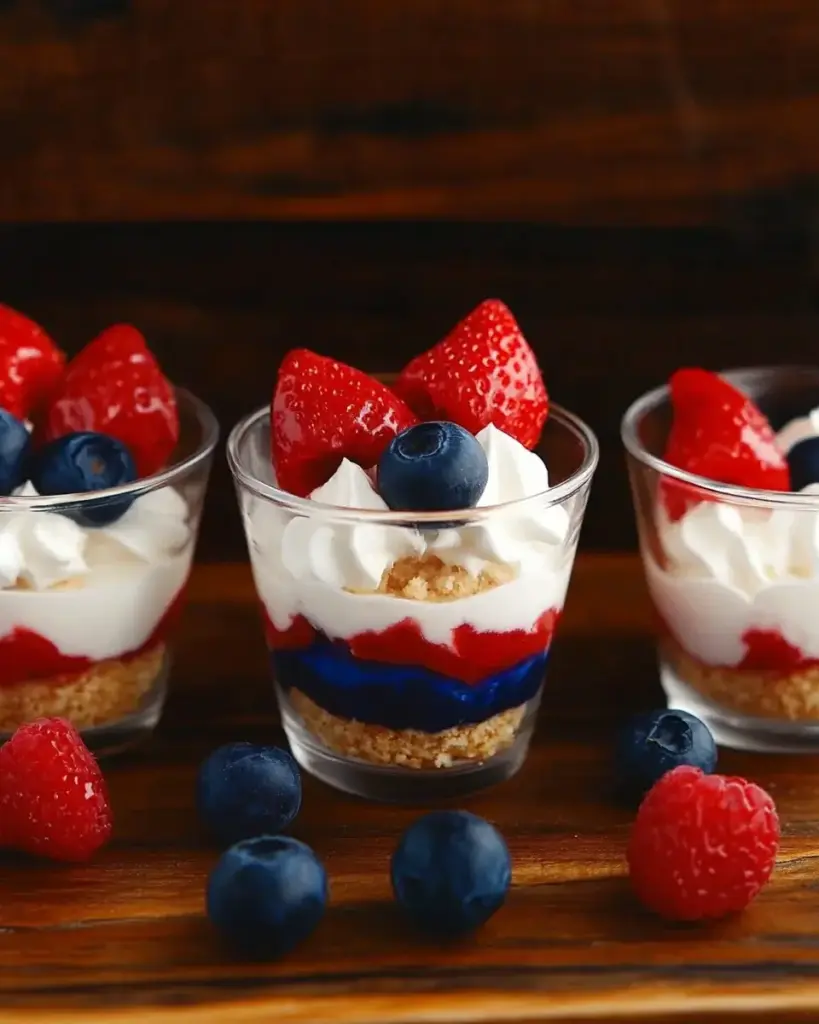
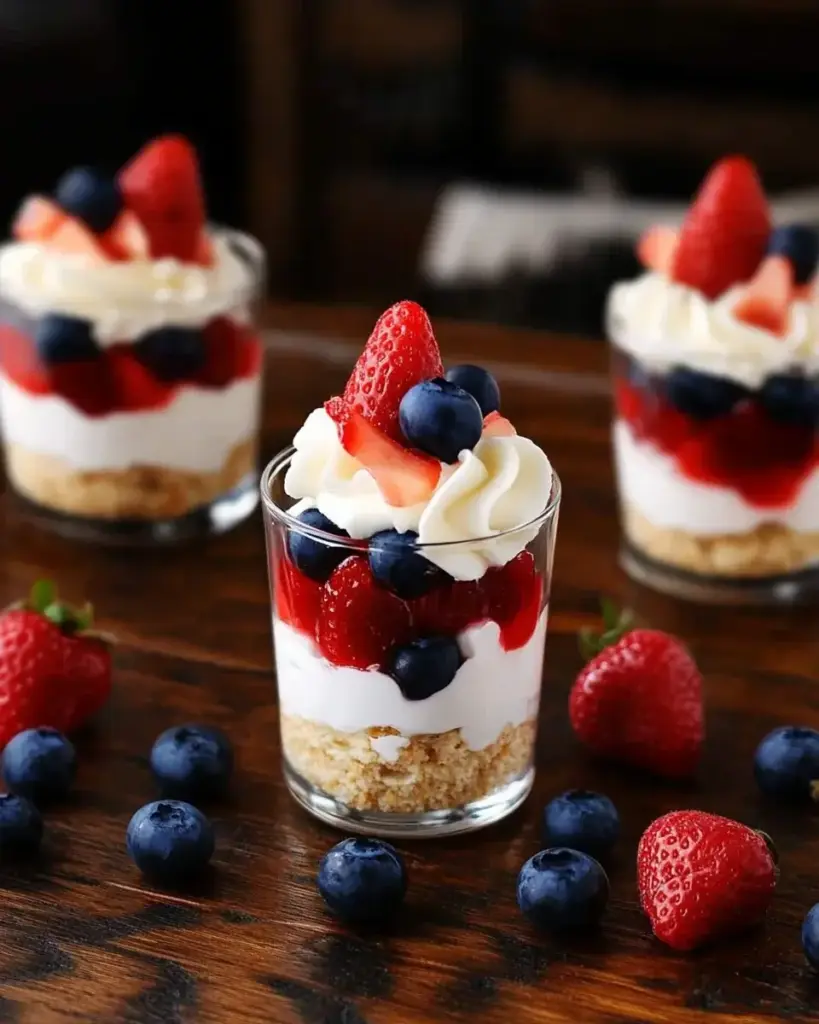
Step 3: Layer the Ingredients
Now, grab a large glass trifle dish or individual cups if you prefer. Start layering by placing a generous layer of pound cake cubes at the bottom. This rich base will soak up the flavors beautifully.
Step 4: Repeat the Layers
Next, add a layer of your creamy vanilla pudding over the pound cake. Follow this with a layer of your mixed berries, and then top it off with a fluffy layer of whipped cream. Repeat this layering process until you’ve used all your ingredients. Finish with a glorious layer of whipped cream on top!
Step 5: Final Touches
For the final touch, garnish your trifle with fresh mint leaves if you like. This adds a pop of color and a refreshing aroma. Cover your trifle and refrigerate it for at least one hour. This chilling time allows all those wonderful flavors to meld together, making each bite even more delightful.
Tips for Success
- Use ripe berries for the best flavor; they should be sweet and juicy.
- Let the trifle chill for at least an hour to enhance the flavors.
- For a fun twist, try adding a layer of lemon curd for extra zing.
- Make it ahead of time; it keeps well in the fridge for a day.
- Don’t be afraid to get creative with your layers—mix and match fruits!
Equipment Needed
- Trifle Dish: A large glass trifle dish showcases the layers beautifully. If you don’t have one, individual cups work just as well.
- Mixing Bowls: Use medium and large bowls for mixing ingredients.
- Spatula: A rubber spatula helps in layering and spreading the pudding and whipped cream.
- Knife: A sharp knife is essential for slicing the pound cake and berries.
Variations
- Angel Food Cake: Swap out the pound cake for angel food cake for a lighter, airy texture.
- Berry Medley: Mix in other berries like raspberries or blackberries for a colorful twist.
- Chocolate Pudding: Use chocolate pudding instead of vanilla for a rich, decadent flavor.
- Dairy-Free Option: Substitute dairy products with coconut cream and dairy-free pudding for a vegan-friendly treat.
- Nutty Crunch: Add a layer of crushed nuts or granola for an extra crunch and flavor contrast.
Serving Suggestions
- Pair your Red, White, and Blue Trifle with a refreshing lemonade or iced tea for a perfect summer drink.
- Serve alongside grilled meats or a light salad for a balanced meal.
- For a festive touch, use clear cups to showcase the beautiful layers at your next gathering.
FAQs about Red, White, and Blue Trifle
Can I make Red, White, and Blue Trifle ahead of time?
Absolutely! This dessert is perfect for making ahead. You can prepare it a day in advance and store it in the fridge. Just remember to add the whipped cream layer right before serving for that fresh, fluffy texture.
What can I substitute for vanilla pudding?
If you’re looking for alternatives, you can use chocolate pudding for a richer flavor or even a fruit-flavored pudding to complement the berries. Just ensure it pairs well with the other ingredients!
How do I store leftovers?
Leftover trifle can be stored in an airtight container in the fridge for up to two days. However, the layers may start to blend together, so it’s best enjoyed fresh!
Can I use frozen berries instead of fresh?
Yes, frozen berries can work in a pinch! Just thaw them and drain any excess liquid before adding them to your trifle. They may not have the same texture as fresh berries, but they’ll still taste delicious.
Is this dessert suitable for a gluten-free diet?
To make a gluten-free Red, White, and Blue Trifle, simply use gluten-free pound cake or angel food cake. The rest of the ingredients are naturally gluten-free, making it a delightful option for everyone!
Final Thoughts
Creating a Red, White, and Blue Trifle is more than just whipping up a dessert; it’s about bringing people together. Each layer tells a story, from the sweet strawberries to the creamy pudding, all topped with fluffy whipped cream. This trifle is a celebration of summer, perfect for barbecues, picnics, or simply enjoying on a warm evening. The joy of sharing this colorful treat with family and friends is unmatched. So, roll up your sleeves, gather your ingredients, and let this delightful dessert become a cherished part of your summer traditions!
Red, White, and Blue Trifle: A Perfect Summer Treat!
Ingredients
Method
- In a medium bowl, combine the sliced strawberries and blueberries. If desired, add a teaspoon of sugar to the berries to enhance their sweetness. Set aside.
- In a separate bowl, mix the prepared vanilla pudding with the vanilla extract until well combined.
- In a large glass trifle dish or individual cups, layer the ingredients starting with a layer of pound cake cubes at the bottom.
- Add a layer of the vanilla pudding over the pound cake, followed by a layer of the mixed berries, and then a layer of whipped cream.
- Repeat the layering process until all ingredients are used, finishing with a layer of whipped cream on top.
- Garnish with fresh mint leaves if desired. Cover and refrigerate for at least 1 hour before serving to allow the flavors to meld.
Nutrition
Notes
- For a lighter version, use angel food cake instead of pound cake.
- Substitute the berries with other fruits like raspberries or peaches for a different flavor profile.