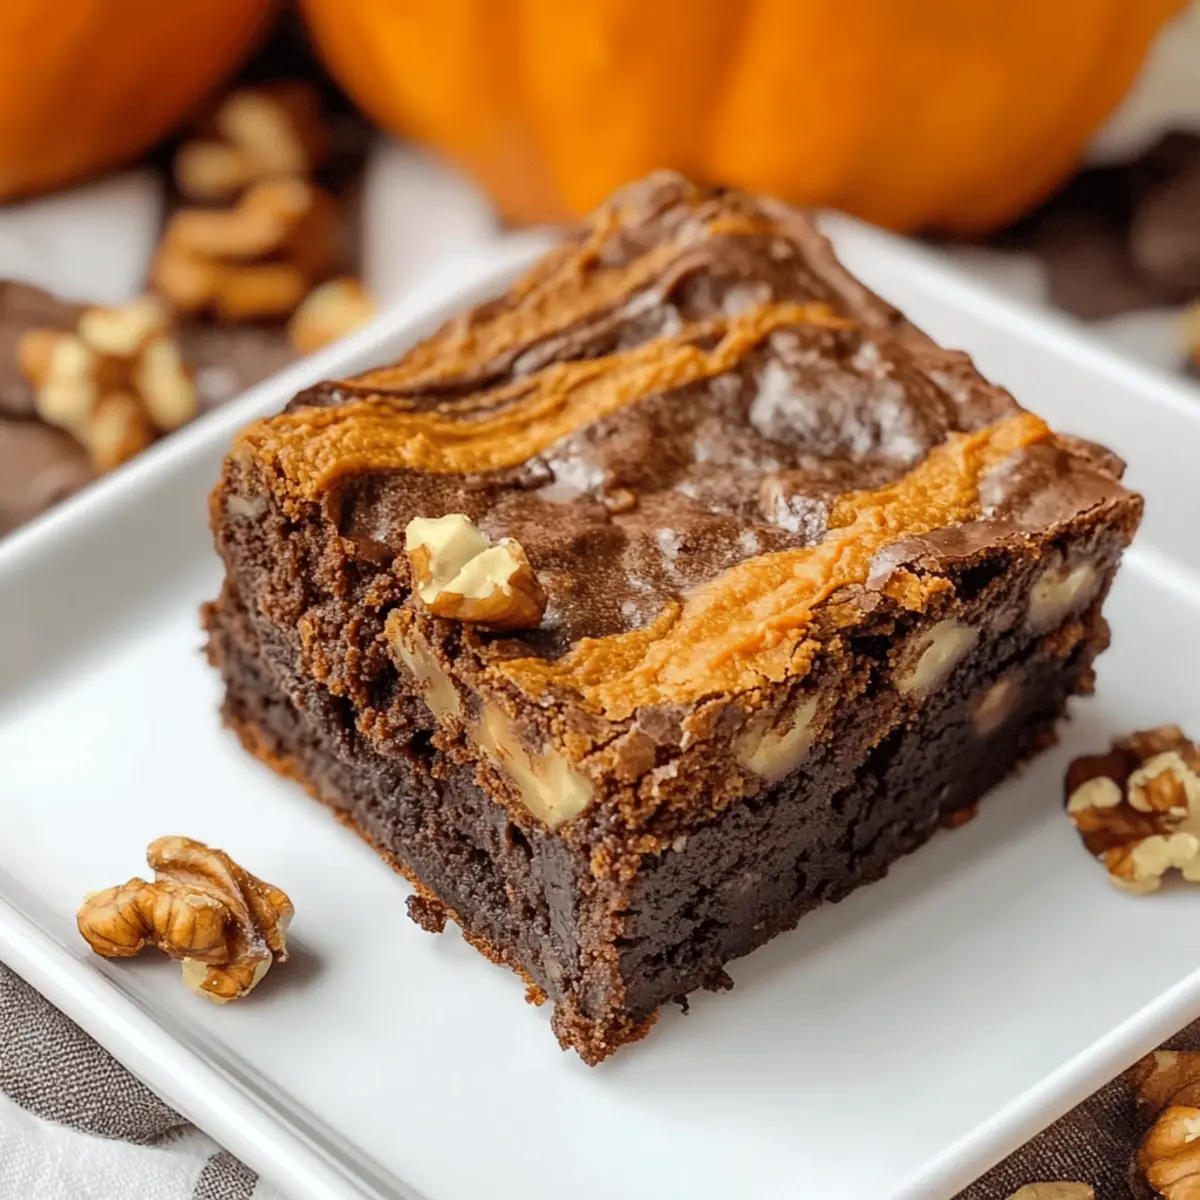
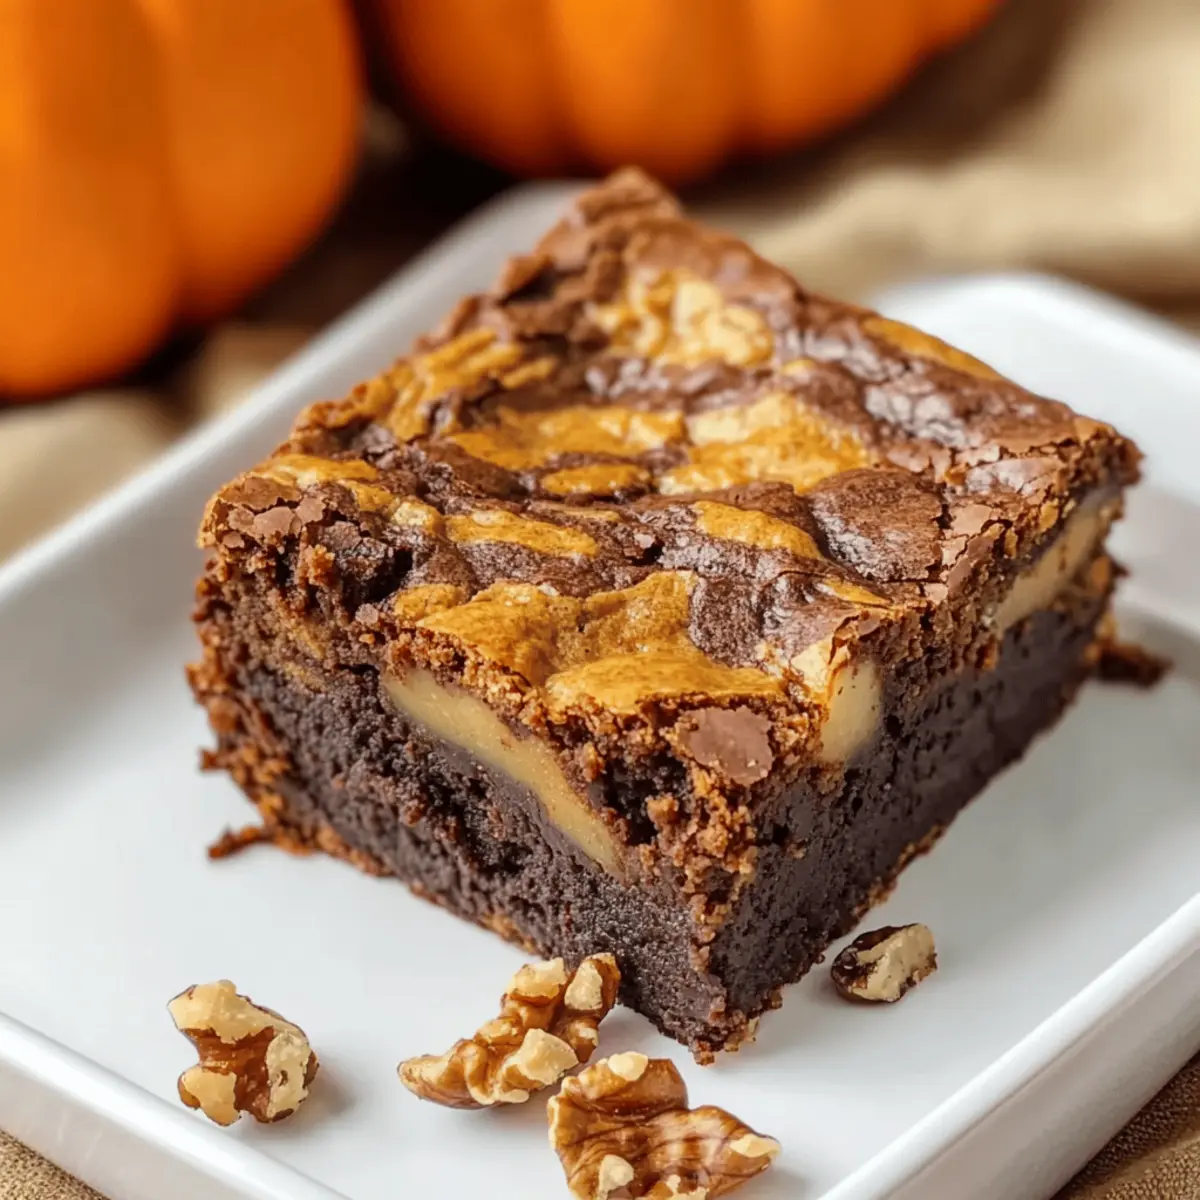
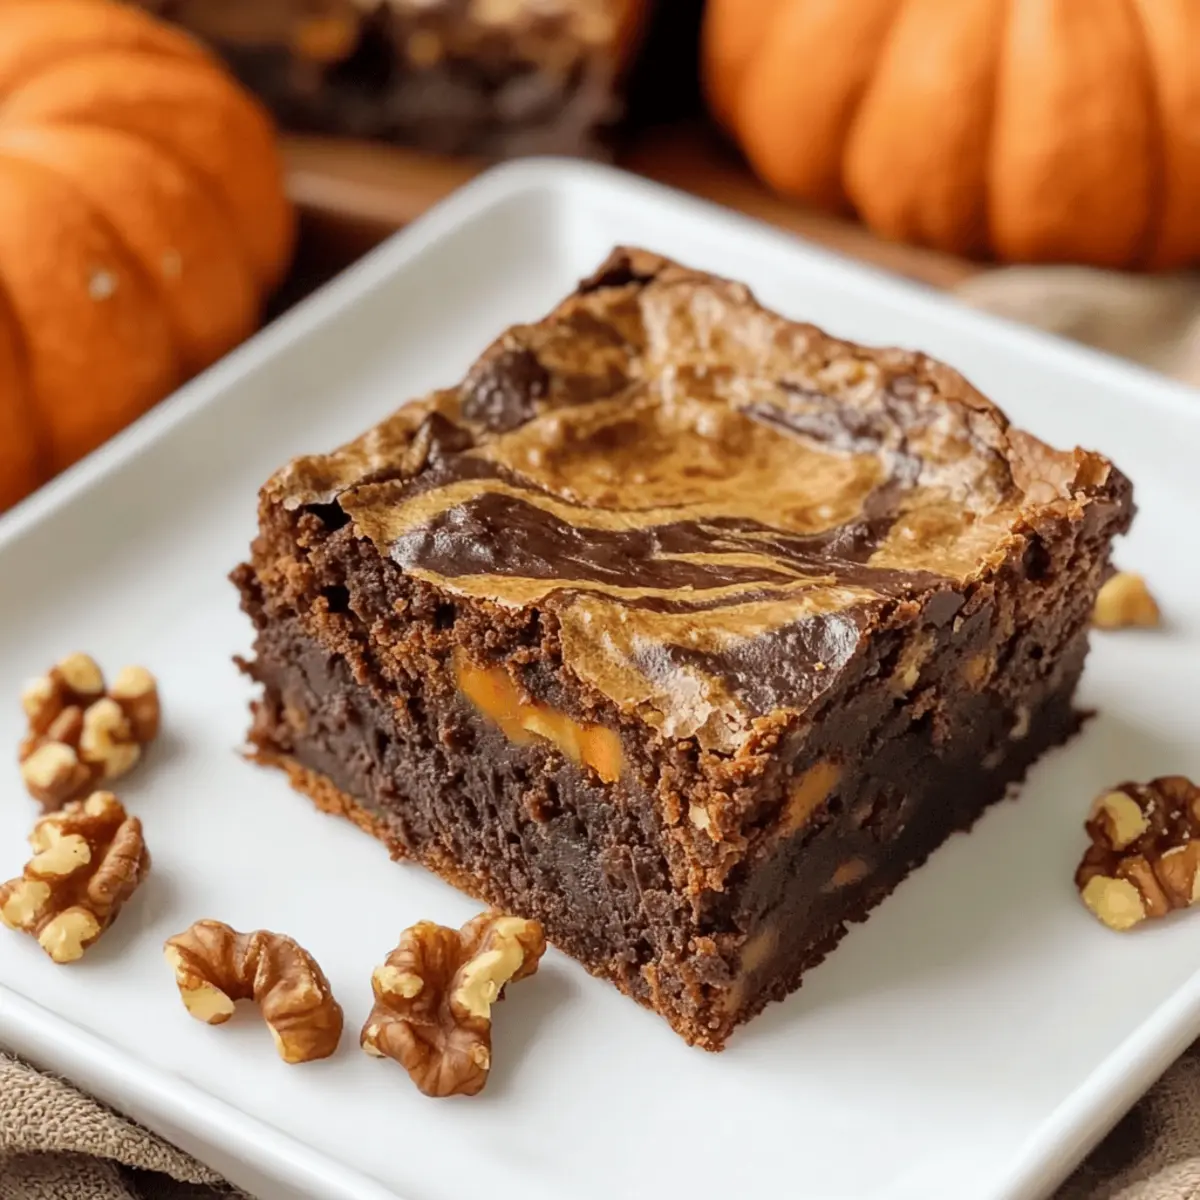
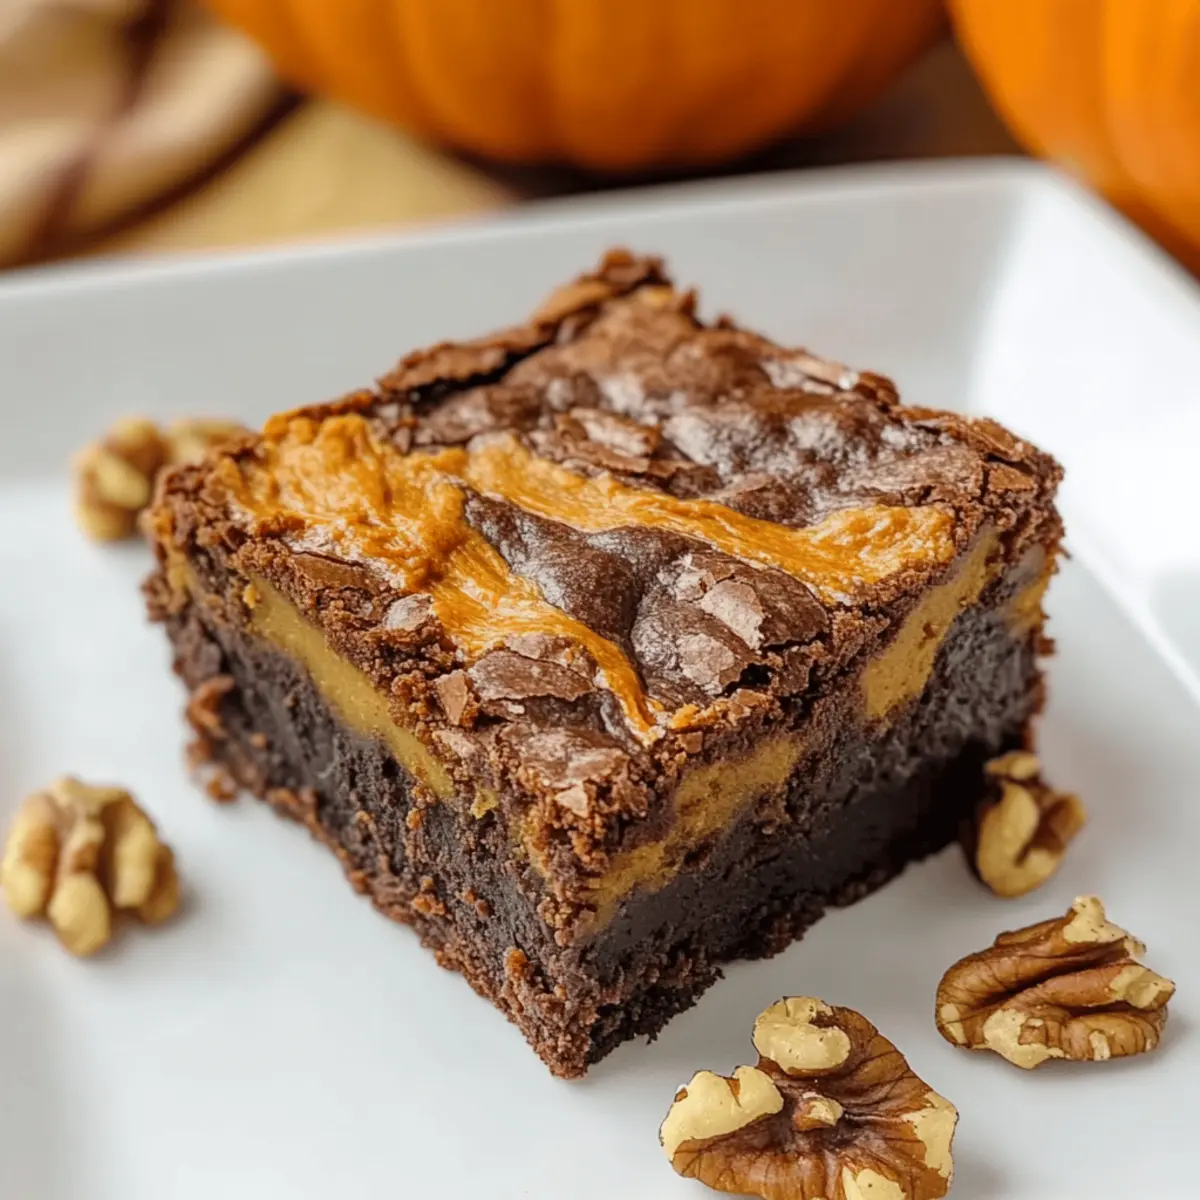
As the chill of fall settles in, I’m often caught daydreaming about the cozy comforts of the season, and what could be more inviting than a batch of fudgy chocolate pumpkin brownies? These delectable treats seamlessly blend the rich, velvety smoothness of chocolate with the warm spices of pumpkin, creating a dessert that’s as satisfying as it is seasonal. Not only do they come together in a snap, but they’re also perfect for sharing at gatherings or snuggling up with on a quiet evening. With every bite, your taste buds will dance in delight, and the sweet aromas wafting from your oven will have everyone wondering what delicious magic is taking place. Are you ready to discover just how irresistible these pumpkin brownies can be?
Why Are These Pumpkin Brownies a Must-Try?
Irresistible Flavor: This recipe is an enchanting blend of chocolate and pumpkin, making each brownie a delightful dance of flavors.
Quick Preparation: With just a few simple steps, you’ll have a batch of these heavenly brownies ready in no time!
Crowd-Pleaser: Perfect for cozy gatherings or quiet evenings at home, these brownies are sure to win over everyone.
Versatile Options: You can easily tailor them to your preferences—try adding nuts, or a creamy topping for an extra indulgence!
Comforting Texture: Each bite reveals a dense, fudgy interior that’s both satisfying and decadent.
Don’t forget to serve them warm with a scoop of ice cream for that ultimate treat, or check out our tips for keeping the flavors fresh overnight!
Pumpkin Brownie Ingredients
• For the Batter
- All-Purpose Flour – Provides structure; substitute with a gluten-free flour blend for a gluten-free version.
- Baking Powder – Leavening agent to help brownies rise; ensure it’s fresh for optimal results.
- Salt – Enhances flavor and balances sweetness; use kosher or sea salt.
- Melted Butter – Adds moisture and richness; can be substituted with coconut oil for a dairy-free option.
- Sugar – Sweetens the brownies and aids in texture; brown sugar can give a deeper flavor.
- Vanilla Extract – Adds depth of flavor; pure vanilla extract is preferred for best taste.
- Eggs – Binds ingredients and provides moisture, contributing to fudginess; can substitute with flax eggs for a vegan version.
- Cocoa Powder – Provides chocolate flavor; dark cocoa powder can be used for a richer taste.
- Semi-Sweet Chocolate Chips – Adds chocolate richness and texture; use dairy-free chips for a vegan option.
- Pumpkin Puree – Moisture and flavor; essential for that fall theme—canned pumpkin puree is recommended, avoid pumpkin pie filling.
- Chopped Walnuts – Adds crunch and nutty flavor; omit for nut-free brownies.
• For the Spice Blend
- Ground Cinnamon – Enhances the warm pumpkin flavor; adjust based on personal preference.
- Ground Cloves – Adds a warm depth; use sparingly for a cozy spice note.
- Ground Nutmeg – Complements the pumpkin; a pinch is all you need for that essential autumn warmth.
Embrace the warmth of these pumpkin brownies as you gather your ingredients and prepare for a delightful baking experience that’s sure to fill your home with comforting aromas!
Step‑by‑Step Instructions for Fudgy Chocolate Pumpkin Brownies
Step 1: Preheat and Prepare the Pan
Begin by preheating your oven to 350°F (175°C). While the oven warms up, grab an 8×8-inch baking pan and grease it generously with butter or non-stick spray. This will ensure that your fudgy chocolate pumpkin brownies come out easily after baking. Set the prepared pan aside to get ready for the delicious batter!
Step 2: Combine Dry Ingredients
In a medium mixing bowl, whisk together the all-purpose flour, baking powder, and salt until well combined. This step is crucial for the proper structure of your pumpkin brownies, ensuring even distribution of the leavening and seasoning. Set this bowl of dry ingredients aside as you gather the wet ingredients for the next step.
Step 3: Mix Wet Ingredients
In a large bowl, melt your butter and let it cool slightly. Then, add the sugar and the pure vanilla extract, mixing until the combination is smooth and creamy. Next, crack in the eggs one at a time, whisking between each addition to create a rich, fudgy mixture. This blend of flavors lays the foundation for the decadence of your brownies.
Step 4: Combine Wet and Dry Mixtures
Gradually add your bowl of dry ingredients into the wet mixture, stirring gently until just incorporated. Be careful not to overmix—you want to maintain that fudgy texture. The batter should be thick and glossy, showcasing how the rich chocolate from your pumpkin brownies will shine through!
Step 5: Create Two Flavors of Batter
Now, divide the brownie batter into two separate bowls. In one bowl, fold in the cocoa powder and semi-sweet chocolate chips, mixing until fully combined. In the other bowl, gently stir in the pumpkin puree, ground cinnamon, ground cloves, and ground nutmeg for that quintessential fall flavor. This will give your brownies a deliciously warm and comforting taste.
Step 6: Layer the Batter
Spoon half of the chocolate batter into your prepared baking pan, spreading it evenly across the bottom. Next, dollop half of the pumpkin batter on top, smoothing it out slightly to create a lovely layered effect. This will infuse your fudgy pumpkin brownies with rich chocolate and warming spices, making for an enticing dessert.
Step 7: Swirl and Top
With the remaining batters, spoon dollops of the chocolate batter and pumpkin mixture randomly over the existing layers. Using a knife or a skewer, gently swirl the batters together, creating that beautiful marbled look. Just a few swirls will do to combine the flavors without fully blending them, preserving the delightful contrast.
Step 8: Bake the Brownies
Place your pan in the preheated oven and bake for 45 to 48 minutes. Keep an eye on them towards the end—your brownies are done when the center is set and does not jiggle when lightly shaken. A toothpick inserted in the center should come out with a few moist crumbs, revealing that lovely fudgy texture of your pumpkin brownies.
Step 9: Cool and Serve
Once baked, remove the brownies from the oven and set them aside to cool in the pan for about 15 minutes. This will help them firm up for easier slicing. Once they are cool enough to handle, cut them into squares and enjoy the rich aroma and decadence of your homemade fudgy chocolate pumpkin brownies!
Make Ahead Options
These fudgy chocolate pumpkin brownies are your ideal companion for busy weeknights! You can prepare the batter up to 24 hours in advance by mixing the wet and dry ingredients separately and storing them in airtight containers in the refrigerator. The pumpkin batter can be made ahead to maintain its fresh pumpkin flavor, while the chocolate batter should be refrigerated to keep the chocolate chips from melting. When you’re ready to bake, simply combine the two batters, swirl them, and pop them in the oven. This not only saves time but also ensures that your brownies are just as delicious and flavorful as if they were made fresh that day!
Expert Tips for Pumpkin Brownies
-
Measure Carefully: Accurate measuring is key to achieving that perfect fudgy texture. Too much flour can lead to dry brownies, so level off measurements!
-
Cooling Time: Allow your brownies to cool for at least 15 minutes in the pan before cutting. This helps them firm up and makes slicing easier—a must for chewy pumpkin brownies!
-
Use a Plastic Knife: For clean edges, try cutting your brownies with a plastic knife instead of metal. It reduces sticking and gives you those beautiful squares.
-
Storage Secrets: To keep extra brownies fresh, store them in an airtight container at room temperature for up to three days or refrigerate for a week. They’ll stay just as delicious!
-
Swirl for Effect: When layering and swirling your batters, don’t overdo it! A few gentle swirls will maintain the beautiful marbling without fully blending the flavors.
-
Adjust Spices: Feel free to adjust the amount of spices based on your taste preference. A little more cinnamon or nutmeg can enhance the fall essence of your pumpkin brownies.
Pumpkin Brownies: Variations & Substitutions
Feel free to embrace your creativity and make these brownies your own with enticing twists that cater to your taste buds!
-
Gluten-Free: Substitute all-purpose flour with a gluten-free flour blend for a delicious alternative that everyone can enjoy.
-
Dairy-Free: Swap melted butter with coconut oil or dairy-free margarine to create a fudgy chocolate pumpkin brownie that caters to dairy sensitivities.
-
Vegan: Replace eggs with flax eggs or applesauce, allowing plant-based friends to indulge in the rich flavors of chocolate and pumpkin.
-
Nuts on the Rise: Experiment with pecans or almonds instead of walnuts for a unique crunch and flavor that adds dimension to your brownies.
-
Extra Indulgence: Top your brownies with a rich cream cheese frosting for an extra layer of decadence that pairs beautifully with the pumpkin spice.
-
Sweet Swirl: Incorporate mini marshmallows or a swirl of caramel for an added gooey sweetness that’ll have everyone reaching for seconds.
-
Flavor Infusion: Add a touch of espresso powder to enhance the chocolate flavor, giving depth and complexity with every bite.
-
Spicy Kick: If you love a little heat, sprinkle in some cayenne pepper or chili powder to your spices for an unexpected and exciting twist that will surprise your taste buds.
So, whether you’re looking for dietary swaps or flavor boosts, these variations will help you make these pumpkin brownies your new family favorite! Don’t forget to add a scoop of vanilla ice cream on top for the ultimate fall treat!
What to Serve with Fudgy Chocolate Pumpkin Brownies
Indulging in the sweet, spiced goodness of these brownies opens the door to a world of delightful side dishes that’ll perfectly enhance your cozy fall experience.
-
Vanilla Ice Cream: A classic pairing, the creamy vanilla ice cream contrasts beautifully with the fudgy texture of the brownies, creating bliss in every bite.
-
Whipped Cream: Light and airy, a dollop of whipped cream adds a refreshing touch, elevating the decadent experience of these pumpkin brownies.
-
Caramel Sauce: Drizzling warm caramel over the brownies highlights their rich flavors while introducing a sweet, buttery nuance that just tantalizes the taste buds.
-
Chai Tea: This spicy tea harmonizes with the pumpkin spices in the brownies, offering a warm and comforting beverage ideal for fall evenings.
-
Coffee: A rich cup of coffee enhances the chocolate notes, making it a perfect accompaniment for those cozy evenings spent indulging in sweet treats.
-
Chocolate Sauce: For chocolate lovers, an extra drizzle of chocolate sauce adds indulgence to your dessert, intensifying the overall chocolate flavor.
-
Chopped Nuts: Sprinkling chopped pecans or walnuts on serving elevates texture and adds a crunchy surprise with each fudgy bite, making it a satisfying treat.
-
Pumpkin Spice Latte: Embrace the season fully with a festive pumpkin spice latte alongside your brownies, creating a delightful autumnal pairing that’s irresistible.
-
Coconut Whipped Cream: For a dairy-free option, try coconut whipped cream; its subtle sweetness and light texture wonderfully complement the richness of the pumpkin brownies.
Storage Tips for Pumpkin Brownies
Room Temperature: Store leftover pumpkin brownies in an airtight container at room temperature for up to 3 days to maintain their fudgy texture and rich flavor.
Fridge: For extended freshness, refrigerate the brownies for up to a week. Just ensure they are in an airtight container to prevent drying out.
Freezer: For longer storage, wrap individual brownies in plastic wrap and place them in a freezer-safe bag. They can be frozen for up to 3 months—perfect for a cozy dessert anytime!
Reheating: When ready to enjoy, thaw brownies in the fridge overnight and warm them briefly in the microwave for a few seconds to restore that lush softness.
Chocolate Pumpkin Brownies Recipe FAQs
What is the best way to select ripe pumpkin for the puree?
Absolutely! When choosing a pumpkin for homemade puree, look for smaller “sugar pumpkins” or “pie pumpkins.” They should feel heavy for their size, with a firm, smooth skin and no dark spots. A uniform orange color is ideal, signaling ripeness.
How long do pumpkin brownies last after baking?
Very! Store your pumpkin brownies in an airtight container at room temperature for up to 3 days. If you want to keep them longer, refrigerate them for up to a week. Let them come to room temperature before serving for the best texture.
Can I freeze these brownies, and how?
Yes, you can! To freeze your pumpkin brownies, first allow them to cool completely. Then, wrap each brownie individually in plastic wrap or aluminum foil. Place them in a freezer-safe bag or container to prevent freezer burn. They will stay fresh for up to 3 months! When you’re ready to enjoy, just thaw in the fridge overnight and warm in the microwave.
What should I do if my brownies turned out too dry?
Oh no! If your brownies are dry, it may be due to excess flour or overbaking. Next time, be sure to spoon the flour into the measuring cup and level it off without packing it down. Also, keep an eye on the baking time; they should be set but still moist in the center. To salvage dry brownies, you can serve them with a scoop of ice cream or a drizzle of chocolate sauce to add moisture.
Are these pumpkin brownies suitable for those with nut allergies?
Great question! To make these brownies nut-free, simply omit the chopped walnuts from the recipe. The rest of the ingredients are naturally nut-free. If you’re baking for someone with severe allergies, make sure to check all product labels to avoid cross-contamination.
Can I substitute eggs with a vegan option?
Certainly! For a vegan version of these chocolate pumpkin brownies, you can substitute each egg with 1 tablespoon of ground flaxseed mixed with 2.5 tablespoons of water. Let this mixture sit for about 5 minutes until it thickens. This will keep your brownies deliciously fudgy and help bind the ingredients together!
Irresistibly Fudgy Pumpkin Brownies for Cozy Fall Nights
Ingredients
Equipment
Method
- Preheat your oven to 350°F (175°C) and grease an 8x8-inch baking pan.
- Whisk together the all-purpose flour, baking powder, and salt in a medium bowl.
- Melt the butter and mix with sugar and vanilla extract until creamy. Add eggs one at a time.
- Gradually mix in the dry ingredients until just incorporated.
- Divide the batter into two bowls; fold cocoa powder and chocolate chips into one and stir pumpkin puree and spices into the other.
- Layer half of the chocolate batter in the prepared pan, followed by half of the pumpkin batter. Smooth it out.
- Spoon dollops of the remaining batters onto the layers and swirl them gently with a knife.
- Bake for 45 to 48 minutes until the center is set and a toothpick comes out with a few moist crumbs.
- Cool for 15 minutes, then slice into squares and enjoy!