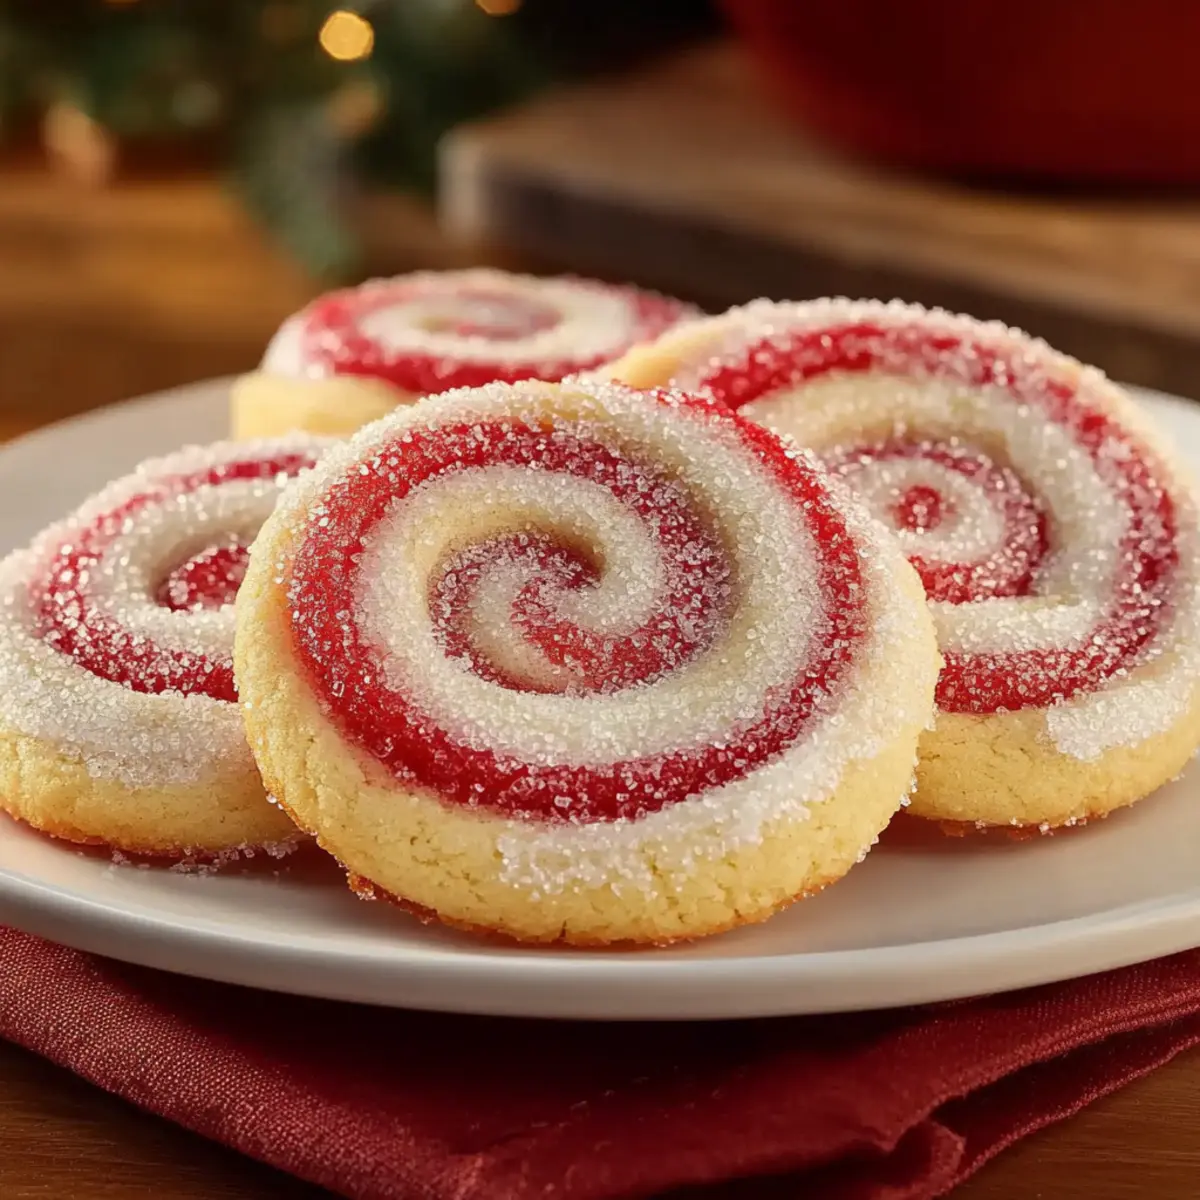
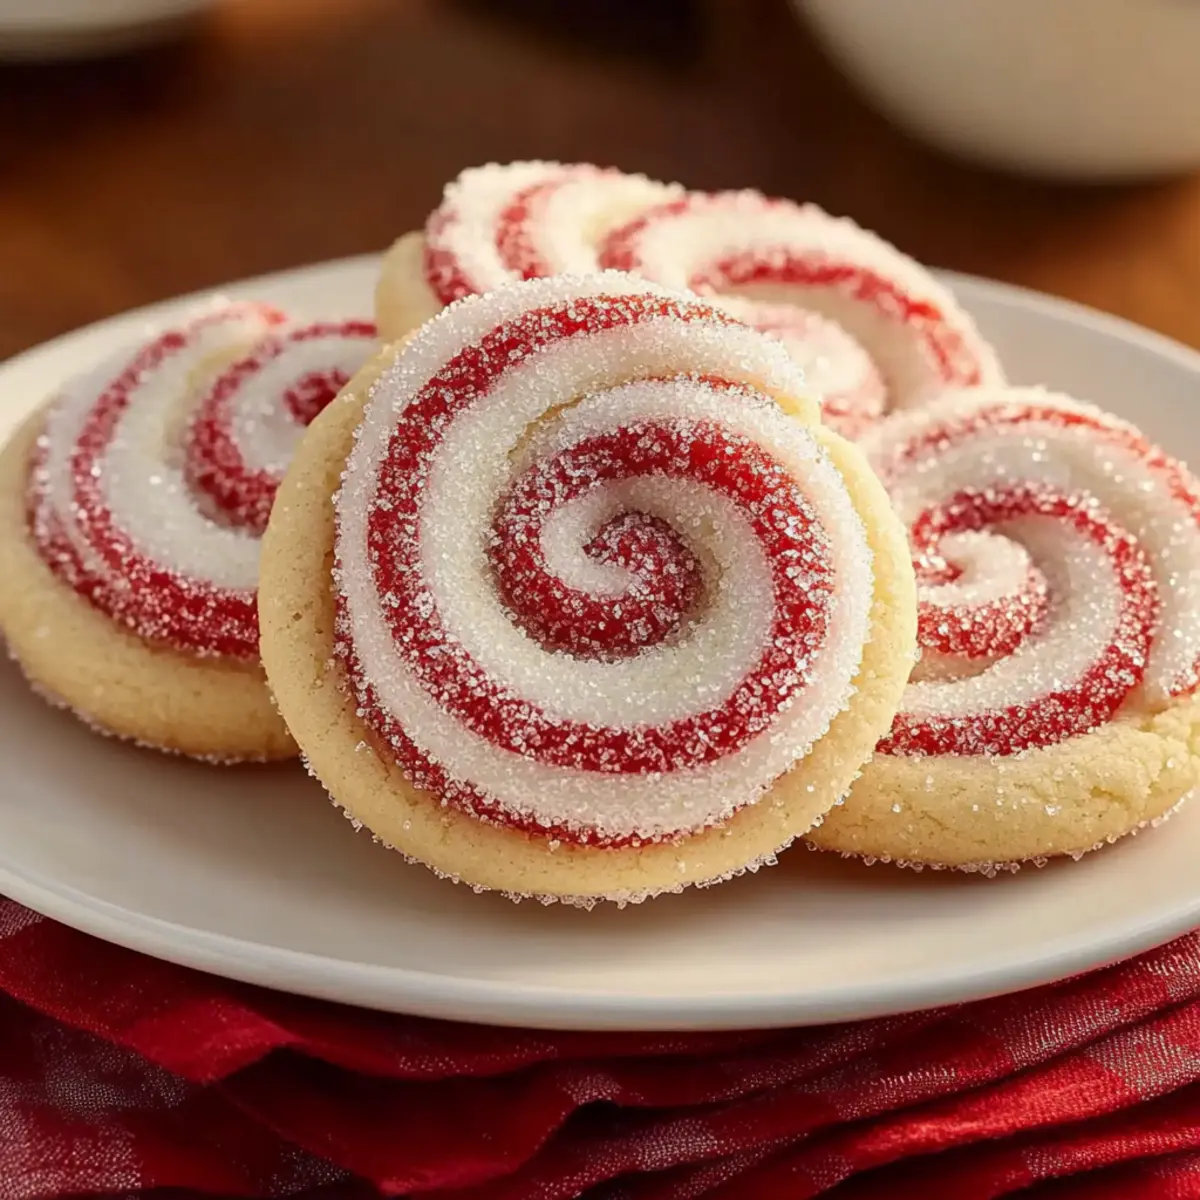
As I stood in my kitchen, the fragrant aroma of freshly baked cookies wafted through the air, instantly transforming my home into a festive wonderland. That’s when I decided to whip up a batch of Peppermint Swirl Cookies, and let me tell you, the results are nothing short of enchanting. These visually stunning treats, adorned with vibrant red and white swirls, not only look impressive but also melt in your mouth with every bite. This recipe is a crowd-pleaser, perfect for holiday gatherings or as thoughtful gifts for loved ones—plus, it’s easy enough for bakers of all levels to master. With a clever double-chilling method, we promise you’ll achieve those striking swirls without any pesky color bleeding. Are you ready to create some holiday magic with me?
Why Are Peppermint Swirl Cookies So Special?
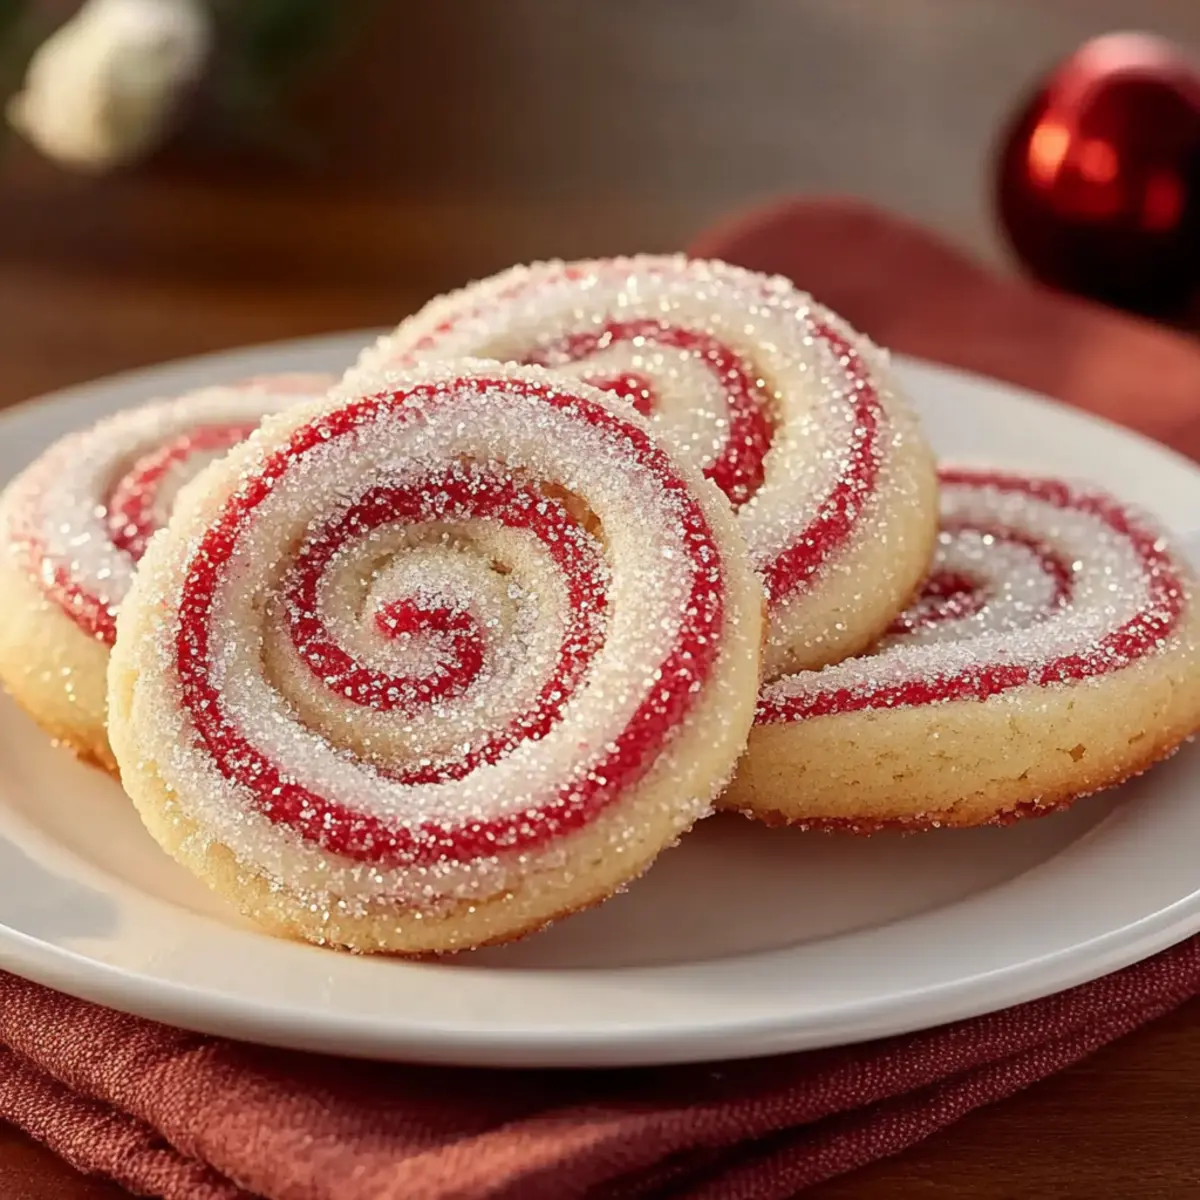
Festive Appeal: These cookies are not just treats; they’re vibrant pieces of edible art, perfectly embodying the holiday spirit.
Easy to Make: The recipe is straightforward, ensuring bakers of all skill levels can whip up a batch with confidence.
Irresistibly Delicious: The combination of peppermint and buttery goodness creates a delectable flavor that everyone will love.
Versatile Options: Feel free to experiment! Swap peppermint for almond or orange zest for unique flavor twists.
Perfect for Gifting: Pack these visually stunning cookies in a festive tin for a delightful homemade gift that will spread joy.
So, whether you’re serving alongside hot cocoa or adding to a holiday cookie platter, these Peppermint Swirl Cookies are guaranteed to impress!
Peppermint Swirl Cookies Ingredients
For the Cookie Dough
• All-Purpose Flour – Provides structure and helps the cookies hold their shape.
• Baking Powder – Acts as a leavening agent, contributing a delicate lift to your cookies.
• Salt – Enhances flavors and balances the sweetness for the perfect bite.
• Unsalted Butter – Make sure it’s softened to achieve a tender crumb and rich flavor.
• Granulated Sugar – Sweetens the cookies and creates a light, fluffy texture when creamed with butter.
• Large Egg – Binds all ingredients together and adds moisture for that melt-in-your-mouth texture.
• Vanilla Extract – Adds warmth and depth, balancing out the mint beautifully.
• Peppermint Extract – Gives these Peppermint Swirl Cookies their iconic cool, minty flavor.
• Red Gel Food Coloring – Offers vibrant color for those striking swirls without excess moisture.
For the Topping
• Coarse Sugar or Crushed Peppermint Candies – Adds sparkle and an extra minty flavor that enhances your beautiful cookies.
Step‑by‑Step Instructions for Peppermint Swirl Cookies
Step 1: Whisk Dry Ingredients
In a medium bowl, whisk together 2 cups of all-purpose flour, 1 teaspoon of baking powder, and a pinch of salt until well combined. This step establishes the structure and lift for your Peppermint Swirl Cookies. Set this mixture aside as you prepare the wet ingredients, allowing the flavors to develop while you work.
Step 2: Cream Butter and Sugar
In a large mixing bowl, use an electric mixer to cream together 1 cup of softened unsalted butter and 1 cup of granulated sugar until the mixture is light and fluffy, about 3-4 minutes. The key here is to incorporate air, which creates a tender texture in your cookies. Once fluffy, gradually add the prepared dry ingredients until a soft dough begins to form.
Step 3: Incorporate Egg and Extracts
Beat in 1 large egg, 1 teaspoon of vanilla extract, and 1 teaspoon of peppermint extract into the creamed mixture until everything is well incorporated. This essential step adds moisture and that signature minty flavor to your Peppermint Swirl Cookies. The dough will begin to come together beautifully as you mix.
Step 4: Divide and Color the Dough
Carefully divide the dough in half. Keep one half plain for contrast and tint the other half with a few drops of red gel food coloring, kneading gently until evenly colored. This creates the vibrant swirls that make the cookies visually stunning. Aim for a concentrated color without overworking the dough to maintain its tenderness.
Step 5: Chill the Dough
Wrap each dough half tightly in plastic wrap and refrigerate for at least 30 minutes. Chilling the dough helps it firm up, making it easier to roll out later. This crucial step also prevents the colors from blending too much and keeps your Peppermint Swirl Cookies looking delightful.
Step 6: Roll Out the Dough
On a lightly floured surface, roll out each colored dough into 10×12-inch rectangles. Ensure they’re approximately the same size to create even layers. This rolling process is essential for achieving those straight and defined swirls. Once rolled, place the red dough gently over the plain dough, preparing for the next exciting step.
Step 7: Form the Swirl Log
Starting with the long edge, carefully roll the layered dough tightly into a log shape. Seal the edges to prevent any filling from escaping. This action is critical for ensuring your Peppermint Swirl Cookies maintain their beautiful spiral when sliced. Once rolled, wrap it tightly in plastic wrap and refrigerate for an additional 2 hours to set.
Step 8: Preheat the Oven
Preheat your oven to 375°F (190°C) while the dough chills. This step ensures your cookies bake evenly and reach that perfect golden-brown edge. Prepare your baking sheets with parchment paper or silicone mats for easy clean-up and gentle non-stick qualities, ready for your upcoming cookie creations.
Step 9: Slice the Cookie Log
Once chilled, remove the log from the refrigerator and slice it into 1/4-inch rounds using a sharp, non-serrated knife. Take care to maintain the round shape during this step, as clean cuts will enhance the visual appeal of your Peppermint Swirl Cookies. Arrange the sliced cookies on the prepared baking sheets, leaving space between them.
Step 10: Bake the Cookies
Bake in the preheated oven for 8 to 10 minutes, just until the edges turn lightly golden. Keep an eye on them, as the cookies will firm up as they cool. This brief baking time ensures your Peppermint Swirl Cookies maintain their tender, melt-in-your-mouth texture while achieving that signature festive appearance.
Step 11: Cool and Transfer
After baking, allow the cookies to cool on the baking sheets for 5 minutes. They will firm up slightly during this time. Then, transfer them to wire racks to cool completely. This final touch will help maintain their texture and allow the flavors to fully develop, ensuring delightful treats ready to be enjoyed.
Storage Tips for Peppermint Swirl Cookies
Room Temperature: Store cookies in an airtight container at room temperature for up to 5-7 days to maintain freshness; adding a slice of bread helps retain moisture.
Freezer: If you’d like to extend their shelf life, freeze the cookies for up to 2 months in a sealed bag or container. Thaw at room temperature before enjoying!
Raw Dough Logs: You can also freeze the unbaked dough logs for 2-3 months. Bake directly from frozen, adding a couple of extra minutes to the baking time for the perfect Peppermint Swirl Cookies.
Reheating: If you’d like to enjoy them warm, simply microwave individual cookies for 5-10 seconds to bring back that fresh-baked feel without losing any flavor.
Expert Tips for Peppermint Swirl Cookies
-
Softened Butter: Ensure your butter is softened to room temperature for proper creaming, which helps create a light and fluffy texture in your cookies.
-
Chilling is Key: Don’t skip the chilling times; they are vital for maintaining the dough’s shape and ensuring vibrant swirls without color bleeding.
-
Slice with Precision: Use a sharp, non-serrated knife to slice the log, resulting in clean cuts that showcase your beautiful peppermint swirl cookies.
-
Avoid Overmixing: Mix your dough just until combined after adding flour; overmixing can lead to tough cookies instead of tender bites.
-
Watch Bake Time: Keep a close eye on your cookies while baking; they should firm up as they cool, so remove them when the edges are lightly golden for the best texture.
What to Serve with Bakery-Perfect Peppermint Swirl Cookies
Indulge in a delightful culinary experience that takes your holiday gatherings to the next level.
- Rich Hot Cocoa: The warm, velvety drink offers a comforting contrast to the cool peppermint flavor, enhancing the festive vibe.
- Creamy Vanilla Ice Cream: A scoop on the side adds a luscious creaminess that balances the cookie’s sweetness and minty zing.
- Spiced Apple Cider: The warmth of spiced cider beautifully complements the refreshing peppermint and adds a cozy touch to your dessert spread.
- Chocolate Dipped Fruit: Fresh strawberries or bananas dipped in chocolate offer a sweet, fruity counterpoint to the peppermint swirls.
- Classic Christmas Punch: This fruity beverage brings a splash of color and sweetness that perfectly aligns with the joyful spirit of the season.
- Nutty Biscotti: Their crunchy texture provides a delightful contrast, making for a satisfying treat when paired with your Peppermint Swirl Cookies.
- Chewy Gingerbread Cookies: With their warm spices, these cookies create a festive pairing that teams up wonderfully with the bright peppermint flair.
- Festive Fruitcake: This traditional treat adds a rich texture and flavor profile, creating a charming balance alongside the light, minty cookies.
- Chocolate Milkshake: The thick, creamy dessert enhances the indulgence, making every bite of peppermint cookies feel extra special and satisfying.
Peppermint Swirl Cookies: Variations & Substitutions
Embrace your creativity as you make these Peppermint Swirl Cookies uniquely yours with fun twists and substitutions!
-
Almond Extract: Swap peppermint extract for almond extract for a nutty flavor that adds a delightful twist to your cookies.
-
Colorful Swirls: Experiment with different gel food colors to create vibrant batches; think green for a festive touch or pastel shades for springtime delights.
-
Choco-Peppermint: Add mini chocolate chips to the dough for an extra delicious chocolatey flavor that perfectly pairs with the mint.
-
Coconut Variation: Incorporate shredded coconut into your dough for a tropical twist that enhances the texture and flavor. The sweetness of coconut beautifully complements the coolness of peppermint.
-
Spicy Kick: Add a pinch of cayenne pepper or a dash of cinnamon to introduce a subtle spicy warmth that contrasts deliciously with the mint.
-
Gluten-Free: Substitute all-purpose flour with a gluten-free blend to create a tasty option everyone can enjoy, without sacrificing texture.
-
Decorative Sprinkles: Top your cookies with festive sprinkles or crushed candy canes before baking for an extra pop of color and crunch. It makes for a delightful presentation, perfect for gatherings.
-
Sugar-Free Option: Use a sugar substitute suitable for baking to craft a lower-calorie version of these cookies while maintaining that delicious flavor.
Whether you’re embracing classic flavors or experimenting with new ones, these Peppermint Swirl Cookies are bound to bring smiles and cheer. And if you’re on the lookout for even more sweet inspiration, don’t forget to check out some lovely treats like Chewy Chocolate Chip or refreshing Pineapple Strawberry Swirled delights!
Make Ahead Options
These Peppermint Swirl Cookies are a wonderful treat to make ahead for your holiday celebrations! You can prepare and chill the dough for up to 24 hours, allowing the flavors to meld beautifully and making it a breeze to bake later. Simply wrap the rolled log in plastic wrap and refrigerate it until you’re ready to slice and bake. If you’re planning even further ahead, the dough can be frozen for up to 2-3 months; just ensure it’s well wrapped to prevent freezer burn. When baking, there’s no need to thaw the dough; slice it directly from the freezer and add an extra minute or two to the bake time for perfectly festive results! Making these cookies ahead not only saves you time on busy days but guarantees delicious, fresh treats whenever you’re ready to enjoy them.
Peppermint Swirl Cookies Recipe FAQs
How do I select the best peppermint extract?
When choosing peppermint extract, I recommend looking for pure extracts made from natural peppermint oil rather than artificial flavoring. Pure extracts provide a stronger and more authentic flavor, ensuring your Peppermint Swirl Cookies have that signature cool minty taste. If you’re sensitive to peppermint intensity, you might also try using an almond extract for a milder flavor profile!
What is the best way to store leftover Peppermint Swirl Cookies?
To keep your Peppermint Swirl Cookies fresh, store them in an airtight container at room temperature for up to 5 to 7 days. A clever trick is to place a slice of bread in the container as well; it helps maintain moisture, keeping your cookies soft and delightful longer. Remember to avoid exposing them to humidity, which could make them stale!
Can I freeze Peppermint Swirl Cookies?
Absolutely! You can freeze your baked Peppermint Swirl Cookies for up to 2 months. Just make sure to place them in a sealed freezer bag or container. To enjoy, simply thaw them at room temperature, or if you prefer them warm, microwave individual cookies for 5-10 seconds. If you want to freeze the raw dough logs, place them in plastic wrap and store them in the freezer for 2-3 months; you can bake them directly from frozen—just add an extra couple of minutes to the bake time!
What if my cookie dough is too sticky?
If your dough seems too sticky after mixing, it could be because the butter wasn’t softened enough or the dough wasn’t chilled adequately. Chill it for an additional 15-30 minutes. If it remains sticky, you can incorporate a little more flour, a tablespoon at a time, until it reaches a workable consistency. Always remember not to overwork the dough; we want to keep those cookies tender!
Are Peppermint Swirl Cookies safe for pets?
It’s important to note that peppermint can be harmful to pets, especially cats and dogs. Keep these festive treats out of their reach to ensure they’re safe. If you’re looking for a pet-friendly holiday treat, consider baking some dog-safe cookies using ingredients like pumpkin and peanut butter instead!
Can I add other flavors to the dough?
Certainly! While peppermint is the star of the show in these cookies, feel free to get creative. You can substitute peppermint extract with almond extract or incorporate some orange zest for a delightful citrus twist. The more the merrier—experimenting with different flavors might just lead to a new family favorite!

Delicious Peppermint Swirl Cookies for Festive Cheer
Ingredients
Equipment
Method
- Whisk together the flour, baking powder, and salt in a medium bowl. Set aside.
- Cream together the butter and sugar until light and fluffy, then add dry ingredients.
- Incorporate the egg, vanilla, and peppermint extracts until well combined.
- Divide the dough in half and tint one half with red food coloring.
- Wrap both dough halves and chill for at least 30 minutes.
- Roll each colored dough into 10x12-inch rectangles and layer them.
- Roll the layered dough tightly into a log shape and wrap tightly.
- Preheat oven to 375°F (190°C) while the dough chills.
- Slice the chilled dough into 1/4-inch rounds and place on baking sheets.
- Bake cookies for 8 to 10 minutes until the edges are lightly golden.
- Cool on baking sheets for 5 minutes before transferring to wire racks.