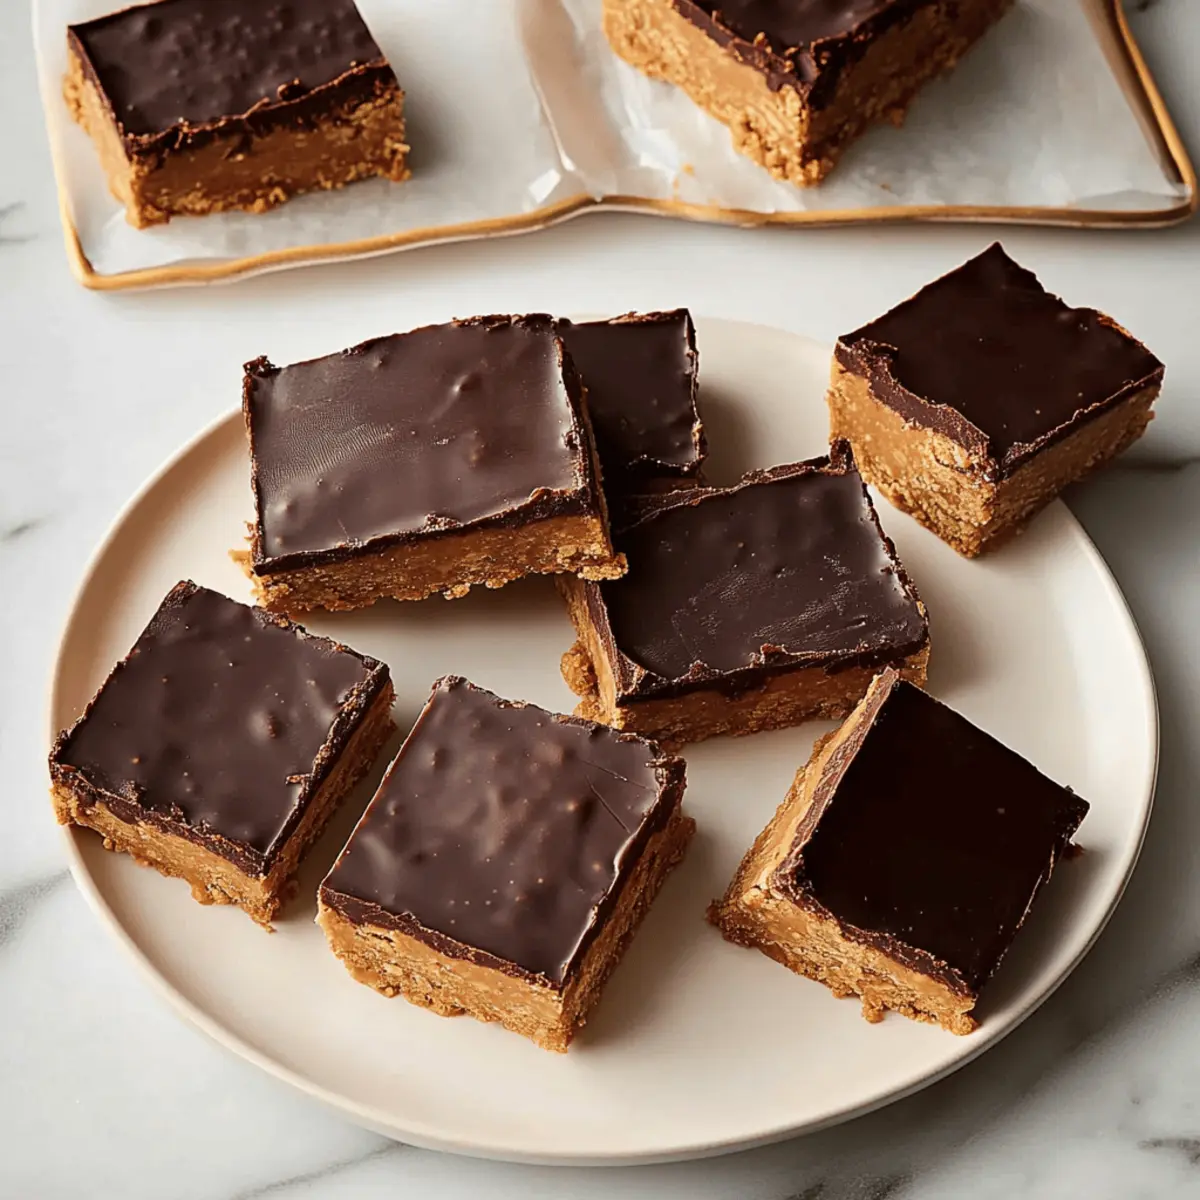
While sifting through my pantry for a quick sweet fix, I stumbled upon a treasure: the ultimate No-Bake Chocolate Peanut Butter Bars! With just five simple ingredients, this recipe not only captures the essence of indulgent peanut butter cups but also offers spectacular convenience. Imagine treating yourself to luscious, creamy bars that skip the oven entirely—perfect for those busy days when you crave a delicious dessert without the fuss. These gluten-free and vegan-friendly bars can easily cater to your dietary needs, making them a crowd-pleaser at any gathering. Ready to whip up something delightful? Let’s dive into this easy-to-make recipe that promises to satisfy every sweet tooth in your house!

Why Are These Peanut Butter Bars Irresistible?
Quick and Easy: In just minutes, you can create a delightful dessert that requires no baking. Perfect for those hectic days!
Decadent Flavor: The luscious combination of chocolate and creamy peanut butter is a match made in dessert heaven.
Dietary Friendly: These bars can easily be tailored to fit gluten-free and vegan lifestyles—everyone can indulge!
Impressive Texture: Experience the contrasting layers of rich chocolate and fudgy peanut butter that create a truly satisfying treat.
Perfect for Sharing: Whether at parties or family gatherings, these bars are sure to wow your friends and loved ones, just like our Garlic Butter Pork or Cowboy Butter Chicken.
Endless Variations: Feel free to experiment with different nut butters or add fun toppings; the sky’s the limit!
Peanut Butter Bars Ingredients
For the Base
• Graham Cracker Crumbs – This forms the sturdy base for the peanut butter bars; you can easily make your own by crushing whole graham crackers.
• Powdered Sugar – Acts as a sweetener and helps bind the base together; make sure to sift it if it’s lumpy.
• Salted Butter – Adds a rich taste to the base; ensure it’s melted for easy mixing. Substitute with vegan butter to keep the recipe vegan-friendly.
• Creamy Peanut Butter – This ingredient provides essential moisture and flavor; ensure it’s well-stirred and smooth for the best results. You can switch to crunchy peanut butter for a delightful texture boost.
For the Topping
• Chocolate Chips – Essential for that decadent layer on top; choose dairy-free chocolate chips for a vegan option.
Step‑by‑Step Instructions for No-Bake Chocolate Peanut Butter Bars
Step 1: Prepare the Baking Dish
Begin by greasing an 8×8-inch baking dish with cooking spray or a thin layer of butter. Next, line it with parchment paper, leaving some overhang to make it easier to remove the bars later. This step ensures a smooth release and a perfect presentation once your decadent peanut butter bars are ready to slice.
Step 2: Mix the Base
In a large mixing bowl, combine graham cracker crumbs and powdered sugar until well blended, ensuring no lumps remain. Pour in the melted salted butter and 1 cup of creamy peanut butter, mixing everything thoroughly until the ingredients form a cohesive, sticky mixture. This will be the rich base of your no-bake chocolate peanut butter bars, so make sure it’s well combined.
Step 3: Press the Mixture into the Dish
With clean hands or a spatula, firmly press the peanut butter mixture evenly into the prepared baking dish. Aim for a smooth, even layer, as this will be the foundation for your delicious bars. Once you achieve a nice, flat surface, you can move on to creating that irresistible chocolate topping.
Step 4: Melt the Chocolate Topping
In a medium microwave-safe bowl, combine chocolate chips with 2 tablespoons of peanut butter. Microwave the mixture in 20-second intervals, stirring well between each interval until melted and smooth—this should take about 1 to 2 minutes. This luscious chocolate blend will crown your peanut butter bars with a rich, dreamy layer.
Step 5: Spread the Chocolate Mixture
Once the chocolate is fully melted and silky, carefully pour it over the pressed peanut butter base in the baking dish. Use a spatula to spread the chocolate evenly, ensuring it covers the entire layer beneath. This beautiful glossy top will not only enhance the flavor but will also provide a delightful contrast to the fudgy base.
Step 6: Chill Until Set
Cover the baking dish with plastic wrap and place it in the refrigerator. Allow the no-bake chocolate peanut butter bars to chill for at least 4 hours or ideally overnight. This chilling time helps the layers firm up, ensuring you create clean, perfect slices when it’s time to enjoy your creation.
Step 7: Slice and Serve
After chilling, remove the bars from the refrigerator and carefully lift them out of the dish using the parchment paper overhang. Place them on a cutting board and slice into your desired size—either thick squares for a hearty treat or smaller pieces for a delicate bite. Your decadent peanut butter bars are now ready to be shared and savored!

Make Ahead Options
These No-Bake Chocolate Peanut Butter Bars are perfect for those hectic days when you want a delicious treat without the last-minute rush! You can prepare the base (graham cracker crumb mixture) up to 24 hours in advance by mixing the graham cracker crumbs, powdered sugar, melted butter, and peanut butter, then pressing it into the baking dish. Cover and refrigerate until you’re ready to add the chocolate topping. The chocolate mixture can also be made ahead—simply melt the chocolate chips with peanut butter and store it in an airtight container for up to 3 days. When you’re ready to serve, just spread the chocolate over the chilled base, let it set in the fridge, and enjoy your decadent peanut butter bars, now stress-free!
Expert Tips for Peanut Butter Bars
-
Choosing Peanut Butter: Use well-stirred, creamy peanut butter to ensure a smooth consistency in your bars. Avoid stiff peanut butter that won’t bind effectively.
-
Avoid Sogy Bars: Press the crumb mixture firmly into the dish to create a solid base. A loose base can lead to uneven bars that fall apart.
-
Melting Chocolate: If you don’t have a microwave, using a double boiler works wonderfully to melt chocolate and peanut butter together smoothly.
-
Chilling Time Matters: Allow the bars to chill for at least 4 hours or overnight for the best texture. This helps them set properly, making slicing easier and cleaner.
-
Storage Tips: Store leftover peanut butter bars in an airtight container in the fridge for up to a week or freeze them for up to 3 months to maintain their deliciousness!
How to Store and Freeze Peanut Butter Bars
Fridge: Store your leftover peanut butter bars in an airtight container for up to 1 week to keep them fresh and decadent.
Freezer: For longer storage, freeze the bars in an airtight container or wrap tightly in plastic wrap for up to 3 months. Thaw in the fridge before serving.
Serving Tip: Enjoy the bars chilled straight from the fridge or at room temperature; they maintain their delicious taste and texture either way!
Reheating: If desired, microwave individual bars for 10-15 seconds to slightly warm them up, enhancing that creamy peanut butter flavor.
Peanut Butter Bars Variations
Customize your peanut butter bars to suit your personal tastes and dietary needs—let your creativity shine!
-
Nut Butter Swap: Replace peanut butter with almond or cashew butter for a unique twist that adds different nutty flavors.
-
Gluten-Free Option: Use gluten-free graham cracker crumbs or crushed nuts as a base, making these delicious bars accessible to all!
-
Vegan Delights: Swap butter for coconut oil or vegan butter, and ensure your chocolate chips are dairy-free for a completely plant-based treat.
-
Topping Enhancements: Add a sprinkle of sea salt on top of the chocolate layer for a sweet-salty contrast. It elevates the flavor profile beautifully.
-
Coconut Bliss: Fold in shredded coconut into the base for a tropical vibe, introducing a chewy texture that complements the richness of the bars.
-
Nutty Crunch: Incorporate chopped peanuts or walnuts into the top chocolate layer to add a delightful crunch—perfect for those who love texture in their desserts!
-
Spicy Kick: Add a pinch of cayenne pepper or a few drops of chili oil to the chocolate mixture for a surprising spicy note that beautifully balances the sweetness.
-
Delectable Swirls: Swirl in some raspberry or strawberry jam before chilling for a fruity blast that beautifully complements the peanut butter flavor.
These variations showcase the versatility of your no-bake chocolate peanut butter bars, just like how you can enjoy a comforting dish of Garlic Butter Pork or the delightful Szechuan Dan Delights. Dive in and have fun exploring!
What to Serve with No-Bake Chocolate Peanut Butter Bars
Imagine hosting friends for an afternoon treat with these no-bake delights, while simplicity and flavor effortlessly come together.
- Cold Milk: A classic pairing that complements the rich flavors of chocolate and peanut butter, enhancing each bite.
- Fresh Berries: Juicy strawberries or raspberries add a burst of freshness and tartness, cutting through the creaminess of the bars.
- Vanilla Ice Cream: Creamy vanilla ice cream offers a delightful scoop alongside the bars, perfect for cooling down those sweet cravings.
- Chia Seed Pudding: Serve a bowl of creamy chia seed pudding for a nutritious side, complementing the decadent richness without being overwhelming.
- Espresso or Coffee: The boldness of coffee balances the sweetness, making it a wonderful pairing for a laid-back dessert experience.
- Nutty Granola: Sprinkling some nutty granola on top adds crunch and flavor, enhancing both texture and enjoyment with every bite.
- Chocolate Sauce Drizzle: For the ultimate indulgence, a drizzle of warm chocolate sauce over the bars amplifies their delectable chocolate goodness.
- Coconut Whipped Cream: Light and airy, coconut whipped cream adds a tropical flair while keeping the dessert feeling light and fresh.
- Almonds or Pecans: A few toasted nuts on the side bring a wonderful crunch, complementing the rich flavors while enhancing texture.

No-Bake Chocolate Peanut Butter Bars Recipe FAQs
How do I choose ripe ingredients for these peanut butter bars?
Absolutely! The most important ingredient to pay attention to is your peanut butter. Choose a creamy, well-stirred peanut butter without any stiff texture. The graham cracker crumbs should be fresh, and it’s best to use powdered sugar that isn’t lumpy, so give it a good sift if needed.
What’s the best way to store leftover peanut butter bars?
Very! Store your leftover peanut butter bars in an airtight container in the fridge, where they’ll stay fresh for up to 1 week. Ensure they’re fully chilled before placing them in the container to avoid moisture accumulation, which can affect their texture.
Can I freeze these peanut butter bars, and how?
Absolutely! To freeze your no-bake chocolate peanut butter bars, wrap them tightly in plastic wrap, then place them in an airtight container to prevent freezer burn. They will keep well for up to 3 months. When you’re ready to enjoy, simply move them to the fridge to thaw for a few hours before serving.
What should I do if my mixture is too crumbly?
If your mixture feels dry or crumbly, it might be due to insufficient moisture. Ensure your peanut butter is well-stirred and melted butter is used liberally. If it’s still too dry, try adding a bit more melted butter or heavy cream, mixing until you reach a sticky consistency that will hold together when pressed.
Are these bars suitable for kids and pets?
These peanut butter bars should definitely be kept out of reach of pets, especially since chocolate is toxic to them. For kids, they make a delicious treat! However, if your child has a peanut allergy, consider substituting the peanut butter with sun butter or almond butter, but check for any nut allergies before doing so!
Can I make these bars vegan or gluten-free?
Very! To cater to a vegan diet, simply substitute regular butter with vegan butter and ensure you use dairy-free chocolate chips. For a gluten-free option, swap out the graham cracker crumbs with gluten-free alternatives, and you’ll have a delightful treat that fits various dietary needs!
Decadent Peanut Butter Bars You Can Make in Minutes
Ingredients
Equipment
Method
- Grease an 8x8-inch baking dish with cooking spray or butter, then line it with parchment paper.
- In a large mixing bowl, combine graham cracker crumbs, powdered sugar, melted butter, and creamy peanut butter until well blended.
- Press the peanut butter mixture evenly into the prepared baking dish.
- In a microwave-safe bowl, combine chocolate chips and peanut butter. Microwave in 20-second intervals, stirring until melted and smooth.
- Pour the melted chocolate over the pressed peanut butter base and spread evenly.
- Cover with plastic wrap and refrigerate for at least 4 hours or overnight until set.
- Remove the bars from the dish using the parchment paper overhang and slice into squares.