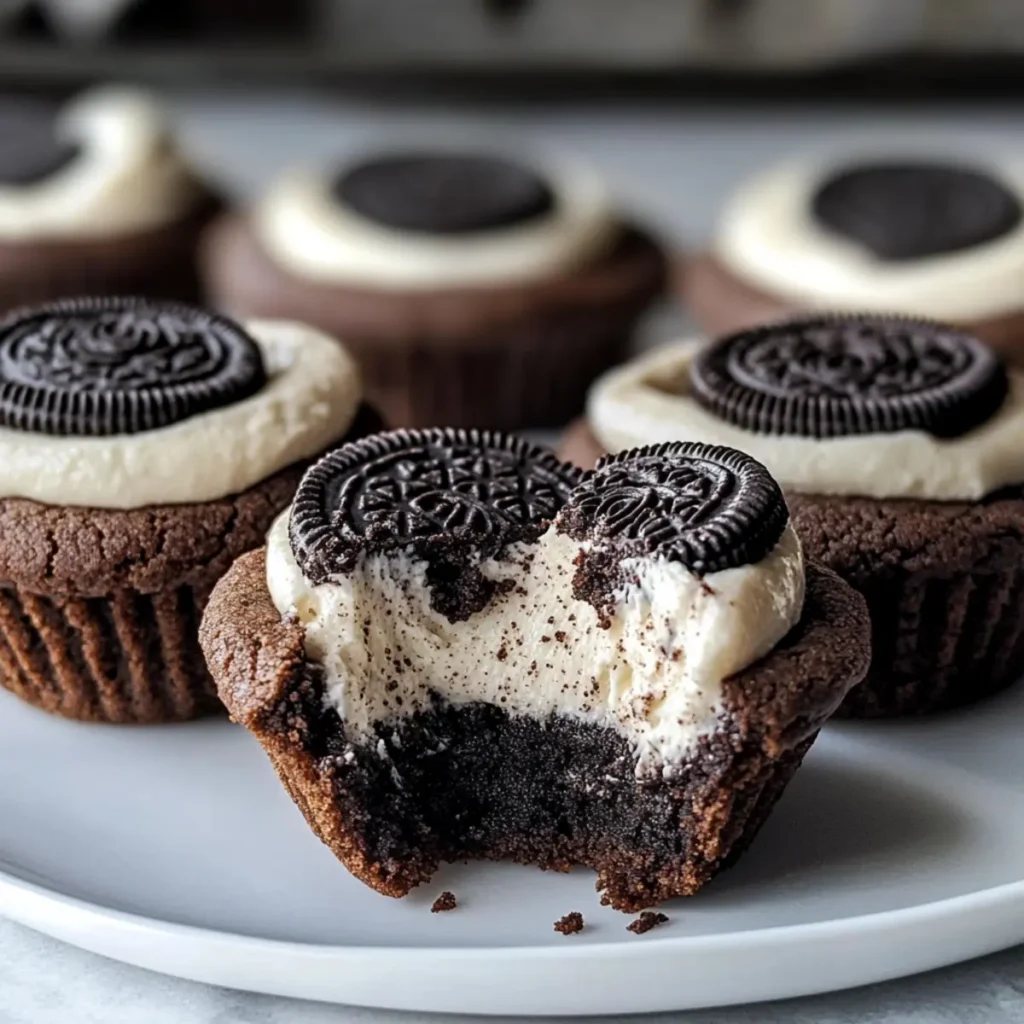
As I whisked cream cheese and sugar together, the kitchen filled with the comforting aroma of sweet nostalgia. My mind wandered back to childhood baking sessions, where the mix of chocolate and cream always elicited smiles. That’s where the magic began, leading me to create these Oreo Cheesecake Cookie Cups. This recipe combines a rich, chocolatey cookie base with a light and fluffy cheesecake filling, making them not just a treat, but an experience to savor. Best of all, they’re quick to prepare and perfect for impressing guests or satisfying your own sweet cravings. With endless customization options for toppings, these little delights promise to be a crowd-pleaser at your next gathering. Are you ready to whip up some deliciousness?

Why Are These Cookie Cups So Irresistible?
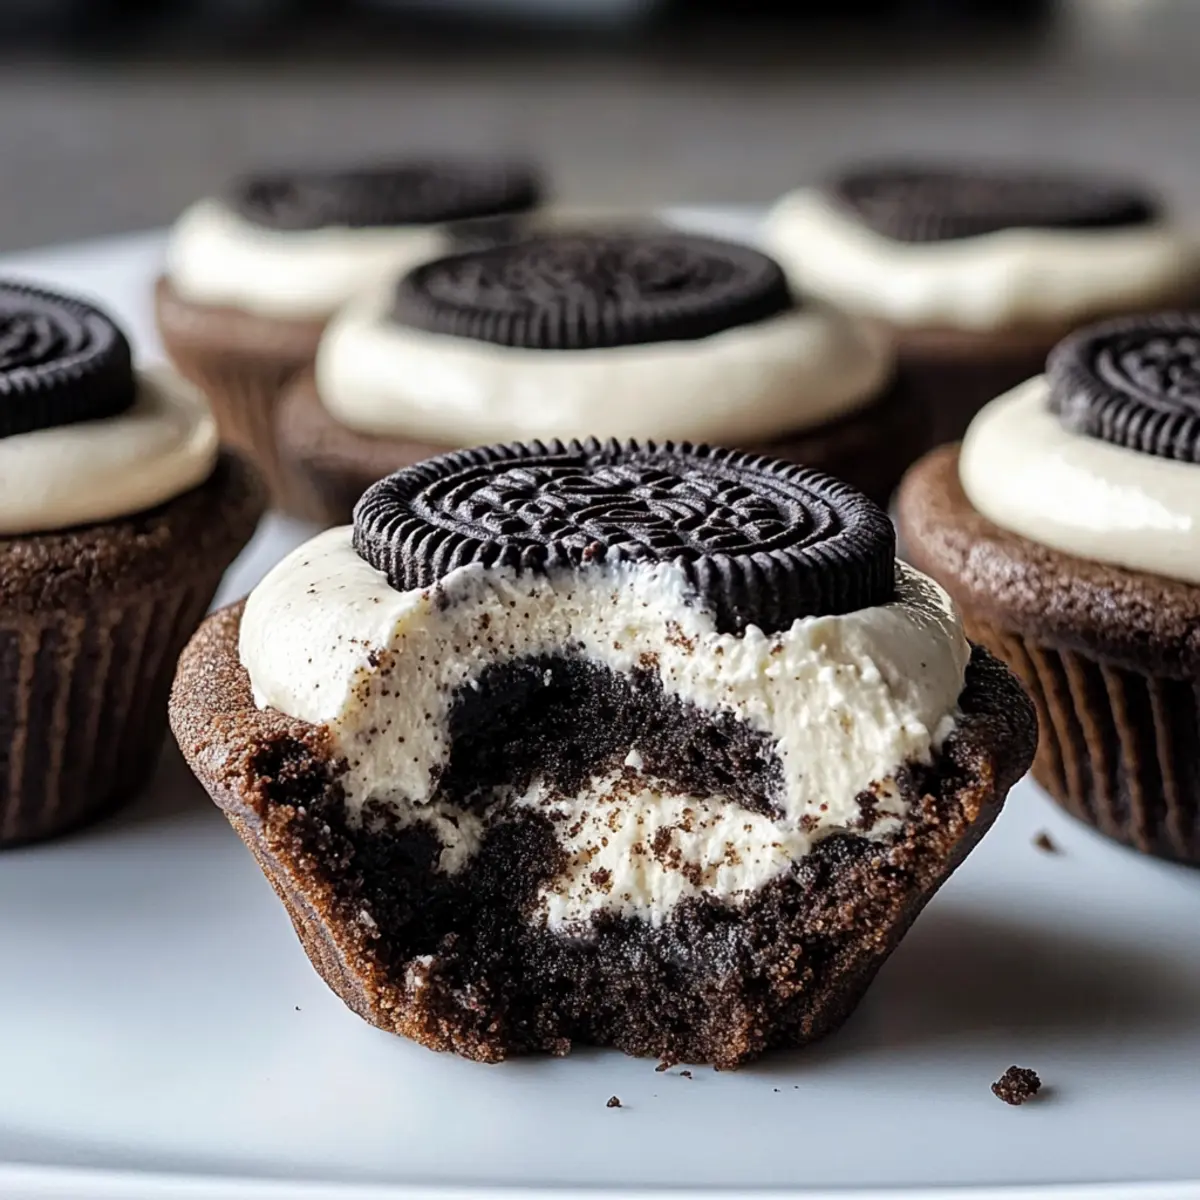
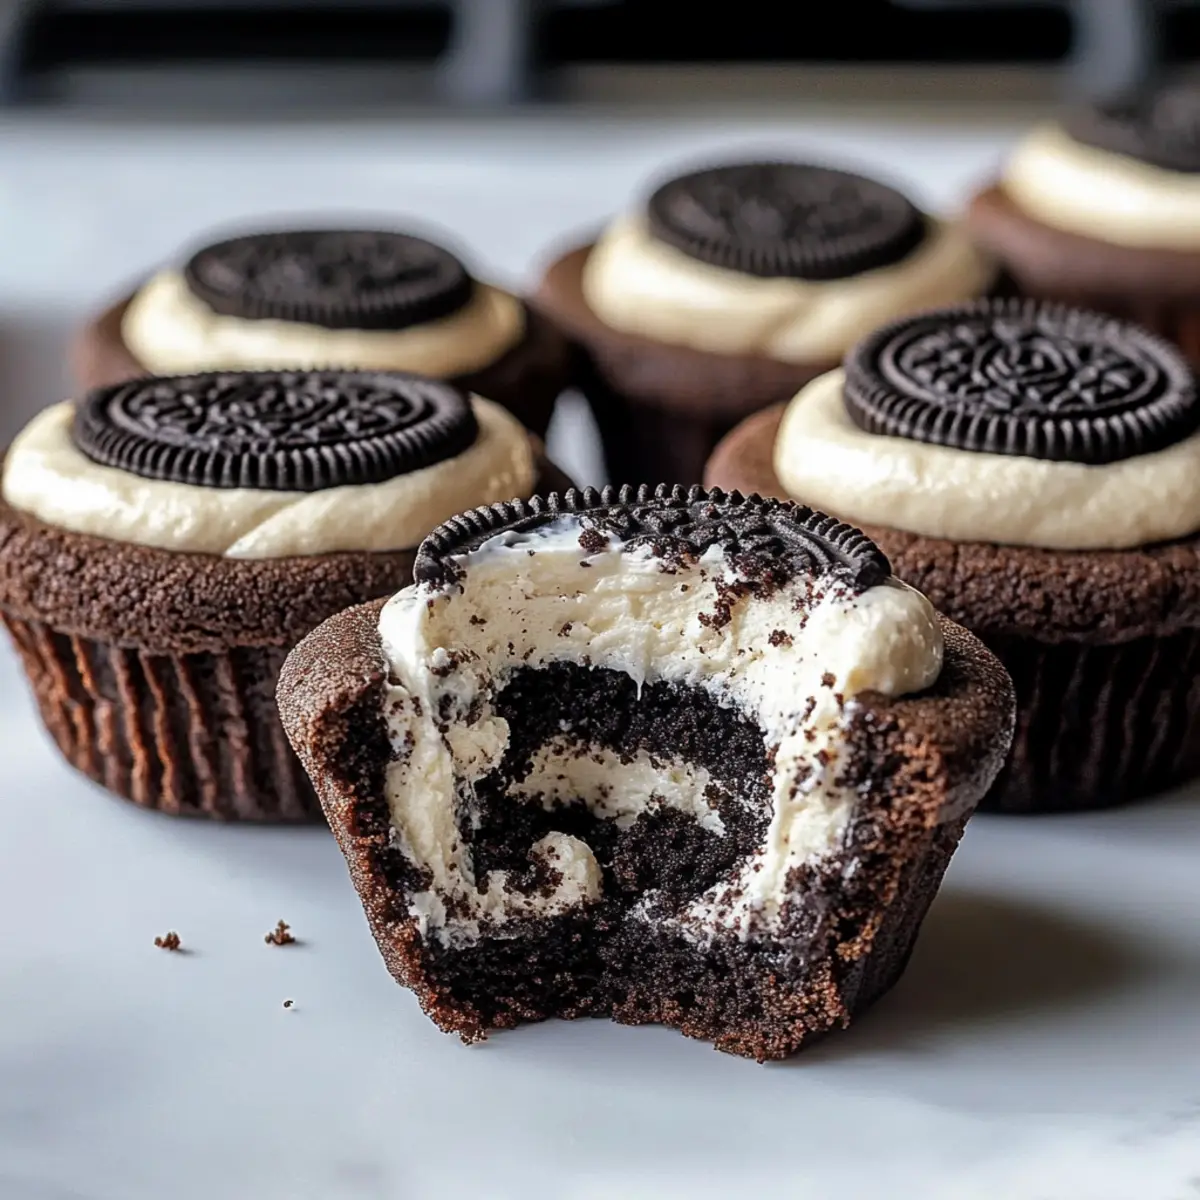
Decadent Layers: Each bite delivers a tantalizing mix of rich cookie and luscious cheesecake flavors that create a dessert experience unlike any other.
Thoughtful Customizations: Easily adapt the recipe to include your favorite toppings like fresh berries or whipped cream for personalized flair, perfect for any season or occasion.
Quick and Easy: With straightforward steps, you’ll have these mouthwatering treats ready in no time—a delightful addition to any gathering or a weekend indulgence.
Crowd-Pleasing Treats: They’re the perfect dessert for parties, guaranteed to impress guests and satisfy sweet cravings alike, just like our [Soft Chewy Simply](https://flavorfulhaven.com/soft-chewy-chocolate-chip-cookies-are-simply-irresistible/) recipe does for cookie lovers.
Kid-Friendly Fun: Involve the little ones in the baking process, making it a fun family activity that sparks joy and creativity in the kitchen.
Store and Enjoy: These Oreo Cheesecake Cookie Cups store beautifully, allowing you to prepare ahead of time and enjoy them over several days without losing their delightful taste.
Oreo Cheesecake Cookie Cups Ingredients
For the Cookie Cups
• All-purpose flour – Essential for the cookie base, providing structure to these delightful cups.
• Dutch-processed cocoa powder – Adds a rich chocolate taste; substitute with regular cocoa powder for a milder flavor.
• Black cocoa powder – Optional for depth of flavor; omit for a less intense chocolate experience.
• Baking soda – Helps the cookies rise, creating a perfect texture.
• Salt – Balances the sweetness and enhances overall flavor.
• Unsalted butter – Key for richness; it should be at room temperature for easy mixing.
• Granulated sugar – Contributes to sweetness and texture in the cookie base.
• Light brown sugar – Adds moisture and a hint of caramel flavor; can replace with more granulated sugar.
• Large eggs – Binds the ingredients together, providing structure; room temperature eggs integrate better.
• Vanilla extract – Enhances flavor; feel free to swap for almond extract for a different twist.
For the Cheesecake Filling
• Heavy whipping cream – Provides lightness to the cheesecake filling; dairy-free cream can be used as an alternative.
• Full-fat cream cheese – The star of the show for creaminess; make sure it’s softened for a smooth blend.
• Oreo cookie crumbs – Delivers the signature flavor and texture; can use other chocolate sandwich cookies as a substitute.
With these Oreo Cheesecake Cookie Cups ingredients, you’re well on your way to creating a decadent dessert that will be a hit with family and friends!
Step‑by‑Step Instructions for Oreo Cheesecake Cookie Cups
Step 1: Preheat the Oven
Begin by preheating your oven to 350°F (175°C) and generously greasing your muffin tins with nonstick spray. This step is crucial to ensure that your Oreo Cheesecake Cookie Cups will easily pop out once baked, maintaining their attractive shape and making for stress-free serving.
Step 2: Prepare the Dry Ingredients
In a mixing bowl, whisk together the all-purpose flour, Dutch-processed cocoa powder, black cocoa powder, baking soda, and salt. This combination creates a rich foundation full of chocolatey goodness for your cookie cups. Ensure the dry ingredients are well combined to avoid any lumps, as this will lead to a smoother cookie base.
Step 3: Cream the Butter and Sugars
Using a stand mixer, beat the room temperature unsalted butter along with granulated sugar and light brown sugar until the mixture appears light and fluffy, about 2-3 minutes. This step aerates the mixture, creating a tender texture in your cookie cups. Then, add the eggs one at a time, along with the vanilla extract, mixing until fully incorporated.
Step 4: Combine Wet and Dry Ingredients
Gradually add the dry ingredient mixture to the wet ingredients in your stand mixer. Mix on low speed until everything is just combined. Avoid over-mixing to keep your cookie cups tender and delicious. You should see the dough starting to come together without any dry flour visible.
Step 5: Scoop into Muffin Tins
Scoop the cookie dough into the prepared muffin tins, filling each cup about two-thirds full. Press the dough down gently to form wells in the center, which will hold your rich cheesecake filling later. Bake these cookie cups for 10-13 minutes, until the edges are set and slightly firm to the touch.
Step 6: Cool and Create Wells
Once baked, remove the muffin tins from the oven and allow the cookie cups to cool for about 5 minutes before gently removing them. Create a well in the center of each cup using the back of a measuring spoon, making sure not to break the edges. Let them cool completely on a wire rack.
Step 7: Whip the Cream
In a chilled mixing bowl, whip the heavy cream until stiff peaks form, which usually takes about 3-4 minutes. This airy texture is key for the cheesecake filling, making it light and fluffy. Be careful not to over-whip, as it can lead to a grainy texture.
Step 8: Prepare the Cheesecake Filling
In a separate bowl, beat the softened cream cheese with granulated sugar until smooth and creamy. This typically takes about 2 minutes. Once combined, gently fold in the whipped cream and Oreo cookie crumbs until no streaks remain, creating a delicious and decadent filling for your Oreo Cheesecake Cookie Cups.
Step 9: Assemble the Cookie Cups
Fill each cooled cookie cup with the cheesecake mixture, using a piping bag or a spoon for precision. Distributing the filling evenly ensures that every bite is a perfect blend of cookie and creaminess. Once filled, cover the muffin tin with plastic wrap to avoid any contamination.
Step 10: Chill Before Serving
Refrigerate the filled Oreo Cheesecake Cookie Cups for at least 1-2 hours to allow the filling to set and flavors to meld. This cooling time is essential for achieving that ideal texture, making each bite delightful. Once set, they are ready for your guests or a sweet treat at home!
Oreo Cheesecake Cookie Cups Variations
Customize your Oreo Cheesecake Cookie Cups for a personal touch that excites your taste buds!
-
Gluten-Free: Use gluten-free all-purpose flour to create a deliciously inclusive treat without compromising flavor.
-
Nutty Twist: Incorporate crushed nuts like pecans or walnuts into the cookie dough for added crunch. This savory hint provides a delightful contrast to the sweet filling.
-
Caramel Drizzle: Top with a luscious caramel sauce to elevate your cookie cups to a whole new level of indulgence. The pairing of chocolate and caramel creates a magical synergy.
-
Berries Galore: Add a fresh burst of flavor by topping with strawberries or raspberries. Their tartness complements the creamy filling beautifully and adds a pop of color.
-
Dairy-Free Option: Substitute the heavy cream and cream cheese with coconut cream and dairy-free cream cheese for a delightful vegan version. It’s an equally delectable twist for those avoiding dairy.
-
Spiced Flavors: Add a dash of cinnamon or pumpkin spice to the cheesecake mixture for a cozy, seasonal variation that warms the soul.
-
Minty Freshness: Incorporate a few drops of peppermint extract into the filling for a refreshing, festive touch. It’s perfect for those who adore a mint-chocolate combo.
-
Extra Chocolate: For the ultimate chocolate lover, mix in chocolate chips to the cookie dough and sprinkle more on top before serving. It’s a rich, double-chocolate delight that will surely satisfy.
These variations will transform your Oreo Cheesecake Cookie Cups into something uniquely your own, just like our delightful [Soft Chewy Simply](https://flavorfulhaven.com/soft-chewy-chocolate-chip-cookies-are-simply-irresistible/) cookies. Dive into the fun of experimenting with flavors and toppings!
Make Ahead Options
These Oreo Cheesecake Cookie Cups are perfect for meal prep and busy weeknights! You can prepare the cookie cups up to 24 hours in advance by baking and cooling them, then storing them in an airtight container at room temperature. The cheesecake filling can also be made ahead and refrigerated for up to 3 days; just mix everything as per the recipe and keep it covered. When you’re ready to serve, simply fill the cooled cookie cups with the cheesecake mixture and chill for an additional hour before serving. This method not only saves time but ensures that your treats are just as delicious as if they were made fresh that day!
Storage Tips for Oreo Cheesecake Cookie Cups
-
Room Temperature: These treats are best stored in the fridge to maintain their creamy texture, but they can sit at room temperature for about 2 hours when serving.
-
Fridge: Store your Oreo Cheesecake Cookie Cups in an airtight container in the refrigerator for up to 5 days. This keeps them fresh and delicious!
-
Freezer: For longer storage, freeze the filled cookie cups for up to 2 months. Make sure to wrap them securely in plastic wrap and place them in a freezer-safe container.
-
Reheating: Simply thaw in the refrigerator overnight before serving, and enjoy these delightful Oreo Cheesecake Cookie Cups at their best!
Expert Tips for Oreo Cheesecake Cookie Cups
-
Room Temperature Ingredients: Ensure your butter, eggs, and cream cheese are at room temperature for easier mixing and a smoother batter. This will improve the texture of your Oreo Cheesecake Cookie Cups.
-
Proper Mixing: Beat the butter and sugars until light and fluffy to incorporate air, which leads to a tender cookie. Avoid over-mixing when adding dry ingredients to prevent dense cookie cups.
-
Even Wells: When creating wells in the baked cookie cups, use the back of a measuring spoon gently to avoid breaking the edges. This ensures a perfect shape for your cheesecake filling.
-
Cool Completely: Allow the cookie cups to cool completely before filling them with the cheesecake mixture. This step prevents melting and ensures the filling stays intact.
-
Chill to Set: Refrigerate the filled cookie cups for at least 1-2 hours. Chilling helps the filling set properly and enhances the overall flavor of your Oreo Cheesecake Cookie Cups.
What to Serve with Oreo Cheesecake Cookie Cups
These delightful cookie cups invite a world of pairings to create a memorable meal.
-
Fresh Berries: The sweetness and tartness of strawberries or raspberries cut through the richness, adding a bright, refreshing contrast.
-
Whipped Cream: A luscious dollop of freshly whipped cream amplifies the creamy filling, making each bite feel indulgent and airy.
-
Chocolate Sauce: Drizzling warm chocolate sauce enhances the chocolatey experience, creating a luscious dessert that’s utterly irresistible.
-
Coffee or Espresso: A rich coffee pairing balances the sweetness, making it an enjoyable combination for dessert lovers who appreciate a sophisticated twist.
-
Milk: A classic companion for cookies, a cold glass of milk complements the flavors beautifully and brings out the nostalgia of childhood treats.
-
Ice Cream: Scoop some vanilla or chocolate ice cream on the side for a decadent dessert duo that indulgently contrasts with the creamy filling.
Each of these pairings adds a unique touch, elevating your Oreo Cheesecake Cookie Cups into an event to remember!
Oreo Cheesecake Cookie Cups Recipe FAQs
How do I choose ripe ingredients for this recipe?
Absolutely! For the best cheesecake filling, ensure your cream cheese is fully softened to room temperature, as this prevents lumps and helps achieve a smooth texture. Eggs should also be room temperature for better incorporation into the batter, so take them out of the fridge about 30 minutes before you start.
What’s the best way to store leftover Oreo Cheesecake Cookie Cups?
I recommend storing your delicious Oreo Cheesecake Cookie Cups in an airtight container in the refrigerator for up to 5 days. This keeps them fresh and maintains their delightful texture while allowing the flavors to meld beautifully. If they are out for serving, they can sit at room temperature for about 2 hours before they need to go back in the fridge.
Can I freeze these cookie cups, and if so, how?
Yes, you can definitely freeze your Oreo Cheesecake Cookie Cups! To do so, wrap each cookie cup tightly in plastic wrap and place them in a freezer-safe container. They will keep well for up to 2 months. When you’re ready to enjoy them, simply thaw in the refrigerator overnight. After thawing, if they seem a bit soft, you can refrigerate them again for an hour before serving to restore their texture.
What should I do if my cookie cups have a soggy bottom?
Very good question! A soggy bottom can happen if the cookie cups are underbaked or if there’s too much filling. To fix this, ensure that you bake the cups until the edges are set and slightly firm. If they’re still soft after baking, return them to the oven for an additional minute or two, keeping an eye on them. Also, once you fill them with the cheesecake mixture, they should chill in the fridge to set properly—that will help prevent any sogginess from excess moisture.
Are there any dietary considerations for my Oreo Cheesecake Cookie Cups?
Absolutely! If you’re catering to dietary restrictions, you can easily make these cookie cups gluten-free by substituting all-purpose flour with gluten-free all-purpose flour. Additionally, for those with dairy allergies, feel free to use dairy-free cream and non-dairy butter, ensuring everyone can enjoy these delightful treats!

Irresistible Oreo Cheesecake Cookie Cups You’ll Crave
Ingredients
Equipment
Method
- Preheat your oven to 350°F (175°C) and grease muffin tins with nonstick spray.
- In a mixing bowl, whisk together all-purpose flour, Dutch-processed cocoa powder, black cocoa powder, baking soda, and salt.
- Using a stand mixer, beat the unsalted butter, granulated sugar, and light brown sugar until light and fluffy, about 2-3 minutes. Add the eggs and vanilla extract, mixing until fully incorporated.
- Gradually add the dry ingredients to the wet ingredients, mixing on low speed until just combined.
- Scoop the cookie dough into muffin tins, filling each cup about two-thirds full. Bake for 10-13 minutes until edges are set.
- Remove from oven and let cool for 5 minutes. Create a well in the center of each cup using a measuring spoon. Cool completely on a wire rack.
- Whip the heavy cream in a chilled bowl until stiff peaks form, about 3-4 minutes.
- Beat the softened cream cheese with granulated sugar until smooth, about 2 minutes. Gently fold in the whipped cream and Oreo cookie crumbs.
- Fill each cooled cookie cup with the cheesecake mixture using a piping bag or spoon.
- Refrigerate filled cookie cups for at least 1-2 hours to allow the filling to set.