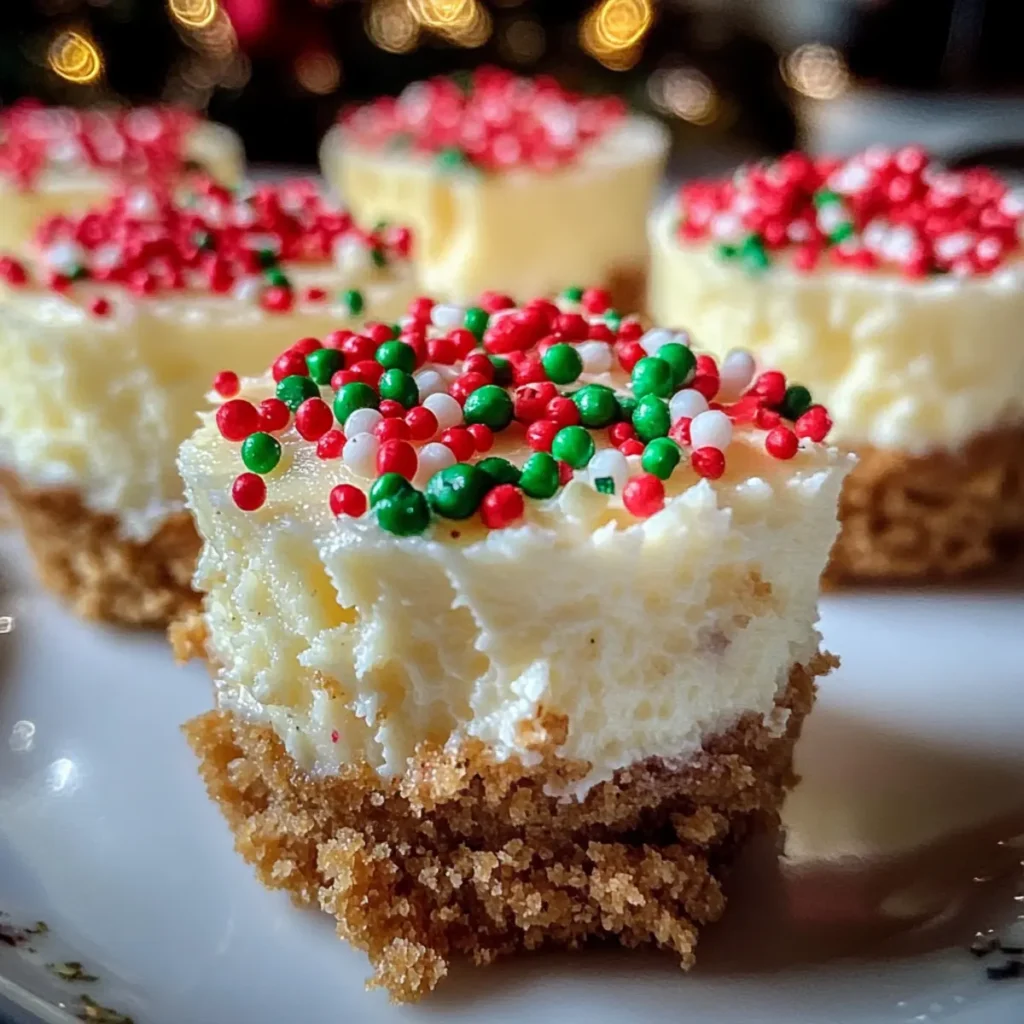
You won’t believe how simple it is to create a dessert that will wow your holiday guests! These irresistible Mini Christmas Cheesecakes combine a creamy filling with a buttery graham cracker crust, all topped with festive red and green sprinkles. Perfect for those who cherish homemade treats, this easy-to-follow recipe not only saves time but can also be customized to suit your taste, making it a crowd-pleaser at every gathering. Whether you’re looking for a delightful addition to your holiday menu or a sweet centerpiece for your dessert table, these mini cheesecakes are the answer. Curious about how to whip up these delightful bites? Let’s dive into this sweet holiday adventure together!

Why are these cheesecakes a must-try?
Effortless Creation: This recipe is so simple, anyone can make it! With just a handful of ingredients, you’ll whip up a delightful dessert in no time.
Deliciously Customizable: Want to switch things up? You can easily alter flavors by adding citrus zest or chocolate, making it perfect for every palate.
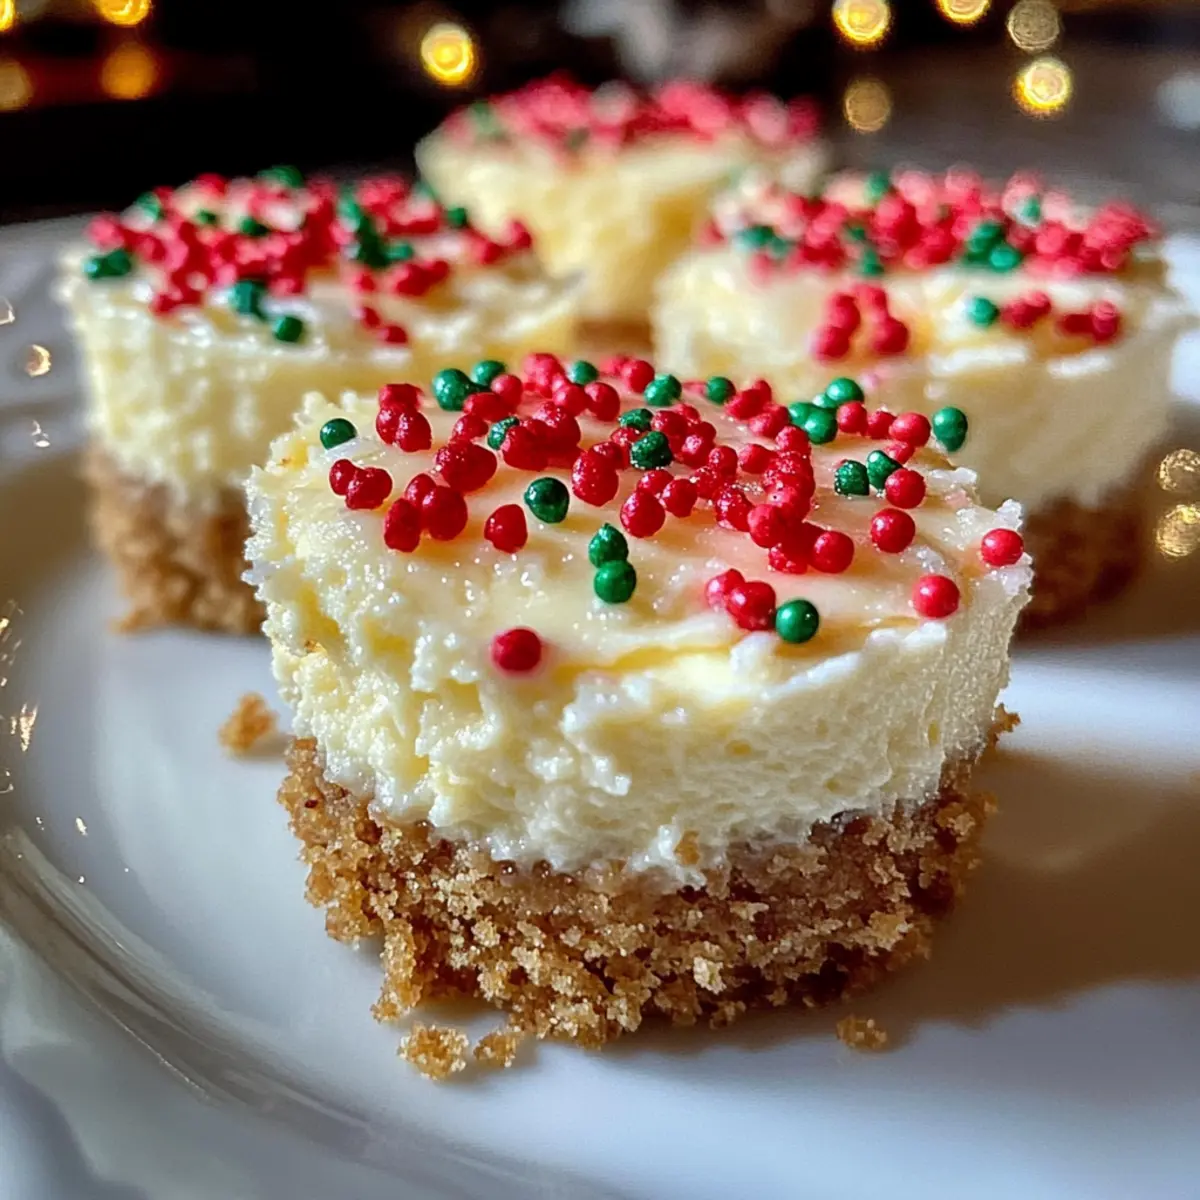
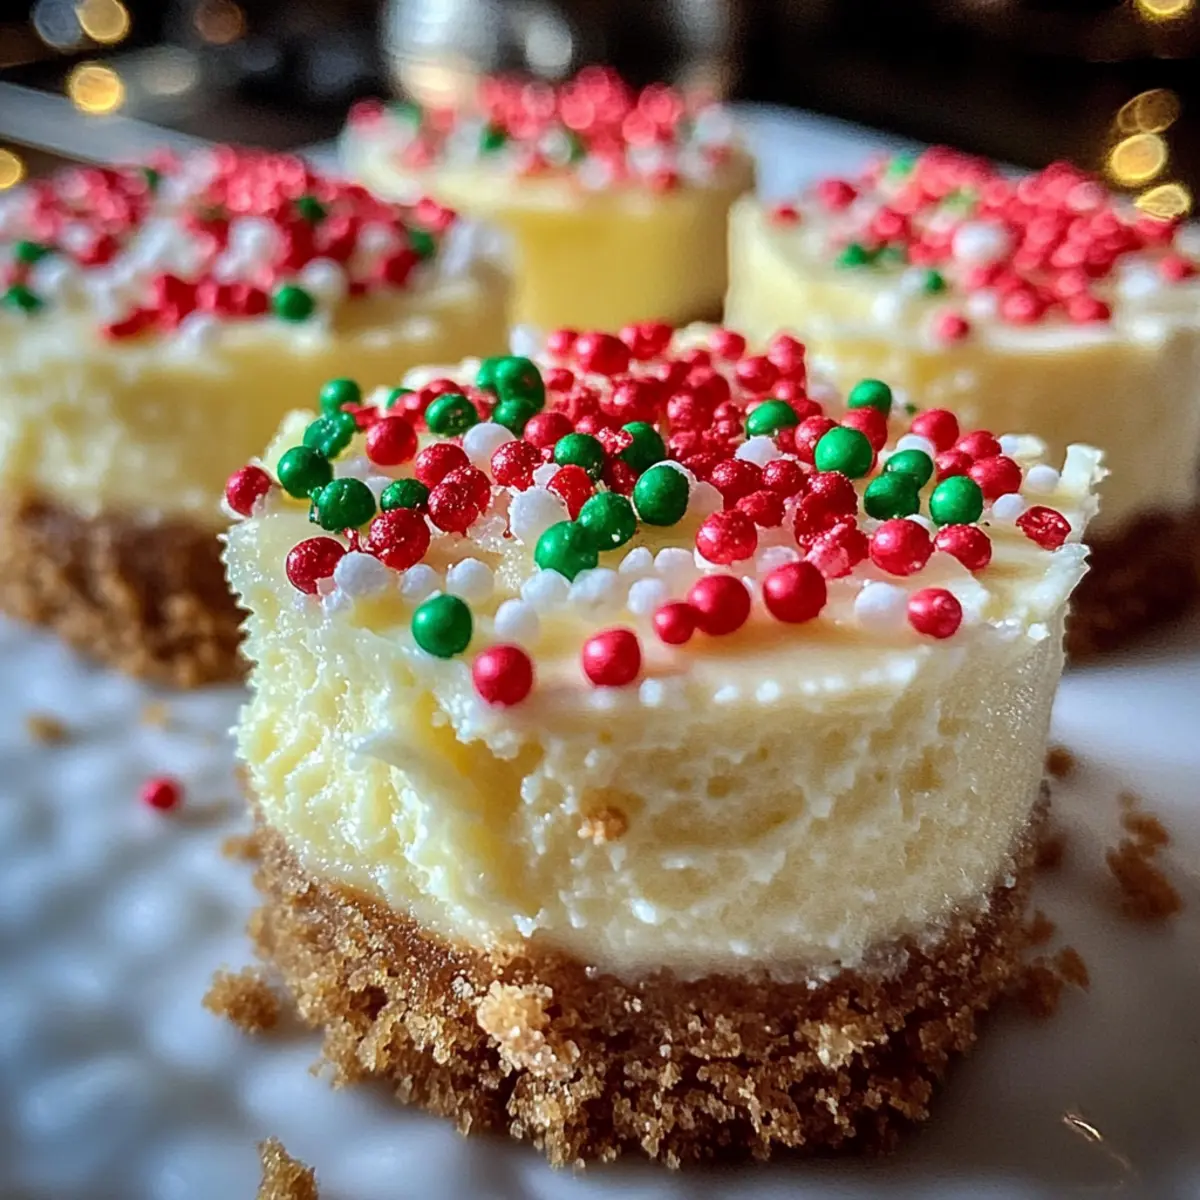
Visual Appeal: Topped with festive red and green sprinkles, these mini cheesecakes look stunning on any dessert table, promising to impress your guests.
Perfect Portion Size: Each bite-sized cheesecake is just the right amount of sweet indulgence, making them ideal for holiday gatherings.
Time-Saving Treat: Make ahead and chill for at least 2 hours, allowing you to savor the holiday festivities without spending hours in the kitchen.
Whether you’re serving them at a party or tucking them into a festive box to share with friends, these Mini Christmas Cheesecakes are sure to delight!
Mini Christmas Cheesecake Ingredients
• Get ready to create magic with these Mini Christmas Cheesecakes!
-
For the Cheesecake Filling
-
Cream Cheese – Provides that creamy, rich texture; remember to use it at room temperature for easy mixing.
-
Sugar – Adds the necessary sweetness to balance the cheesecake’s tartness perfectly.
-
Vanilla Extract – A must for enhancing flavors; opt for pure vanilla for the best results.
-
Sour Cream – Contributes tanginess and creaminess; you can swap this for Greek yogurt if you’re after a lighter option.
-
Eggs – Essential for binding the filling together; add them one at a time for a smooth mixture.
-
For the Crust
-
Crushed Graham Crackers – These form the base of the crust and provide a delightful crunch; feel free to substitute with digestive biscuits if you prefer.
-
Butter (melted) – Binds the crust ingredients together; using unsalted butter allows better control over flavor.
-
For the Festive Touch
-
Red and Green Sprinkles – These are purely for decoration; consider adding fruit preserves or a chocolate drizzle for extra flair if you wish!
Step‑by‑Step Instructions for Mini Christmas Cheesecakes
Step 1: Preheat the Oven
Begin by preheating your oven to 325°F (160°C). This crucial step ensures that your mini Christmas cheesecakes bake evenly from the moment they’re placed in the oven. While the oven warms up, gather your supplies and line a mini cupcake pan with cupcake liners, setting the stage for your delightful holiday treats.
Step 2: Prepare the Cheesecake Filling
In a mixing bowl, combine softened cream cheese and sugar using an electric mixer on medium speed. Mix until the batter is smooth and creamy, which should take about 2-3 minutes. Next, incorporate vanilla extract and sour cream, mixing until fully blended. The mixture should be luscious and well-combined, creating the perfect base for your mini Christmas cheesecakes.
Step 3: Add the Eggs
Now, it’s time to introduce the eggs into your cheesecake filling. Add one egg at a time, gently mixing after each addition just until combined. Be careful not to overmix, as this can lead to air bubbles in your filling. The final mixture should be silky and slightly pale in color, ready to bring your mini Christmas cheesecakes to life.
Step 4: Make the Crust
In another bowl, combine crushed graham crackers with melted butter, mixing thoroughly until the crumbs are evenly coated. The mixture should resemble wet sand. Next, press this crust mixture firmly into the bottom of each cupcake liner using the back of a spoon or your fingers to create a solid base for your cheesecakes.
Step 5: Fill the Liners
Spoon the cheesecake filling into the prepared cupcake liners, filling each about three-quarters full. This allows room for the filling to rise slightly while baking. The contrasting layers of crust and creamy filling will create a beautiful presentation, making your mini Christmas cheesecakes as pleasing to the eye as they are to the taste.
Step 6: Bake to Perfection
Carefully place the cupcake pan in the preheated oven and bake for approximately 20 minutes. You’ll know they’re ready when the edges appear set but the center still has a slight jiggle. This delicate balance is key in achieving the creamy texture that will make your mini Christmas cheesecakes so delightful.
Step 7: Cool and Chill
After baking, remove the mini cheesecakes from the oven and allow them to cool in the pan for about 10 minutes. Then, transfer them to a wire rack to cool completely. Once cool, refrigerate the cheesecakes for at least 2 hours. This chilling time is crucial, as it allows flavors to meld and the texture to firm up beautifully.
Step 8: Decorate and Serve
Finally, before serving, add a festive touch by decorating the tops of your mini Christmas cheesecakes with red and green sprinkles. This fun addition not only enhances their appearance but also reflects the joyous holiday spirit. Serve chilled at your next gathering, and watch your guests delight in every delicious bite of these luscious mini Christmas cheesecakes!
Mini Christmas Cheesecakes Variations & Substitutions
Feel free to explore delightful twists on this classic dessert and make it uniquely your own!
-
Lighter Option: Swap cream cheese for Neufchâtel cheese for a lower-fat version without compromising too much on flavor.
-
Citrus Zest: Add a teaspoon of lemon or orange zest to the filling for a refreshing citrus twist that brightens the cheesecake!
-
Chocolate Lovers: Mix in melted chocolate into the cheesecake batter for a rich, decadent flavor. Top with chocolate ganache for extra indulgence.
-
Nutty Flavor: Incorporate ground nuts into the crust, like almonds or pecans, for added crunch and depth.
-
Fruit-Infused: Blend in pureed fruit, like strawberries or raspberries, into the cheesecake filling to add natural sweetness and a pop of color.
-
Dairy-Free: Use a dairy-free cream cheese alternative along with coconut cream for a delicious vegan twist that everyone will love.
-
Spiced Version: Sprinkle cinnamon or nutmeg into the batter for a warm spiced flavor that’s perfect for the holiday season.
-
Toppings Galore: Switch up the sprinkles for crushed peppermint candies or drizzle with caramel sauce for an enticing finishing touch—these subtle changes can elevate even the best Mini Christmas Cheesecakes!
Experimenting with your favorite flavors makes these mini cheesecakes an enjoyable canvas for your creativity, so dive in and have fun!
How to Store and Freeze Mini Christmas Cheesecakes
Fridge: Store leftover mini Christmas cheesecakes in an airtight container for up to 5 days to maintain their creamy texture and flavor.
Freezer: For longer storage, freeze the cheesecakes in a single layer in a freezer-safe container for up to 2 months.
Thawing: To enjoy frozen mini cheesecakes, simply thaw them overnight in the refrigerator before serving. This helps preserve their delightful taste and texture.
Reheating: These mini cheesecakes are best served chilled directly from the fridge; reheating is not recommended as it can alter their creamy consistency.
Expert Tips for Mini Christmas Cheesecakes
- Room Temperature Ingredients: Ensure all ingredients, especially cream cheese and eggs, are at room temperature. This step helps achieve a smooth filling without lumps.
- Baking Time Awareness: Keep an eye on the baking process; the mini cheesecakes should be slightly jiggly in the center when you remove them from the oven for that perfect texture.
- Chilling is Essential: Don’t rush the chilling time. Allowing your mini Christmas cheesecakes to chill for at least 2 hours is crucial for achieving that creamy, sliceable consistency.
- Avoid Overmixing: When adding eggs, mix gently just until incorporated. Overmixing can introduce air bubbles, resulting in a less desirable texture.
- Experiment with Toppings: Feel free to play around with different toppings like chocolate drizzle or fruit preserves to enhance the flavor of your mini cheesecakes!
Make Ahead Options
Busy home cooks will love that these Mini Christmas Cheesecakes can be prepared up to 24 hours in advance! You can mix the cheesecake filling and fill the cupcake liners a day ahead, then refrigerate them until you’re ready to bake. Just before serving, bake the cheesecakes as directed and allow them to cool before chilling for at least 2 hours. This not only saves you time on the day of your gathering but also ensures each bite is just as delicious as if they were freshly made. Remember, the sprinkles can be added right before serving to keep them vibrant and festive!
What to Serve with Mini Christmas Cheesecakes?
These festive treats will make your holiday gathering unforgettable, and pairing them with delightful accompaniments will elevate the experience.
-
Sparkling Cranberry Drink: A bubbly drink provides a refreshing contrast to the creamy cheesecakes, enhancing the festive spirit of your celebration.
-
Warm Gingerbread Cookies: The spiced flavor of gingerbread harmonizes beautifully with the sweetness of the cheesecakes, creating a comforting holiday vibe.
-
Chocolate-Dipped Strawberries: The rich taste of chocolate adds a decadent touch while the fresh berries provide a bright, vibrant contrast, perfect for a sweet balance.
-
Classic Eggnog: This creamy holiday drink complements the rich texture of the cheesecakes, making it a cozy pairing for a joyous evening.
-
Pineapple-Mint Salsa: A zesty salsa infuses a burst of fresh flavor that cuts through the richness of the cheesecakes and brings a unique twist to your dessert spread.
-
Whipped Cream Topping: A dollop of lightly sweetened whipped cream on top adds an airy texture that makes each bite heavenly, echoing the creamy filling underneath.
-
Festive Fruit Platter: A mix of seasonal fruits like pomegranates and apples brings a colorful, refreshing element that beautifully contrasts with the cheesecake sweetness.
-
Coffee or Hot Chocolate: Serving a warm beverage like coffee or rich hot chocolate alongside gives a comforting finish to your dessert experience, rounding out the holiday vibe perfectly.
Mini Christmas Cheesecakes Recipe FAQs
What type of cream cheese should I use?
I recommend using full-fat cream cheese for the best flavor and texture. Make sure it’s at room temperature to blend smoothly into the filling, creating that rich, creamy consistency we all love.
How can I tell if my mini cheesecakes are done baking?
The ideal way to check is to look for a set edge with a slightly jiggly center. This typically happens around the 20-minute mark at 325°F (160°C). Overbaking can lead to cracks and a dry texture, so don’t be afraid to trust your instincts!
How should I store any leftover cheesecakes?
Store your leftover mini Christmas cheesecakes in an airtight container in the refrigerator. They’ll keep well for up to 5 days, maintaining their delightful texture and flavor. If you want to save them longer, you can freeze them for up to 2 months. Just be sure to wrap them individually in plastic wrap before placing them in a freezer-safe container.
Can I freeze mini cheesecakes? How do I do it?
Absolutely! To freeze, allow the baked cheesecakes to cool completely. Then place them in a single layer in a freezer-safe container, ensuring they’re not touching. They can be frozen for up to 2 months. When you’re ready to enjoy them, simply thaw overnight in the refrigerator for best results while preserving their creamy texture.
Are these mini cheesecakes suitable for people with allergies?
These mini Christmas cheesecakes contain dairy and eggs, which may not be suitable for those with lactose intolerance or egg allergies. For a dairy-free version, you might explore using vegan cream cheese and substitutes for eggs, though this will alter the final flavor and texture. Always check the specific product labels for any allergens.
What if my cheesecakes crack while baking?
If you notice cracks forming, it likely means they were overbaked or the oven temperature was too high. To prevent this, keep an eye on them during baking, and avoid opening the oven door frequently. A water bath while baking can also help maintain moisture and reduce the chances of cracking.

Mini Christmas Cheesecakes That Will Delight Your Holidays
Ingredients
Equipment
Method
- Preheat your oven to 325°F (160°C) and prepare a mini cupcake pan with liners.
- In a bowl, mix softened cream cheese and sugar until smooth.
- Add vanilla extract and sour cream, mixing until fully blended.
- Introduce eggs one at a time, mixing gently after each addition.
- Combine crushed graham crackers with melted butter and press into liners.
- Fill each liner with cheesecake filling, about three-quarters full.
- Bake for approximately 20 minutes until edges set but centers jiggle.
- Cool for 10 minutes in pan, then transfer to a wire rack to cool completely.
- Refrigerate for at least 2 hours before serving.
- Decorate with red and green sprinkles before serving.