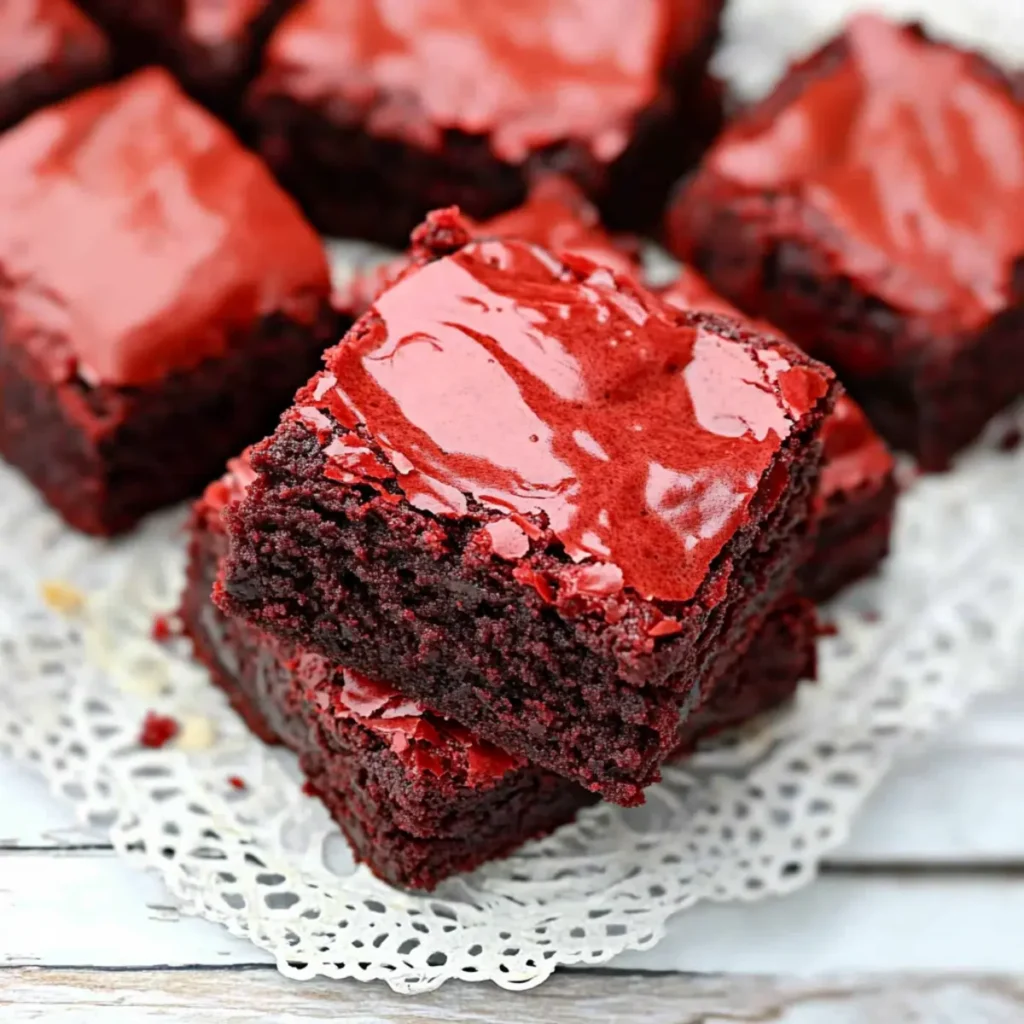
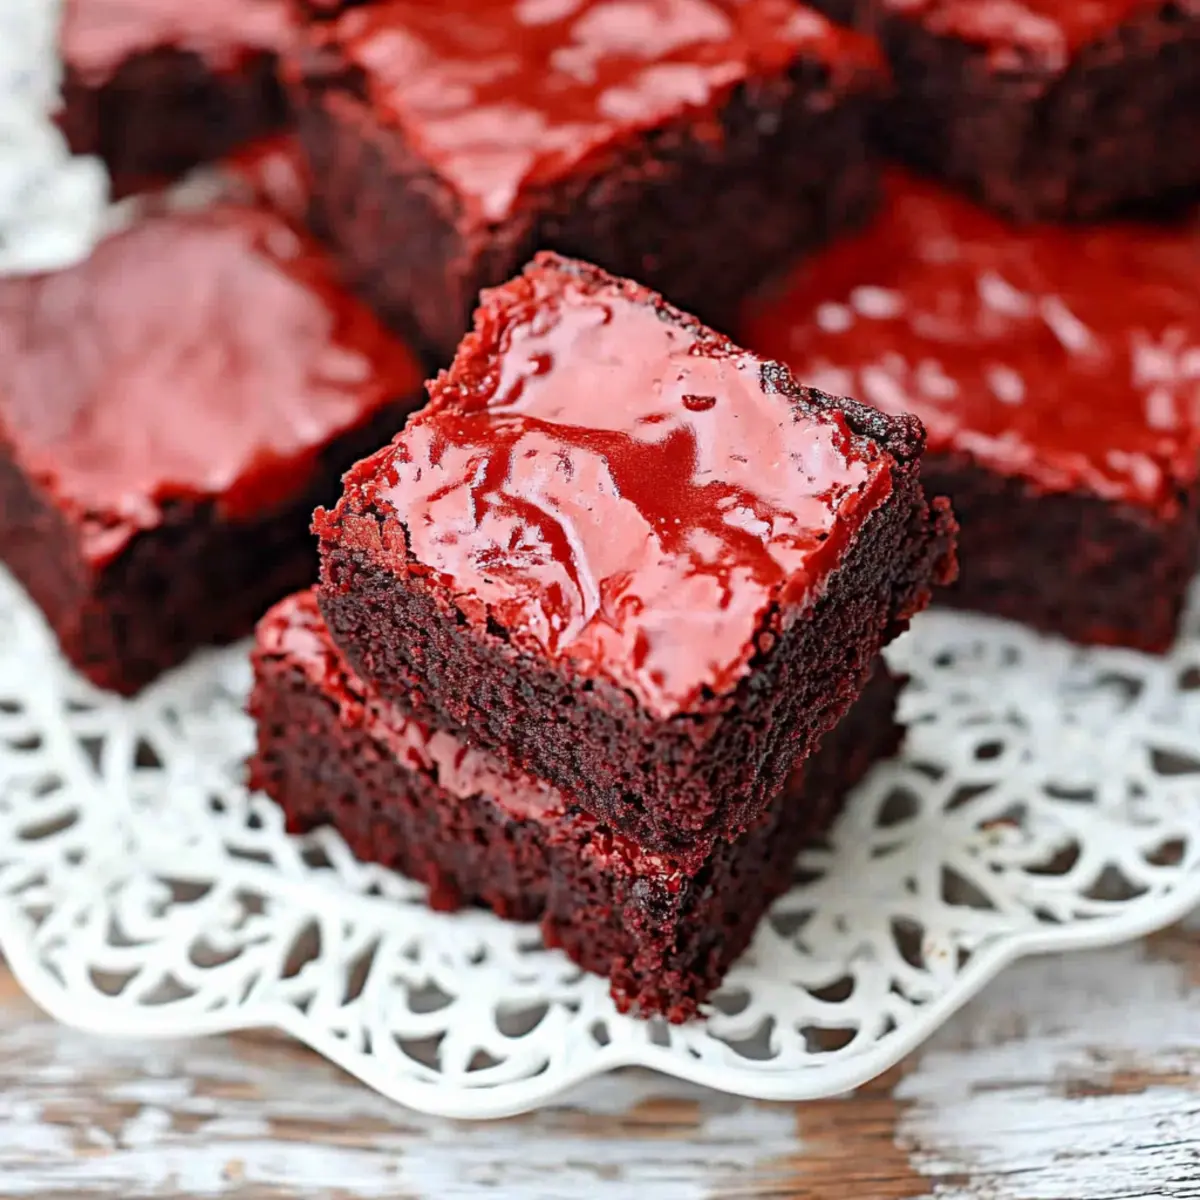
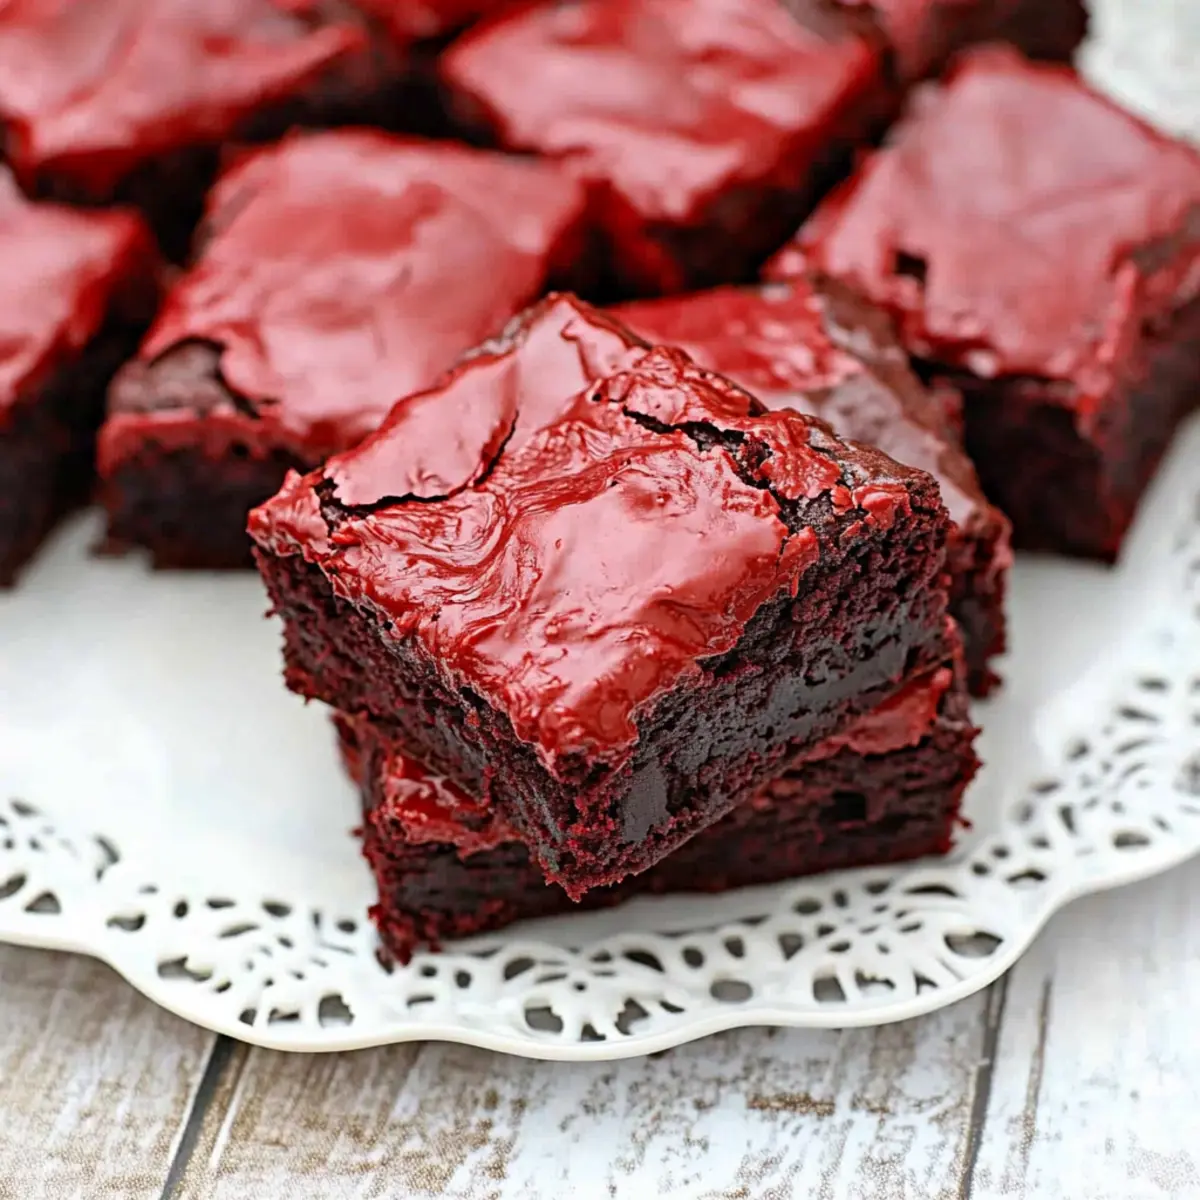
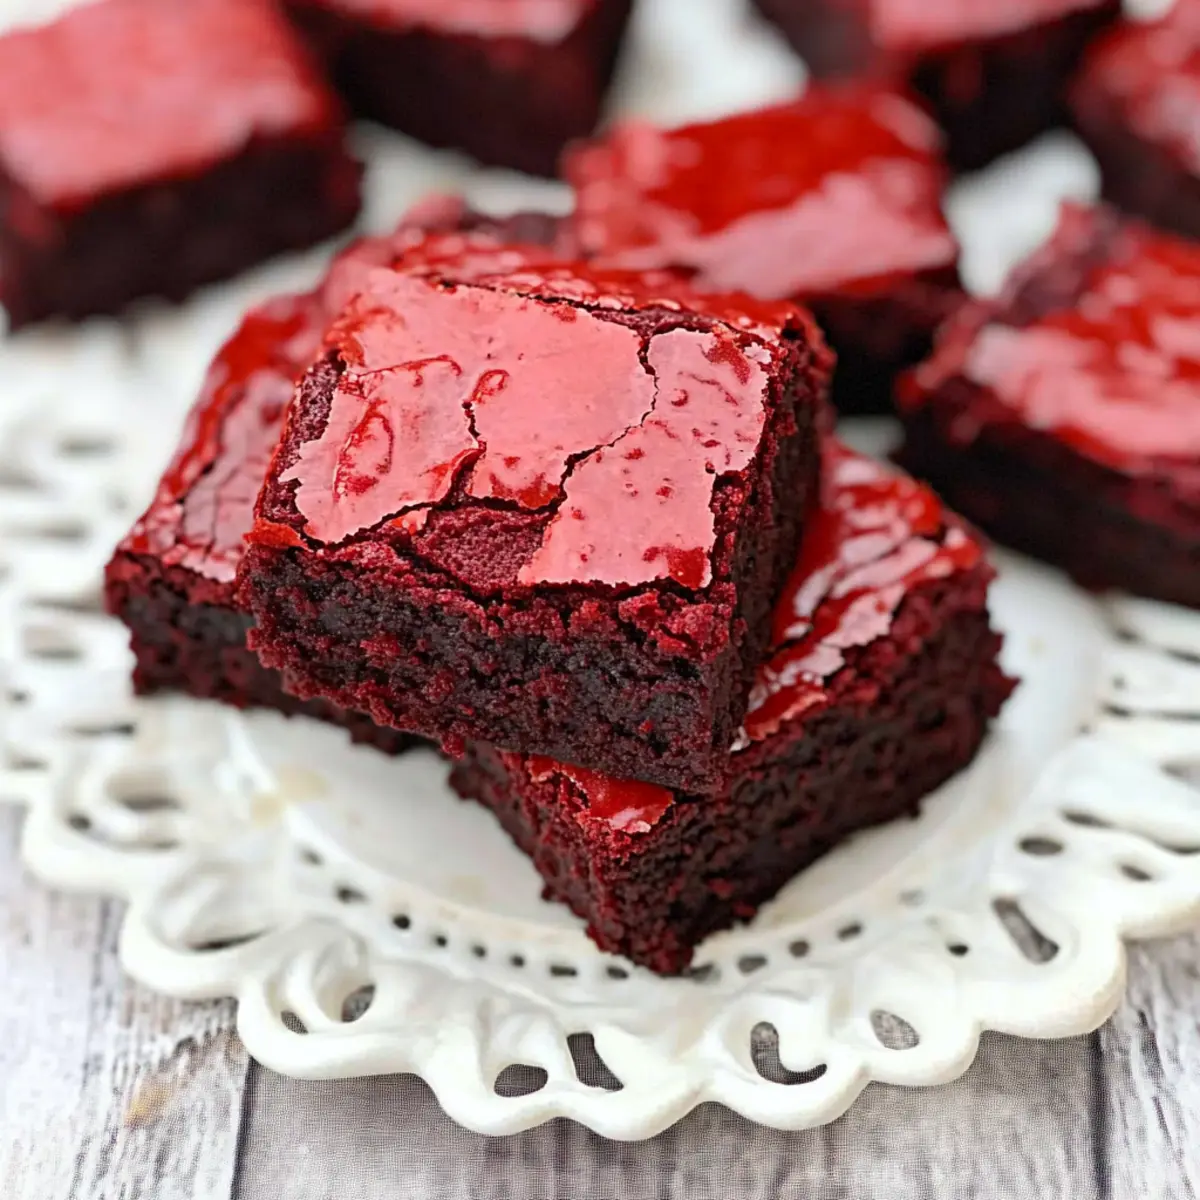
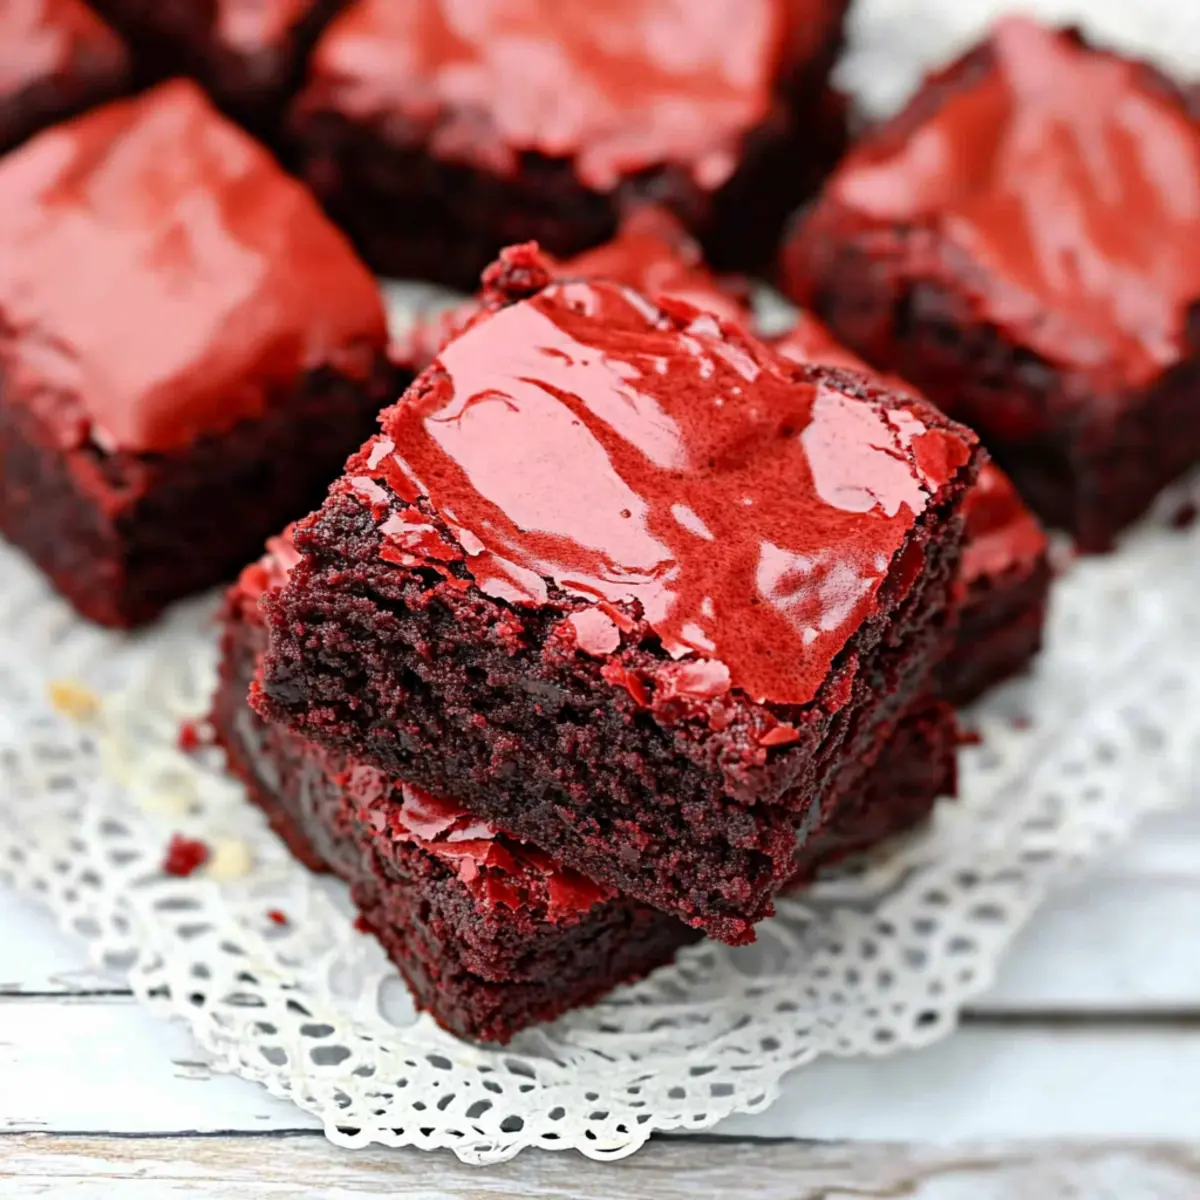
As I whisked together the ingredients for these delightful homemade red velvet brownies, the rich aroma enveloped my kitchen, sparking cherished memories of baking with family. This recipe for Homemade Red Velvet Brownies transforms the classic red velvet cake into a fudgy, gooey treat, adorned with a tangy cream cheese frosting that’s simply irresistible. Not only do they look stunning with their vibrant hue, but these brownies are also incredibly quick to whip up, making them a perfect choice for any occasion—whether it’s a cozy night in or a festive gathering. Plus, they freeze beautifully, so you can have a sweet indulgence at the ready whenever the craving strikes! What’s your favorite way to enjoy a little chocolatey goodness?
Why are these brownies so irresistible?
Decadence Awaits: Each bite of these brownies delivers an explosion of flavor, blending rich cocoa with a hint of tang from the cream cheese frosting. Fudgy Delight: The gooey, fudgy texture is practically a hug for your taste buds, making them a go-to for chocolate lovers. Quick and Easy: With simple ingredients and straightforward steps, you’ll have these beauties baked in no time. Versatile Options: Feel free to customize by adding nuts or experimenting with different extracts for personalized twists. Trust me, these brownies will steal the show at any gathering, leaving everyone begging for your secret recipe—just like with my Better Than Homemade Fried Rice or Thai Red Curry Dumpling Soup!
Homemade Red Velvet Brownies Ingredients
For the Brownies
- Unsalted Butter – Provides moisture and richness; substitute with salted butter, reducing additional salt for balanced flavor.
- Ghirardelli Milk Chocolate Chips – Offers a rich chocolate flavor, ensuring fudginess; may replace with dark chocolate for a more intense chocolate experience.
- Eggs (5 large) – Acts as a binding agent and adds moisture; for a vegan option, consider using flaxseed meal or aquafaba.
- Granulated Sugar (½ cup) – Adds just the right sweetness; brown sugar can provide a deeper flavor profile.
- Packed Brown Sugar (1¼ cups) – Enhances moisture and flavor depth; coconut sugar can be used for a healthier alternative.
- Salt (1 teaspoon) – Balances the sweetness while reducing any bitterness present.
- Vanilla Extract (1¼ teaspoons) – Provides aromatic flavor and compliments the cocoa beautifully.
- Red Food Coloring (2 tablespoons) – Imparts the classic vibrant hue of red velvet; omit for a natural alternative using beet juice.
- All-Purpose Flour (2 cups) – Forms the structure of the brownies; gluten-free flour can be used for a fabulous gluten-free version.
- Baking Powder (1 teaspoon) – Helps with leavening, ensuring a lighter texture that’s still rich.
- Ghirardelli Unsweetened Cocoa Powder (3 tablespoons) – Adds a robust chocolate flavor; can substitute with Dutch-process cocoa for a different profile.
For the Cream Cheese Frosting
- Cream Cheese (4 ounces, softened) – The key player for an iconic tangy frosting; Neufchâtel cheese is a lighter option.
- Unsalted Butter (5 tablespoons, room temperature) – Enhances the creaminess of the frosting.
- Salt (¾ teaspoon) – Enhances the flavors and balances the sweetness of the frosting.
- Vanilla Extract (1 teaspoon) – Provides an additional layer of flavor, elevating the frosting.
- Confectioners Sugar (2-3 cups) – Sweetens the frosting; reduce the amount for a less sweet option that suits your palate.
- Heavy Cream or Milk (1-2 tablespoons) – Adjusts consistency, making spreading a breeze for that velvety finish.
Dive into these delightful Homemade Red Velvet Brownies; your taste buds will thank you!
Step‑by‑Step Instructions for Homemade Red Velvet Brownies
Step 1: Preheat Oven and Prepare Pan
Begin by preheating your oven to 350°F (175°C). While the oven heats up, line a 9×13-inch baking pan with either foil or parchment paper, making sure to leave some overhang for easy removal later. Lightly grease the lining with cooking spray or butter to ensure the brownies release easily once baked.
Step 2: Melt Butter and Chocolate
In a microwave-safe bowl or a saucepan over low heat, melt together 1 cup of unsalted butter and 1 cup of Ghirardelli milk chocolate chips until smooth. Stir gently to combine, then set aside to cool slightly. This step is crucial as the warm mixture should not be hot enough to cook the eggs in the next step.
Step 3: Whisk Together Wet Ingredients
In a large mixing bowl, vigorously whisk together 5 large eggs, 1¼ teaspoons of vanilla extract, ½ cup of granulated sugar, and 1¼ cups of packed brown sugar until the mixture is smooth and slightly frothy. Stir in 2 tablespoons of red food coloring to create that signature red hue, ensuring it’s fully incorporated for a vibrant finish in your homemade red velvet brownies.
Step 4: Combine Chocolate Mixture
Once the melted butter and chocolate mixture has cooled down to a warm temperature, gradually fold it into your wet ingredients. Mix until fully combined, but be careful not to overmix; you want to maintain that rich, velvety texture that makes these brownies so decadent.
Step 5: Mix Dry Ingredients Together
In a separate bowl, combine 2 cups of all-purpose flour, 3 tablespoons of Ghirardelli unsweetened cocoa powder, 1 teaspoon of baking powder, and 1 teaspoon of salt. Whisk thoroughly to ensure the dry ingredients are evenly distributed. This step prevents clumps and ensures that every bite of your brownies is perfectly balanced in flavor.
Step 6: Combine Wet and Dry Mixtures
Gradually add the dry ingredients to the wet chocolate mixture, folding gently until just combined. Be cautious not to overmix; a few visible flour streaks are acceptable. The batter should be thick, fudgy, and a bit glossy, with no dry patches in sight, ready to be transformed into delicious homemade red velvet brownies.
Step 7: Bake the Brownies
Transfer the brownie batter to the prepared pan and spread it evenly with a spatula. Bake in the preheated oven for 35-40 minutes or until a toothpick inserted into the center comes out clean or with just a few moist crumbs attached. Allow the brownies to cool in the pan on a wire rack for about 15 minutes before lifting them out using the foil or parchment overhang.
Step 8: Prepare Cream Cheese Frosting
While the brownies are cooling, prepare your cream cheese frosting. In a mixing bowl, beat together 4 ounces of softened cream cheese, 5 tablespoons of unsalted butter, ¾ teaspoon of salt, and 1 teaspoon of vanilla extract until creamy. Gradually add in 2-3 cups of confectioners sugar, mixing until smooth. Adjust the consistency by adding 1-2 tablespoons of heavy cream or milk for easy spreading.
Step 9: Frost and Serve
Once the brownies have cooled completely, spread the cream cheese frosting generously over the top using an offset spatula for a smooth finish or a piping bag for decorative swirls. For the best texture, refrigerate the frosted brownies for at least 30 minutes before slicing. This will set the frosting and make them easier to cut into those luscious, fudgy homemade red velvet brownies.
What to Serve with Decadent Red Velvet Brownies
Indulge your senses further by complementing these gooey delights with perfect pairings that enhance their rich flavors.
-
Vanilla Ice Cream: A scoop of creamy vanilla ice cream provides a delightful contrast to the fudgy brownies, creating a luscious bite. The cold creaminess perfectly balances the sweetness of the red velvet.
-
Fresh Berries: Strawberries or raspberries brighten your plate with a burst of freshness. Their natural tartness cuts through the sweetness, adding a refreshing twist that’s simply irresistible.
-
Espresso or Coffee: A warm cup of espresso offers a robust counterpoint to the brownies, enhancing the chocolate flavor. The rich, bitter profile of coffee beautifully complements the sweetness of the cream cheese frosting.
-
Chocolate Ganache: Drizzle warm chocolate ganache over the brownies for an ultra-decadent treat. The silky chocolate adds an extra layer of richness that chocolate lovers will adore.
-
Mint Chocolate Chip Milkshake: This dreamy shake is creamy and refreshing, while the mint adds a unique twist. It’s a delightful contrast to the dense brownies and a fun way to enjoy a sweet treat.
-
Caramel Sauce: A drizzle of sweet, buttery caramel sauce adds indulgent sweetness. The gooey texture of caramel melds wonderfully with the brownies, making each bite a divine experience.
-
Chilled Lemonade or Iced Tea: A tall glass of refreshing lemonade or iced tea offers a bright, zesty note. The acidity helps to balance the richness of the brownies, making it a perfect pairing for sunny days.
-
Chocolate Covered Strawberries: These elegant bites provide a romantic touch, perfect for special occasions. The combination of chocolate and berry flavors reinforces the sweet and tangy elements of the brownies, creating a delightful harmony.
-
Cream Cheese Frosted Cookies: If you can’t get enough cream cheese frosting, complement your brownies with soft, fluffy cookies made with the same frosting. The familiar flavor enhances the brownie experience!
Expert Tips for Homemade Red Velvet Brownies
-
Perfect Temperature: Make sure the melted butter and chocolate mixture is warm, not hot, to avoid cooking the eggs and ruining your brownies.
-
Room Temperature Ingredients: Using room temperature eggs and butter helps the batter emulsify better, leading to fudgier and denser homemade red velvet brownies.
-
Measure Flour Correctly: Spoon the flour into your measuring cup and level it off, avoiding the common mistake of packing it too tightly, which can make brownies cakier.
-
Don’t Overmix: Gently fold the dry ingredients into the wet mixture until just combined; overmixing can lead to tough brownies instead of the desired fudgy texture.
-
Cool Before Frosting: Allow the brownies to cool completely before frosting; this prevents the frosting from melting and ensures a lovely, creamy layer on top.
Make Ahead Options
These decadent red velvet brownies are perfect for meal prep enthusiasts! You can bake the brownies up to 24 hours in advance and keep them unfrosted at room temperature, wrapped tightly to maintain moisture. If you want to prep even further ahead, consider making the cream cheese frosting up to 3 days in advance; simply store it in an airtight container in the refrigerator. When you’re ready to serve, frost the brownies once they’ve cooled completely, and for a firmer texture, refrigerate them for at least 30 minutes before slicing. This way, you’ll enjoy the same deliciousness while saving precious time on busy days!
Homemade Red Velvet Brownies Variations
Feel free to get creative and make these brownies uniquely yours with delightful twists and substitutions!
-
Vegan Option: Replace the eggs with 1/4 cup of applesauce for each egg or use flaxseed meal mixed with water for a fantastic vegan treat.
-
Nutty Crunch: Add 1 cup of chopped walnuts or pecans to the batter for a crunchy texture that beautifully contrasts the fudgy brownies. The nuts add a wonderful earthiness that complements the sweetness.
-
Chocolate Lovers: Substitute half of the all-purpose flour with cocoa powder for an extra-chocolatey brownie. This little change creates an intense chocolate experience, perfect for those who can’t resist.
-
Gluten-Free: Swap out the all-purpose flour with a 1:1 gluten-free flour blend to enjoy these decadent brownies without gluten. You won’t miss out on the fudgy goodness!
-
Alternative Sweeteners: Use coconut sugar instead of brown and granulated sugar for a slightly healthier twist that adds a caramel-like flavor to the brownies.
-
Spiced Delight: Add a pinch of cinnamon or a dash of cayenne pepper to the batter for a surprising warmth that elevates the flavor profile. It’s a subtle yet delightful twist that will surprise your guests!
-
Cream Cheese Twist: Mix in 1/2 cup of mini chocolate chips into the frosting for a delightful surprise as you frost them. Every bite will be extra indulgent!
These marvelous variations ensure that you can shape your homemade red velvet brownies to fit any occasion or dietary need. Don’t forget to save some for later; they freeze beautifully! If you’re in the mood for more delectable treats, consider trying out my recipe for Homemade Drinkable Yogurt—a luscious, creamy delight that’s simple to make!
How to Store and Freeze Homemade Red Velvet Brownies
Fridge: Store your frosted homemade red velvet brownies in an airtight container in the refrigerator for up to 1 week. This keeps them fresh and tasty while the cream cheese frosting maintains its luscious texture.
Freezer: For longer storage, wrap the brownies tightly in plastic wrap and then place them in a freezer-safe container. They can be frozen for up to 3 months. Allow them to thaw in the fridge overnight before serving.
Cutting: If you plan to freeze them, consider cutting the brownies into squares before wrapping; this makes it easy to grab a piece whenever you crave a fudgy indulgence.
Reheating: To enjoy your brownies warm, microwave individual servings for about 10-15 seconds or until warmed through. This will bring back that gooeyness and enhance the chocolate flavor!
Homemade Red Velvet Brownies Recipe FAQs
How do I select ripe ingredients for my brownies?
Absolutely! For the best flavor, use unsalted butter that is soft but not melted. When it comes to chocolate, I recommend high-quality brands like Ghirardelli, as they provide rich flavor without any bitterness. Eggs should be fresh and at room temperature for better emulsification.
What is the best way to store my homemade red velvet brownies?
Make sure to store your frosted brownies in an airtight container in the refrigerator for up to 1 week. This keeps them fresh, while the cream cheese frosting remains creamy. If you’re using a non-frosted version, they can be stored at room temperature for a day or two.
Can I freeze my homemade red velvet brownies?
Very! To freeze your brownies, first, allow them to cool completely. Then, wrap each brownie tightly in plastic wrap and place them in a freezer-safe container. They can be frozen for up to 3 months. When you’re ready to enjoy them, simply thaw overnight in the refrigerator, and enjoy that delicious fudginess!
What should I do if my brownies turn out too dry?
If you find your brownies are dry, it’s likely due to overbaking. Always keep an eye on them during the last few minutes of baking; they should come out with a few moist crumbs attached to the toothpick. If you want to add moisture back in, serve them with a scoop of vanilla ice cream or a drizzle of chocolate sauce to enhance the experience.
Are there any dietary considerations for these brownies?
Of course! If you’re looking for a vegan option, you can substitute the eggs with flaxseed meal (1 tablespoon of flaxseed mixed with 2.5 tablespoons of water) for every egg. Additionally, Neufchâtel cheese can be used in place of cream cheese for a lower-fat option, and coconut sugar can replace brown sugar for a healthier alternative.
Irresistibly Fudgy Homemade Red Velvet Brownies Recipe
Ingredients
Equipment
Method
- Preheat your oven to 350°F (175°C) and line a 9x13-inch baking pan with foil or parchment paper, greasing lightly.
- Melt together 1 cup of unsalted butter and 1 cup of Ghirardelli milk chocolate chips until smooth; let cool slightly.
- Whisk together 5 eggs, 1¼ teaspoons of vanilla, ½ cup granulated sugar, and 1¼ cups brown sugar until smooth. Stir in red food coloring.
- Fold the cooled butter and chocolate mixture into the wet ingredients until combined, being careful not to overmix.
- In another bowl, whisk together 2 cups of flour, 3 tablespoons of cocoa powder, 1 teaspoon of baking powder, and 1 teaspoon of salt.
- Gradually fold the dry ingredients into the wet mixture until just combined.
- Transfer the batter to the prepared pan and bake for 35-40 minutes, until a toothpick comes out clean or with moist crumbs.
- Allow the brownies to cool in the pan for 15 minutes before lifting them out using the overhang.
- For the frosting, beat together cream cheese, butter, salt, and vanilla. Gradually mix in confectioners sugar and adjust consistency with cream or milk.
- Once cooled, frost the brownies and refrigerate for at least 30 minutes before slicing.