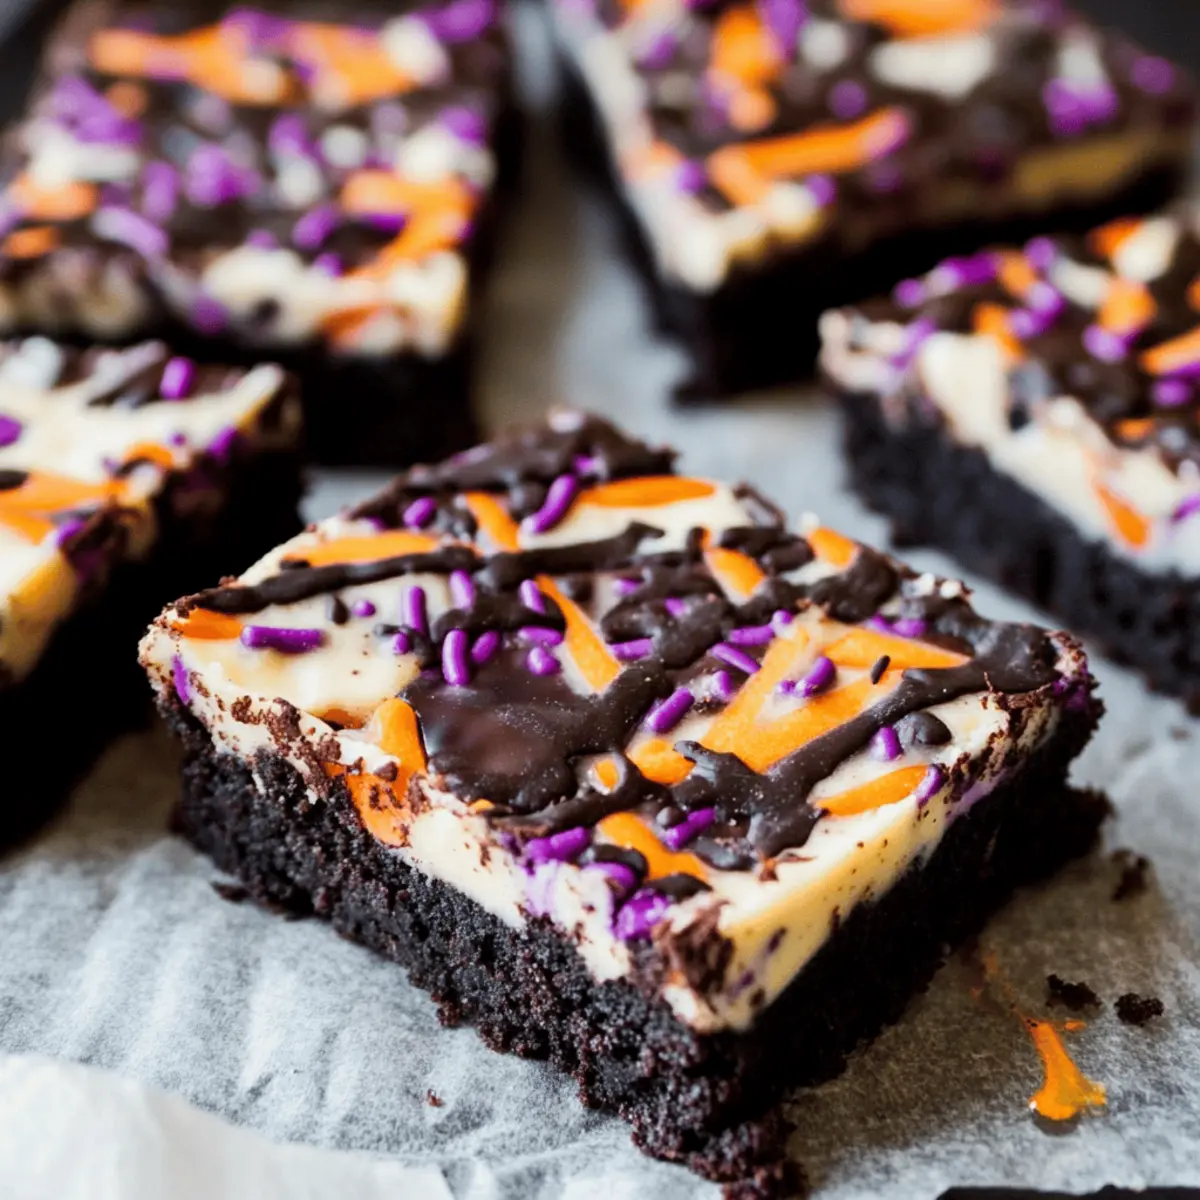
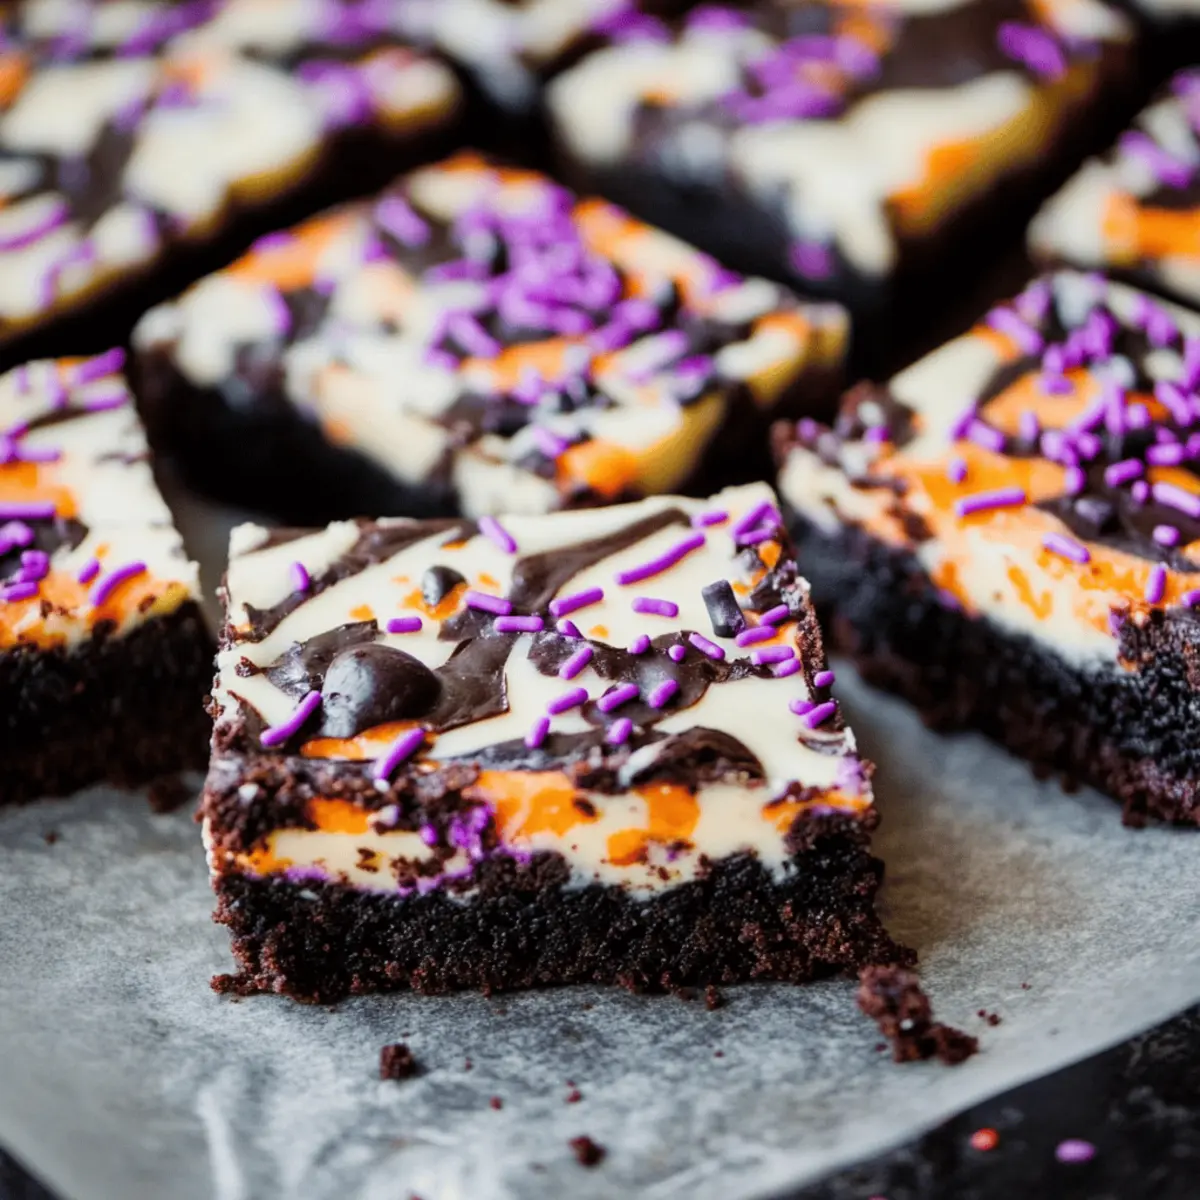
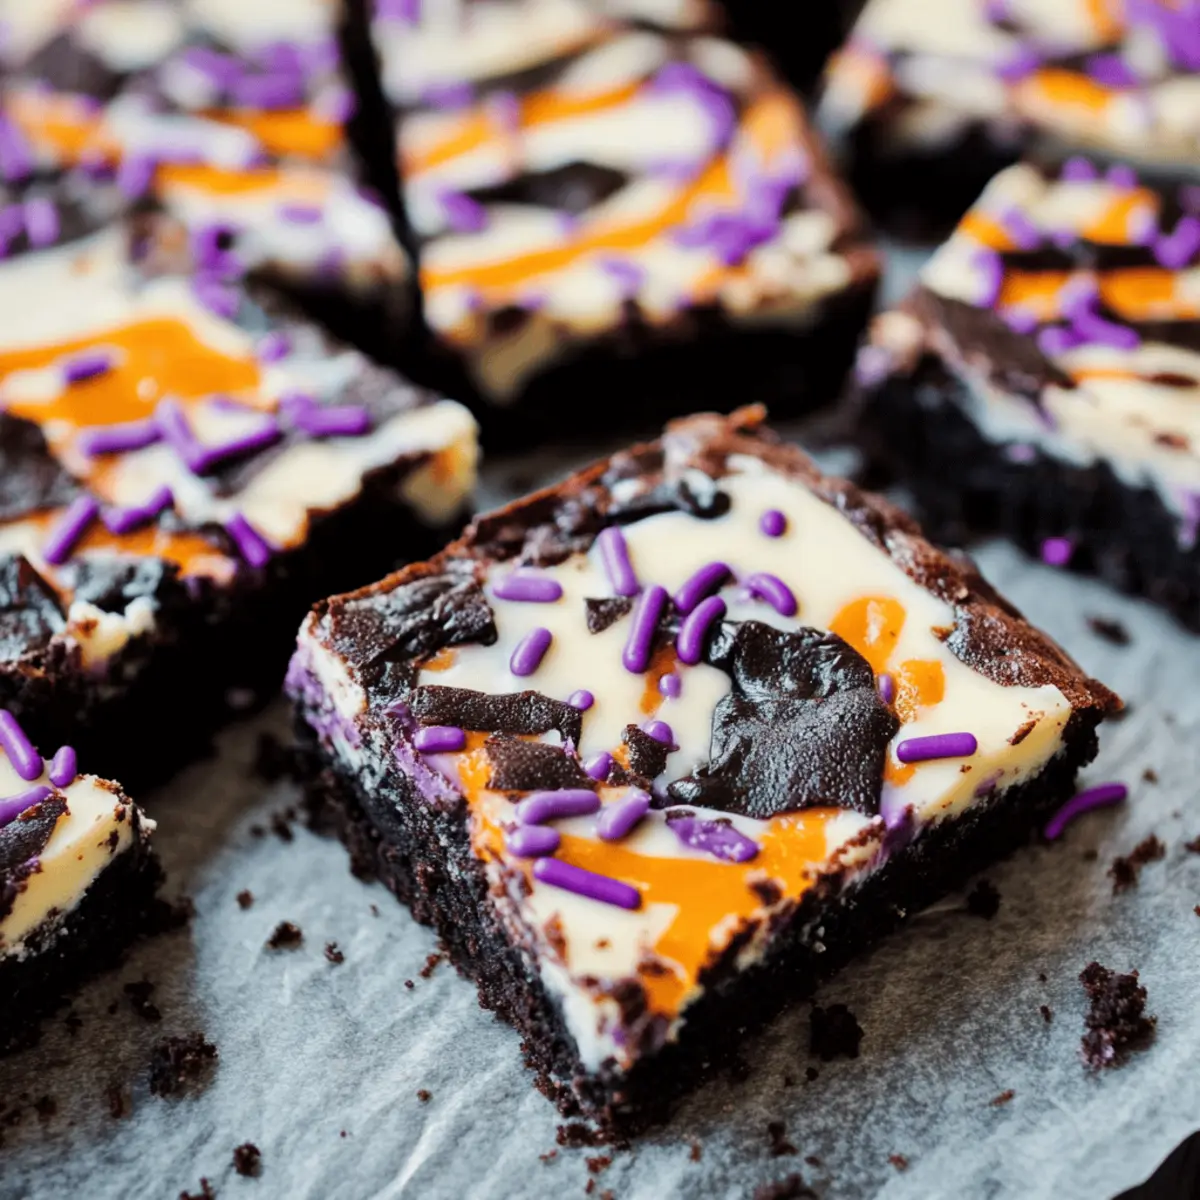
The aroma of chocolate wafting through the air is a precursor to a delightful surprise this Halloween—Halloween Cheesecake Brownies! Combining the rich, fudgy texture of brownies with a vibrant, creamy cheesecake layer, this treat is a fun and easy baking adventure perfect for both seasoned chefs and curious beginners alike. Whether you’re gearing up for a spirited gathering or simply want to bring a touch of festivity to your family’s dessert table, these colorful brownies are sure to be a hit. Not only do they look spectacular with their marbled colors and fun sprinkles, but they’re also a time-saver for busy bakers who want to impress without spending hours in the kitchen. So, are you ready to concoct your own spooky masterpiece? Let’s dive into this easy chocolate creation!
Are Halloween Cheesecake Brownies Worth It?
Irresistible flavors: The combination of fudgy brownies and creamy cheesecake creates a decadent dessert that both kids and adults will adore.
Easily adaptable: Add your twist with food coloring and sprinkles for a festive flair, perfect for any occasion beyond Halloween!
Quick and simple: You can whip these up in no time, making them a fantastic choice for busy bakers looking to impress guests.
Crowd-pleaser: With stunning presentation and rich taste, these brownies are sure to be the star of your dessert table. Pair them with a scoop of vanilla ice cream for an extra special treat!
Halloween Cheesecake Brownies Ingredients
For the Brownie Base
- Butter – Provides moisture and richness; unsalted is best for controlling salt levels.
- Cocoa Powder – Adds deep chocolate flavor; Dutch-process cocoa yields a milder taste.
- Sugar – Sweetens the brownies; feel free to use brown sugar for a chewier texture.
- Salt – Enhances flavor but can be omitted if using salted butter.
- Eggs – Binds and moistens; make sure they are chilled for the best emulsion.
- Vanilla Extract – Offers a depth of flavor; swapping in almond extract adds a unique twist.
- All-Purpose Flour – Provides structure; substitute with a gluten-free blend for gluten-free brownies.
For the Cheesecake Layer
- Cream Cheese – Creates the rich, creamy layer; reduced-fat cream cheese is an alternative for fewer calories.
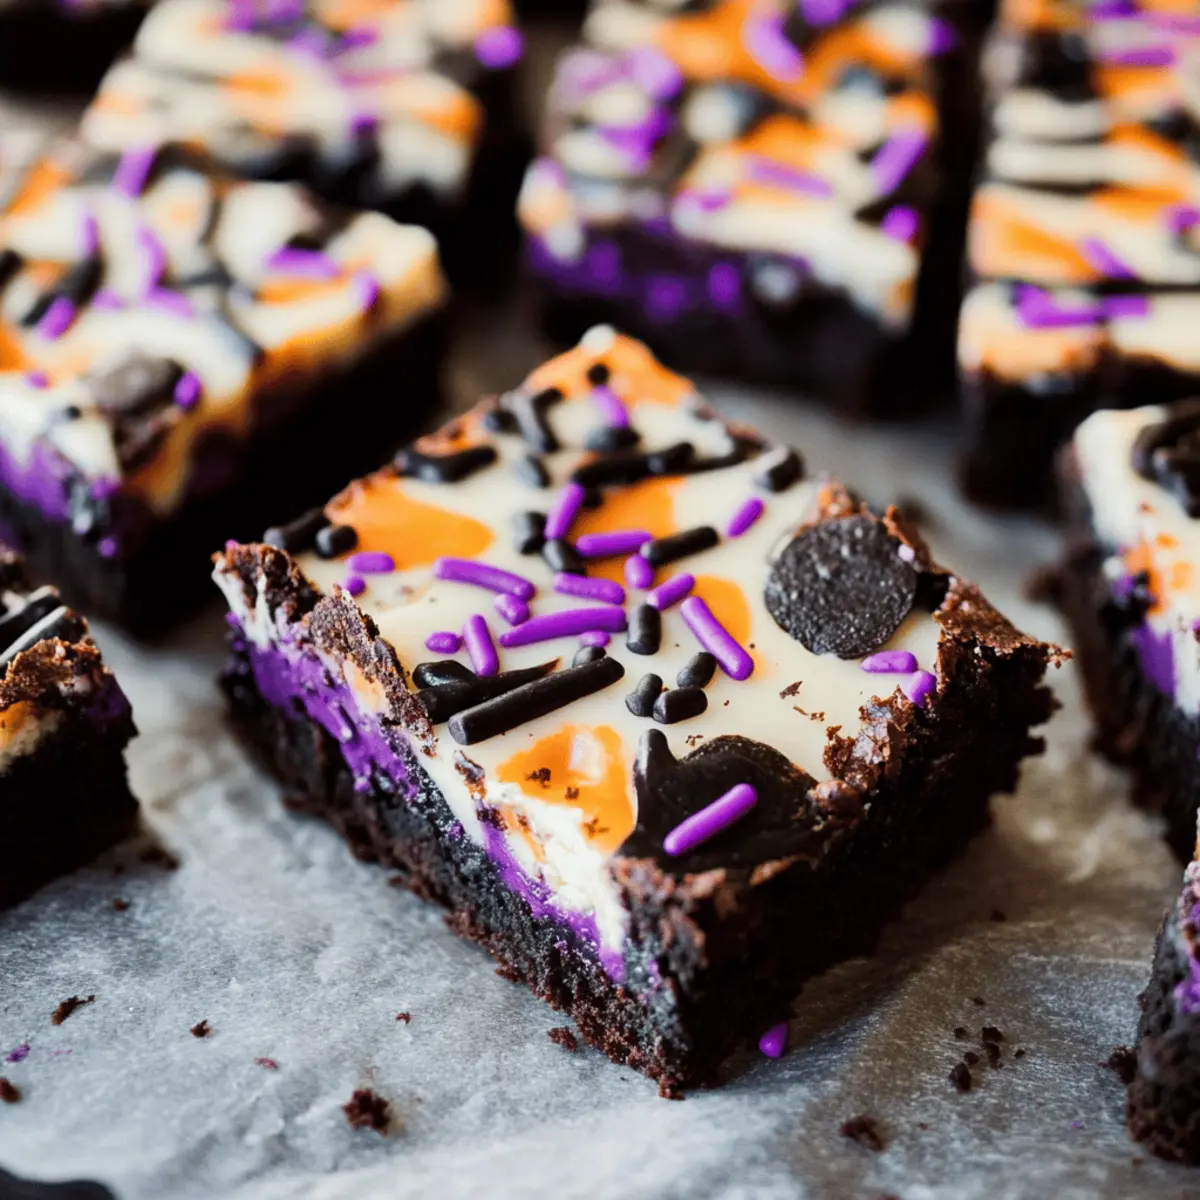
- Purple Food Coloring – Adds a fun, spooky hue; substitute with any food coloring for a personal touch.
- Sprinkles – Enhance the festive look; Halloween-themed sprinkles are perfect for seasonal appeal.
These Halloween Cheesecake Brownies aren’t just visually stunning; their layers of flavor create a delightful treat that will impress everyone at your Halloween gatherings! Enjoy baking the magic!
Step‑by‑Step Instructions for Halloween Cheesecake Brownies
Step 1: Preheat and Prepare
Preheat your oven to 325°F (163°C) while you prepare your 9×9 inch baking pan. Lightly coat the pan with baking spray and line it with parchment paper, allowing some overhang for easy removal later. This preparation ensures your Halloween Cheesecake Brownies can be lifted out without hassle once baked.
Step 2: Melt the Brownie Base
In a double boiler set over simmering water, combine the butter, cocoa powder, sugar, and salt. Stir gently until the mixture is fully melted and smooth, which should take about 5-7 minutes. This rich mixture will serve as the decadent base for your brownies, so aim for a glossy texture before moving on.
Step 3: Incorporate the Eggs
Allow the melted mixture to cool for a couple of minutes, then add the chilled eggs one at a time, whisking vigorously after each addition. This step ensures a well-emulsified batter, essential for the perfect fudgy consistency of your Halloween Cheesecake Brownies. The batter should become thick and glossy as you mix.
Step 4: Add the Flour
Once the eggs are fully incorporated, fold in the all-purpose flour until just combined, being careful not to overmix. You want to see a thick brownie batter with no flour streaks remaining. This batter acts as a sturdy foundation, balancing the creamy cheesecake layer that will follow.
Step 5: Prepare the Cheesecake Mixture
In a separate bowl, blend the cream cheese until smooth. Then, divide this mixture in half. Mix half with purple food coloring until you achieve your desired hue and fold sprinkles into the other half. This colorful twist will add fun flavors and textures to your Halloween Cheesecake Brownies.
Step 6: Layer the Batter
Spoon half of your brownie batter into the prepared pan, spreading it evenly. Then, add dollops of both cheesecake mixtures on top of the brownie layer. Finally, gently top with the remaining brownie batter, ensuring everything is evenly distributed for that perfect marbled look.
Step 7: Create the Marbled Effect
Using a toothpick or skewer, gently swirl the batters together to create a delightful marbled effect. Be careful not to overdo this; just a few swirls should give your Halloween Cheesecake Brownies a beautiful appearance without losing the distinct layers.
Step 8: Bake and Cool
Place the pan in the preheated oven and bake for 22-25 minutes, or until the center is set and a toothpick inserted comes out with a few moist crumbs. The edges should appear firm, while the center might still have a slight jiggle, indicating a soft and fudgy brownie texture.
Step 9: Final Touches
Once baked, remove the brownies from the oven and let them cool completely in the pan on a wire rack. This may take at least 30-40 minutes. Cooling completely is crucial for cleaner cuts, ensuring you can slice these beautiful Halloween Cheesecake Brownies into perfect squares for serving.
How to Store and Freeze Halloween Cheesecake Brownies
Room Temperature: Store your Halloween Cheesecake Brownies in an airtight container at room temperature for up to 4 days. This keeps them fresh and accessible for snacking throughout the day.
Fridge: For extended freshness, refrigerate the brownies in an airtight container for up to 1 week. This will also help maintain the creamy cheesecake layer.
Freezer: Wrap the brownies tightly in plastic wrap and then place them in a freezer-safe container for up to 3 months. Thaw in the fridge overnight when you’re ready to enjoy them again.
Reheating: If you prefer them warm, gently heat individual squares in the microwave for about 10-15 seconds. This creates a deliciously gooey texture, enhancing that fudgy experience!
Make Ahead Options
These Halloween Cheesecake Brownies are perfect for meal prep, allowing busy bakers to save time during the Halloween rush! You can prepare the brownie batter and the cheesecake mixture up to 24 hours in advance. Simply store each in separate airtight containers in the refrigerator to maintain their quality. When you’re ready to bake, layer the brownie batter with the colorful cheesecake mixtures as directed in the recipe. This way, you’ll have festive, delicious brownies to serve with minimal effort. Just remember to allow the brownies to cool completely before slicing for cleaner cuts—trust me, they’ll be just as delightful and impressive as if you made them fresh that day!
What to Serve with Halloween Cheesecake Brownies
Indulging in Halloween Cheesecake Brownies is just the beginning of your festive feast; let’s elevate your treat experience!
- Vanilla Ice Cream: A scoop of creamy vanilla ice cream pairs beautifully, balancing the rich chocolate and tangy cheesecake with cold, sweet bliss.
- Whipped Cream: Light, airy dollops of whipped cream add a delightful contrast, enhancing the dessert’s festive feel without overshadowing the flavors.
- Caramel Sauce: Drizzling warm caramel sauce over a brownie square brings an extra layer of sweetness that beautifully complements the chocolatey base.
- Pumpkin Spice Latte: The warm spices in this coffee drink harmonize with the dessert’s chocolate and cream cheese, creating a cozy pairing ideal for fall.
- Chocolate-Dipped Strawberries: Juicy strawberries add freshness, their slight acidity counteracting the richness of the brownies while offering a lovely splash of color on the plate.
- Fruit Salad: A bright fruit salad introduces a refreshing element, cleansing the palate and balancing the sweetness of the brownies with a burst of flavor.
- Hot Chocolate: Cozy up with a mug of rich hot chocolate for a truly indulgent experience; sprinkle some mini marshmallows on top for fun!
- Spooky Themed Cupcakes: For a complete Halloween spread, colorful cupcakes add a festive touch that will impress your guests and add to the celebration.
Expert Tips for Halloween Cheesecake Brownies
-
Butter Temperature: Ensure the butter mixture is hot but not boiling when adding eggs. This helps emulsify the batter properly for rich, fudgy brownies.
-
Cool Completely: Let the brownies cool entirely before cutting into squares. This prevents messy edges and ensures clean, beautiful slices for presentation.
-
Color Adjustment: When adding food coloring, start with a small amount and gradually increase until you reach the desired vibrancy. Too much can alter the texture of your cheesecake layer.
-
Use Parchment: Don’t skip the parchment paper lining for your baking pan. It makes for easier removal and keeps your Halloween Cheesecake Brownies intact.
-
Oven Check: Every oven is different! Check your brownies a minute or two before the suggested baking time to avoid overbaking. You want them fudgy and soft in the center.
Halloween Cheesecake Brownies Variations & Substitutions
Feel free to customize your Halloween Cheesecake Brownies and make them uniquely yours with these fun tweaks!
-
Gluten-Free: Use a gluten-free flour blend instead of all-purpose flour for a delicious, safe version. You’ll hardly notice the difference in taste!
-
Nutty Crunch: Add chopped nuts, like walnuts or pecans, into the brownie mix for an appealing crunch and rich flavor contrast. It makes each bite even more exciting!
-
Cheesecake Flavors: Experiment with flavored cream cheese, such as pumpkin or chocolate, for a tasty twist that resonates with seasonal themes. Your family might just ask for this variation year-round!
-
Spicy Option: Incorporate a pinch of cayenne pepper into the brownie batter for a surprising kick that complements the chocolate beautifully. The heat balances the sweetness perfectly!
-
Fruit-Filled: Mix in some chopped strawberries or raspberries into the cheesecake layer for a fresh burst of flavor and a twist on tradition. The tartness is a delightful contrast to the sweetness!
-
Colorful Layers: Instead of just purple, divide the cheesecake layer into multiple colors for a vibrant rainbow effect. Ideal for parties, it invites everyone to dig in for a fun surprise!
-
Less Sugar: Substitute a natural sweetener, like honey or agave syrup, for the sugar to create a slightly lighter version that still tastes heavenly. You might find you love this healthier take!
-
Festive Toppings: Add crushed Halloween candy like mini Snickers or M&M’s on top before baking for a fun, crunchy element that adds festivity to every square. Everyone loves a little extra surprise!
With these variations, you can tailor your Halloween Cheesecake Brownies to any taste preference or occasion. Enjoy the creative journey and let your baking flourish!
Halloween Cheesecake Brownies Recipe FAQs
What kind of butter should I use for Halloween Cheesecake Brownies?
It’s best to use unsalted butter for better control over the salt levels in your brownies. This ensures that the sweetness of the brownies shines through without being overly salty.
How can I store my Halloween Cheesecake Brownies?
You can keep your brownies in an airtight container at room temperature for up to 4 days, or refrigerate them for up to 1 week. This way, they remain fresh and ready to enjoy!
Can I freeze Halloween Cheesecake Brownies?
Absolutely! Wrap the brownies tightly in plastic wrap and place them in a freezer-safe container for up to 3 months. When you’re ready to enjoy them, simply thaw them in the fridge overnight.
What if my brownies turn out too dry?
If your brownies come out dry, it might be due to overbaking or not enough moisture in the batter. Avoid overbaking by checking them a minute or two before the suggested time. They should be set but still soft in the center.
Are there any dietary considerations for those with allergies?
Yes! If you’re serving these brownies to guests with dietary restrictions, remember they contain gluten (from flour) and dairy (from butter and cream cheese). You can make them gluten-free by using a gluten-free flour blend and consider substituting with vegan cream cheese for a dairy-free version.
Halloween Cheesecake Brownies to Wow Your Guests This Season
Ingredients
Equipment
Method
- Preheat your oven to 325°F (163°C) and prepare your baking pan with baking spray and parchment paper.
- Melt butter, cocoa powder, sugar, and salt in a double boiler until smooth.
- Cool melted mixture for a few minutes, then add eggs one at a time, whisking well after each.
- Fold in the all-purpose flour until just combined.
- Blend cream cheese in a separate bowl, dividing it. Color half with food coloring and mix sprinkles into the other half.
- Layer half of the brownie batter in the prepared pan, spoon dollops of both cheesecake mixtures, and top with remaining brownie batter.
- Swirl the batters together with a toothpick to create a marbled effect.
- Bake for 22-25 minutes until the center is set. Let cool completely on a wire rack.
- Slice into squares once completely cooled.