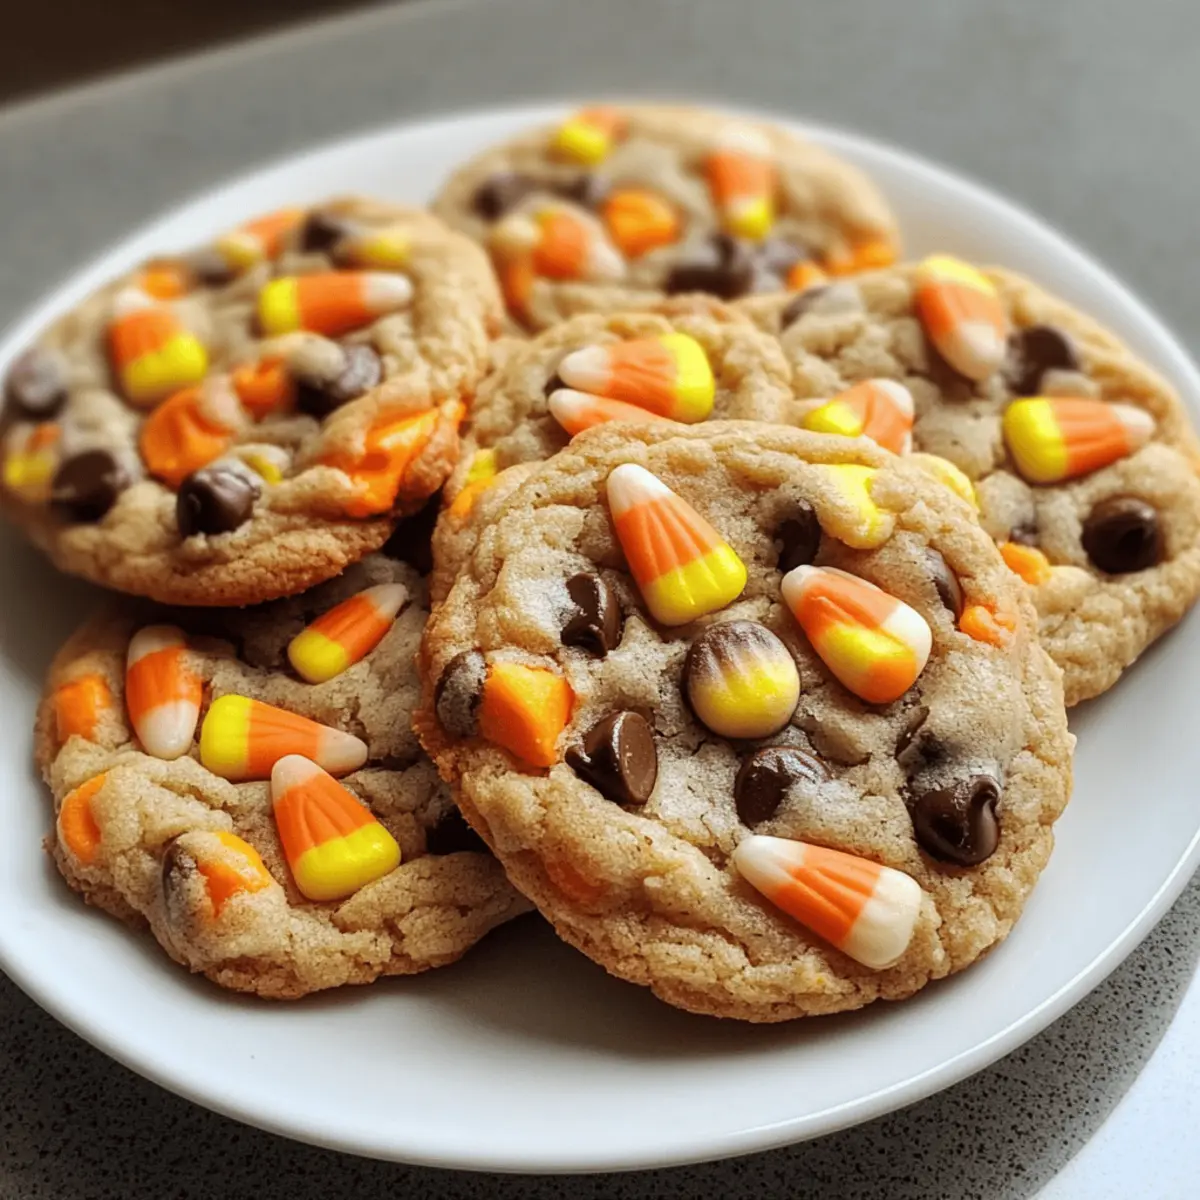
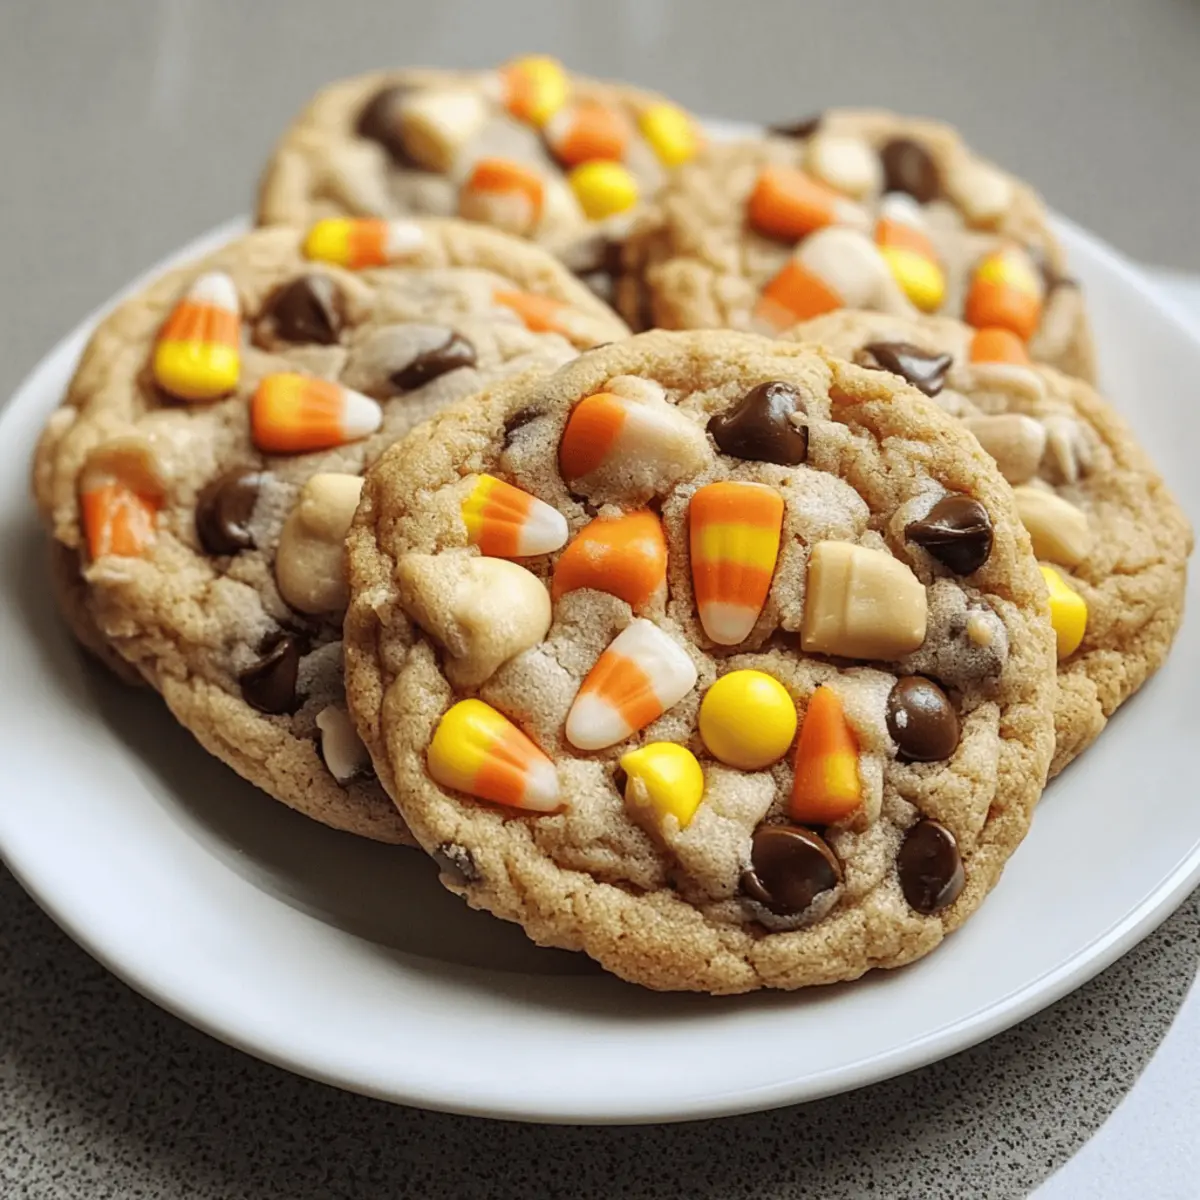
As the leaves turn and the air gets crisp, the excitement of Halloween stirs up memories of crafting spooky delights in the kitchen. This year, I’m thrilled to share my Halloween Cauldron Cookie Creation, a recipe that transforms traditional cookies into colorful cauldrons of treats. These whimsical cookies are not only a fantastic project to enjoy with your kids, but they also offer a healthier twist to typical Halloween sweets—free of artificial ingredients yet bursting with festive fun! With a chewy texture and an inviting vanilla scent, you’ll discover how easy it is to whip up a batch that’s sure to delight trick-or-treaters and party guests alike. Are you ready to conjure up some cookie magic?
Why Are These Cookies So Special?
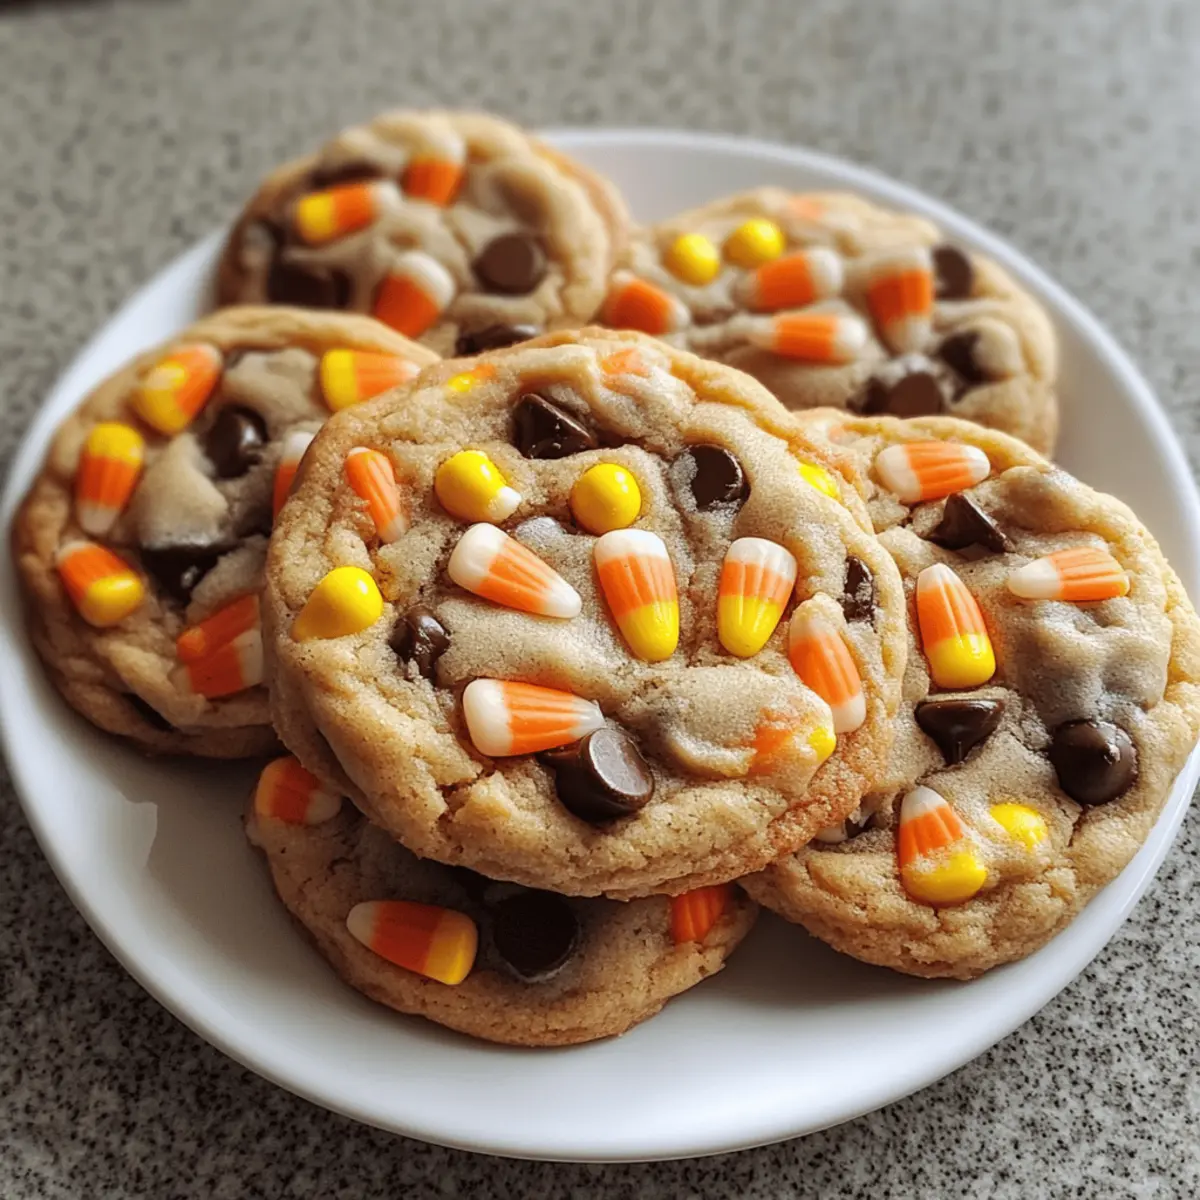
Delightfully Festive: These Halloween Cauldron Cookies are packed with colorful candy surprises, turning an ordinary treat into a magical experience for kids and adults alike.
Easy to Customize: With variations like swapping chocolate chips for white chocolate or adding chopped nuts, you can create a unique cookie every time!
Quick and Fun: Whip up a batch in under 30 minutes, making them perfect for last-minute Halloween gatherings or cozy family nights.
Wholesome Ingredients: Using simple, vegetarian ingredients, these cookies are a healthier choice compared to store-bought sweets, ensuring everyone can indulge without guilt.
Perfect for Sharing: Whether you’re handing them out to trick-or-treaters or serving them at a Halloween party, these eye-catching cookies are sure to impress and delight!
For more delightful baking ideas, check out my Soft Chewy Simply cookies that are always a hit.
Halloween Cauldron Cookie Creation Ingredients
• Note: Gather these fun and festive ingredients for a magical cookie adventure!
For the Cookie Base
- Unsalted Butter – Adds richness and moisture; feel free to swap with margarine.
- Granulated Sugar – Sweetens the cookies and contributes to their chewy texture.
- Brown Sugar – Enhances flavor depth and retains moisture for that delicious chewiness.
- Eggs – Provides essential structure; can be replaced with 1/4 cup applesauce or mashed banana per egg.
- Vanilla Extract – Essential for that warm, inviting aroma and flavor.
- All-Purpose Flour – The backbone ingredient; precise measuring makes all the difference.
- Baking Soda – Serves as a leavening agent to help cookies rise; can substitute with triple the amount of baking powder.
- Salt – Balances sweetness and enhances the overall flavor.
For the Sweet Additions
- Chocolate Chips – Offers delightful chocolatey sweetness; experiment with dark or white chocolate for variety.
- Candy Corn (or other candies) – Decorates and adds a festive touch; mix in your favorite Halloween treats for a surprise!
These delightful ingredients bring your Halloween Cauldron Cookie Creation to life, ensuring every bite is a cheerful celebration of the season!
Step‑by‑Step Instructions for Halloween Cauldron Cookie Creation
Step 1: Preheat the Oven
Begin by preheating your oven to 350°F (175°C). This initial step is crucial for achieving the perfect texture in your Halloween Cauldron Cookie Creation. While the oven heats up, gather your baking sheets and line them with parchment paper to prepare for the cookie dough.
Step 2: Cream the Butter and Sugars
In a large mixing bowl, cream together 1 cup of softened unsalted butter, ½ cup granulated sugar, and ½ cup brown sugar using an electric mixer. Beat them on medium speed for about 2-3 minutes until the mixture is light and fluffy, signaling that your base is ready for the rest of your ingredients.
Step 3: Incorporate Eggs and Vanilla
Add 2 large eggs and 1 teaspoon of vanilla extract to the butter-sugar mixture. Continue mixing on medium speed until everything is well incorporated and the mixture appears smooth and slightly glossy. This step adds moisture and that delightful aroma to your Halloween Cauldron Cookie Creation.
Step 4: Whisk the Dry Ingredients
In a separate bowl, whisk together 2 ½ cups of all-purpose flour, 1 teaspoon of baking soda, and ½ teaspoon of salt. This mixture will ensure an even distribution of leavening and flavor. Gradually add the dry ingredients to the wet mixture, stirring gently until just combined to avoid overmixing.
Step 5: Fold in the Sweet Additions
Gently fold in 1 cup of chocolate chips and 1 cup of candy corn with a spatula, ensuring they are evenly distributed throughout the cookie dough. This will create that irresistible blend of chocolatey sweetness and festive color in your Halloween Cauldron Cookie Creation.
Step 6: Scoop the Dough
Using a cookie scoop or tablespoon, drop spoonfuls of dough onto the prepared baking sheets, spacing them about 2 inches apart. Aim for around 12 cookies per sheet to allow for spreading. Observe the delightful mix of colors and shapes as you prepare to bake!
Step 7: Bake to Perfection
Slide the baking sheets into the preheated oven and bake for 10-12 minutes, or until the edges are lightly golden while the centers remain soft. Keep an eye on them, as this visual cue indicates that your Halloween Cauldron Cookie Creation is perfectly chewy!
Step 8: Cool and Transfer
Once baked, remove the sheets from the oven and allow the cookies to cool on the baking sheet for about 5 minutes. This step is essential as it helps maintain their chewy texture. Afterward, carefully transfer them to a wire rack to cool completely and let those warm, inviting scents fill your home.

Expert Tips for Halloween Cauldron Cookie Creation
-
Avoid Overmixing: Mixing too much after adding the dry ingredients can lead to tough cookies. Stir gently until just combined to keep that chewy texture.
-
Check for Doneness: Be vigilant and check your cookies at the 10-minute mark. Removing them when the edges are golden and centers soft will ensure the perfect bake!
-
Cool Properly: Let cookies cool on the baking sheet for 5 minutes before transferring them. This step helps retain moisture and enhances that delightful chewy texture.
-
Storage Secrets: Store your Halloween Cauldron Cookie Creation in an airtight container, layered with parchment paper if stacking. This way, they stay fresh and delicious for days!
-
Experiment with Add-ins: Feel free to get creative! Swap chocolate chips for nuts or dried fruits, or add your favorite Halloween candies to give every batch a unique twist.
Make Ahead Options
These Halloween Cauldron Cookie Creations are a fantastic treat to prepare in advance, making your Halloween celebrations easier and more enjoyable! You can mix the cookie dough up to 24 hours before baking; simply cover it tightly in plastic wrap and refrigerate. This allows the flavors to meld beautifully while keeping the dough fresh. To maintain that delightful chewy texture, be sure to store the baked cookies in an airtight container at room temperature for up to 5 days. When you’re ready to enjoy these sweet treats, bake the cookies straight from the fridge, keeping a close eye on them to ensure they achieve that perfect golden edge. This way, you can savor time spent with family, knowing a delicious dessert is just minutes away!
How to Store and Freeze Halloween Cauldron Cookies
Room Temperature: Store your Halloween Cauldron Cookie Creation in an airtight container at room temperature for up to 4-5 days to maintain their delightful chewiness.
Freezer: For longer storage, freeze the cookies in a single layer on a baking sheet until firm, then transfer to a freezer-safe container. They can be frozen for up to 2-3 months.
Reheating: To enjoy the frozen cookies, simply thaw them at room temperature for about 15-20 minutes, or warm them in the oven at 350°F (175°C) for 5-7 minutes to revive that fresh-chewy goodness.
Layering: If stacking your Halloween Cauldron Cookie Creation, place parchment paper between layers in the container to prevent sticking and ensure each cookie stays perfect.
Halloween Cauldron Cookie Creation: Exciting Variations
Feel free to let your creativity run wild with these variations, transforming each batch of cookies into a unique treat that delights the senses!
-
Chocolate Twist: Substitute classic chocolate chips for white chocolate or dark chocolate to explore different flavor profiles. Each bite offers a new experience; you might just discover a new favorite!
-
Nutty Goodness: Add chopped pecans or walnuts for a delightful crunch. The combination of chewy cookie and crispy nuts awakens the palate, enhancing the overall texture beautifully.
-
Fruity Surprise: Mix in dried fruits like cranberries or raisins for a natural sweetness that complements the cookies. This fruity twist adds a pop of color and flavor that balances the richness perfectly.
-
Festive Candies: Incorporate other Halloween candies like gummy worms or M&M’s for a fun and whimsical vibe. This creates a treasure trove of surprises in each cookie, making them even more exciting for kids!
-
Spiced Up: Add a teaspoon of cinnamon or nutmeg for a warm, spiced flavor that feels just right for the season. This touch of warmth enhances the cozy feel of your baked treats.
-
Heat it Up: A dash of cayenne pepper can give these cookies a surprising kick! This spicy twist plays wonderfully against the sweetness, offering a unique taste adventure for the brave-hearted.
-
Gluten-Free Delight: Swap out all-purpose flour for a gluten-free flour blend to cater to dietary restrictions. Ensuring everyone can enjoy these delightful treats brings joy to the season’s festivities.
Sometimes, a fresh perspective on beloved classics makes all the difference in a recipe like these Soft Chewy Simply cookies. Don’t hesitate to mix things up!
What to Serve with Halloween Cauldron Cookie Creation
Elevate your Halloween gathering with an array of delightful treats that are sure to enchant your guests and enhance the festive spirit.
-
Milk: A classic pairing, glassful of cold milk complements the chocolate and candy flavors beautifully, making each bite of cookie even more satisfying.
-
Hot Apple Cider: The warm, spiced notes of apple cider create a cozy atmosphere, perfect for sipping while indulging in chewy cauldron cookies.
-
Pumpkin Spice Latte: Embrace the season with this creamy, caffeinated delight that pairs wonderfully with the sweet and festive flavors of the cookies.
-
Chewy Caramel Corn: The crunch with a hint of sweetness adds a fun texture contrast, making for a delightful treat to accompany your cookies.
-
Decorated Trick-or-Treat Bags: Fill them with a few cookies and assorted candies for a fun, festive giveaway that friends and neighbors will love.
-
Fruit Platter: A bright platter of seasonal fruits like apples and pears not only adds freshness but also balances the sweetness of your Halloween Cauldron Cookie Creation.
-
Halloween-Themed Ice Cream: Think pumpkin or ghost-shaped desserts that tie into the spooky theme, creating a festive dessert experience.
-
Chocolate-Covered Pretzels: The salty crunch against the sweet cookies creates an irresistible flavor combination that everyone will crave.
-
Mini Pumpkin Pies: These personal-sized goodies add a traditional touch to your holiday spread and are a delightful contrast to the cookie’s chewy texture.
Halloween Cauldron Cookie Creation Recipe FAQs
What is the best way to choose ripe ingredients for this recipe?
Absolutely! When selecting your ingredients, ensure your butter is soft but not melted for easy creaminess. For eggs, use fresh ones; look for those with intact shells and a date stamped that’s not too far past. When it comes to chocolate chips and candy corn, I recommend choosing high-quality brands for the best flavor and texture!
How should I store Halloween Cauldron Cookies, and how long do they last?
I often store my Halloween Cauldron Cookie Creation in an airtight container at room temperature, where they maintain their chewy goodness for 4-5 days. If you want to keep them longer, you can freeze them! Just layer them between parchment paper in a freezer-safe container, and they’ll last up to 2-3 months—just thaw on the counter or warm them in the oven to enjoy!
Can I freeze Halloween Cauldron Cookies, and if so, how?
Definitely! To freeze your delightful cookies, start by placing them in a single layer on a baking sheet for about an hour until they’re firm. Once frozen, transfer them to an airtight container or freezer bags, layering them with parchment to prevent sticking. They’ll be good for 2-3 months—perfect for a future Halloween celebration or a sweet surprise when you’re craving something tasty!
What should I do if my cookies come out too hard or dry?
Very! If your cookies turn out too hard, it might be due to overbaking or overmixing. In the future, keep a close eye on them, especially around the 10-minute mark. For any dry cookies, you can revive them by storing them with a slice of bread in an airtight container, which helps maintain moisture—enjoy those chewy textures again!
Are there any dietary considerations or allergies I should be aware of for this recipe?
Absolutely! This recipe for Halloween Cauldron Cookie Creation is vegetarian-friendly, but be mindful if you have gluten allergies. You can substitute with a gluten-free flour blend! Additionally, ensure that the brands of chocolate chips and candy corn you choose don’t contain any allergens like nuts or dairy, especially if you’re sharing with others. Always check labels for peace of mind!
Halloween Cauldron Cookie Creation: Magical Treats to Make
Ingredients
Equipment
Method
- Preheat your oven to 350°F (175°C) and line baking sheets with parchment paper.
- Cream together 1 cup of unsalted butter, ½ cup granulated sugar, and ½ cup brown sugar using an electric mixer for 2-3 minutes until light and fluffy.
- Add 2 eggs and 1 teaspoon of vanilla extract, mixing until smooth and glossy.
- In a separate bowl, whisk together 2 ½ cups of all-purpose flour, 1 teaspoon of baking soda, and ½ teaspoon of salt.
- Gradually incorporate the dry ingredients into the wet mixture, stirring gently until just combined.
- Fold in 1 cup of chocolate chips and 1 cup of candy corn using a spatula.
- Scoop the dough onto prepared baking sheets, spacing them about 2 inches apart.
- Bake for 10-12 minutes until edges are golden and centers remain soft.
- Cool on baking sheet for 5 minutes before transferring to a wire rack to cool completely.