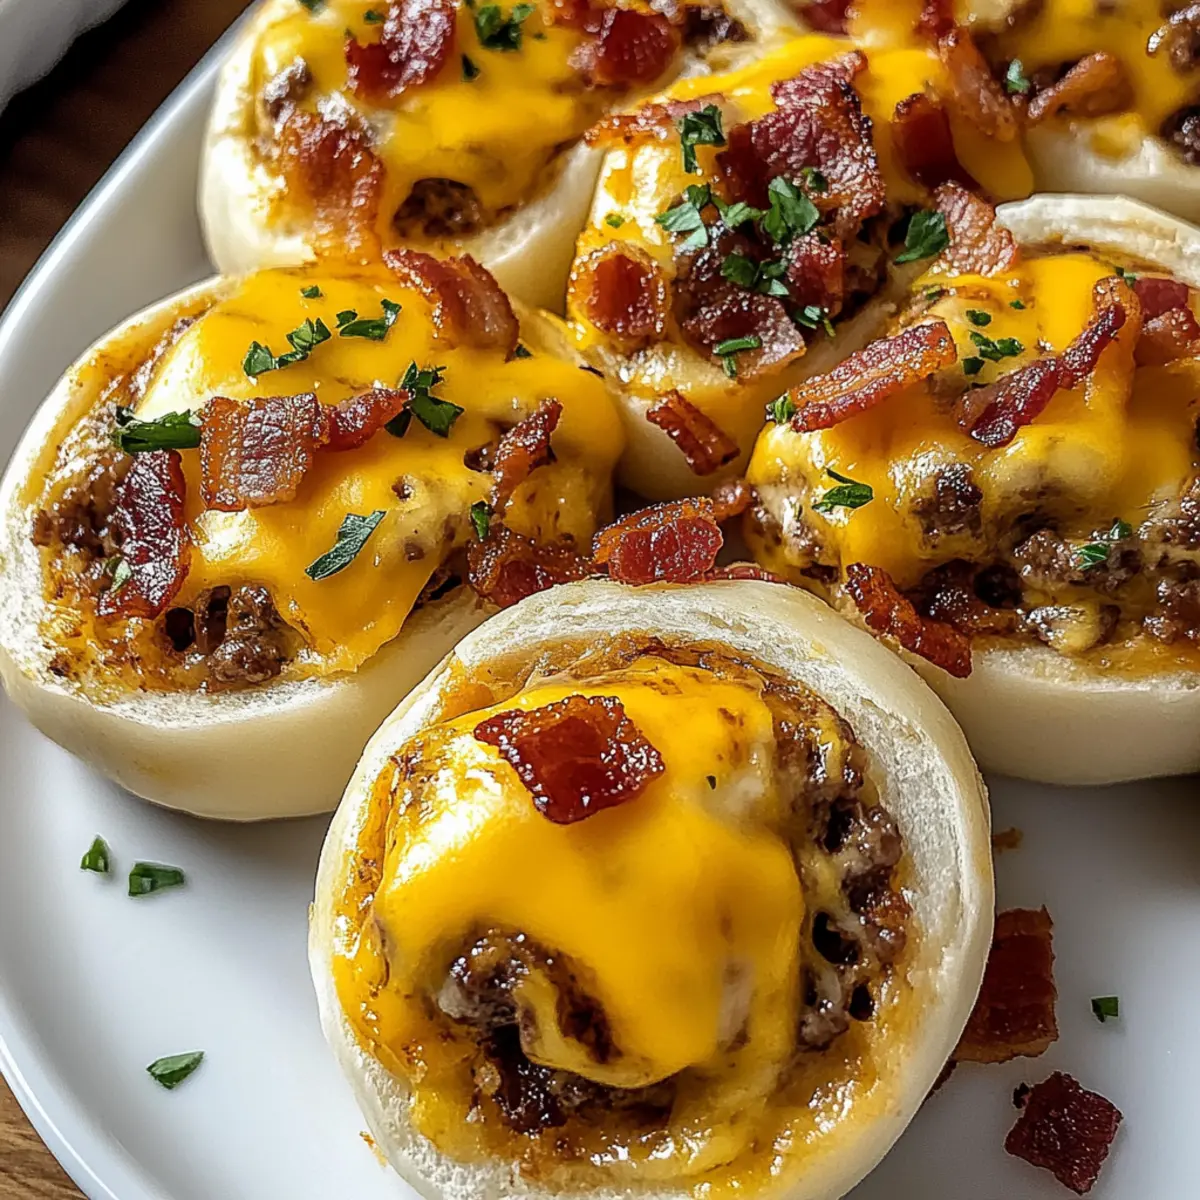
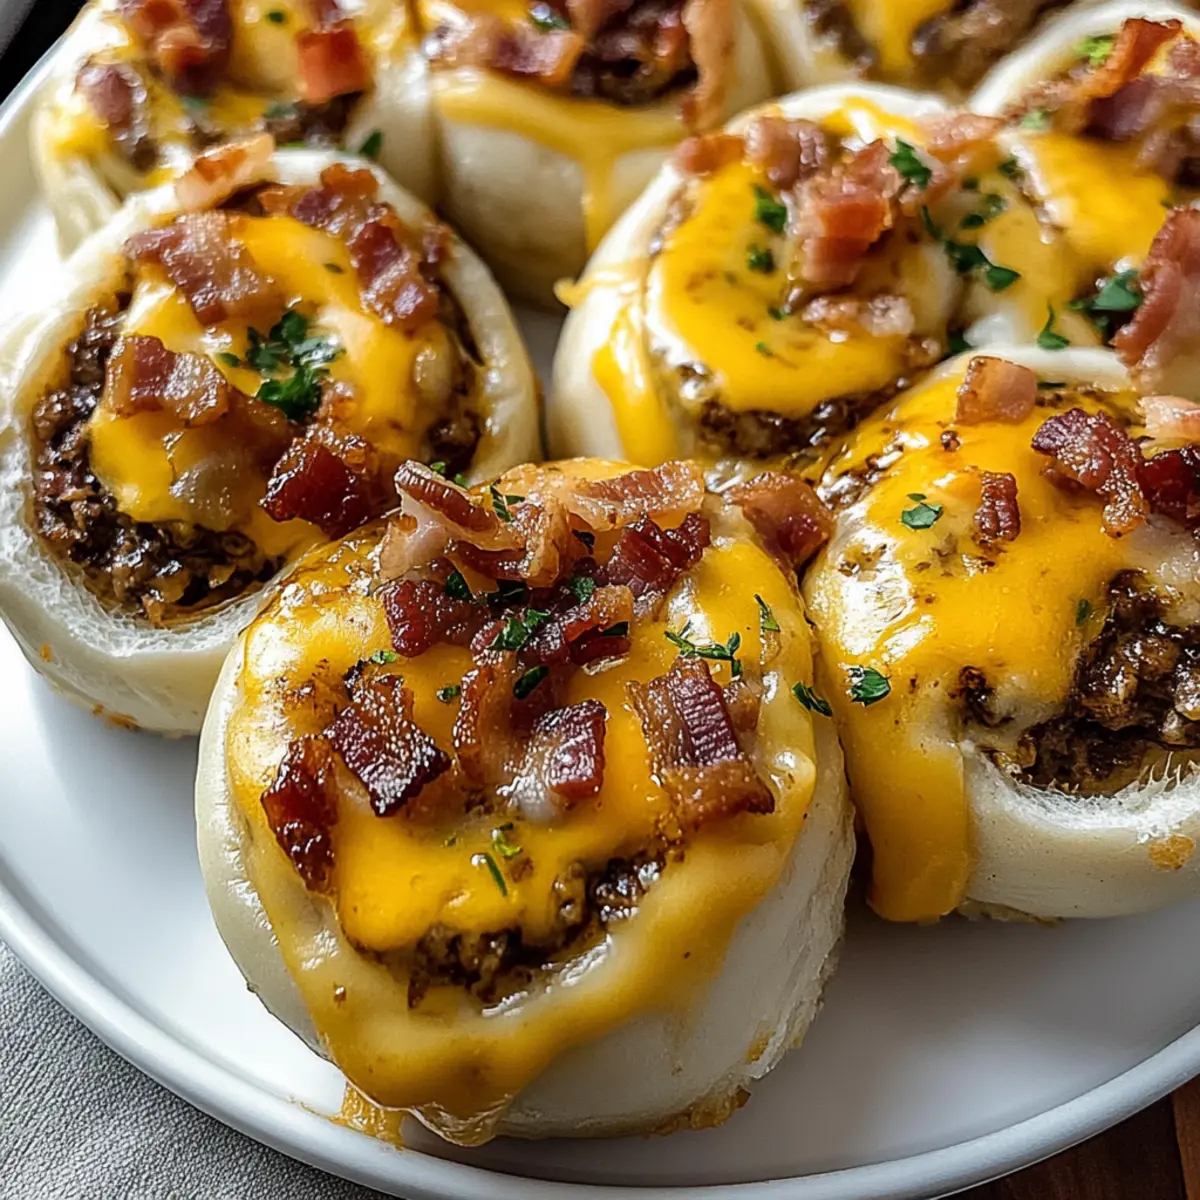
As I stood in the kitchen, the delightful sizzle of bacon on the stovetop reminded me of my favorite comfort foods. There’s something undeniably special about Garlic Butter Bacon Cheeseburger Rollups that makes them the perfect solution for weeknight dinners or casual gatherings. Combining juicy ground beef, crispy bacon, and rich cheddar, all snuggled up in flaky pizza dough, this recipe is not only beginner-friendly but also a quick prep that can be whipped up in under an hour. Whether you’re feeding a crowd or simply craving a little comfort, these rollups bring a nostalgic twist to home cooking. Curious about how to make this delectable dish? Let’s dive in!

Why Are These Rollups So Irresistible?
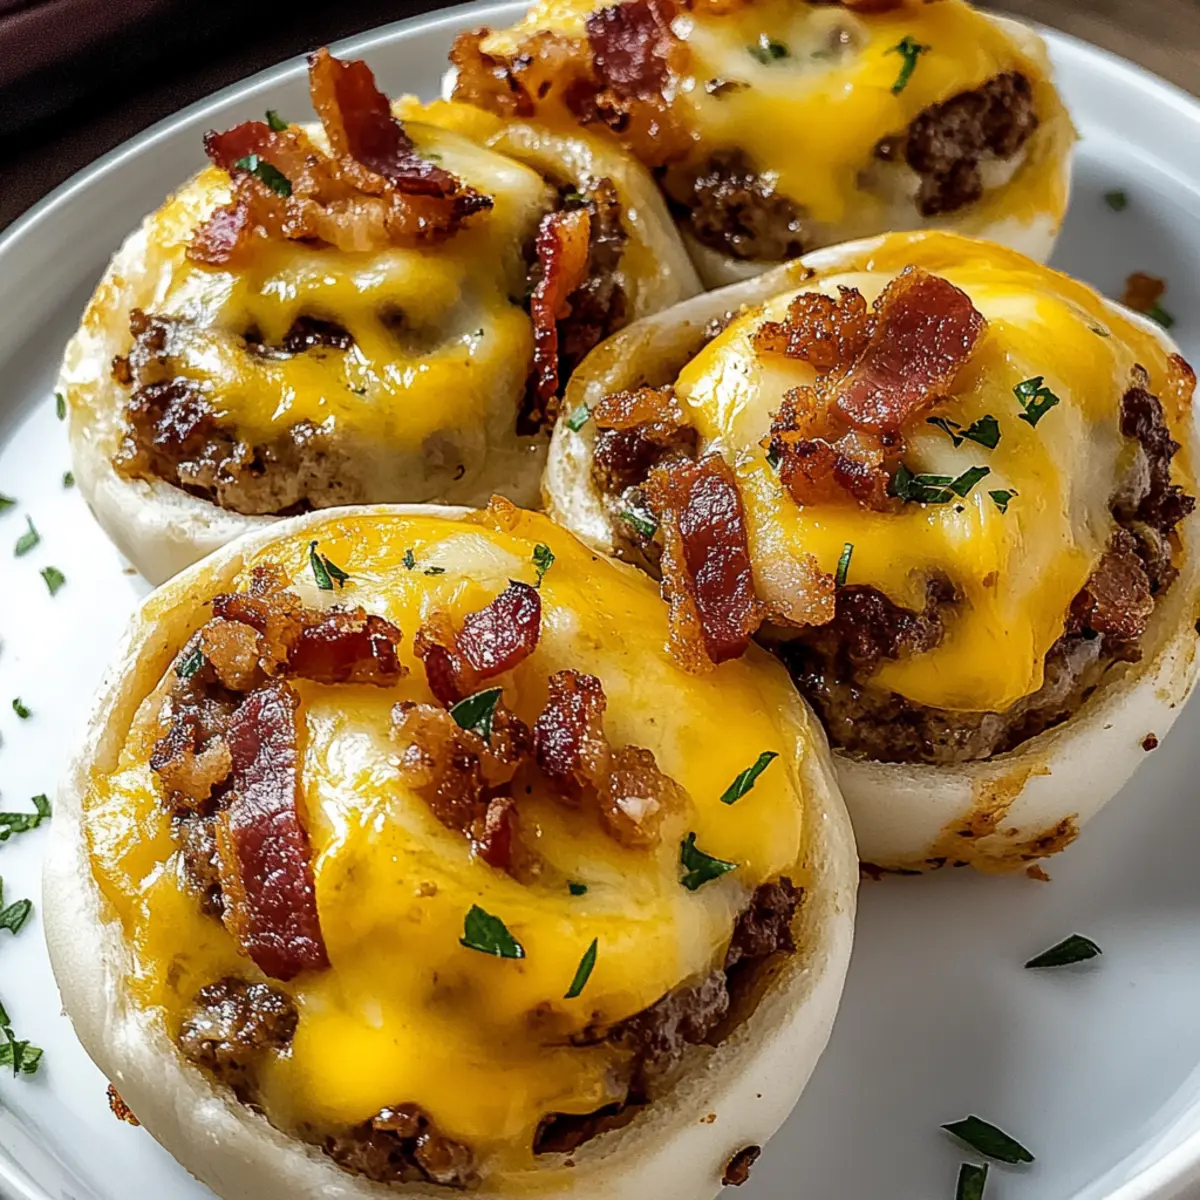
Comforting, Classic Flavors: Each bite delivers a mouthwatering mix of cheeseburger essentials—juicy beef, crispy bacon, and melty cheese that create a symphony of taste.
Quick & Easy: With just a 47-minute total prep and cook time, you’ll have a delicious meal on the table in no time, making it ideal for those busy weeknights.
Crowd-Pleasing Delight: Perfect for gatherings, these rollups impress guests and invite everyone to dig in, just like my Garlic Butter Chicken.
Portable Snack: Their unique form makes them easy to share or enjoy on the go, reminiscent of your favorite cheeseburger but way more fun!
Versatile Variations: Feel free to personalize them—add some kick with jalapeños, or switch up the cheese for your unique twist, similar to my {Garlic Parmesan Cheeseburger](https://flavorfulhaven.com/garlic-parmesan-cheeseburger-bombs-recipe-is-a-must-try/).
Garlic Butter Bacon Cheeseburger Rollups Ingredients
• Prepare to create these mouthwatering rollups that will have everyone asking for seconds!
For the Filling
- Ground Beef – Offers a hearty base, capturing that classic cheeseburger flavor (substitute with ground turkey or plant-based options if desired).
- Bacon – Delivers crispy, smoky bursts of flavor (opt for turkey bacon for a lighter choice).
- Shredded Cheddar Cheese – Provides that beloved gooey meltiness typical of cheeseburgers (you can swap for Monterey Jack or Gouda for variety).
- Cream Cheese – Adds a smooth, tangy creaminess to the filling (remember to soften it before mixing).
- Worcestershire Sauce – Enhances the savory complexity of the filling.
- Garlic Powder – Infuses a warm, mellow garlic note throughout.
- Onion Powder – Boosts the savory profile with delicious onion sweetness.
- Salt and Pepper – Essential for seasoning; use to taste for balance.
For the Dough and Topping
- Refrigerated Pizza Dough – Acts as a flaky wrapper that transforms into a golden crust (feel free to use homemade dough if you prefer).
- Unsalted Butter – Gives a glossy finish that crisps the dough (olive oil is a great substitute for a lighter version).
- Garlic (minced) – Fresh garlic elevates the overall flavor of the rollups.
- Fresh Parsley (optional) – A sprinkle for garnish to add brightness and color.
Indulge in these Garlic Butter Bacon Cheeseburger Rollups that blend all your favorite flavors and make mealtime memorable!
Step‑by‑Step Instructions for Garlic Butter Bacon Cheeseburger Rollups
Step 1: Preheat and Prep
Begin by preheating your oven to 375°F (190°C). While the oven warms up, line a baking sheet with parchment paper to prevent sticking and make cleanup a breeze. This preliminary step ensures that your garlic butter bacon cheeseburger rollups bake evenly and develop a crispy, golden crust.
Step 2: Cook the Beef
In a large skillet over medium heat, cook the ground beef until it’s thoroughly browned, about 6-8 minutes. Make sure to break it apart with a spatula for even cooking. Once browned, drain any excess fat to keep your rollups from being greasy, ensuring that the flavor of the beef truly shines through.
Step 3: Mix the Filling
In a large mixing bowl, combine the cooked beef with crumbled bacon, shredded cheddar cheese, softened cream cheese, Worcestershire sauce, garlic powder, onion powder, salt, and pepper. Stir these ingredients together until well blended and creamy. This savory filling makes the heart of your garlic butter bacon cheeseburger rollups, offering a rich and satisfying flavor.
Step 4: Roll Out the Dough
On a lightly floured surface, roll out the refrigerated pizza dough into a rectangular shape, approximately 12×18 inches. Aim for an even thickness, as this will help the dough cook uniformly. After rolling, this dough will serve as the delightful flaky wrapper for your scrumptious filling.
Step 5: Assemble the Rollups
Spread the beef mixture evenly over the rolled-out pizza dough, making sure to leave a small border along the edges for sealing. This is a crucial step in crafting your garlic butter bacon cheeseburger rollups, as it ensures each bite is packed with flavor without any spillage during baking.
Step 6: Form the Roll
Starting from one long edge, carefully roll the dough tightly into a log shape, sealing the edges as you go. This allows the savory filling to stay inside while baking. Take your time here to create a tight roll to keep all the deliciousness contained in your garlic butter bacon cheeseburger rollups.
Step 7: Cut the Rollups
Using a sharp knife, slice the rolled dough into approximately 1-inch thick pieces, placing them cut-side up on the prepared baking sheet. This provides uniformity in baking and ensures that every rollup bakes evenly and develops that perfect golden-brown color.
Step 8: Brush with Butter
In a small bowl, melt unsalted butter and mix in minced garlic. Brush this flavorful mixture generously over the tops of each rollup just before baking. This step not only enhances the flavor but also guarantees a beautiful, glossy finish to your garlic butter bacon cheeseburger rollups.
Step 9: Bake to Perfection
Place the baking sheet in the preheated oven and bake for 18-22 minutes, until the rollups are golden brown and crispy. Keep an eye on them during the last few minutes of baking, as oven temperatures can vary, and you want them just right for that delightful texture.
Step 10: Cool and Garnish
Once baked, remove the garlic butter bacon cheeseburger rollups from the oven and let them cool slightly on the baking sheet. This cooling period helps the cheese set a bit before cutting. If desired, sprinkle with fresh parsley for a burst of color and freshness, making for a delightful presentation.
Storage Tips for Garlic Butter Bacon Cheeseburger Rollups
Fridge: Store leftover rollups in an airtight container for up to 3-4 days to maintain freshness and flavor.
Freezer: For longer storage, freeze the rollups in a single layer on a baking sheet, then transfer to an airtight container once frozen. They can be stored for up to 3 months.
Reheating: To reheat, place rollups in the oven at 350°F (175°C) for about 10-15 minutes, or until heated through, to maintain their crispy texture.
Make Ahead: You can prepare the rollups a day in advance and refrigerate them before baking. Just add a couple of extra minutes to the baking time if they’re chilled.
Expert Tips for Garlic Butter Bacon Cheeseburger Rollups
Avoid Greasy Fillings: Drain the excess fat from the cooked beef thoroughly to keep your filling flavorful without unwanted grease.
Cool Slightly: Let the rollups cool for a few minutes after baking to avoid cheese oozing when you cut them.
Use a Sharp Knife: For the best results, slice the roll with a sharp knife; this helps achieve clean cuts and uniform rollups.
Experiment with Cheese: Feel free to swap out shredded cheddar for other melting cheeses like Monterey Jack or pepper jack to create your own twist on these garlic butter bacon cheeseburger rollups.
Seal It Tight: Ensure that you roll the dough tightly and seal the edges well so that the delicious filling stays intact during baking.
Garlic Butter Bacon Cheeseburger Rollups Variations
Feel free to unleash your creativity with these scrumptious rollups, making them uniquely yours with flavorful twists!
-
Spicy Kick: Add diced jalapeños to the beef mixture for a fun burst of heat. This little addition will surely spice up your dinner!
-
Cheese Swap: Replace the cheddar with pepper jack for a zesty, spicy flavor. Mixing in different cheeses can really transform the rollups into something extraordinary.
-
Herb Infusion: Experiment with herb blends like Italian seasoning or fresh basil for enhanced aroma. A touch of fresh herbs can elevate the comforting taste of the filling.
-
Veggie Delight: Toss in some finely chopped bell peppers or mushrooms for added nutrition and texture. The veggies melt pleasantly into the filling, providing irresistible layers of flavor.
-
Bacon Alternatives: Go for turkey bacon or even a plant-based bacon option for a lighter or vegetarian version. You’ll still achieve that desirable smoky flavor.
-
Garlic Lover’s Dream: If you adore garlic, increase the amount of minced garlic in the butter brushing before baking. Trust me, it will create a wonderfully fragrant aroma!
-
Dough Variation: Instead of refrigerated pizza dough, try crescent roll dough for a flakier twist. The buttery layers bring a whole new level of deliciousness to your rollups!
-
Sweet Twist: Blend in a handful of caramelized onions for a touch of sweetness. This unexpected twist adds depth to each bite, making them even more comforting.
These Garlic Butter Bacon Cheeseburger Rollups are delicious as they are, but exploring variations not only keeps things exciting but also allows you to customize them to your taste. And while you’re at it, don’t forget to check out my recipe for Garlic Butter Pork Chops for another must-try dish!
Make Ahead Options
These Garlic Butter Bacon Cheeseburger Rollups are perfect for meal prep enthusiasts! You can prepare the filling up to 24 hours in advance by combining cooked ground beef, crumbled bacon, cheeses, and seasonings in an airtight container. Refrigerate until ready to use. Additionally, you can roll the dough with the filling and cut the rollups ahead of time, storing them in the fridge for up to 3 days. Just make sure to brush the tops with melted butter and garlic right before baking to keep them just as delicious. When ready to serve, bake directly from the fridge, adding a few extra minutes to the baking time for optimal results. Enjoy the convenience of having this crowd-pleaser ready to pop in the oven on busy weeknights!
What to Serve with Garlic Butter Bacon Cheeseburger Rollups
Elevate your mealtime with these delightful rollups paired with complementary sides that create a truly satisfying feast!
-
Crispy Potato Fries: Their crunchy exterior and fluffy interior provide the perfect contrast to the savory rollups. Serve with a sprinkle of sea salt for extra flavor.
-
Fresh Garden Salad: Bright, crisp greens tossed with a tangy vinaigrette can balance the richness of the rollups, adding an invigorating freshness to each bite.
-
Creamy Coleslaw: This creamy side adds a satisfying crunch and a touch of sweetness, making it a delightful accompaniment that complements the savory rollups marvelously.
-
Ranch Dressing for Dipping: A cool and creamy ranch dip can enhance your experience, adding an extra layer of flavor with every bite of the garlic butter bacon cheeseburger rollups.
-
BBQ Sauce: The smoky sweetness of BBQ sauce pairs wonderfully with the savory ingredients, providing a tangy contrast that enhances the flavor profile of the rollups.
-
Pickles: Tangy pickles can cut through the richness of the rollups, adding a crunchy, acidic element that makes each bite even more enjoyable.
-
Sweet Corn on the Cob: A side of sweet, buttery corn adds a seasonal touch, echoing the comfort food vibes with its warm, juicy goodness.
-
Classic Milkshake: For a fun twist, consider pairing these rollups with a rich chocolate or vanilla milkshake for the ultimate nostalgic meal experience!
Whether you’re hosting a get-together or enjoying a cozy family dinner, these pairings will make your Garlic Butter Bacon Cheeseburger Rollups even more special!
Garlic Butter Bacon Cheeseburger Rollups Recipe FAQs
What type of ground beef should I use for the rollups?
Absolutely! I recommend using 80/20 ground beef for the best balance of flavor and juiciness. If you’re looking for a healthier option, ground turkey or plant-based meat alternatives work well and still provide a satisfying taste.
How long will leftovers stay fresh in the fridge?
Very! You can store leftover garlic butter bacon cheeseburger rollups in an airtight container in the fridge for up to 3-4 days. Just be sure to keep them sealed tightly to maintain their flavor and texture.
Can I freeze the garlic butter bacon cheeseburger rollups?
Yes, indeed! To freeze, lay the rollups on a baking sheet in a single layer and freeze for about 1-2 hours until firm. Then transfer them to an airtight container or freezer bag, where they’ll keep well for up to 3 months. When you’re ready to enjoy, simply reheat them in the oven!
What should I do if my filling turns out too greasy?
Not a problem! If you find your filling is greasy, the key is to make sure you drain the excess fat after cooking the ground beef. You can also try using leaner beef or even substituting with turkey bacon, which has less fat compared to regular bacon.
Are there any dietary considerations I should keep in mind?
Absolutely! If you’re cooking for someone with a dairy allergy, you can substitute cream cheese with a dairy-free alternative and choose a dairy-free melting cheese. Also, consider using gluten-free pizza dough to make these rollups gluten-free for those with sensitivities.
What’s the best method to reheat the rollups for optimal texture?
I often make sure to reheat my rollups in the oven for the best results. Preheat the oven to 350°F (175°C) and place the rollups on a baking sheet. Heat for about 10-15 minutes until they’re warmed through and the crust becomes golden again. This helps maintain that blissfully crispy outside!
Garlic Butter Bacon Cheeseburger Rollups You'll Crave!
Ingredients
Equipment
Method
- Preheat your oven to 375°F (190°C) and line a baking sheet with parchment paper.
- Cook the ground beef in a skillet over medium heat until thoroughly browned, about 6-8 minutes. Drain excess fat.
- In a mixing bowl, combine the cooked beef, crumbled bacon, shredded cheddar, softened cream cheese, Worcestershire sauce, garlic powder, onion powder, salt, and pepper. Mix until creamy.
- Roll out the pizza dough on a floured surface into a rectangular shape (approximately 12x18 inches).
- Spread the beef mixture evenly over the dough, leaving a border for sealing.
- Roll the dough tightly into a log shape, sealing the edges as you go.
- Cut the roll into approximately 1-inch thick pieces and place them cut-side up on the baking sheet.
- Melt unsalted butter, mix in minced garlic, and brush this mixture over the tops of each rollup.
- Bake for 18-22 minutes until golden brown and crispy.
- Let cool slightly on the baking sheet and, if desired, sprinkle with fresh parsley before serving.