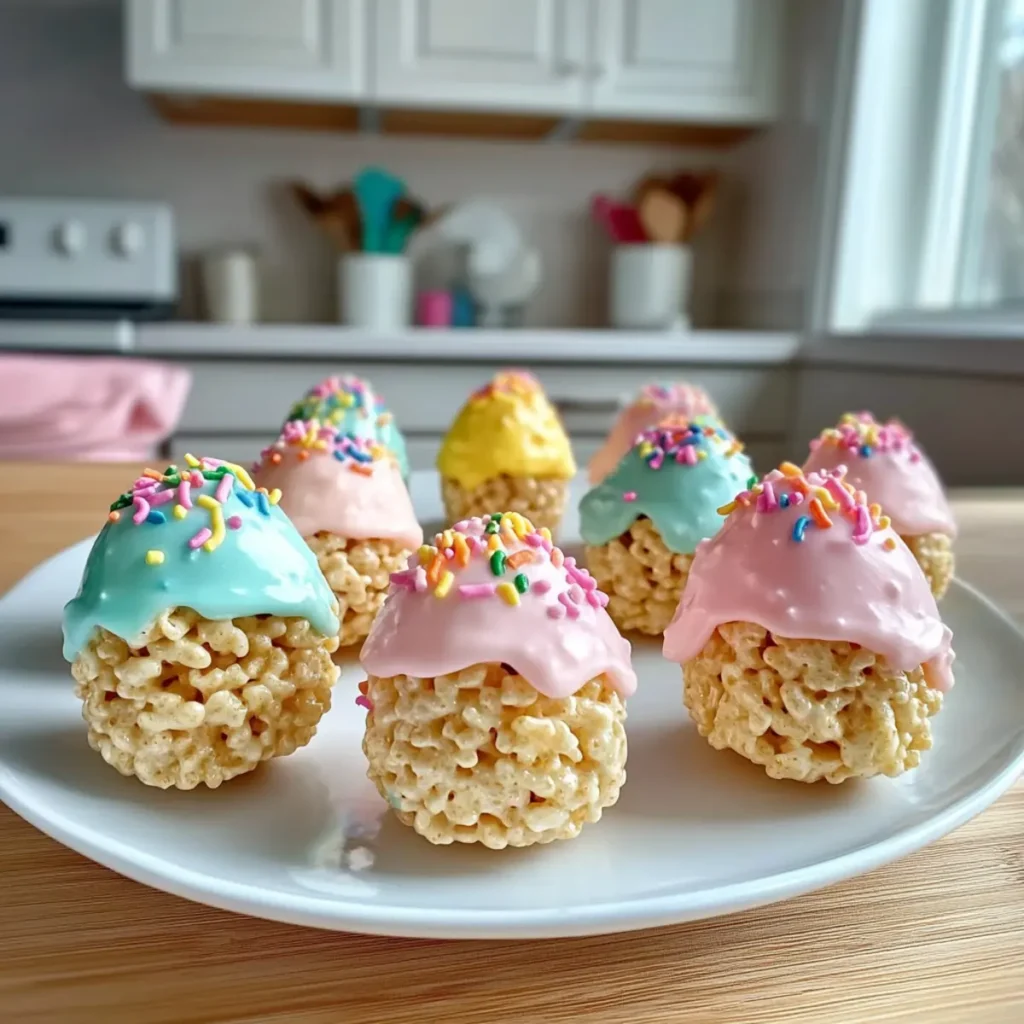
As I walked through the colorful aisles of my local grocery store, the excitement of Easter festivities danced in the air, beckoning me to create something delightful in my kitchen. The perfect solution? Cute and Colorful Easter Egg Rice Krispies Treats! These no-bake treats are not just easy to whip up but also a major crowd-pleaser, making them ideal for bringing smiles to both kids and adults alike. With a touch of vibrant pastel icing and a sprinkle of cheer, these treats add a festive flair to any celebration while keeping the mess to a minimum. Why not add a little sweetness to your spring gatherings this year? Get ready to dive into a world of fun and creativity with these irresistible treats that are as much fun to make as they are to eat—are you curious to see how it’s done?
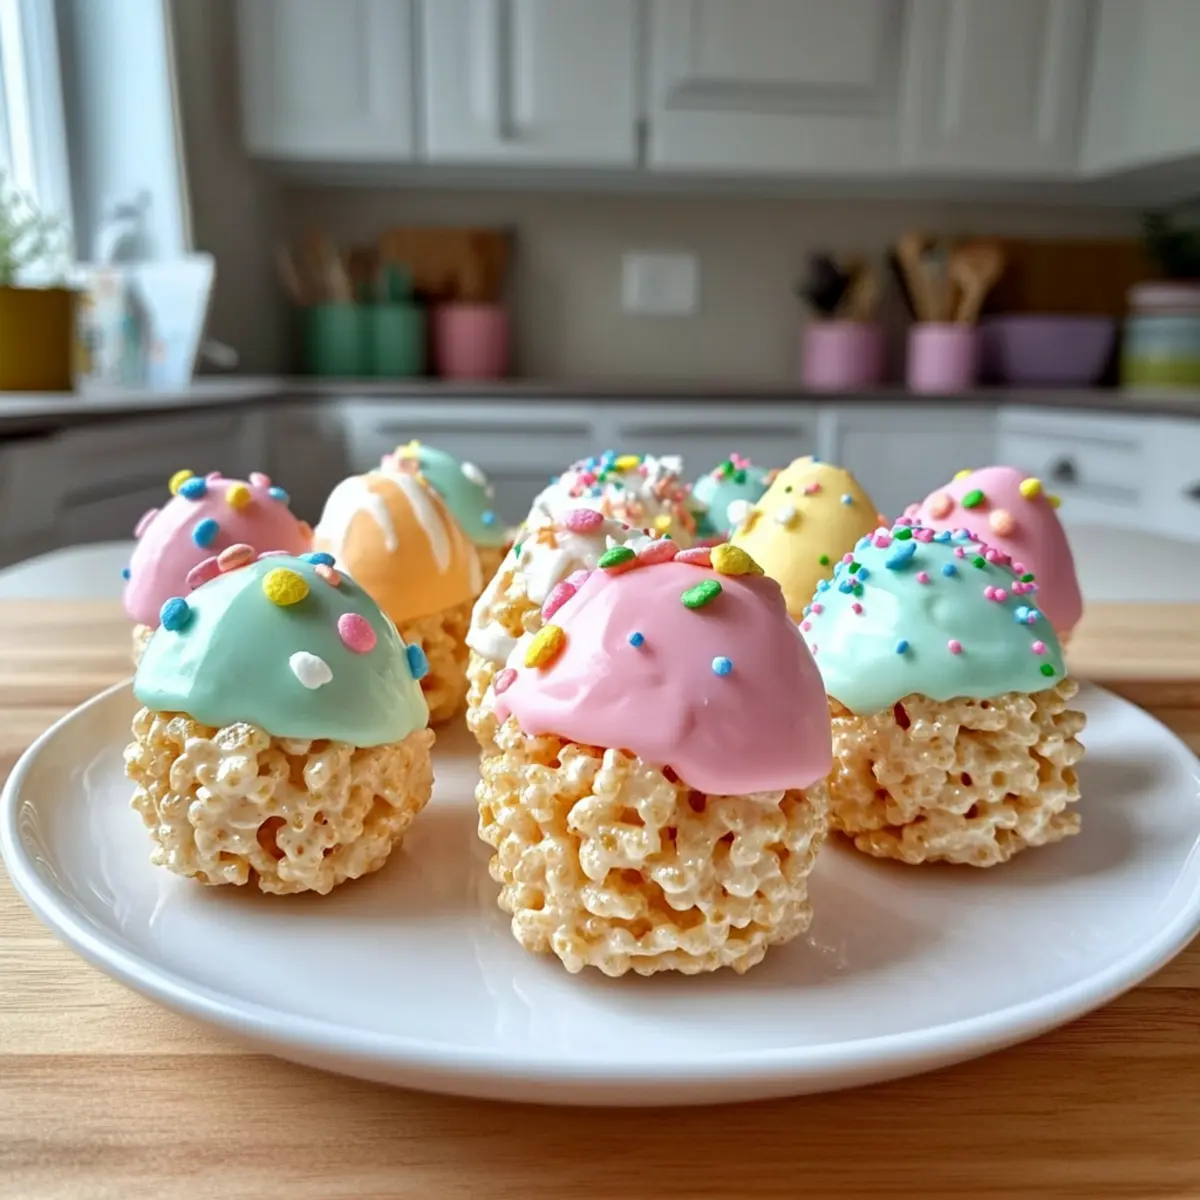
Why Are These Treats So Irresistible?
Simplicity at Its Best: This no-bake recipe is incredibly easy, perfect for all skill levels.
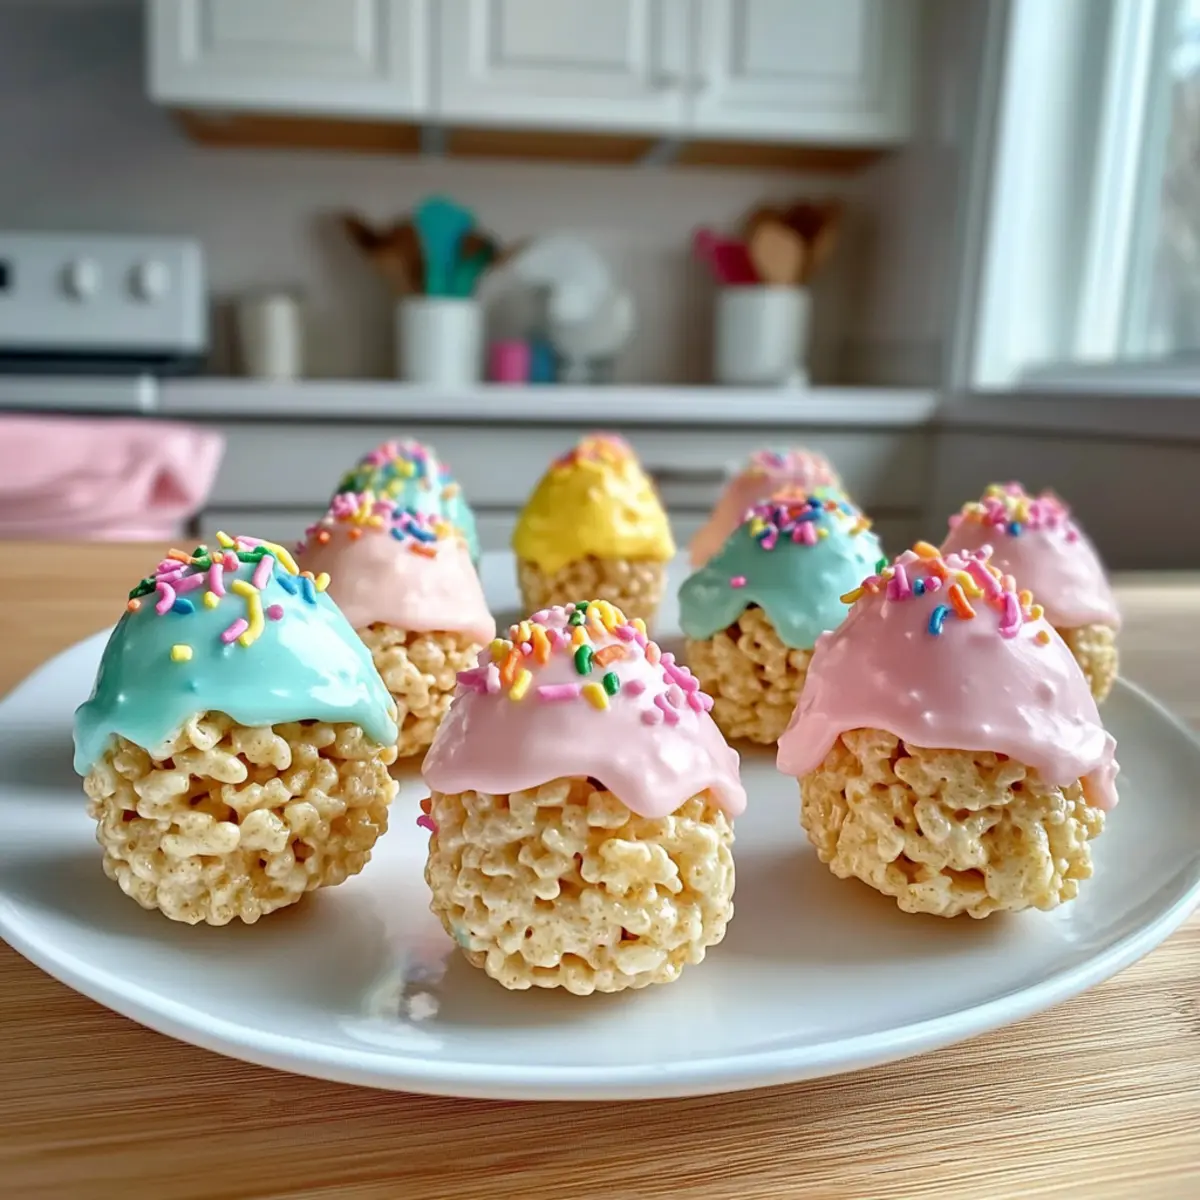
Vibrant Aesthetics: With colorful pastel icing and cheerful sprinkles, these treats are visually stunning and add a festive touch to any table.
Kid-Friendly Fun: Kids will love shaping the treats into Easter eggs, making this a delightful family activity. You’ll find everyone joining the fun, just like with my Smothered Chicken Rice for dinner!
Quick to Make: The entire process takes just minutes, allowing you to whip up these goodies in no time, making it a hassle-free treat for unexpected guests.
Memory-Making: These treats are perfect for creating lasting memories, whether at an Easter party or a simple family get-together. Engage with other festive recipes too, like Corn Chicken Rice, and make this a spring to remember!
Easter Egg Rice Krispies Treats Ingredients
For the Treats
- Rice Krispies Cereal – Provides the essential crunch and structure; classic Rice Krispies work perfectly for this festive treat.
- Marshmallows – The key to sweetness and that beloved chewy texture; mini marshmallows melt faster for convenience.
- Butter – Offers richness and binds the mixture; margarine can be a great dairy-free alternative.
For the Decoration
- Pastel Icing – Brightens up the treats, adding flavor and festivity; feel free to make your own or grab some store-bought.
- Colorful Sprinkles – Enhances the visual appeal and fun factor; mix and match different shapes and colors to celebrate Easter!
These delightful Easter Egg Rice Krispies Treats will surely be the highlight of your spring festivities!
Step‑by‑Step Instructions for Easter Egg Rice Krispies Treats
Step 1: Gather Your Ingredients
Begin by gathering all your ingredients for the Easter Egg Rice Krispies Treats. You’ll need Rice Krispies cereal, marshmallows, butter, pastel icing, and colorful sprinkles. Make sure to have a large mixing bowl and a saucepan ready as well. Setting everything up in advance creates a smooth cooking experience and adds excitement for the festive treat-making!
Step 2: Melt Butter & Marshmallows
In a medium-sized saucepan, melt 3 tablespoons of butter over low heat. Once melted, add in 4 cups of mini marshmallows, stirring continuously. Keep an eye on the mixture as it transforms; it should take about 5 minutes to fully melt and become creamy. This step is crucial for achieving that delightful chewy texture in your Easter Egg Rice Krispies Treats.
Step 3: Combine with Cereal
Remove the saucepan from heat and immediately add 6 cups of Rice Krispies cereal to the melted marshmallow mixture. Gently fold the cereal into the gooey mixture using a spatula, ensuring every piece is evenly coated. This should take about 2 minutes. The coated cereal will look shiny and slick, and that’s when you know it’s ready for shaping into festive eggs!
Step 4: Shape Treats
Allow the mixture to cool for about 5 minutes, just until it’s manageable to handle. Grease your hands with butter or cooking spray to prevent sticking. Take a handful of the mixture and shape it into egg forms, about the size of a large egg. Repeat until all the mixture is used up, creating about 12 to 15 Easter Egg Rice Krispies Treats that are sure to be a hit at your spring celebration!
Step 5: Decorate
Once the egg shapes are formed, it’s time to get creative! Using a spoon, drizzle pastel icing over each egg while they are still warm. Quickly sprinkle your colorful sprinkles over the icing to make them shine and sparkle. The icing should remain wet to ensure that the sprinkles stick. This vibrant decoration makes your Easter Egg Rice Krispies Treats not only delicious but also festive and fun!
Step 6: Set and Serve
Allow your decorated Easter Egg Rice Krispies Treats to set on a parchment-lined baking sheet for about 10 minutes. The icing will harden slightly while the treats cool down. Once set, they are ready to be enjoyed! Arrange them on a platter or in a basket for an eye-catching centerpiece at your Easter gathering, and watch as smiles light up everyone’s faces!

Easter Egg Rice Krispies Treats Variations
Customize your Easter Egg Rice Krispies Treats and let your creativity shine through these delightful variations!
-
Chocolate Lovers: Substitute half the marshmallows with melted chocolate for a fudgy twist. This decadent alternative brings a rich flavor that pairs beautifully with pastel icing.
-
Nutty Crunch: Add 1 cup of chopped nuts, like almonds or walnuts, into the mixture before shaping. The added crunch enhances texture while keeping this treat delightful and original.
-
Flavored Sprinkles: Change the flavor profile by using citrus or berry-flavored sprinkles. This twist adds a burst of flavor while keeping the festive touch intact.
-
Dairy-Free Delight: Swap butter for coconut oil and use dairy-free marshmallows. This variation keeps the recipe just as tasty while catering to those with dietary restrictions.
-
Fruit Infusion: Mix in 1 cup of finely chopped dried fruits like apricots or cranberries for a burst of fruity goodness. The chewy fruits complement the marshmallow and cereal perfectly.
-
Coconut Bliss: Fold in 1 cup of shredded coconut into the mixture for a tropical twist. This addition provides a delightful chew and a hint of sweetness.
-
Minty Fresh: Infuse some mint extract into the melted marshmallows for a refreshing flavor boost. This will create a surprising burst of flavor that everyone will remember.
-
Zingy Lemon: Add a teaspoon of lemon zest to the marshmallow mixture for a citrusy glow. This brightens the flavor and adds an irresistible zing!
Each variation is an opportunity to explore new flavor combinations, just like jumping into a new recipe adventure. For more festive ideas, you’ll love my Easter Punch Seasonal to accompany your treats! Enjoy crafting these mouthwatering delights!
How to Store and Freeze Easter Egg Rice Krispies Treats
Airtight Container: Store your Easter Egg Rice Krispies Treats in an airtight container at room temperature for up to 3 days to keep them fresh and chewy.
Fridge Alternative: If you prefer, you can refrigerate the treats for a firmer texture, but they may become slightly chewy. Consume within 5 days.
Freezing Option: For longer storage, freeze the treats in a single layer on a baking sheet until firm, then transfer to a freezer-safe bag. They will last for up to 2 months.
Reheating Tip: If you freeze the treats, let them thaw at room temperature before enjoying. Avoid microwaving to preserve the texture of your Easter Egg Rice Krispies Treats.
Make Ahead Options
These Cute and Colorful Easter Egg Rice Krispies Treats are a fantastic option for meal prep, allowing you to enjoy stress-free fun during your celebrations! You can easily prepare the treat mixture up to 24 hours in advance—just shape the eggs and place them in an airtight container at room temperature to maintain their delightful texture. When you’re ready to serve, simply drizzle with pastel icing and add colorful sprinkles while they’re still warm for that festive touch. If you prefer to have them ready for a party, make them up to 3 days ahead, but keep them covered in the fridge to prevent any stickiness. With these time-saving tips, you’ll have a delicious treat that shines as brightly as your festivities!
What to Serve with Easter Egg Rice Krispies Treats
Looking to create a standout spring gathering? Pair these sweet delights with complementary dishes that will round out your festive occasion!
-
Fresh Fruit Salad: A bright, refreshing mix of seasonal fruits like strawberries, blueberries, and kiwi adds a burst of color and natural sweetness that contrasts beautifully with the treats.
-
Carrot Cake Cupcakes: With their rich flavors and cream cheese frosting, these moist cupcakes echo the Easter theme while offering a delightful treat alongside the Rice Krispies bites.
-
Creamy Vanilla Ice Cream: A scoop of creamy ice cream serves as a cool, soft complement, helping to balance the sweetness of the Rice Krispies treats with a luscious contrast.
-
Chocolate Dipped Pretzels: The salty crunch of pretzels dipped in chocolate offers a fun contrast of flavors and textures. These treats are easy to grab and add to your festive spread.
-
Spring Veggie Platter: Crisp vegetables like snap peas, carrots, and bell pepper strips, served with a light dip, provide a crunchy and healthy option to balance the sweetness of your Rice Krispies treats.
-
Sweet Lemonade: A refreshing, zingy lemonade can brighten the entire flavor profile, perfectly enhancing those sweet, colorful treats on a sunny spring day.
This combination of ideas will help ensure your Easter Egg Rice Krispies Treats take center stage while harmonizing with other delicious offerings!
Expert Tips for Easter Egg Rice Krispies Treats
-
Greased Hands: Always grease your hands when shaping the treats to prevent sticking, ensuring a smooth and easy shaping process.
-
Choose the Right Marshmallows: For the best texture in your Easter Egg Rice Krispies Treats, mini marshmallows melt faster and create a creamier consistency, avoiding any lumps.
-
Vibrant Icing Colors: Use gel icing colors instead of liquid for a bolder and more vibrant appearance; this makes your treats look even more festive.
-
Reach the Right Temperature: Allow the butter and marshmallows to fully melt together without burning; this step is essential for that perfect chewy texture.
-
Proper Setting Time: Don’t rush the setting stage; allowing the treats to cool for at least 10 minutes helps them hold their shape better and gives the icing time to firm up before serving.

Easter Egg Rice Krispies Treats Recipe FAQs
What type of Rice Krispies should I use?
You should use standard Rice Krispies cereal for the best texture in your Easter Egg Rice Krispies Treats. They provide the essential crunch and structure that make these treats so delightful. Avoid off-brands, as they may not deliver the same quality and taste.
How should I store my Easter Egg Rice Krispies Treats?
Store your Easter Egg Rice Krispies Treats in an airtight container at room temperature for up to 3 days. For a firmer texture, you can refrigerate them, but make sure to consume them within 5 days. To maintain their chewiness, I recommend keeping them at room temperature.
Can I freeze the Easter Egg Rice Krispies Treats?
Absolutely! You can freeze the treats for longer storage. Simply place them in a single layer on a baking sheet until firm, then transfer them to a freezer-safe bag. They can last in the freezer for up to 2 months. When you’re ready to enjoy them, let them thaw at room temperature to preserve their delightful texture.
What should I do if the mixture is too sticky when shaping?
If the mixture becomes too sticky while you’re shaping your Easter Egg Rice Krispies Treats, simply grease your hands with a little butter or cooking spray. This will help prevent the mixture from sticking to your hands and allow you to shape the treats more easily.
Are there any dietary considerations I should keep in mind?
Yes! If you’re catering to specific dietary needs, you can substitute margarine for butter to make these treats dairy-free. Additionally, for those with allergies, be mindful that both the marshmallows and Rice Krispies may contain gluten or dairy; check labels if necessary.
Can I customize the decorations?
Very! Feel free to customize your pastel icing colors or use different types of sprinkles for your Easter Egg Rice Krispies Treats. For added fun, consider adding crushed candies or nuts into the mixture or as toppings for extra flavor and texture.
Easter Egg Rice Krispies Treats That Brighten Your Spring
Ingredients
Equipment
Method
- Gather all your ingredients for the Easter Egg Rice Krispies Treats.
- Melt 3 tablespoons of butter in a saucepan over low heat. Add 4 cups of mini marshmallows, stirring continuously until fully melted.
- Remove from heat and add 6 cups of Rice Krispies cereal, folding gently to coat.
- Once cooled slightly, shape the mixture into egg forms, creating about 12 to 15 treats.
- Drizzle pastel icing over each egg and sprinkle with colorful sprinkles.
- Allow to set on a parchment-lined baking sheet for about 10 minutes.