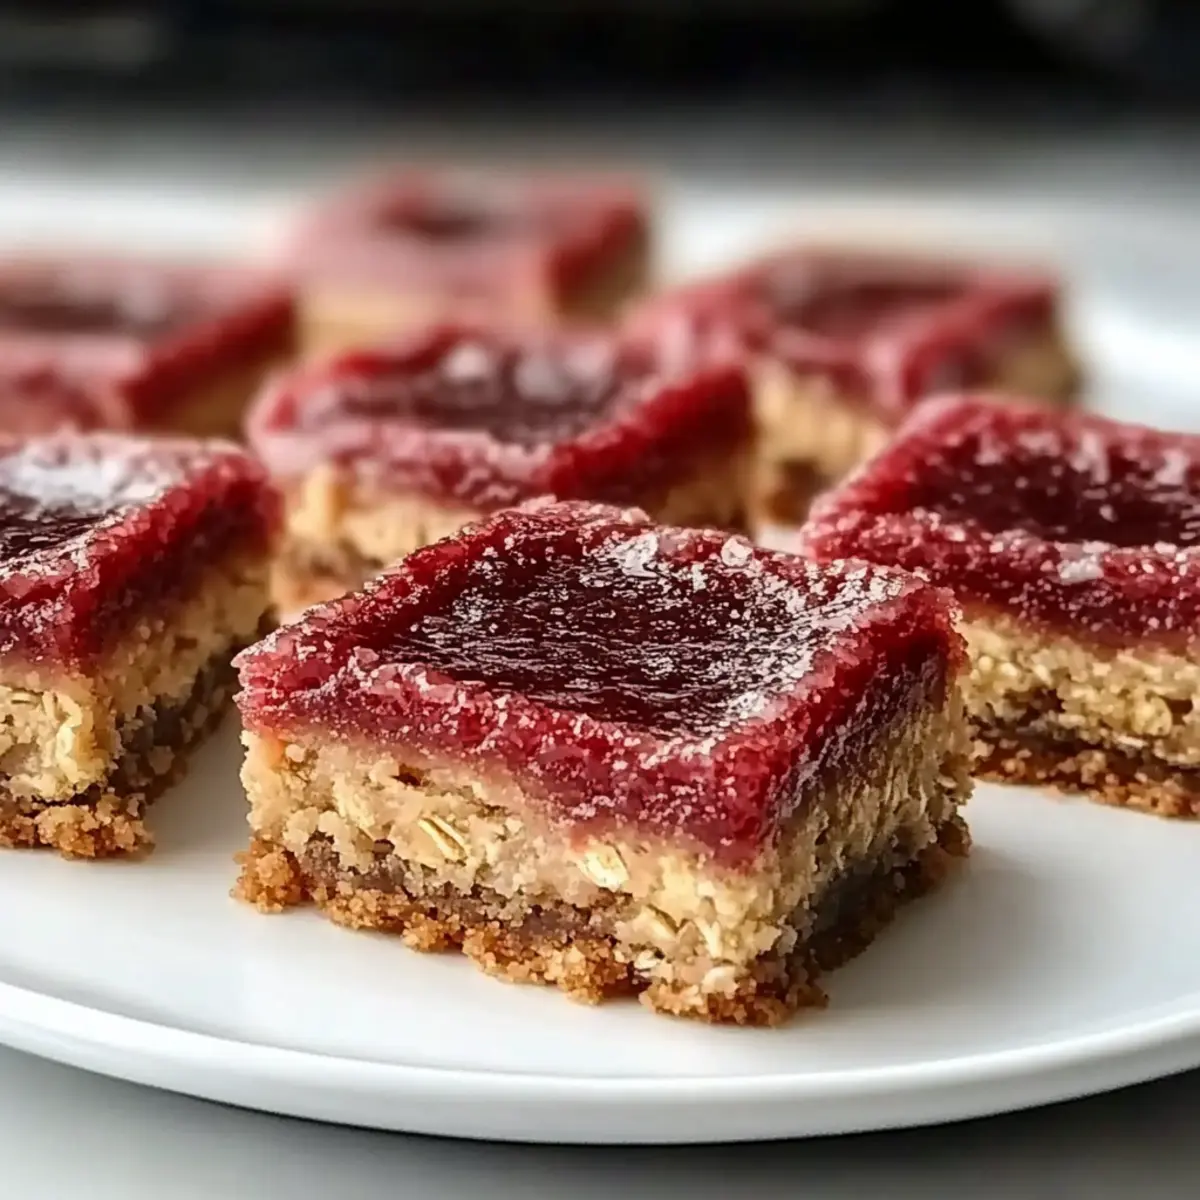
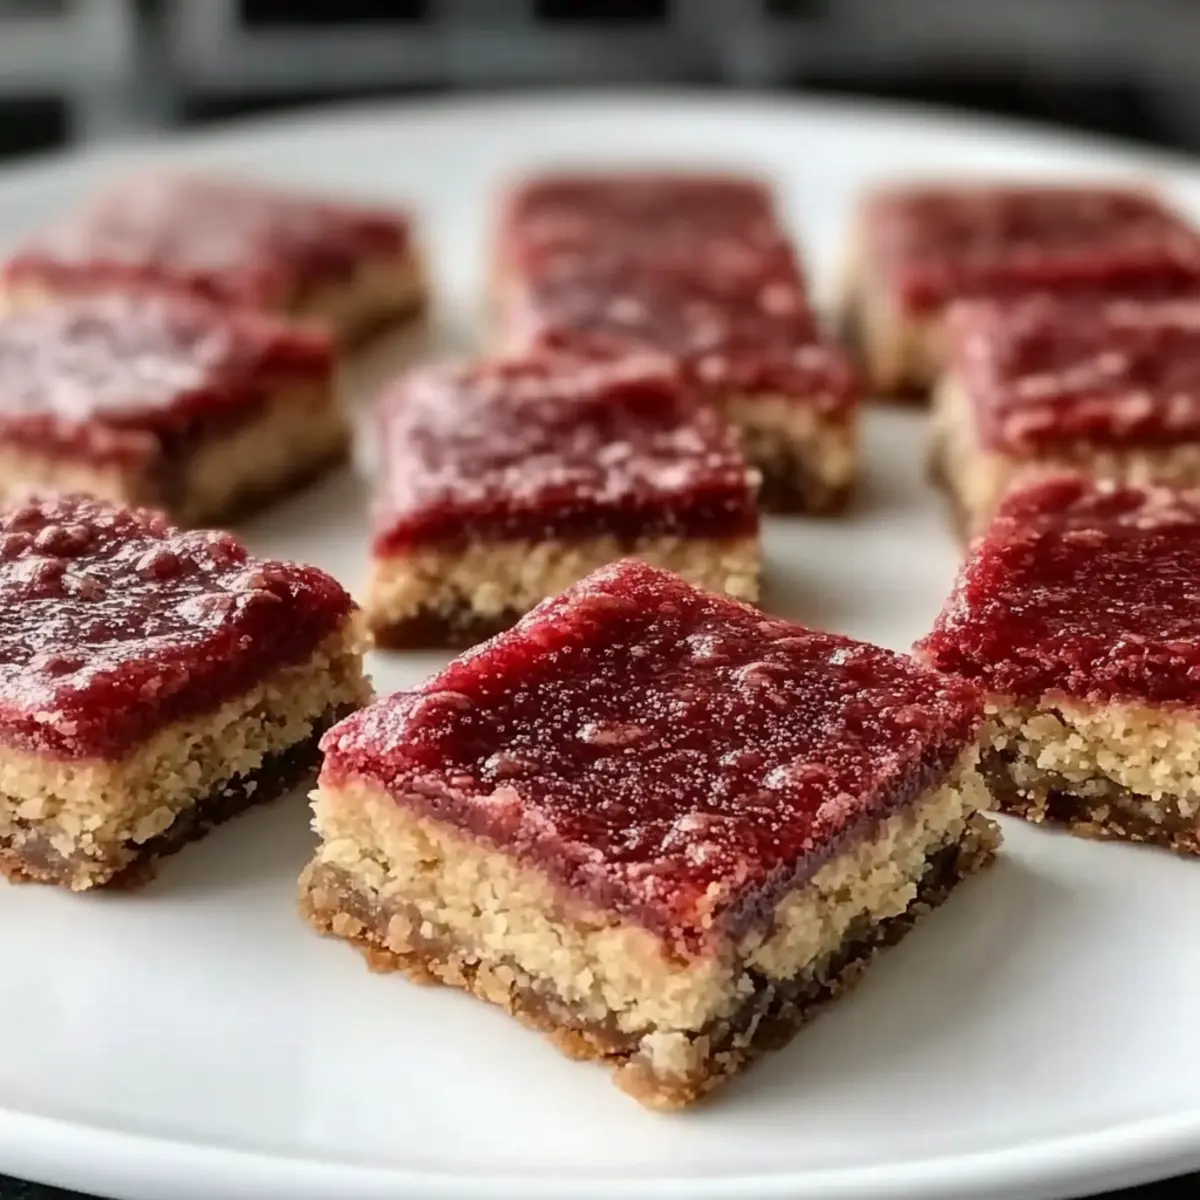
With a texture that mimics your favorite bakery treats and a recipe that anyone can master, these 4-Ingredient Crispy Chocolate Oat Cookies are about to become your go-to dessert. Imagine biting into a cookie that’s both crispy on the outside and slightly chewy on the inside, offering a perfect balance of chocolatey goodness. Not only are these cookies a delightful treat, but their quick prep time means you can whip them up even on your busiest days. Plus, they’re gluten-free and customizable, making them a crowd-pleaser for friends and family alike. Curious about how simple ingredients can create such delectable results? Let’s dive into this easy recipe together, shall we?
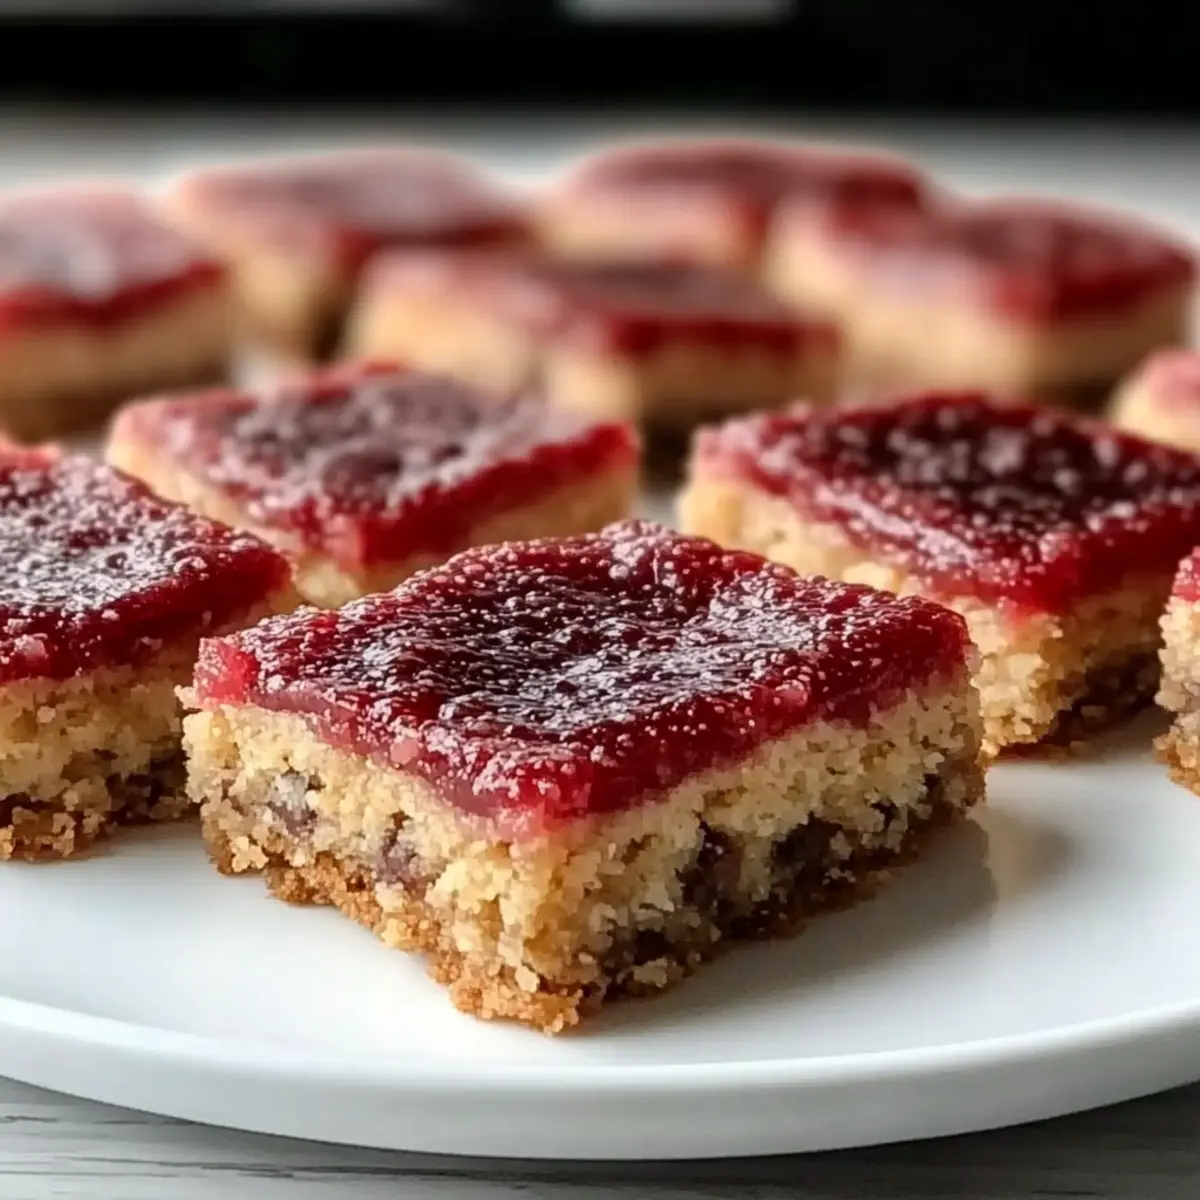
Why are these cookies a must-try?
Simplicity: With just four ingredients, you can create a deliciously satisfying treat without any fuss. Customizable: Whether you’re a peanut butter lover or need a nut-free option, this recipe easily adapts to your preferences. Quick preparation: Ready in under 15 minutes, these cookies fit perfectly into your busy schedule. Crowd-pleaser: Their rich chocolate flavor and crispy texture make them a hit at gatherings! Plus, for more quick recipe options, check out my Baked Apple Fritters or Baked Teriyaki Salmon.
Chocolate Oat Cookie Ingredients
-
For the Cookie Base
• Oats – Essential for structure and a chewy texture; opt for certified gluten-free oats if needed.
• Peanut Butter – Adds richness and binds the ingredients; substitute with almond or sunflower seed butter for a nut-free version.
• Maple Syrup – Natural sweetener that adds moisture; can be replaced with agave syrup or honey for different flavors. -
For the Chocolate Bliss
• Chocolate Chips – Provide bursts of sweetness; consider dark chocolate for a deeper flavor or dairy-free chips for vegan options.
These simple ingredients create the incredible flavors in your Chocolate Oat Cookies, making them easy and delicious!
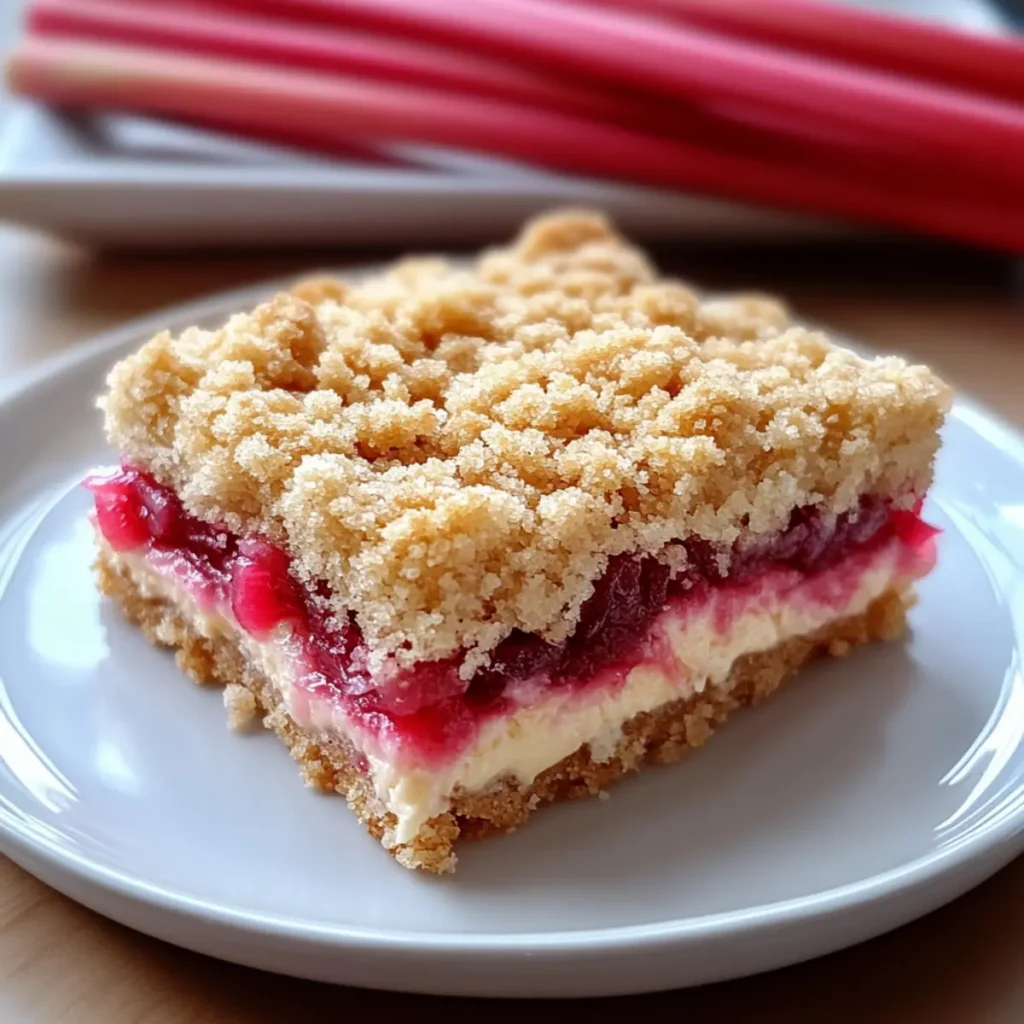
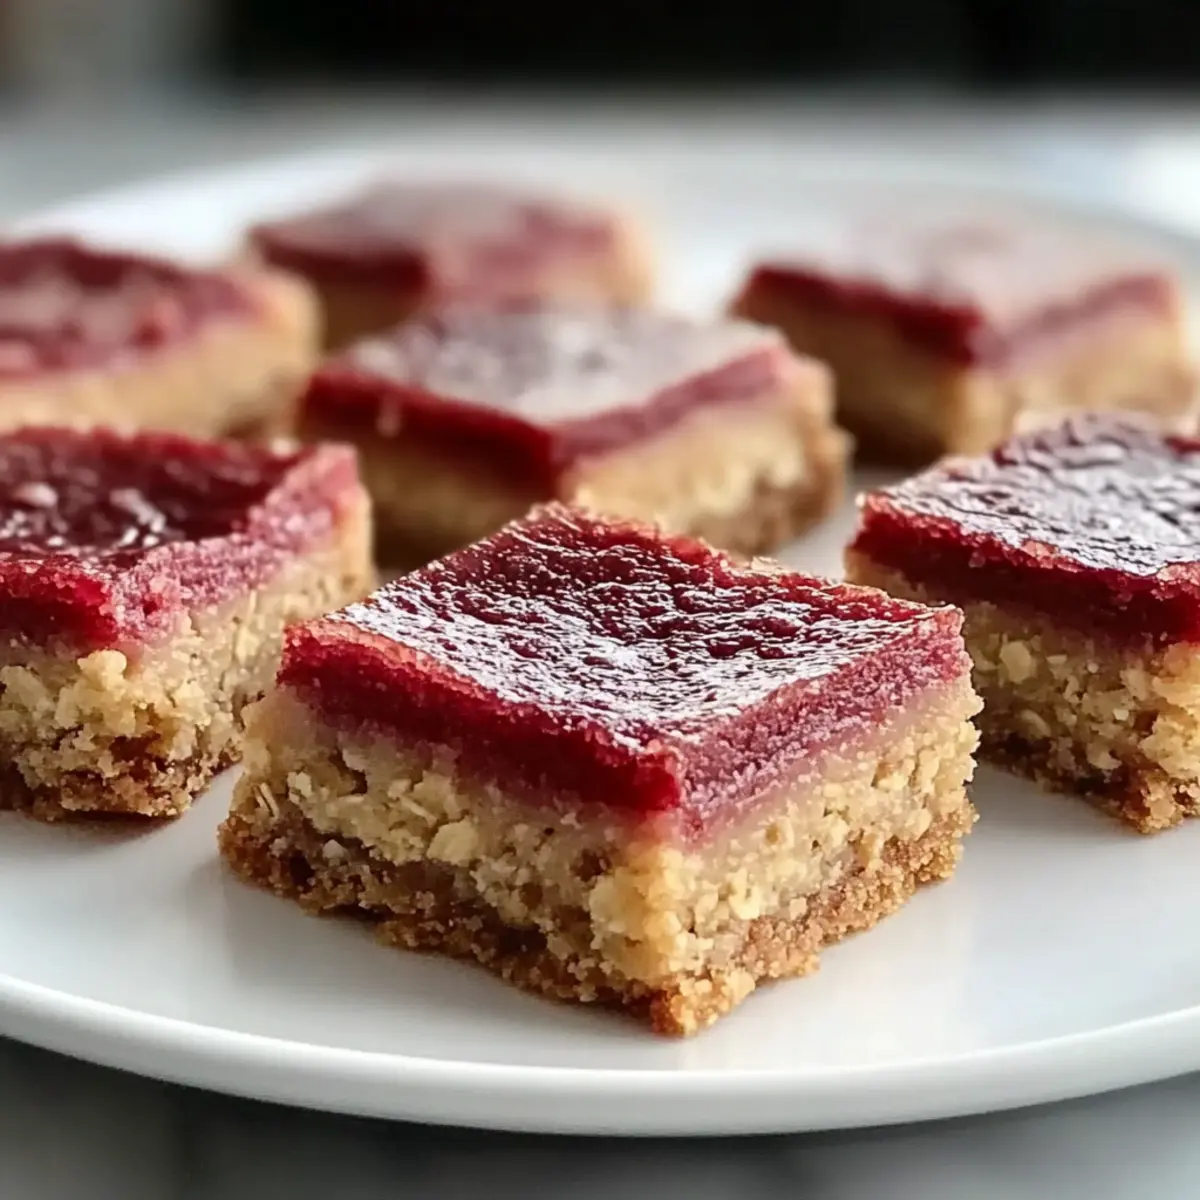
Step‑by‑Step Instructions for No Bake Rhubarb Cheesecake Squares
Step 1: Prepare the Base
Start by crushing graham crackers or your chosen base in a food processor until they resemble fine crumbs. Combine these crumbs with melted butter and a pinch of salt in a mixing bowl. Stir the mixture until all the crumbs are fully coated and the consistency is like wet sand. Press this mixture firmly into the bottom of a greased 9×9-inch baking dish to create an even layer, then set aside.
Step 2: Make the Creamy Filling
In a large mixing bowl, beat together cream cheese and sugar until smooth and creamy, about 2-3 minutes. Gradually fold in the cooled rhubarb mixture (prepared separately by cooking rhubarb with sugar and cornstarch) until evenly distributed. The filling should be thick but spreadable. Pour the creamy filling over the prepared base, smoothing the top with a spatula for an even finish.
Step 3: Chill the Squares
Cover the baking dish tightly with plastic wrap and refrigerate the cheesecake squares for at least 4 hours, or until they are set completely. This chilling step is crucial for the flavors to meld together and the texture to firm up. When ready, you should be able to gently press the top without it giving much. This marks that your No Bake Rhubarb Cheesecake Squares are ready for the next step.
Step 4: Slice and Serve
Once fully chilled, remove the baking dish from the refrigerator and use a sharp knife to score and cut the cheesecake into squares. For clean edges, run the knife under hot water before slicing, then wipe it dry. Serve these delightful cheesecake squares on a beautiful platter, garnished with a sprinkle of powdered sugar or fresh rhubarb slices if desired. Enjoy the refreshing flavors!
Make Ahead Options
These 4-Ingredient Crispy Chocolate Oat Cookies are perfect for busy home cooks looking to save time! You can prepare the dough up to 24 hours in advance by mixing the oats, peanut butter, maple syrup, and chocolate chips, and refrigerate it in an airtight container. This prevents the cookies from losing their texture and flavor. When you’re ready to bake, simply scoop the dough onto the baking tray and pop them in the oven as directed. Alternatively, you can bake the cookies and store them in an airtight container at room temperature for up to 5 days or freeze them for up to 3 months. Just allow them to thaw before serving for results that are just as delicious as fresh-baked!
No Bake Rhubarb Cheesecake Squares Customization
Feel free to elevate your 4-Ingredient Crispy Chocolate Oat Cookies with these delightful variations that will spark your creativity in the kitchen.
- Nut-Free: Substitute peanut butter with sunflower seed butter for a safe option without nuts. This alternative still keeps that creamy texture intact.
- Sweetness Swap: Use agave syrup instead of maple syrup for a lighter sweetness. You might find that it adds a lovely twist to the flavor!
- Vegan Delight: Opt for dairy-free chocolate chips and ensure your peanut butter is vegan-friendly for a plant-based dessert everyone can enjoy.
- Fruit Burst: Add dried cranberries or raisins for a fruity surprise within the cookies. The chewiness of the fruit beautifully complements the crunch of the oats.
- Dark Chocolate: Choose dark chocolate or cocoa nibs for a bold flavor twist. This will enhance the chocolate experience while giving a rich depth to every bite.
- Flavor Add-Ins: Mix in a teaspoon of vanilla extract for an aromatic lift or a pinch of sea salt to balance the sweetness. Both additions create a mouthwatering depth of flavor.
- Coconut Lover: Fold in shredded coconut for a delightful tropical twist. The coconut adds unique texture and flavor, making each cookie an adventure!
- Choco-Mint: Add a drop of mint extract along with your chocolate chips for a refreshing minty cookie charm. It’s like a delicious twist on a classic treat!
For more tasty inspirations, why not try whipping up some amazing Baked Ranch Chicken for dinner or indulge in the flavors of my No Bake Banana Cream Pies? Happy baking!
Expert Tips for Chocolate Oat Cookies
-
Ingredient Quality: Use natural peanut butter without added sugars or oils for the best flavor and texture. This ensures a perfect cookie structure.
-
Prevent Spreading: Refrigerate the dough for about 15 minutes before baking. This helps prevent the cookies from spreading too much in the oven.
-
Chewy Center: Be careful not to overbake! Aim for cookies that are golden on the edges but still soft in the center for that ideal chewy bite.
-
Mix-Ins Versatility: Feel free to add nuts or seeds for added crunch and nutrition. Just remember to stick with gluten-free options to keep the chocolate oat cookies suitable for everyone.
-
Storage Tips: Store in an airtight container at room temperature to maintain freshness. They can also be frozen for up to three months for a quick treat anytime!
What to Serve with 4-Ingredient Crispy Chocolate Oat Cookies
Elevate your dessert experience by exploring delightful pairings that make these cookies even more irresistible.
- Almond Milk: A creamy sip that perfectly complements the crispy texture, enhancing the chocolate flavor’s richness.
- Ice Cream: The dream team! A scoop of vanilla or chocolate ice cream adds a luscious creaminess that contrasts beautifully with each cookie bite.
- Fresh Berries: Juicy strawberries or raspberries add a tart freshness, balancing the sweetness and bringing vibrant color to your plate.
- Whipped Cream: A dollop of lightly sweetened whipped cream provides a fluffy texture that harmonizes with the cookies’ crispy edges.
- Coffee: Whether hot or iced, a rich cup of coffee enhances the chocolaty flavors, making every bite and sip a delightful treat.
- Nut Butter Dip: Combine peanut butter or almond butter with a touch of maple syrup for a delicious dip that echoes the cookie’s flavors.
- Chocolate Sauce: Drizzle melted chocolate or fudge sauce over the top for an indulgent touch and extra chocolatey goodness.
- Coconut Yogurt: This dairy-free option introduces a creamy consistency with a subtle tang, marrying perfectly with the cookies’ sweet chocolate notes.
- Fruity Smoothie: Whip up a smoothie with banana and spinach for a nutritious drink that complements the cookies while satisfying your sweet tooth.
Storage Tips for Chocolate Oat Cookies
Room Temperature: Keep cookies in an airtight container at room temperature for up to 1 week to maintain their delightful texture and flavor.
Fridge: For extra freshness, store your cookies in the fridge in an airtight container for up to 2 weeks. Just let them sit at room temperature for a few minutes before enjoying!
Freezer: Freeze cookies in a single layer on a baking sheet, then transfer to a freezer-safe bag or container for up to 3 months. Thaw at room temperature before serving.
Reheating: To refresh the cookies, warm them in the microwave for 10-15 seconds or place them in a 350°F (175°C) oven for a couple of minutes for that freshly-baked taste!
Chocolate Oat Cookies Recipe FAQs
What type of oats should I use for the cookies?
Absolutely! Use rolled oats for the best texture. If gluten sensitivity is a concern, make sure to choose certified gluten-free oats to avoid any cross-contamination.
How should I store the Chocolate Oat Cookies?
For optimal freshness, store your cookies in an airtight container at room temperature for up to one week. If you want to enjoy them longer, you can refrigerate the cookies for up to two weeks. Just remember to let them come to room temperature before indulging!
Can I freeze Chocolate Oat Cookies?
Yes, you can! To freeze, place the cookies in a single layer on a baking sheet until firm, then transfer them to a freezer-safe bag or container. They will keep well for up to three months. When you’re ready to eat, simply thaw at room temperature or warm them in the microwave for 10-15 seconds for that fresh-baked goodness.
What to do if my cookies spread too much during baking?
If your cookies spread too much, it could be due to using runny peanut butter or not chilling the dough. For best results, refrigerate the dough for about 15 minutes before baking. This helps prevent excessive spreading and keeps your cookies thick and chewy.
Are there any dietary considerations for these cookies?
Very! If you’re making these for someone with nut allergies, you can easily substitute the peanut butter with sunflower seed butter or any other nut-free alternative. Additionally, for a vegan option, ensure that you use dairy-free chocolate chips and maple syrup as your sweetener. Enjoy baking for everyone!
Can I modify the ingredients for different flavors?
Absolutely! You can explore mixes like adding vanilla extract for warmth, or maybe even incorporating dried fruits like cranberries or a pinch of cinnamon. The beauty of this recipe is its versatility; feel free to customize it to your taste!
No Bake Rhubarb Cheesecake Squares for Effortless Sweetness
Ingredients
Equipment
Method
- Prepare the Base: Crush graham crackers, mix with melted butter and salt, and press into the baking dish.
- Make the Creamy Filling: Beat cream cheese and sugar, fold in rhubarb mixture, and pour over the base.
- Chill the Squares: Cover and refrigerate for at least 4 hours until set.
- Slice and Serve: Cut into squares and serve decorated as desired.