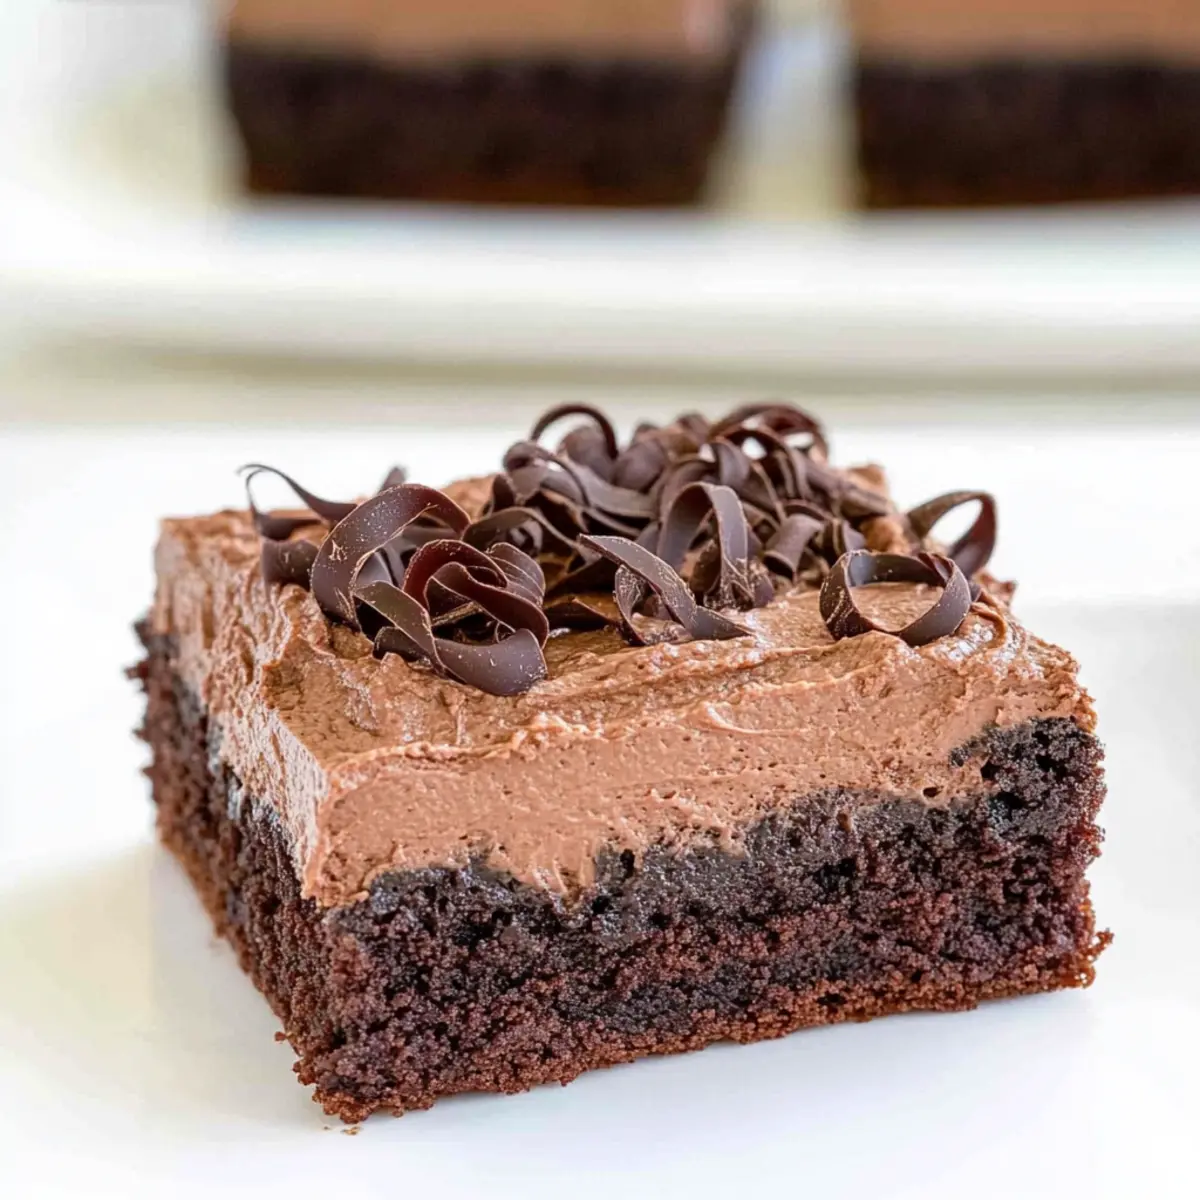
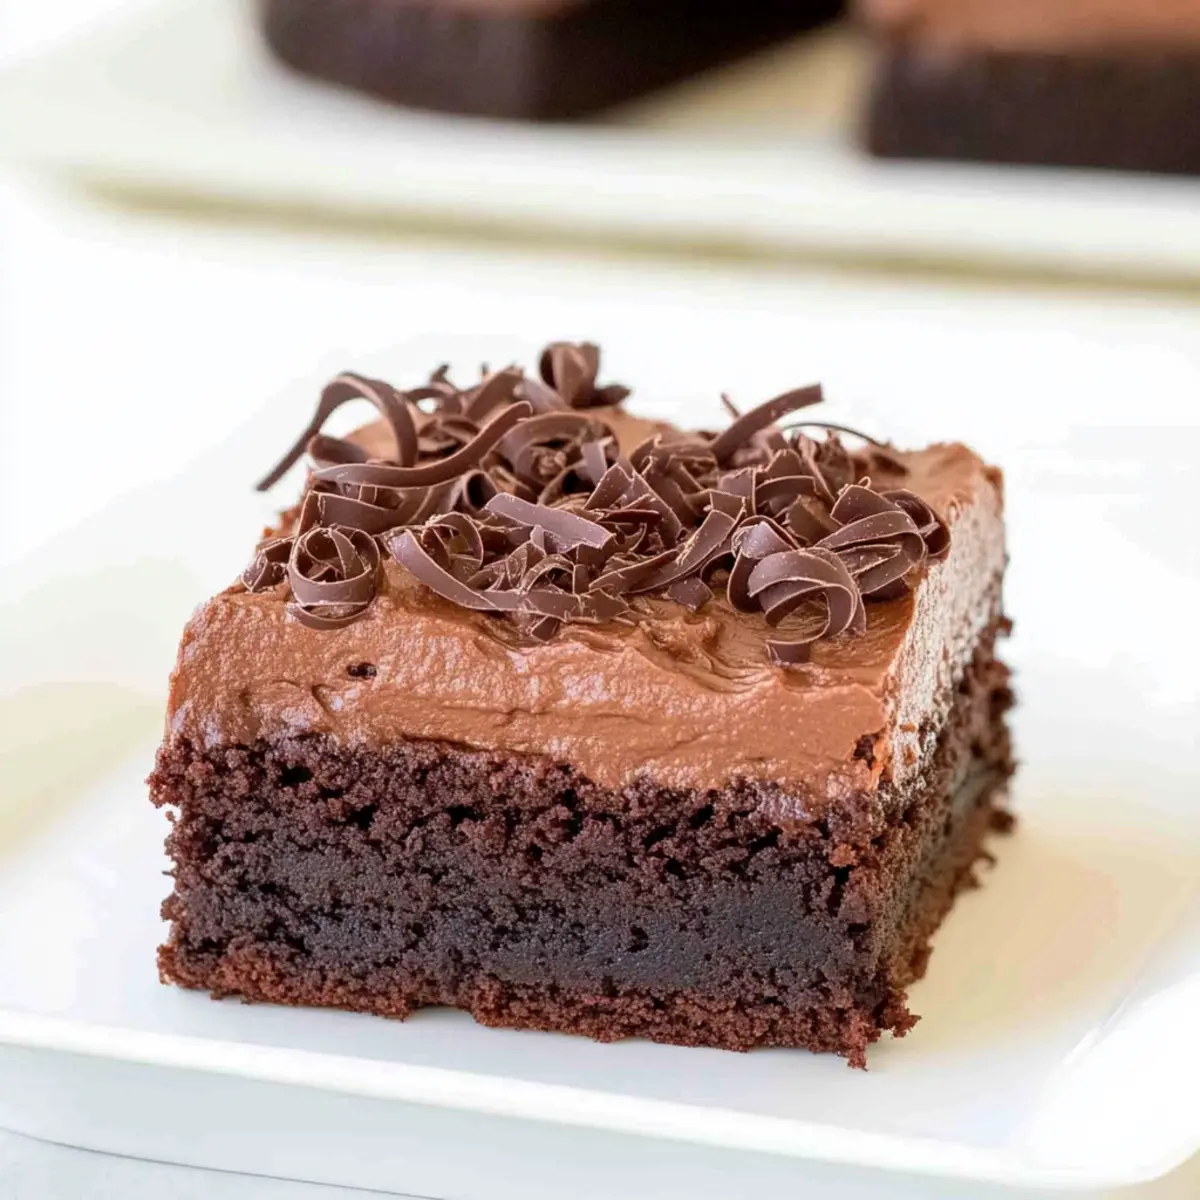
Stepping into my kitchen, the aroma of melting chocolate instantly transports me to my happy place. Today, I’m bringing you a recipe that will elevate your dessert game: Chocolate Mousse Brownies. This indulgent treat marries the classic, fudgy brownie with a silky layer of rich chocolate mousse, creating a heavenly combination that’s surprisingly easy to whip up, even for the intermediate baker. Besides being a spectacular crowd-pleaser, these brownies can be made ahead, perfect for when you’re entertaining or just craving something sweet. So, are you ready to dive into a world of chocolatey bliss that will make every bite a delightful experience?
Why Are These Brownies So Irresistible?
Indulgent flavors that satisfy: These Chocolate Mousse Brownies bring together fudgy richness and creamy mousse for a dessert experience that’s pure bliss. Unique combination of textures: The dense brownie base paired with smooth mousse creates a delightful contrast. Quick prep time means you can enjoy this treat without spending hours in the kitchen! Versatile enough to impress: They work perfectly for dinner parties or a cozy night in. And if you love chocolate, don’t forget to check out my Soft Chewy Chocolate or try a delicious Chocolate Protein Pudding for a sweet, guilt-free snack!
Chocolate Mousse Brownies Ingredients
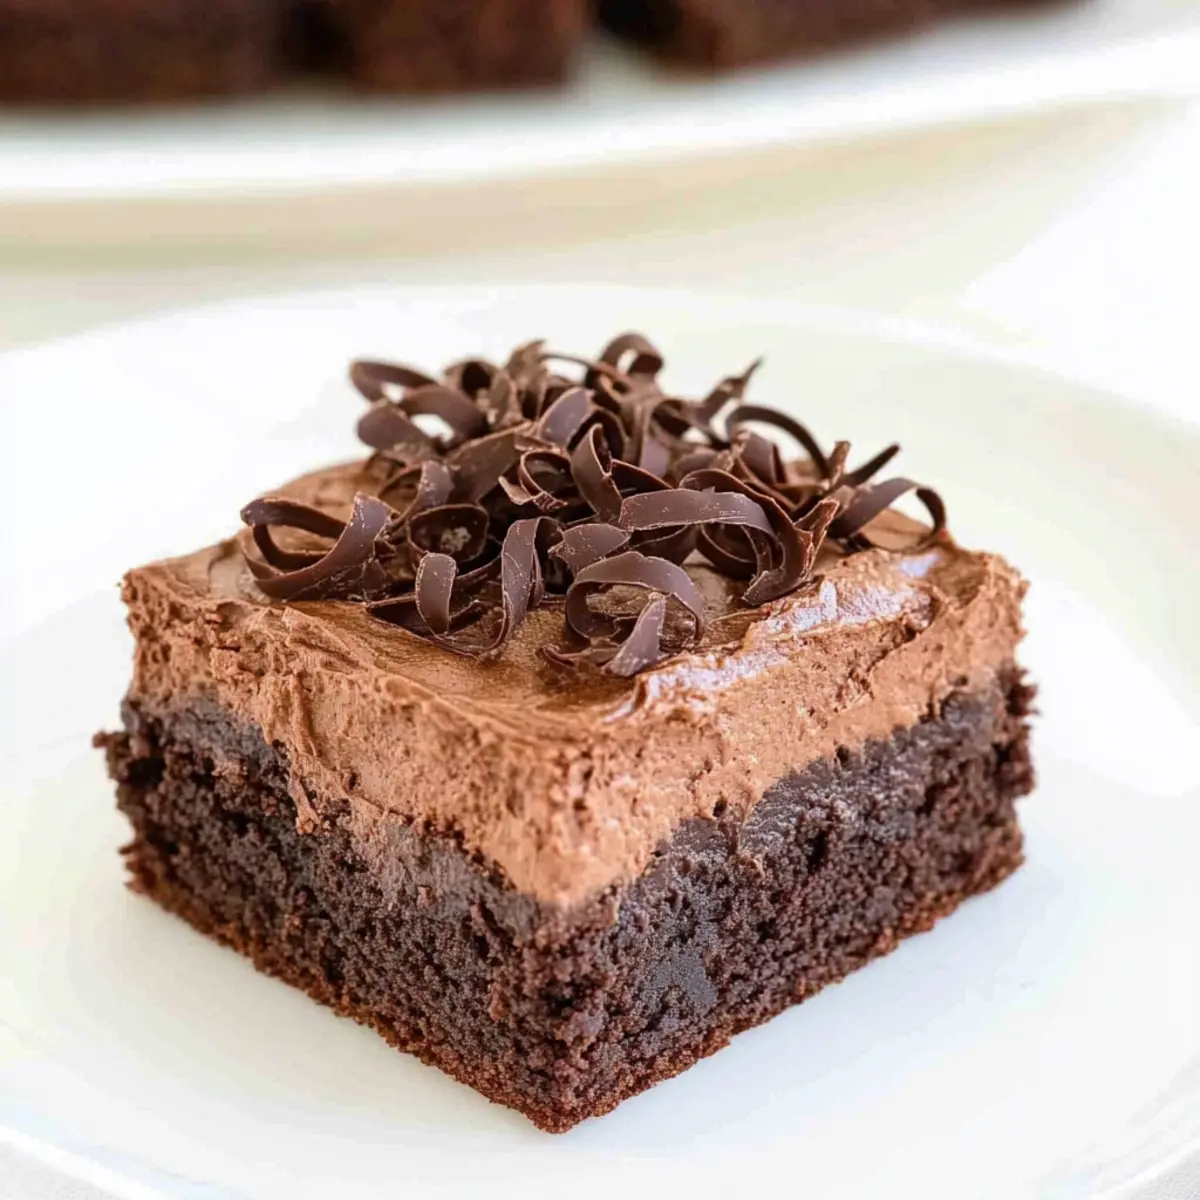
• Create a heavenly dessert experience with these rich Chocolate Mousse Brownies!
-
For the Brownies
-
All-Purpose Flour – Provides structure to the brownies; substitute with gluten-free flour for a gluten-free option.
-
Cornstarch – Adds tenderness and moisture; can be replaced with additional all-purpose flour if necessary.
-
Dutch-Processed Cocoa Powder – Offers a rich, deep chocolate flavor; use unsweetened cocoa as a substitution, though the flavor will differ.
-
Baking Powder – Helps the brownies rise slightly; ensure it is fresh for the best results.
-
Kosher Salt – Enhances flavor; use table salt as a substitute but halve the quantity due to size differences.
-
Large Eggs – Provide moisture, richness, and help with leavening; room temperature eggs are crucial for proper mixing.
-
Granulated Sugar – Sweetens and contributes to moisture and texture; brown sugar can deepen the flavor profile.
-
Unsalted Butter – Gives richness and flavor; for a dairy-free option, use vegan butter.
-
Vanilla Extract – Adds warmth and complexity; use pure vanilla for better flavor as opposed to imitation.
-
For the Chocolate Mousse
-
Heavy Whipping Cream – Essential for the mousse layer’s richness; substitute with non-dairy cream for a dairy-free version if needed.
-
Semi-Sweet Chocolate Chips – Key for flavoring the mousse; choose dark or milk chocolate based on preference.
-
For the Garnish
-
Chocolate Curls – Optional for enhancing presentation; can be replaced with shaved chocolate or cocoa powder for a simpler finish.
Embrace the joy of baking and indulge your senses with these delightful Chocolate Mousse Brownies!
Step‑by‑Step Instructions for Chocolate Mousse Brownies
Step 1: Preheat the Oven
Begin by preheating your oven to 350°F (175°C). While it warms up, line a 9×13-inch baking dish with parchment paper, allowing some overhang for easy removal later. Ensure the parchment is smooth and prevents sticking; this will help create those perfect Chocolate Mousse Brownies.
Step 2: Prepare the Brownie Mixture
In a large mixing bowl, whisk together the all-purpose flour, cornstarch, Dutch-processed cocoa powder, baking powder, and kosher salt. Set aside. In a stand mixer, combine the room temperature eggs, granulated sugar, melted unsalted butter, and vanilla extract. Beat on medium speed until fluffy and smooth, about 3-4 minutes. Gradually add in your dry ingredients until just combined, avoiding overmixing.
Step 3: Bake the Brownies
Pour the rich brownie batter into your prepared baking dish, spreading it evenly. Bake in the preheated oven for 30-35 minutes, checking for doneness when the edges are set but the center still feels slightly moist. Allow the brownies to cool in the pan for about 10 minutes before lifting them out using the parchment paper and letting them cool completely on a wire rack.
Step 4: Make the Chocolate Mousse
While the brownies cool, it’s time to prepare the creamy mousse. In a small saucepan, heat ½ cup of heavy whipping cream over medium heat until it just starts to steam; don’t let it boil. Remove from heat and stir in semi-sweet chocolate chips, mixing until completely melted and smooth. Let the chocolate mixture cool to room temperature.
Step 5: Whip the Cream for Mousse
In a separate mixing bowl, whip the remaining heavy cream to stiff peaks using an electric mixer. This step is crucial for achieving that airy texture. Once the chocolate mixture is cool, gently fold it into the whipped cream until just combined, being careful not to deflate the mousse.
Step 6: Assemble the Dessert
Pour the velvety chocolate mousse over the cooled brownies, spreading it evenly with a spatula. Smooth out the top to create an inviting surface for the mousse. Cover the brownies with plastic wrap and refrigerate for at least 2 hours, allowing the mousse to set and firm up. For the best flavor, consider letting it chill overnight.
Step 7: Optional Garnish
Once the Chocolate Mousse Brownies are well-chilled, you can elevate their presentation. If desired, garnish the top with chocolate curls or shavings for a professional touch. Use a vegetable peeler to create curls from a chocolate bar, or simply sprinkle some cocoa powder for a beautiful finish.
Step 8: Serve and Delight
When ready to serve, slice the brownies into generous squares, revealing the beautiful layers within. Serve chilled, optionally topped with fresh berries for a delightful contrast to the rich chocolate. Enjoy this indulgent treat with family and friends, creating sweet memories together!
Chocolate Mousse Brownies Variations
Feel free to get creative with your Chocolate Mousse Brownies and make them truly yours!
-
Gluten-Free: Substitute all-purpose flour with a gluten-free blend to enjoy this rich dessert without worries.
-
Dairy-Free: Use vegan butter and a non-dairy cream in the mousse to make a deliciously dairy-free version for everyone to savor.
-
Nutty Delight: Fold in chopped nuts like walnuts or pecans into the brownie batter for a crunchy texture that complements the smooth mousse.
-
Flavor Twist: Experiment with citrus zest, like orange or lemon, in the mousse for a refreshing zing that contrasts beautifully with the chocolate.
-
Spicy Kick: For the adventurous, add a pinch of cayenne pepper or cinnamon to the brownie batter for a subtle heat that awakens the palate.
-
Fruit Layer: Consider adding a layer of raspberry or cherry preserves between the brownie and mousse for a delightful tartness that enhances flavors.
-
Different Chocolate: Swap out semi-sweet chocolate chips for dark or milk chocolate based on your preference, creating a custom flavor profile.
-
Peanut Butter Swirl: Drizzle melted peanut butter over the brownie batter before baking for a decadent twist that combines chocolate and nutty goodness.
No matter how you choose to customize, remember that baking is all about joy and experimentation. And if you’re looking for more chocolate delights, check out my scrumptious Soft Chewy Chocolate or the delightful Chocolate Protein Pudding!
Make Ahead Options
These delightful Chocolate Mousse Brownies are perfect for meal prep and can be made in advance to save time on busy days! You can prepare the brownie layer up to 3 days ahead; simply bake and allow them to cool completely before covering them tightly with plastic wrap and storing them in the refrigerator. The mousse can be made up to 24 hours in advance and stored in the fridge as well, which allows the flavors to meld beautifully. When you’re ready to serve, pour the mousse over the brownies, refrigerate for at least 2 hours (or preferably overnight to set), and enjoy the same luscious taste just as if you made them that day!
What to Serve with Chocolate Mousse Brownies
Pairing the rich and creamy Chocolate Mousse Brownies with delightful sides will elevate your dessert experience to new heights!
-
Fresh Berries: The tartness of berries like raspberries or strawberries contrasts beautifully with the rich chocolate, providing a refreshing balance.
-
Vanilla Ice Cream: The creamy texture of vanilla ice cream complements the fudgy brownies while adding a touch of cold to each decadent bite.
-
Espresso or Coffee: The bold flavors of espresso enhance the chocolate and mousse, creating a perfectly indulgent experience for adult gatherings.
Indulging with a glass of chilled milk also pairs wonderfully, contrasting the rich sweetness. This combination makes every bite even more delightful!
-
Chocolate Sauce: A drizzle of warm chocolate sauce not only adds visual appeal but also intensifies the chocolate flavor, perfect for true chocolate lovers.
-
Whipped Cream: A dollop of freshly whipped cream can provide a light texture, making it feel less indulgent and more refreshing.
-
Mint Leaves: A few fresh mint leaves on top offer a delightful aroma and a burst of freshness that cuts through the richness.
Storage Tips for Chocolate Mousse Brownies
-
Fridge: Store your Chocolate Mousse Brownies in an airtight container in the refrigerator for up to 4 days, keeping them moist and fresh for indulgent snacking.
-
Freezer: For longer storage, freeze the brownies wrapped tightly in plastic wrap and then in aluminum foil for up to 2 months. Thaw in the refrigerator before serving for the best texture.
-
Reheating: If you prefer them warm, gently reheat individual pieces in the microwave for about 10-15 seconds, just until warmed through—this enhances the richness!
-
Serving After Storage: Allow chilled brownies to sit at room temperature for a few minutes before serving, as this will bring out the flavors of the chocolate mousse beautifully.
Expert Tips for Chocolate Mousse Brownies
-
Perfect Texture: Ensure the brownie edges are set but the center jiggles slightly. This will give you that rich, fudgy texture we all love.
-
Quality Ingredients: Always use high-quality chocolate for the mousse too, as it directly impacts the flavor. With Chocolate Mousse Brownies, every bite should be heavenly!
-
Gentle Mixing: When folding the whipped cream into the chocolate, be careful not to deflate the mousse. This helps maintain that airy creaminess.
-
Chill Time: Allow the brownies to chill for at least 2 hours, or preferably overnight. This helps the mousse set properly and enhances the flavors.
-
Storage Tips: Keep your Chocolate Mousse Brownies in an airtight container in the fridge for up to 4 days. They’re perfect to make ahead for gatherings!

Chocolate Mousse Brownies Recipe FAQs
How should I select ripe ingredients for the brownies?
Absolutely! When selecting your ingredients, especially for the chocolate mousse brownies, aim for high-quality chocolate. Look for chocolate that has a cocoa content of 60% or higher for rich flavor. Also, ensure your eggs are fresh and at room temperature for proper mixing; this helps create a fluffy brownie texture. Your butter should be softened but not melted, which is key to achieving the perfect consistency in your batter.
What is the best way to store Chocolate Mousse Brownies, and how long do they last?
The more the merrier when it comes to chocolate mousse brownies! Store them in an airtight container in the refrigerator for up to 4 days. This keeps them moist and fresh, making them perfect for late-night cravings. If you’d like to enjoy them later, freezing is also an option—just wrap them tightly in plastic wrap and then in aluminum foil for up to 2 months.
Can I freeze Chocolate Mousse Brownies?
Certainly! To freeze your chocolate mousse brownies, first let them cool completely after preparing. Wrap them securely in plastic wrap, ensuring there are no air pockets, then place them in a freezer-safe bag or container. This way, they will maintain their delicious flavor and texture for up to 2 months. When you’re ready to enjoy, thaw them in the refrigerator overnight for the best results.
What are some common troubleshooting tips for making these brownies?
Very! One common issue is overmixing the brownie batter, which can lead to a dense texture rather than a fudgy one. Mix until just combined. If your brownies turn out too dry, double-check your bake time; they should be set around the edges but a bit moist in the center. Additionally, use high-quality chocolate in both the brownies and the mousse, as this greatly enhances flavor.
Can chocolate mousse brownies be enjoyed by those with dietary restrictions?
Absolutely! For a gluten-free option, simply substitute the all-purpose flour with a gluten-free blend. If you need a dairy-free version, opt for vegan butter and non-dairy cream to create the mousse. For those with nut allergies, ensure that your chocolate and any garnishes are nut-free as well. Always read labels carefully to choose the right ingredients.
What if I don’t have heavy whipping cream for the mousse?
No worries at all! If you’re out of heavy whipping cream, try using full-fat coconut milk as a dairy-free alternative. Refrigerate the can overnight, then scoop out the solid parts for the moussey texture once whipped. It will still yield a deliciously rich chocolate mousse that complements the brownies beautifully!
Irresistible Chocolate Mousse Brownies You Need to Try
Ingredients
Equipment
Method
- Preheat the oven to 350°F (175°C) and line a 9x13-inch baking dish with parchment paper.
- In a large mixing bowl, whisk together the flour, cornstarch, cocoa powder, baking powder, and salt.
- In a stand mixer, combine the eggs, sugar, melted butter, and vanilla extract and beat until fluffy.
- Gradually add the dry ingredients until just combined; avoid overmixing.
- Pour the brownie batter into the prepared baking dish and bake for 30-35 minutes.
- Allow the brownies to cool in the pan for 10 minutes before transferring them to a wire rack.
- In a small saucepan, heat ½ cup of heavy cream over medium heat until steaming.
- Remove from heat and stir in the chocolate chips until melted and smooth.
- Let the chocolate mixture cool to room temperature.
- Whip the remaining cream to stiff peaks and gently fold it into the chocolate mixture.
- Pour the mousse over the cooled brownies and smooth the top.
- Cover with plastic wrap and refrigerate for at least 2 hours, preferably overnight.
- Optionally garnish the mousse with chocolate curls before serving.
- Slice the brownies and serve chilled.