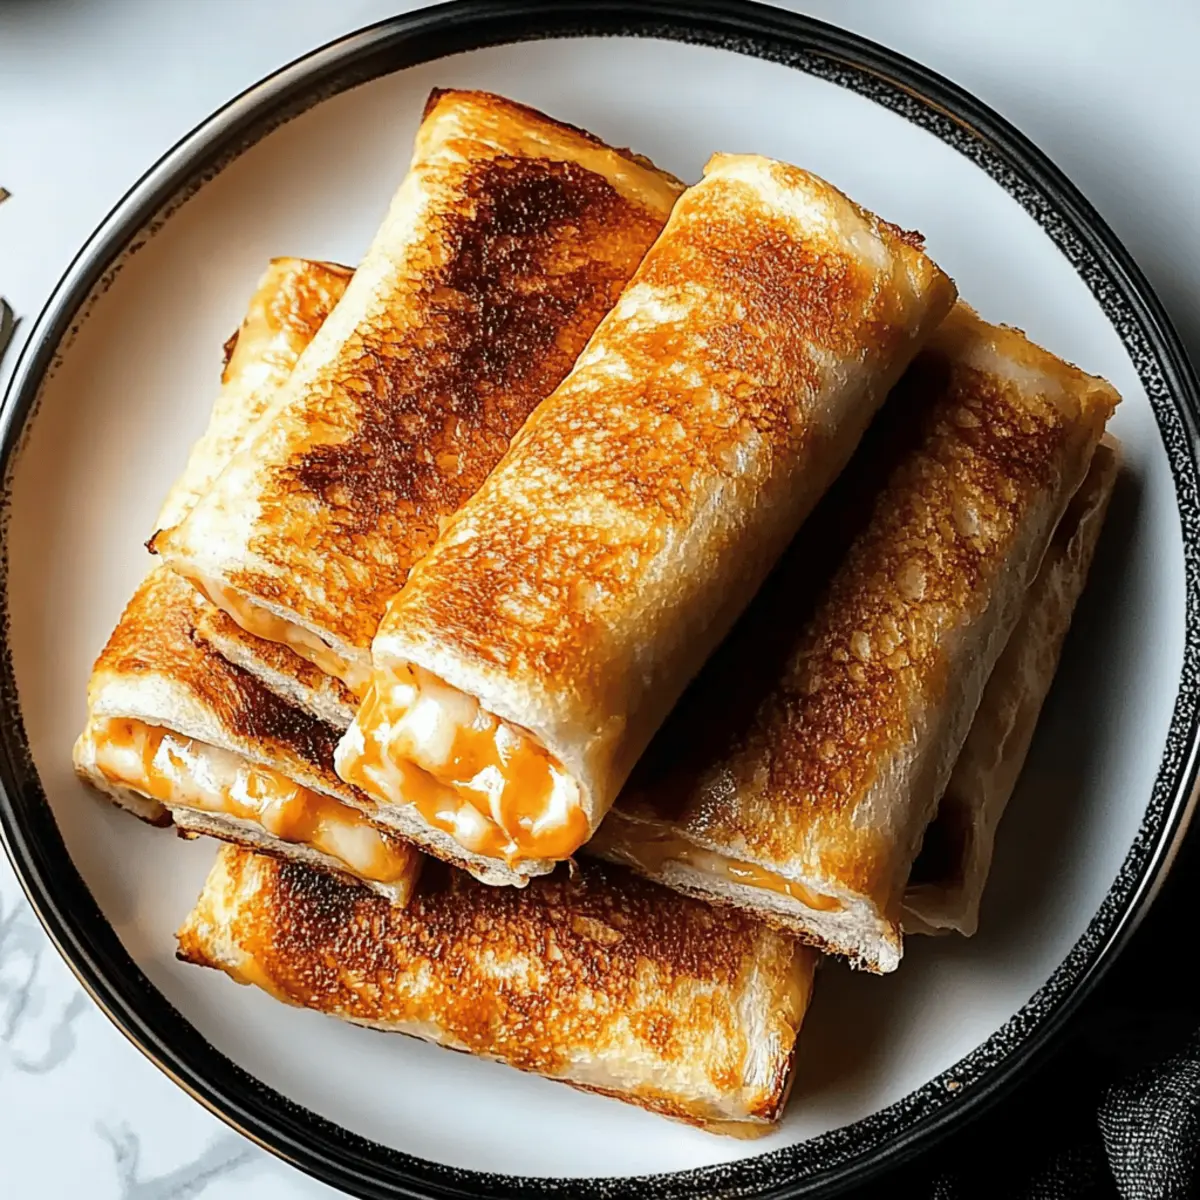
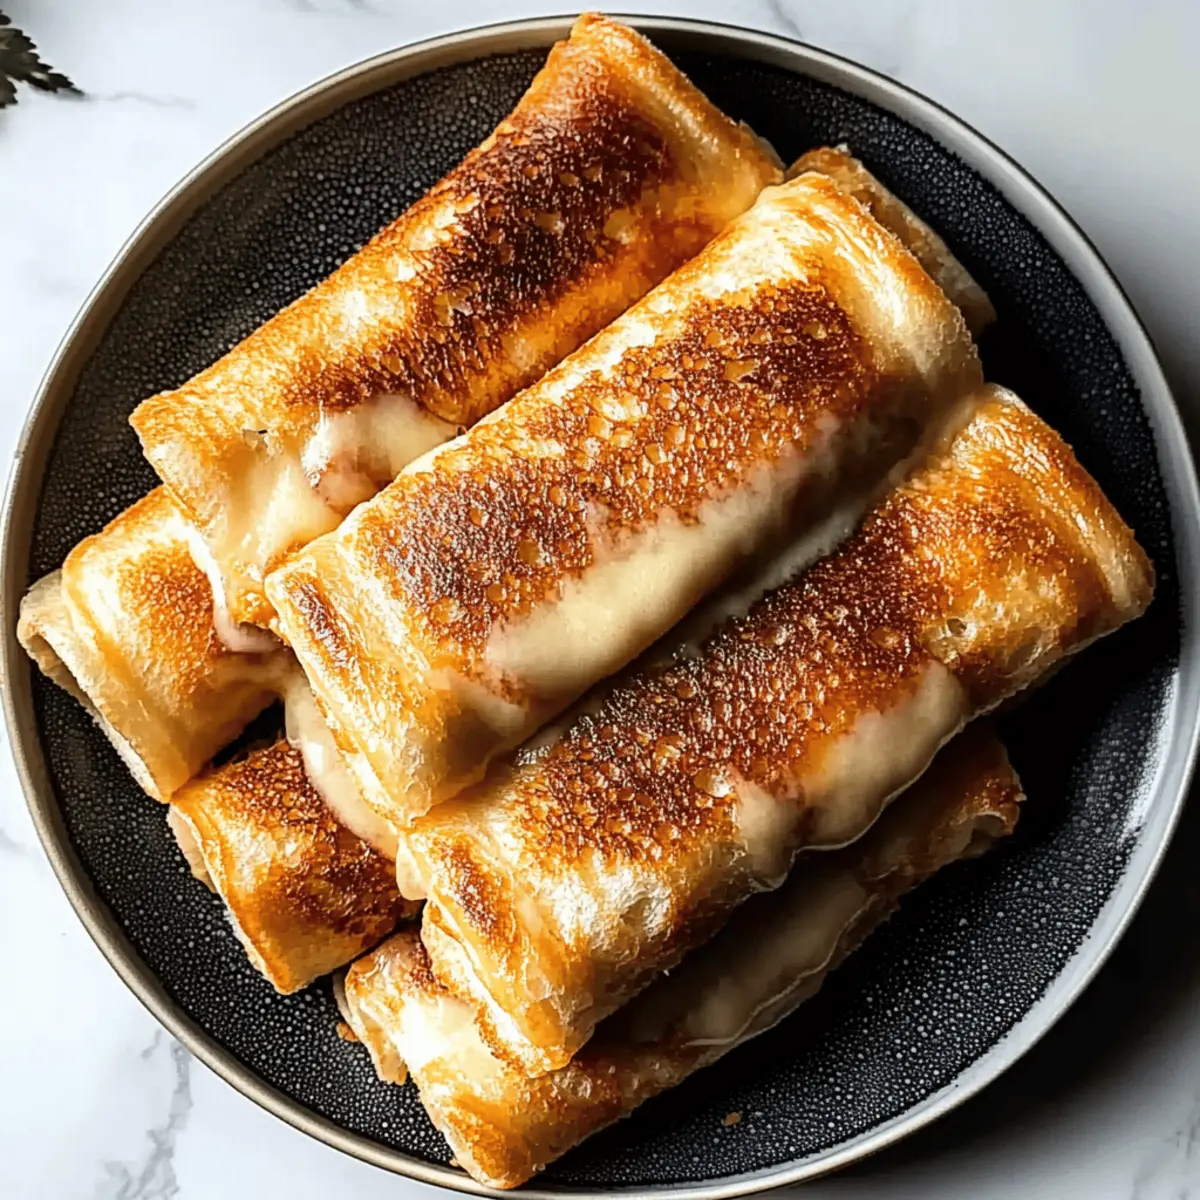
As I watched my toddler struggle with traditional sandwiches, a lightbulb went off: Grilled Cheese Roll-Ups could be the answer to our lunchtime dilemma! These playful, cheesy delights transform the classic grilled cheese into an exciting and easily manageable treat for little hands. Not only do they come together in less than 10 minutes, but they’re also completely customizable—perfect for both picky eaters and busy parents looking for quick, nutritious options. Whether paired with fruit or dipped into marinara, these roll-ups make lunchtime feel like a cozy adventure. Ready to roll up some cheesy goodness and watch your kids devour them? Let’s dive into this fun recipe!
Why Are Grilled Cheese Roll-Ups a Hit?
Quick, As busy parents, we appreciate meals that come together in under 10 minutes without compromising on flavor.
Customizable, Tailor these roll-ups to your toddler’s taste—add ham, turkey, or even veggies for a nutrition boost.
Easy to Hold, The rolled format makes them perfect for tiny hands, ensuring a mess-free eating experience.
Gooey Goodness, With a crispy exterior and melted cheese interior, these delightful bites bring comfort to snack time.
Perfect for Any Occasion, Whether it’s a quick lunch or an after-school snack, these roll-ups will have your kids cheering for more! Try serving them with a side of fruit or some homemade dipping sauces like marinara to elevate the fun. If you’re looking for other easy-to-make dishes, check out Grilled Chicken Broccoli or Stuffed Chicken Cheese for even more family-friendly options.
Grilled Cheese Roll-Ups Ingredients
For the Roll-Ups
• Bread – Choose standard or gluten-free, depending on your dietary needs for ultimate enjoyment.
• Shredded Cheese – For the best melt and flavor, opt for mozzarella or cheddar, as these are ideal for Grilled Cheese Roll-Ups.
• Butter – This adds a rich taste and helps achieve that perfect golden-brown crust; olive oil is a healthier substitute if desired.
Optional Fillings
• Deli Meat – Whether turkey or ham, these add protein and flavor that can appeal to even the pickiest of eaters.
• Veggies – Small pieces of bell pepper, spinach, or even shredded carrots can boost nutrition without the fuss.
Step‑by‑Step Instructions for Grilled Cheese Roll-Ups
Step 1: Prepare the Bread
Begin by removing the crusts from your slices of bread to make them easier for toddlers to manage. Lay the slices on a clean surface and use a rolling pin to flatten them to about 1/4 inch thick, creating a uniform texture that will hold the filling well. This step is crucial as it prevents tearing during rolling.
Step 2: Add the Cheese
Sprinkle a generous amount of shredded cheese—mozzarella or cheddar work beautifully—over each flattened slice of bread. If you’d like to increase the flavor and nutrition profile, consider adding optional fillings like tiny pieces of turkey or diced veggies atop the cheese. Distribute the toppings evenly, ensuring every bite is filled with cheesy goodness.
Step 3: Roll Them Up
Starting from one end, roll each slice of bread tightly to enclose the cheese and any fillings, securing the ingredients inside. If desired, use a toothpick to hold the roll-up together, which will help during cooking. Aim for a tight roll without applying too much pressure that may cause the bread to tear.
Step 4: Heat the Skillet
Place a non-stick skillet over medium heat and add a pat of butter, allowing it to melt and coat the bottom of the pan. Wait until the butter begins to bubble and turn golden; this indicates that the skillet is at the right temperature for cooking your Grilled Cheese Roll-Ups.
Step 5: Cook the Roll-Ups
Carefully place the roll-ups in the hot skillet, ensuring they are spaced apart to promote even cooking. Cook them for about 2-3 minutes on each side until they develop a rich golden color and the cheese inside has melted beautifully. Keep an eye on them to avoid burning and rotate them as needed for uniform crispiness.
Step 6: Slice and Serve
Once cooked, remove the roll-ups from the skillet and let them cool for a minute on a paper towel. Then, slice each roll-up into bite-sized pieces suitable for little hands to grasp easily. Serve your Grilled Cheese Roll-Ups with fresh fruits, veggie sticks, or a tasty dipping sauce like marinara for a delightful snack.
What to Serve with Grilled Cheese Roll-Ups?
Create a delightful meal by pairing these cheesy treats with fresh, vibrant sides and dipping sauces.
-
Tomato Soup: A classic accompaniment, the tangy warmth of tomato soup beautifully balances the cheesy richness of the roll-ups.
-
Fresh Fruit Salad: Bright, juicy fruits add a refreshing contrast, making every bite feel light and cheerful. Consider using seasonal fruits for extra vibrancy!
-
Carrot and Cucumber Sticks: Crisp, crunchy vegetables not only add a nutritious element but provide a satisfying texture pairing to your cheesy bites.
-
Marinara Sauce: Offering a zesty dip option, marinara sauce amplifies the fun for little ones as they dunk their roll-ups into something delicious.
-
Greek Yogurt Dip: Creamy and tangy, this dip can be flavored with herbs, adding a cool aspect that complements the roll-ups perfectly.
-
Sweet Potato Fries: Crispy and slightly sweet, these fries align wonderfully with the cheesy flavor, serving up a hearty side that kids will love.
-
Apple Slices with Peanut Butter: A protein-packed fruit option, the sweet and salty combination provides a great flavor and texture contrast to the roll-ups.
Expert Tips for Grilled Cheese Roll-Ups
Flatten Bread Well: Ensure each bread slice is flattened adequately to avoid tearing during rolling—this creates a better texture and easier handling for toddlers.
Use Quality Cheese: Opt for fresh mozzarella or sharp cheddar for the cheesiest melt, which enhances the flavor of your Grilled Cheese Roll-Ups.
Monitor Heat: Cook on medium heat to prevent burning. If the roll-ups are browning too quickly, reduce the temperature for a more even cook.
Secure with Toothpicks: If your roll-ups are struggling to hold their shape, use toothpicks to keep them together during cooking. Just remember to remove them before serving!
Experiment with Fillings: Don’t hesitate to get creative! Add thinly sliced veggies, deli meats, or even a sprinkle of spices to customize the flavor and nutrition of your roll-ups.
Grilled Cheese Roll-Ups Variations & Substitutions
Feel free to get creative and make these Grilled Cheese Roll-Ups uniquely yours with fun twists and swaps!
-
Dairy-Free Option: Substitute shredded cheese with your favorite plant-based cheese for a delicious dairy-free treat.
Adding a nutty or smoky flavor can make all the difference in elevating their taste! -
Extra Cheesy: Layer in additional cheese varieties like pepper jack or gouda for more flavor.
Mixing cheeses can create a melty masterpiece that will have everyone asking for seconds! -
Herb-Infused Butter: Brush the bread with melted butter mixed with garlic powder or fresh herbs like basil for added aroma.
This little enhancement will send your taste buds soaring, turning the ordinary into extraordinary! -
Veggie Boost: Sneak in some finely chopped spinach or shredded zucchini to your cheese for a nutritional punch.
Kids often won’t even notice those extra greens, but you’ll feel good knowing they’re there! -
Meat Lovers: Include thinly sliced pepperoni or deli meats like turkey or ham for a heartier snack.
Changing the filling can transform these roll-ups into a protein-packed delight, satisfying even the hungriest of toddlers. -
Sweet Twist: Drizzle honey or maple syrup over hot roll-ups for a sweet touch that pairs wonderfully with the cheese.
Pairing sweet and savory opens up a world of flavor that kids will love to explore! -
Spicy Kick: Add jalapeños or a touch of hot sauce to the cheese for those who enjoy a bit of heat.
It’s a perfect way for parents to customize their portion, balancing flavors just right. -
Different Breads: Experiment with whole grain, sourdough, or even tortilla wraps for a different texture and taste.
Using different types of bread can create a whole new experience, keeping snack time exciting!
No matter how you choose to customize, these Grilled Cheese Roll-Ups will become a delicious staple for snack time. And if you’re looking for other quick and creative ideas, be sure to check out Garlic Parmesan Cheeseburger or Grilled Texas Roadhouse for more family-friendly options.
How to Store and Freeze Grilled Cheese Roll-Ups
Fridge: Store leftover Grilled Cheese Roll-Ups in an airtight container for up to 3 days; reheat in a microwave for about 30-60 seconds or in a skillet over low heat until warmed through.
Freezer: These yummy roll-ups can be frozen for up to 1 month. Place them in a single layer on a baking sheet to freeze solid, then transfer to an airtight bag. Thaw before reheating in a skillet.
Reheating: For best results, reheat frozen roll-ups in a skillet over medium heat, cooking until golden brown on all sides and the cheese is melted again.
Make Ahead Options
These Grilled Cheese Roll-Ups are perfect for meal prep enthusiasts looking to save time on busy weekdays! You can prepare the roll-ups and keep them wrapped tightly in plastic wrap in the fridge for up to 24 hours before cooking. Simply follow the assembly instructions, including rolling with cheese and optional fillings, then refrigerate. When you’re ready to serve, just heat your skillet, add some butter, and cook the roll-ups for about 2-3 minutes on each side until golden and gooey. For longer storage, you can freeze the assembled roll-ups for up to 1 month; simply thaw before cooking. This way, you’ll always have a quick, delicious snack ready to go!
Grilled Cheese Roll-Ups Recipe FAQs
How do I choose the right bread for Grilled Cheese Roll-Ups?
Absolutely! For the best results, select bread that is soft enough to flatten easily without tearing. Standard white or whole wheat bread works well, but if you need a gluten-free option, look for gluten-free bread that has a good texture. Remember, the fresher the bread, the better it will taste and roll!
How should I store leftover roll-ups?
Very! Store any leftover Grilled Cheese Roll-Ups in an airtight container in the fridge for up to 3 days. To reheat, simply pop them in the microwave for 30-60 seconds or place them back in a skillet over low heat until warmed through. This keeps them nice and crispy!
Can I freeze Grilled Cheese Roll-Ups?
Absolutely! You can freeze these delicious roll-ups for up to 1 month. To do this, lay them in a single layer on a baking sheet and freeze until solid. Then, transfer them to an airtight freezer bag. When you’re ready to enjoy them, thaw inside the fridge overnight and then reheat in a skillet until golden brown.
What if the bread tears while rolling?
No worries! If your bread tears during rolling, it might be because it wasn’t flattened enough or was too dry. Make sure to use fresh bread and flatten it to about 1/4 inch thick. If the bread still tears, patch it with a little bit of cheese, as this will help hold it together during cooking.
Are Grilled Cheese Roll-Ups safe for toddlers with allergies?
Very! Always check for any allergens based on your toddler’s dietary restrictions. Common allergens include dairy and gluten, but you can easily modify the recipe by using dairy-free cheese and gluten-free bread. Always read labels when choosing packaged ingredients, and if unsure, consult with a healthcare provider about specific allergies.
Can I customize the fillings in my Grilled Cheese Roll-Ups?
Absolutely! These roll-ups are highly customizable! You can add small pieces of deli meats like turkey or ham, or finely diced veggies like bell peppers or spinach. Just be sure any fillings you add complement the melted cheese and maintain the roll-up structure. The more the merrier!
Grilled Cheese Roll-Ups: A Cheesy Delight for Any Snack Time
Ingredients
Equipment
Method
- Prepare the Bread: Remove the crusts and flatten slices of bread to about 1/4 inch thick using a rolling pin.
- Add the Cheese: Sprinkle shredded cheese over each flattened slice, and add any optional fillings if desired.
- Roll Them Up: Roll each slice tightly to enclose the cheese and fillings, securing with toothpicks if needed.
- Heat the Skillet: Melt butter in a non-stick skillet over medium heat until bubbling and golden.
- Cook the Roll-Ups: Place roll-ups in the skillet and cook for 2-3 minutes on each side until golden brown and cheese is melted.
- Slice and Serve: Cool slightly, slice into bite-sized pieces, and serve with fruits or dipping sauces.