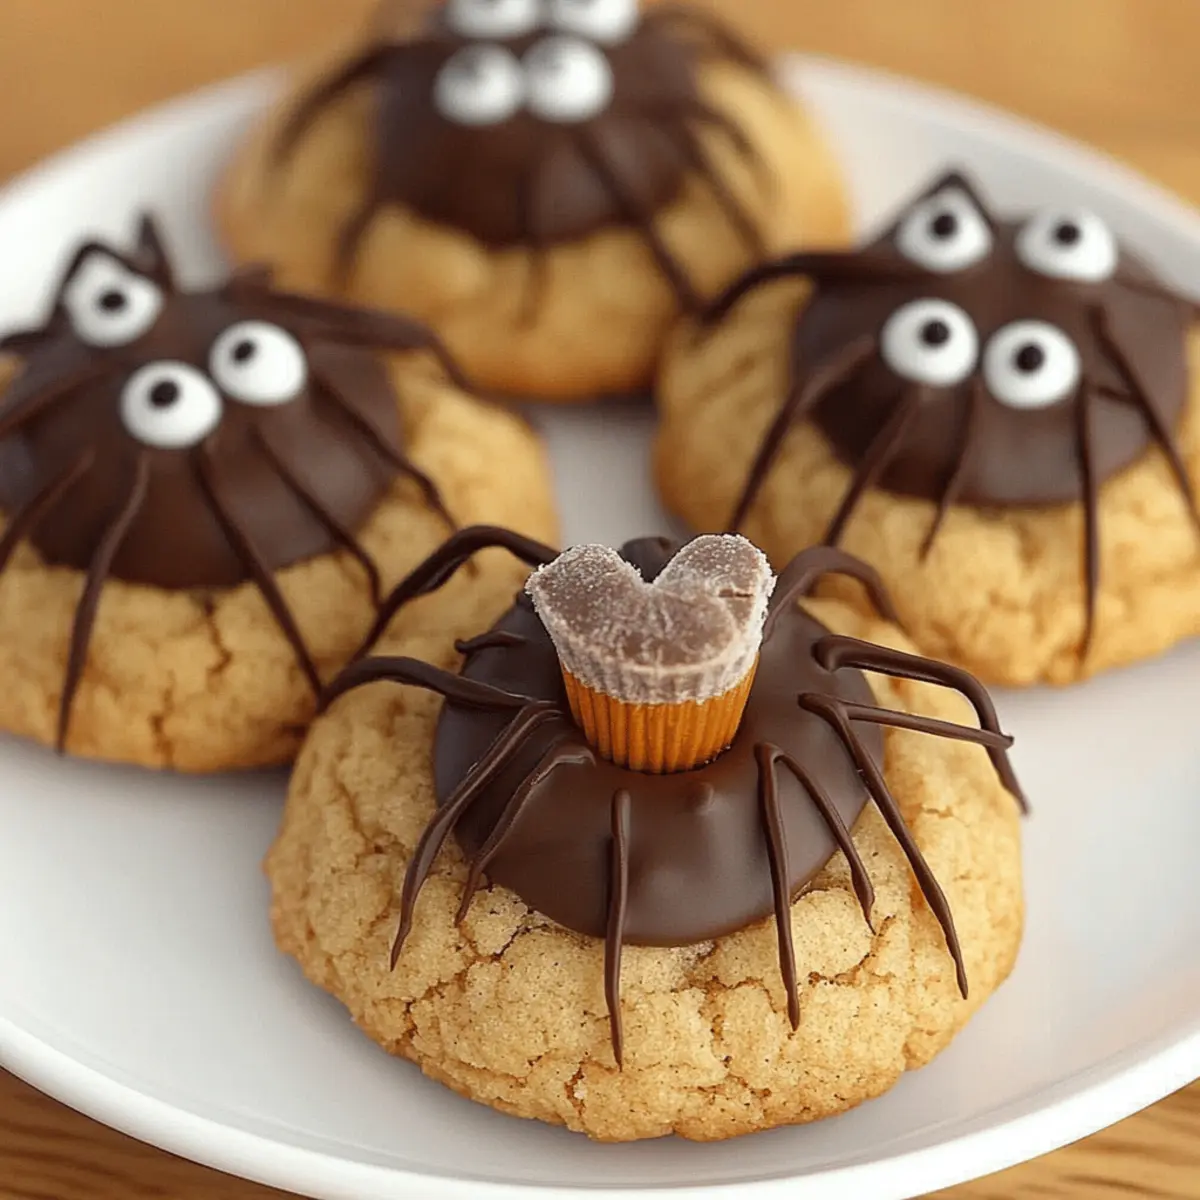
As I sifted through spooky Halloween inspiration, I stumbled upon a delightful idea that wonderfully combines whimsy and mouthwatering taste: Peanut Butter Spider Cookies. These adorable treats are just as fun to make as they are to devour, featuring a heavenly blend of creamy peanut butter and sweet chocolate. Perfect for Halloween parties or a playful twist on school lunches, these cookies promise to be a crowd-pleaser for kids and adults alike. They’re not only striking in appearance but also quick to whip up, making them an irresistible choice for busy home chefs. Who wouldn’t want to impress their guests with these amusing, spidery goodies? Ready to get your baking apron on and create some Halloween magic?
Why Bake Peanut Butter Spider Cookies?
Fun and Festive: These cookies bring your Halloween spirit to life with a delightful spider design that kids will adore.
Yummy Flavor Combo: The rich peanut butter paired with sweet chocolate creates a mouthwatering treat that’s hard to resist.
Quick and Easy: Whip them up in just one hour, making them a stress-free addition to your Halloween plans!
Perfect for Sharing: Their unique look will make your cookies the centerpiece of any Halloween gathering, sure to impress guests of all ages.
Versatile Twists: Feel free to swap in almond butter or decorate with mini marshmallows for an added spooky touch!
For more festive ideas, check out my Garlic Butter Chicken or Soft Chewy Chocolate Chip Cookies to complement your Halloween spread!
Peanut Butter Spider Cookies Ingredients
For the Cookie Base
• Shortening – Provides a tender and moist texture; butter can be substituted but may alter the consistency.
• Peanut Butter – Essential for flavor; smooth or chunky can be used based on preference.
• Brown Sugar – Adds moisture and deeper sweetness; no direct substitute recommended for best flavor.
• Granulated Sugar – Brings sweetness and aids in spreading; coconut sugar works as a lower glycemic option.
• Egg – Binds ingredients and helps the cookie rise; no vegan substitute is recommended for this recipe.
• Milk – Ensures moisture and smooth blending of dry ingredients; soy milk can be used for dairy-free options.
• Vanilla Extract – Enhances flavor; opt for pure vanilla for the best taste.
• All-Purpose Flour – Provides structure; ensuring accurate measurement is key to avoid crumbling.
• Baking Soda – Essential for leavening; ensure freshness for proper rise.
• Salt – Balances sweetness and enhances overall flavor.
For Decoration
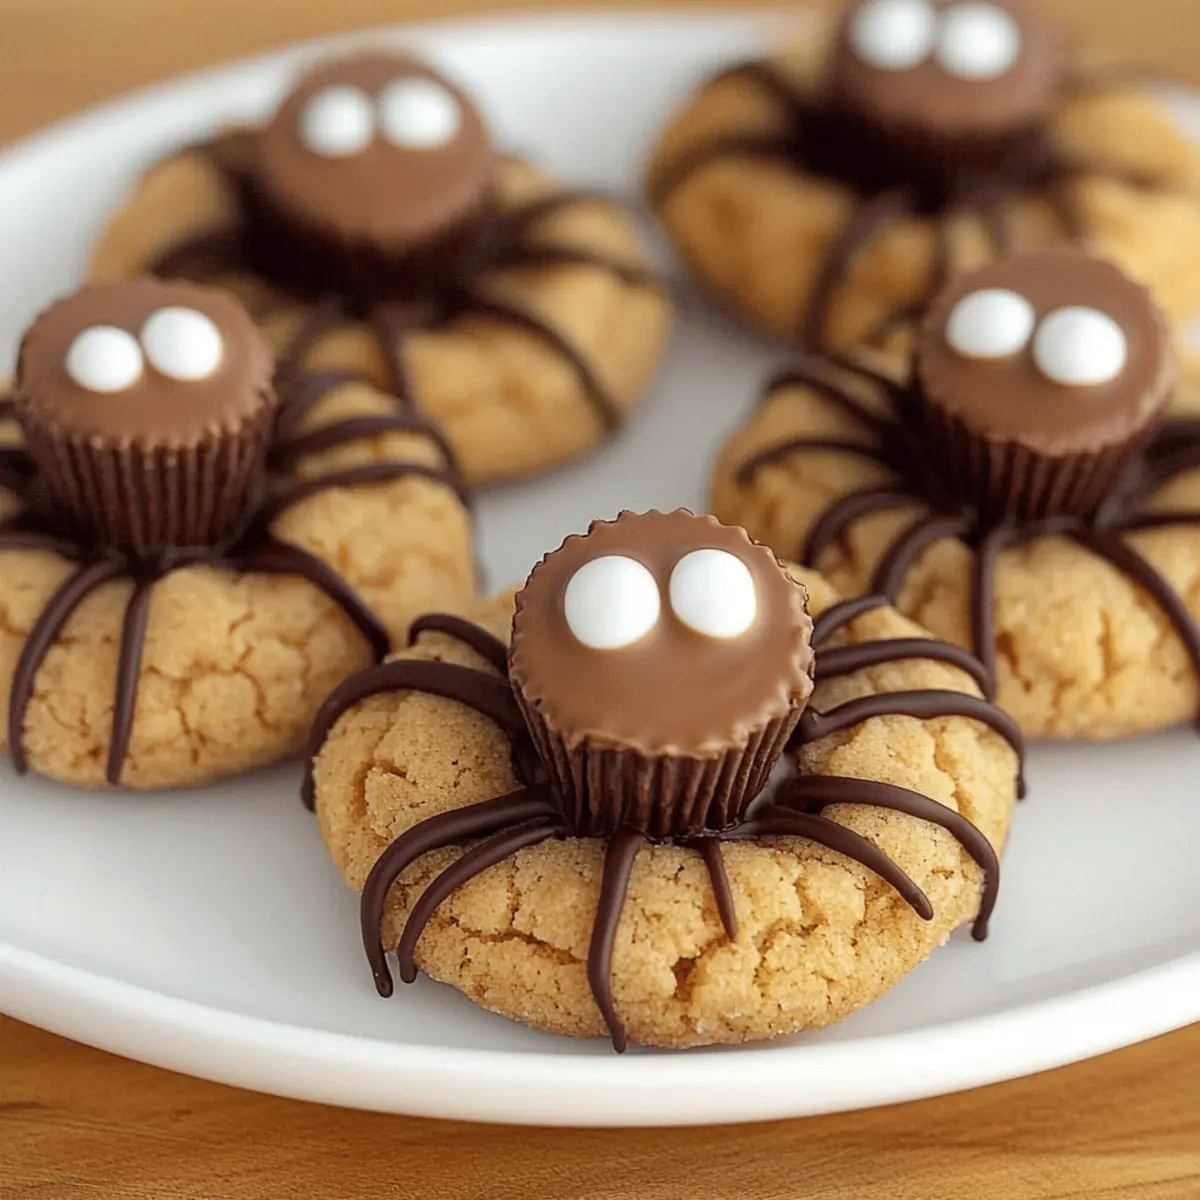
• Miniature Reese’s Cups – Act as the spider body; be sure to freeze them beforehand to maintain shape.
• Candy Eyes – Crucial for a spooky look; can be found in most grocery stores.
• Chocolate Chips – Used for piping spider legs; or consider chocolate melts for easier handling.
• Granulated Sugar (for rolling) – Adds sweetness and texture to the cookie surface.
These Peanut Butter Spider Cookies are not just treats; they’re a whimsical Halloween creation that will enchant family and friends!
Step‑by‑Step Instructions for Peanut Butter Spider Cookies
Step 1: Preheat the Oven
Start by preheating your oven to 375°F (190°C). This ensures that your Peanut Butter Spider Cookies bake perfectly from the start. While the oven heats, line a cookie sheet with parchment paper or leave it ungreased. This will prepare your workspace for the delicious cookies that are about to come.
Step 2: Mix Wet Ingredients
In a large mixing bowl, combine shortening, peanut butter, brown sugar, granulated sugar, egg, vanilla extract, and milk. Beat these ingredients together using an electric mixer on medium speed for about 2-3 minutes until the mixture is smooth and creamy. The combination of these ingredients creates a lovely, rich batter that will form the base of your cookies.
Step 3: Blend Dry Ingredients
In a separate bowl, whisk together all-purpose flour, baking soda, and salt until well combined. This step is key to ensuring your dry ingredients are evenly distributed throughout the dough, giving your Peanut Butter Spider Cookies a consistent texture. Be sure to break up any clumps in the flour for the best results!
Step 4: Combine Mixtures
Gradually add the dry ingredient mixture to the wet ingredients, mixing on low speed until just combined. Avoid over-mixing, as this can make the cookies tough. You want your dough to be soft and slightly sticky, ready for shaping. This is the moment when the wonderful peanut butter aroma begins to fill your kitchen!
Step 5: Shape the Dough
Using a tablespoon or cookie scoop, form the dough into 1-inch balls and roll them in granulated sugar until fully coated. Arrange the sugar-coated dough balls on the prepared cookie sheet, leaving about 2 inches of space between each one. This spacing allows the Peanut Butter Spider Cookies to spread while baking, turning them into perfectly chewy treats.
Step 6: Bake the Cookies
Place the cookie sheet in the preheated oven and bake for 10-12 minutes. Keep an eye on them; they should be golden around the edges but still soft in the center. Once baked, remove the sheet from the oven and allow the cookies to cool for a minute before proceeding to the next step.
Step 7: Add the Spider Bodies
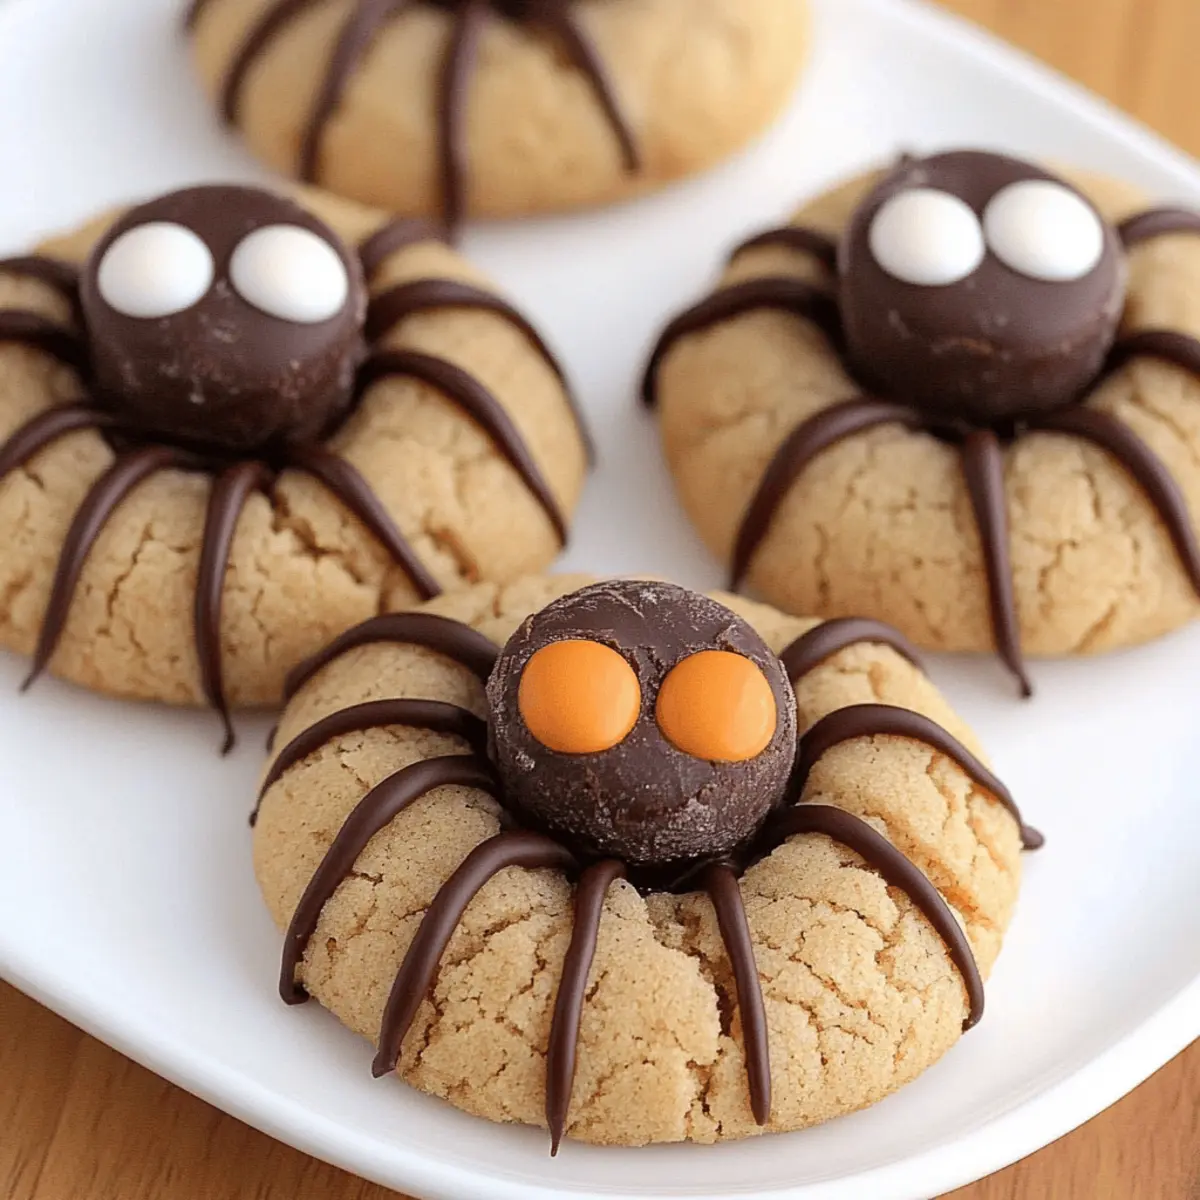
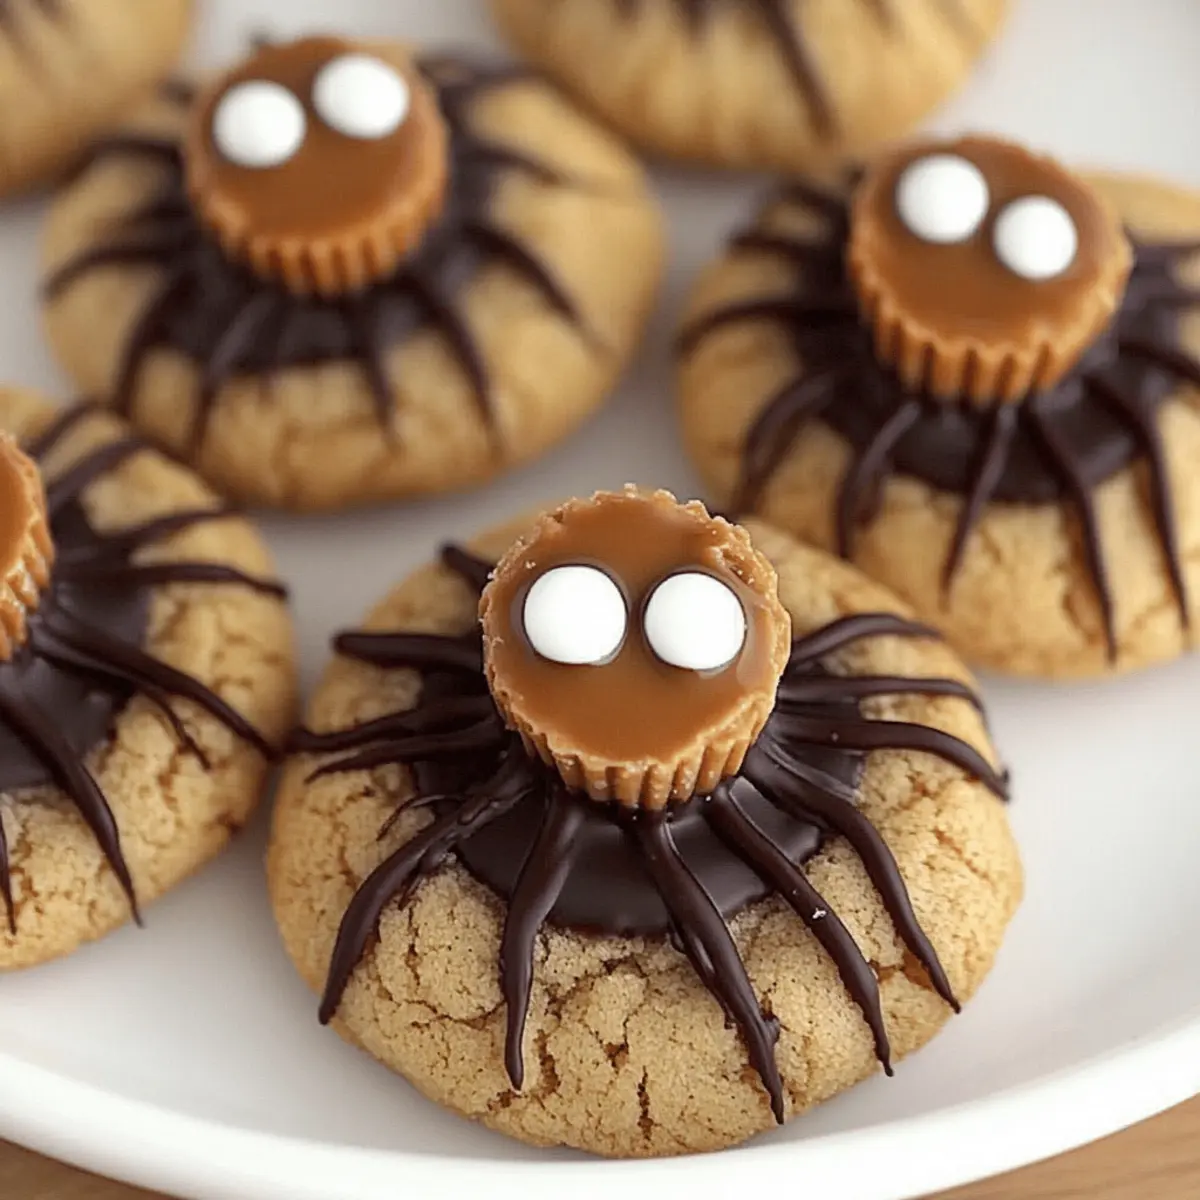
Quickly press a frozen miniature Reese’s Cup into the center of each cookie while they are still warm. The heat will slightly melt the candy, helping it adhere nicely to the cookie. This adorable addition serves as the spider body, making your Peanut Butter Spider Cookies come to life with Halloween spirit!
Step 8: Place the Candy Eyes
While the chocolate is still soft, gently place two candy eyes on each Reese’s Cup for the final touch. Position them to create a fun and spooky look. This step adds personality to your Peanut Butter Spider Cookies and will surely delight anyone seeing them!
Step 9: Chill the Cookies
Transfer the cookies to a wire rack to cool completely. To help set the candy and chocolate, chill the cookies in the refrigerator for about 10 minutes. This quick cooling period not only firms up the decorations but also enhances the overall texture, making each bite even more enjoyable.
Step 10: Pipe the Spider Legs
Melt chocolate chips in a zippered bag placed in warm water or, alternatively, in the microwave in short bursts. Cut a small corner of the bag and carefully pipe spider legs extending from each Reese’s Cup. This step adds an extra touch of creativity and spookiness to your Peanut Butter Spider Cookies, creating the perfect Halloween treat.
Step 11: Final Chill
Once you’ve piped all the legs, return the cookies to the refrigerator for another 10 minutes to allow the chocolate to set properly. This final chill ensures that your adorable Peanut Butter Spider Cookies hold their shape and look fantastic when served—perfect for sharing at any Halloween gathering!
How to Store and Freeze Peanut Butter Spider Cookies
Room Temperature: Store cookies in an airtight container at room temperature for up to 1 week to maintain their chewy texture and fresh taste.
Fridge: If you prefer firmer cookies, keep them in the refrigerator for up to 2 weeks. Just remember they might lose some softness.
Freezer: For longer storage, freeze unbaked cookie dough balls in a single layer on a baking sheet. Once solid, transfer to a freezer bag for up to 3 months for quick baking later.
Reheating: To enjoy cookies warm, simply reheat in the microwave for 10-15 seconds. Perfect for a delightful after-school treat!
Make Ahead Options
These Peanut Butter Spider Cookies are a fantastic choice for meal prep, allowing you to save time during the festive season! You can prepare the cookie dough up to 24 hours in advance; simply shape the dough into 1-inch balls, roll them in sugar, and store them in an airtight container in the refrigerator. This will keep your dough fresh and ready to bake whenever you need a spooky treat. When you’re ready to bake, follow the usual baking steps, including pressing the frozen Reese’s Cups into the cookies right after they come out of the oven. This way, you’ll enjoy warm, freshly baked cookies with all the delightful decorations, just as delicious as if they were made on the spot!
Peanut Butter Spider Cookies Variations
Feel free to let your creativity shine and personalize your spooky treats to delight everyone at your Halloween gathering!
-
Nut-Free: Swap peanut butter with sunflower seed butter for a fun, nut-free alternative that maintains the creamy consistency.
-
Marshmallow Spiders: Replace candy eyes with mini marshmallows for a fluffy twist. These sweet little marshmallow spiders will add a whimsical touch to your cookies.
-
Add Crunch: Stir in crushed pretzels or toffee bits into the dough for added crunch. This unexpected texture contrast takes the cookies to another level of deliciousness.
-
Pumpkin Spice Twist: Mix in pumpkin spice with the dry ingredients to add a warm autumn flavor. It’s a subtle change that whispers fall!
-
Chocolate Overload: Drizzle melted chocolate over the baked cookies for extra sweetness and rich texture. Don’t worry; more chocolate is always welcome!
-
Spooky Colors: Use colored chocolate melts for the spider legs and candy eyes. Bright colors will make your Peanut Butter Spider Cookies pop with festive flair.
-
Heat It Up: For a spicy kick, add a pinch of cayenne pepper to the dough. This unexpected twist adds a fun challenge to those who dare to try!
-
Decorate Differently: Instead of Reese’s Cups, try using chocolate-covered almonds or hazelnuts as the spider bodies for a tasty variation.
For more Halloween inspiration, check out my delightful Garlic Butter Chicken or perhaps some Soft Chewy Chocolate Chip Cookies to complement your spooky treats!
What to Serve with Halloween Peanut Butter Spider Cookies?
Indulge in a spooky Halloween feast that pairs deliciously with these cute and charming cookies.
- Chilled Milk: The classic pairing adds a creamy, refreshing balance to the rich peanut butter cookies, enhancing every bite.
- Pumpkin Pie: A slice of this autumn staple brings warmth and beloved flavors of fall into your Halloween celebration, creating a cozy dessert table.
- Caramel Apple Slices: The sweet, tangy crunch perfectly complements the soft and chewy cookies, making every nibble a delightful experience.
- Whipped Cream: Light and fluffy, a dollop of whipped cream adds a dreamy texture that contrasts nicely with the cookies’ chewyness.
- Hot Chocolate: Cozy up with a cup of rich hot chocolate beside your cookies; the sweetness complements the peanut butter and chocolate flavors beautifully.
- Fruit Salad: A blend of fresh, seasonal fruits introduces a vibrant and refreshing element, balancing the richness of your spooky treats.
- Halloween Punch: A fun, fruity punch adds a festive flair, energizing the party spirit while remaining a crowd-pleasing drink for all ages.
- Spooky Cupcakes: Decorate vanilla or chocolate cupcakes with Halloween themes for a fantastic dessert assortment that works perfectly alongside the spider cookies.
- S’mores Dip: This gooey, indulgent treat offers a fun twist and is perfect for pairing with your cookies, exploring mingling flavors in a creative way!
Expert Tips for Peanut Butter Spider Cookies
-
Measure Carefully: Use proper measuring techniques to ensure ingredient accuracy, especially for flour; too much can lead to crumbly cookies.
-
Don’t Skip the Chill: Chill the cookies after decorating to help the chocolate legs set firmly. This keeps your Peanut Butter Spider Cookies looking spooktacular!
-
Use Frozen Treats: Freezing the Reese’s Cups before adding them to the cookies is essential; it prevents them from melting too much and losing shape when pressed in.
-
Mix on Low: When combining wet and dry ingredients, mix on low speed to avoid overworking the dough, ensuring a tender cookie texture.
-
Substitution Strategies: If you prefer to use almond butter instead of peanut butter, it provides a delightful twist in flavor while still keeping that creamy texture.
Peanut Butter Spider Cookies Recipe FAQs
What type of peanut butter should I use?
You can use either smooth or chunky peanut butter, depending on your preference! Smooth peanut butter will give you a creamy texture, while chunky will add a delightful bite.
How should I store the Peanut Butter Spider Cookies?
Store your cookies in an airtight container at room temperature for up to 1 week. If you want them to last longer, you can refrigerate them for up to 2 weeks, though they may lose some of their chewy texture.
Can I freeze the dough or cookies?
Absolutely! For longer storage, freeze unbaked cookie dough balls in a single layer on a baking sheet. After they are solid, transfer them to a freezer bag, where they will stay fresh for up to 3 months. When you’re ready to bake, just pop them straight into the oven without thawing; they may need an extra minute or two.
What should I do if my cookies are spreading too much?
If your cookies are spreading too much during baking, ensure that your shortening or butter is at the right temperature—not too soft or melted. Additionally, make sure you’re correctly measuring your flour. Too little flour can lead to overly thin cookies.
Are there any dietary considerations for this recipe?
Yes, since the recipe contains eggs and dairy, it’s not suitable for vegans. You might try egg substitutes or a dairy-free milk alternative. For nut allergies, substituting peanut butter with sunflower seed butter could be a safe and delicious option!
Can I decorate these cookies differently?
You can definitely switch up the decorations! Instead of Reese’s Cups, try using chocolate-covered pretzels for a fun twist. If candy eyes aren’t available, mini marshmallows can create an equally spooky appearance!
Peanut Butter Spider Cookies: Spooky Treats for Halloween Fun
Ingredients
Equipment
Method
- Preheat your oven to 375°F (190°C) and prepare your cookie sheet.
- Mix the shortening, peanut butter, brown sugar, granulated sugar, egg, vanilla extract, and milk until smooth.
- In another bowl, whisk together the flour, baking soda, and salt.
- Gradually combine the dry ingredients with the wet ingredients until just mixed.
- Shape dough into 1-inch balls and roll in granulated sugar. Place on a cookie sheet.
- Bake the cookies for 10-12 minutes until golden around the edges.
- Press a frozen Reese's Cup into the center of each cookie while warm.
- Place two candy eyes on each Reese's Cup.
- Cool cookies on a wire rack and chill in the refrigerator for 10 minutes.
- Melt chocolate chips, pipe spider legs, and chill again for 10 minutes.