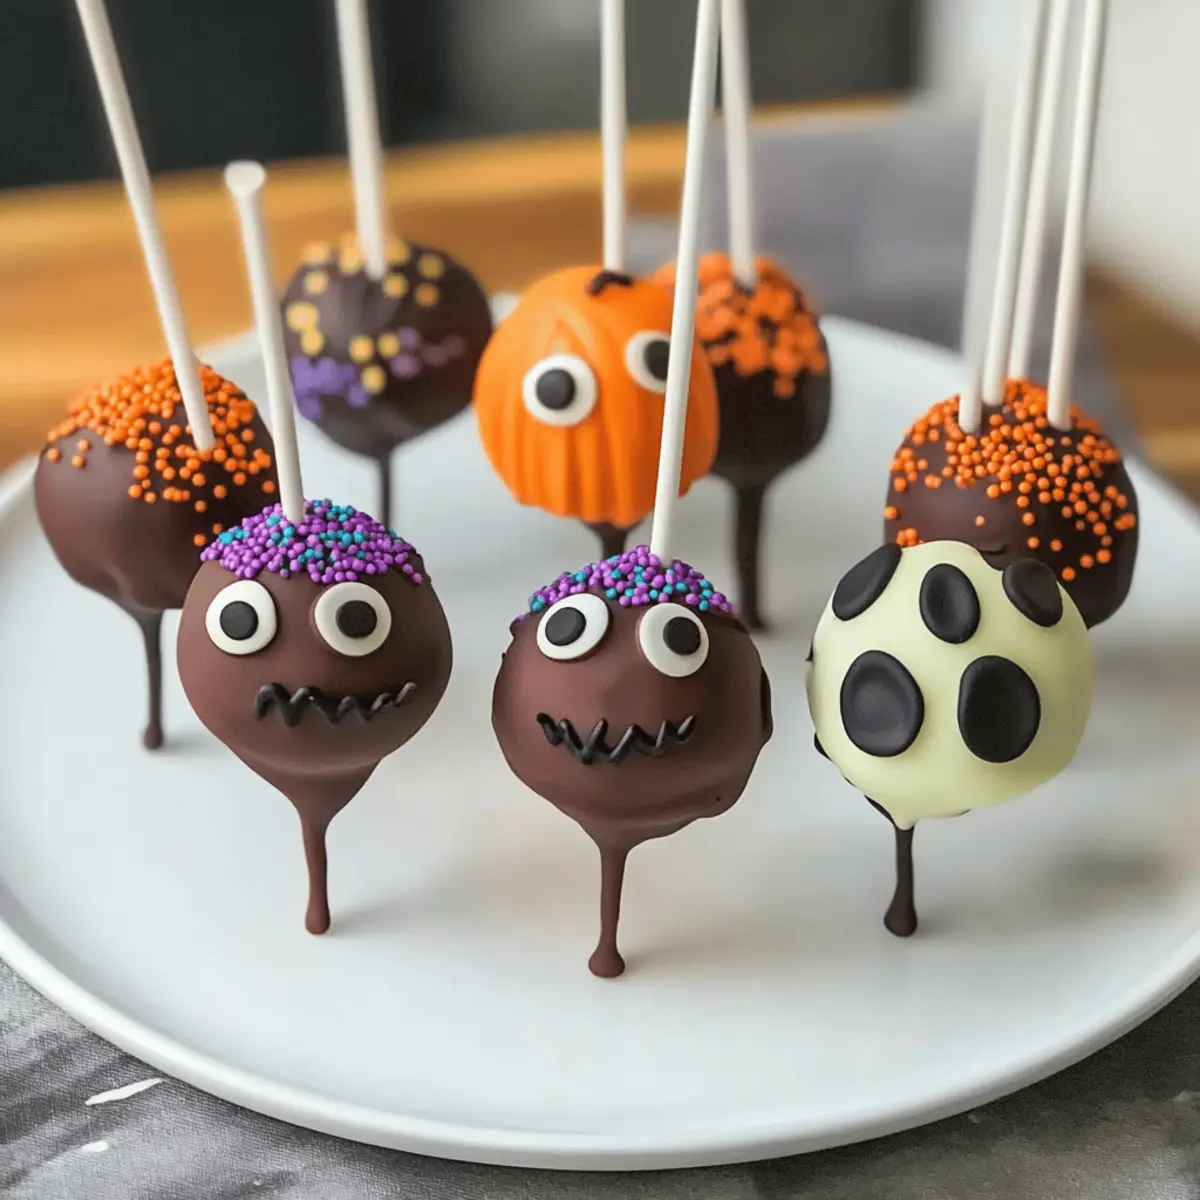
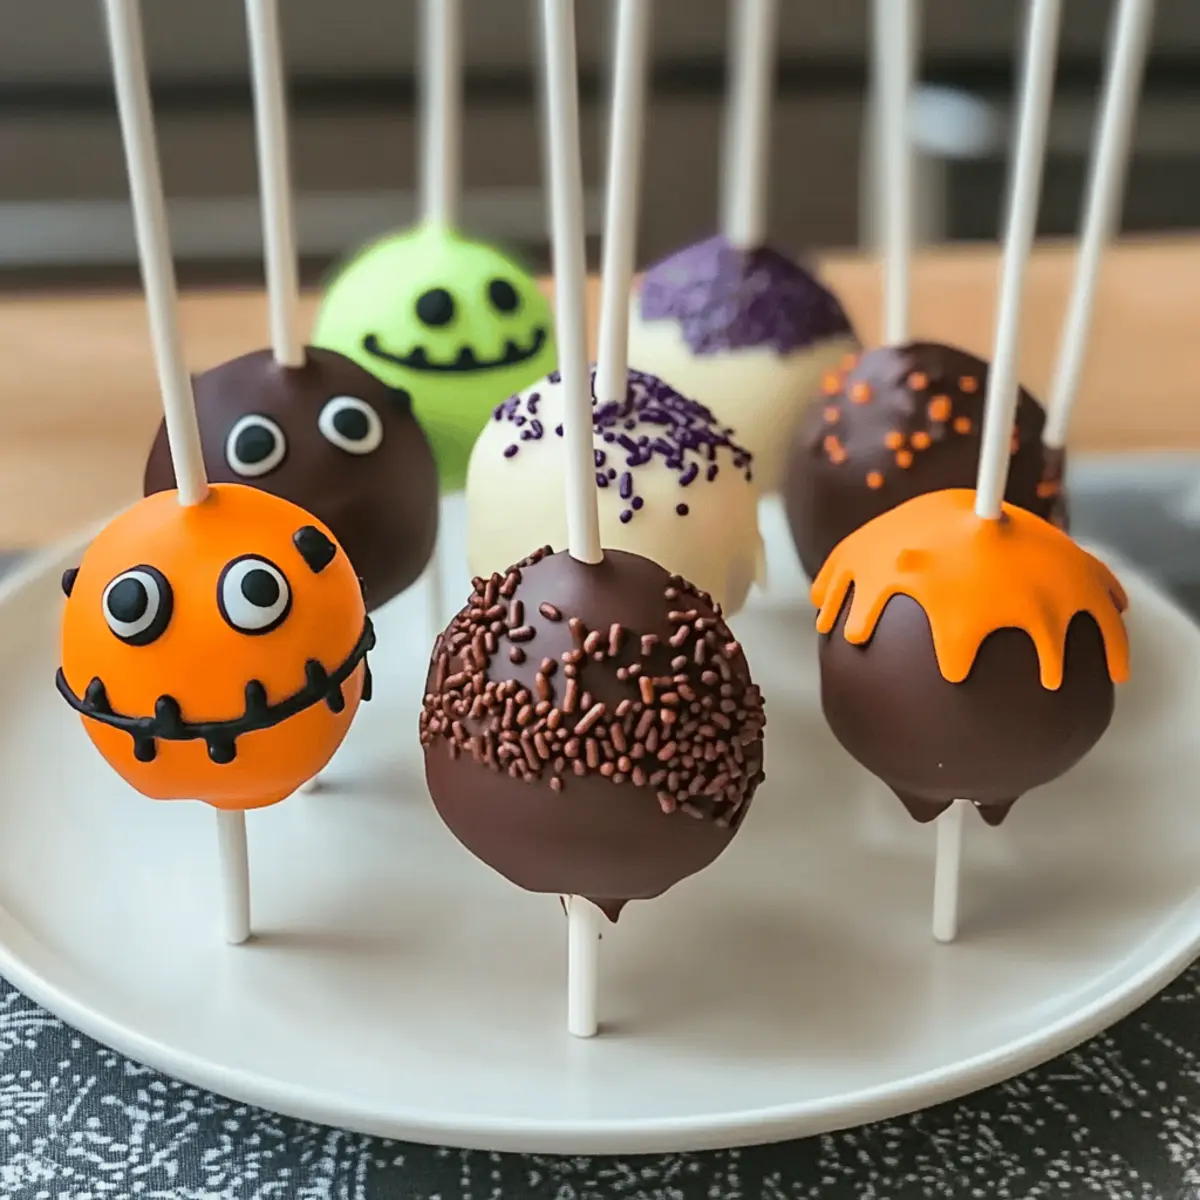
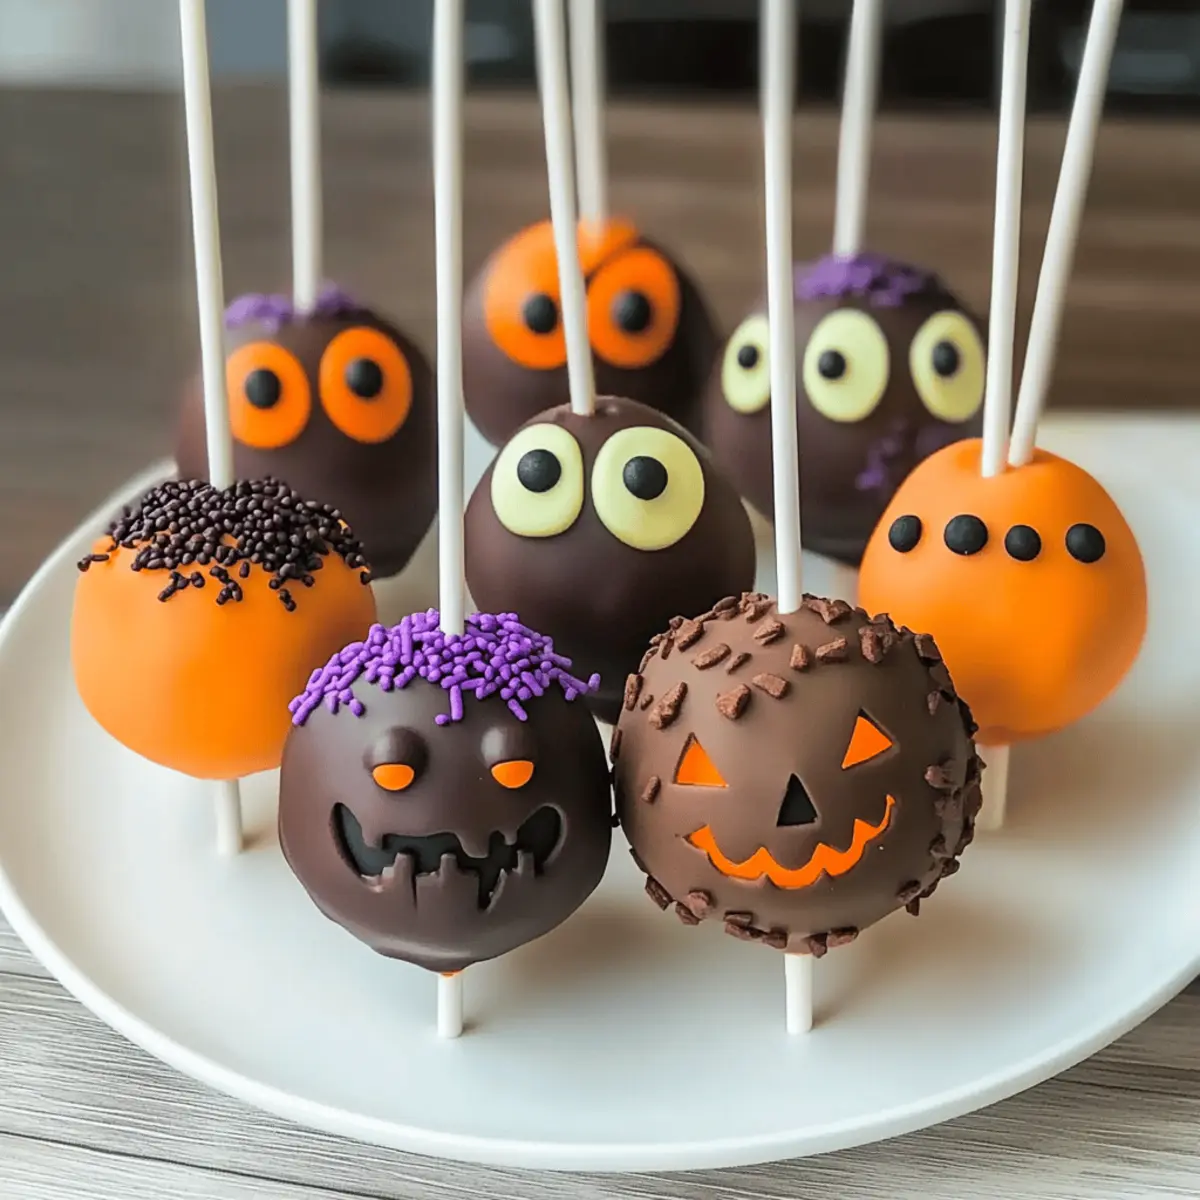
As I unwrapped the leftover cake from last week’s celebration, a playful idea sparked in my mind—why not transform it into spooky Halloween Cake Pops? These delightful treats aren’t just easy to whip up; they’re a fantastic way to engage family and friends in the kitchen. Whether you opt for a boxed mix or decide to go the homemade route, this recipe provides the perfect canvas for creativity. With a few simple ingredients and endless decorating possibilities, you can craft charming mummies, eerie eyeballs, or even cheerful pumpkins that are sure to impress. Plus, they make for an excellent addition to any Halloween gathering or a fun project to share with little ones. Ready to get crafty and sweeten your spooky season? Let’s dive into the delicious world of Halloween Cake Pops!
Why Are Halloween Cake Pops So Fun?
Spooktacular Appeal: Halloween Cake Pops are not only delicious but also a conversation starter at any gathering.
Total Customizability: Tailor these treats to any Halloween theme—be it frightening mummies or joyful pumpkins!
Easy to Make: Perfect for beginners, this recipe allows anyone to confidently create impressive goodies.
Interactive Fun: Gather family and friends to help decorate; it’s a great bonding activity that brings everyone together.
No Waste: Use leftover cake for a guilt-free treat! This recipe is great for recycling those extra bits into something special.
Perfect Treats: They’re bite-sized, making them ideal for Halloween parties or as personalized gifts that everyone will love.
Halloween Cake Pops Ingredients
For the Cake Base
• Cake Mix or Homemade Cake – Choose your favorite flavor, whether it’s classic chocolate or vibrant red velvet, to craft the perfect foundation for your Halloween Cake Pops.
• Cake Scraps – Don’t toss out leftover cake; combine them with frosting to create the base for your pops!
For the Binder
• Frosting – Any variety will work; use this sweet element to moisten the cake crumbs and hold them together, ensuring your cake pops don’t crumble.
For the Coating
• Chocolate or Candy Coating – Melted chocolate provides a delicious and smooth exterior; try using chocolate melts for ease in dipping.
For the Decorations
• Sprinkles – Use colorful sprinkles to add a festive touch wherever you like! They’ll enhance the visual appeal of your Halloween Cake Pops.
• Candy Eyes – Perfect for creating spooky designs like mummies or creepy eyeballs, adding a playful touch to your treats.
Get ready to unleash your creativity with these Halloween Cake Pops! Each ingredient not only serves a purpose but also invites you to customize these treats into something uniquely yours.
Step‑by‑Step Instructions for Halloween Cake Pops
Step 1: Prepare the Cake
Begin by baking your cake according to the instructions on the box or your favorite homemade cake recipe. Once baked, allow the cake to cool completely on a wire rack for about 30 minutes. This cooling process is essential to prevent melting the frosting in the next steps, ensuring your Halloween Cake Pops turn out perfectly.
Step 2: Crumble Cake
Once the cake has cooled, transfer it into a large mixing bowl and crumble it into fine crumbs using your hands or a fork. Aim for a texture similar to sand; this will help in binding it with frosting later. Set the crumbled cake aside, ready for the flavorful binding step that will create the foundation of your spooky treats.
Step 3: Mix in Frosting
Gradually add your chosen frosting to the crumbled cake, using a spatula or your hands to combine. Start with a small amount and mix until the mixture holds together when squeezed, resembling dough. You want to create a moist yet manageable texture for your Halloween Cake Pops; it should not be overly wet or crumbly.
Step 4: Form Balls
With your mixture ready, scoop out small portions and roll them into bite-sized balls (about 1 inch in diameter) between your palms. Place the formed balls on a baking sheet lined with parchment paper. This step is crucial, as it shapes your Halloween Cake Pops and prepares them for chilling, ensuring that they maintain their form.
Step 5: Chill the Pops
Once all your balls are formed, place the baking sheet in the refrigerator for about 15–30 minutes. This chilling time allows the cake balls to firm up, making them easier to dip in the coating without crumbling. Check that they feel solid to the touch before proceeding to the next step.
Step 6: Melt the Coating
While your cake pops chill, melt your chocolate or candy coating in a microwave-safe bowl. Heat in 30-second intervals, stirring in between until smooth. It’s essential to avoid overheating the chocolate to prevent seizing—aim for a silky, pourable consistency that will coat your Halloween Cake Pops perfectly.
Step 7: Dip and Decorate
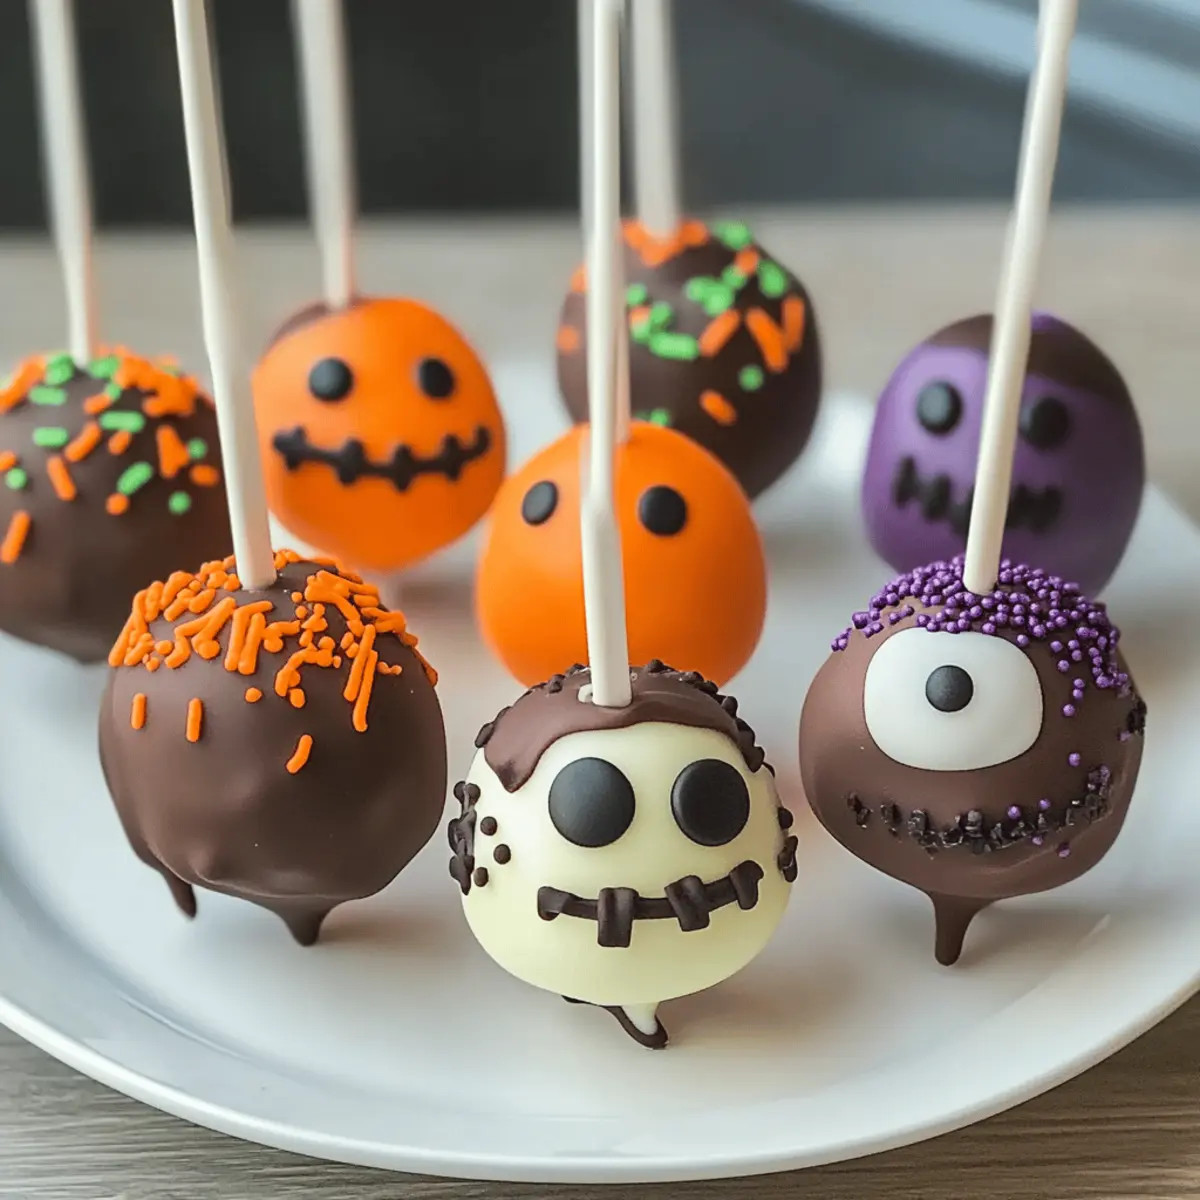
Carefully dip each chilled cake ball into the melted coating, ensuring it’s fully covered. Allow any excess coating to drip off, then place it back on the parchment-lined sheet. Before the coating hardens, get creative with your decorations! Add colorful sprinkles or candy eyes to craft cute or spooky designs for your Halloween Cake Pops.
Step 8: Serve or Store
Once decorated, allow the cake pops to sit at room temperature until the coating hardens, which takes about 10-15 minutes. Alternatively, you can place them in the refrigerator for quicker setting. Serve your festive Halloween Cake Pops on a tray for everyone to enjoy, or store them in an airtight container in the fridge for up to a week.
Make Ahead Options
These Halloween Cake Pops are a fantastic choice for meal prep and can be made ahead of time to ease your busy schedule! You can prepare the cake balls up to 24 hours in advance. Simply follow the first four steps—baking, crumbling, mixing, and rolling into balls—then refrigerate them on a baking sheet until firm. To maintain their quality, ensure they are stored in an airtight container after chilling. When you’re ready to enjoy, just melt your chocolate or candy coating, dip the chilled cake pops, and decorate as desired. This way, you’ll have spooktacular treats ready with minimal effort, perfect for any Halloween festivities!
Expert Tips for Halloween Cake Pops
-
Chill Properly: Ensure your cake balls are sufficiently chilled before dipping to prevent crumbling. This step is crucial for achieving perfect Halloween Cake Pops.
-
Use Quality Coating: Choose a high-quality chocolate or candy coating for a smooth finish. Avoid overheating to prevent it from seizing, which can ruin your coating consistency.
-
Stick Placement: Insert the cake pop sticks halfway into the cake balls after dipping. This helps keep them upright as the coating sets and avoids any messy mishaps.
-
Get Creative: Don’t be afraid to experiment with flavors and designs! Try different icing colors or shapes to personalize your Halloween Cake Pops and stand out at gatherings.
-
Store Wisely: Keep your cake pops in an airtight container in the fridge to maintain freshness for up to a week. They also freeze well if you want to make them ahead of time!
Halloween Cake Pops: Creative Twists
Get ready to unleash your inner artist and make these spooky treats your own! With just a few playful twists, you can transform Halloween Cake Pops into a unique creation everyone will adore.
- Gluten-Free: Substitute regular cake mix with gluten-free cake mix for a delicious treat that everyone can enjoy.
- Vegan: Use a plant-based frosting and a vegan cake mix to create egg-free, dairy-free Cake Pops suitable for vegan diets.
- Flavor Explosion: Add flavored extracts, like almond or peppermint, to your frosting for a delightful surprise in each bite.
- Nutty Crunch: Incorporate crushed nuts or nut butter into the cake mixture for an added texture and rich flavor.
- Decor Galore: Use edible glitter or themed candy decorations to craft eye-catching designs that really stand out.
- Spicy Kick: Include a pinch of cinnamon or cayenne pepper in the cake mixture for a warm, unexpected twist.
- Fruity Fusion: Mix in small bits of dried fruit like cranberries or apricots for a sweet and chewy element.
- Themed Shapes: Try molding your cake pops into different shapes—like ghosts or bats—to really get into the Halloween spirit!
Feel free to let your imagination run wild! These variations allow you to personalize your Halloween Cake Pops while keeping the fun of this festive treat alive. And if you’re looking for more inspiration, don’t forget to check out our tips for storage and freezing or ideas on what to serve alongside these delightful creations.
How to Store and Freeze Halloween Cake Pops
Fridge: Keep your decorated Halloween Cake Pops in an airtight container in the fridge for up to 1 week to maintain freshness and flavor.
Freezer: For longer storage, freeze the uncoated cake balls in a single layer on a baking sheet. Once firm, transfer them to a freezer bag and store for up to 3 months.
Reheating: When ready to enjoy, thaw the cake pops in the fridge before dipping them in chocolate or candy coating for best results.
Room Temperature: If serving on the same day, the cake pops can be displayed at room temperature for up to 2 hours, but they should be kept cool if possible to maintain their shape.
What to Serve with Halloween Cake Pops?
These delightful, festive treats will enchant your guests and create a magical atmosphere for any Halloween gathering.
-
Spooky Fruit Platter: Combine seasonal fruits like oranges, apples, and grapes to add fresh, vibrant pops of color, balancing sweetness with nutrition.
-
Witch’s Brew Hot Chocolate: Rich, creamy hot chocolate adorned with marshmallow ghosts combines the coziness of fall with spooky charm, perfect for warming up after trick-or-treating.
-
Mummy Dogs: Delicious hot dogs wrapped in crescent roll dough for a fun, easy-to-eat treat that complements the sweetness of cake pops—bite-sized and fun for all!
-
Ghoulishly Green Salad: A crisp salad with spinach, avocado, and green apple provides a refreshing contrast to the sweets while adding color to your Halloween table spread.
-
Candy Corn Chex Mix: This sweet and salty mix blends cereal, candy corn, and nuts, appealing to kids and adults alike and enhancing the festive atmosphere.
-
Pumpkin Spice Ice Cream: Serve this creamy delight as a chilling contrast to your warm drinks, creating a delicious dessert pairing that embodies the spirit of fall festivity.
-
Creepy Cupcakes: Decorated with ghoulish designs, these serve as an extra dose of sweetness, seamlessly fitting into your spooky-themed dessert table.
Each of these pairings allows your Halloween Cake Pops to shine while creating a truly enchanting festive experience for your family and friends!
Halloween Cake Pops Recipe FAQs
How do I choose the right cake mix for my Halloween Cake Pops?
Absolutely! For Halloween Cake Pops, you can use any flavor you love—be it chocolate, vanilla, or even red velvet for a fun twist. If you wish to get creative, try incorporating some spices into your batter for a seasonal touch, or opt for a boxed mix for convenience.
What’s the best way to store my Halloween Cake Pops?
To keep your Halloween Cake Pops fresh, store them in an airtight container in the fridge for up to 1 week. Make sure to separate layers with parchment paper to prevent them from sticking together. If you plan on enjoying them later, they can also be frozen for up to 3 months.
Can I freeze the cake pops once they’re decorated?
Yes! However, it’s best to freeze the uncoated cake balls for the best texture. Once firm, you can dip them in chocolate or candy coating after thawing to avoid issues with condensation. To freeze, place the formed balls on a baking sheet in a single layer, then transfer to a freezer bag for up to 3 months.
What should I do if my cake pops are falling apart during dipping?
If your cake pops are crumbling when you dip them, it might be because they weren’t chilled long enough or the mixture is too dry. Ensure they are well-chilled for at least 15-30 minutes before dipping and adjust the frosting amount slightly if needed so the mixture holds together when rolled into balls.
Are these Halloween Cake Pops safe for people with allergies?
Great question! Be mindful of your guests’ allergies; check for any allergens present in the cake mix, frosting, or chocolate coating you use. You can easily swap in gluten-free cake mixes or dairy-free frosting to accommodate different dietary needs.
What if I want to use leftover cake?
Oh, that’s a fantastic idea! Simply crumble your leftover cake into fine crumbs, and follow the mixing steps with frosting as if you were starting from scratch. This way, you can transform cake scraps into delightful Halloween Cake Pops without wasting a thing.
Spooky Halloween Cake Pops for a Fun Family Treat
Ingredients
Equipment
Method
- Prepare the Cake: Bake your cake according to instructions and let it cool completely.
- Crumble Cake: Transfer cooled cake into a bowl and crumble into fine crumbs.
- Mix in Frosting: Add frosting to crumbled cake until it holds together like dough.
- Form Balls: Roll small portions into balls about 1 inch in diameter.
- Chill the Pops: Refrigerate the cake balls for 15–30 minutes to firm up.
- Melt the Coating: Melt chocolate or candy coating in a microwave-safe bowl.
- Dip and Decorate: Dip the cake balls in coating and add sprinkles or candy eyes before hardening.
- Serve or Store: Let coating harden, then serve or store in an airtight container.