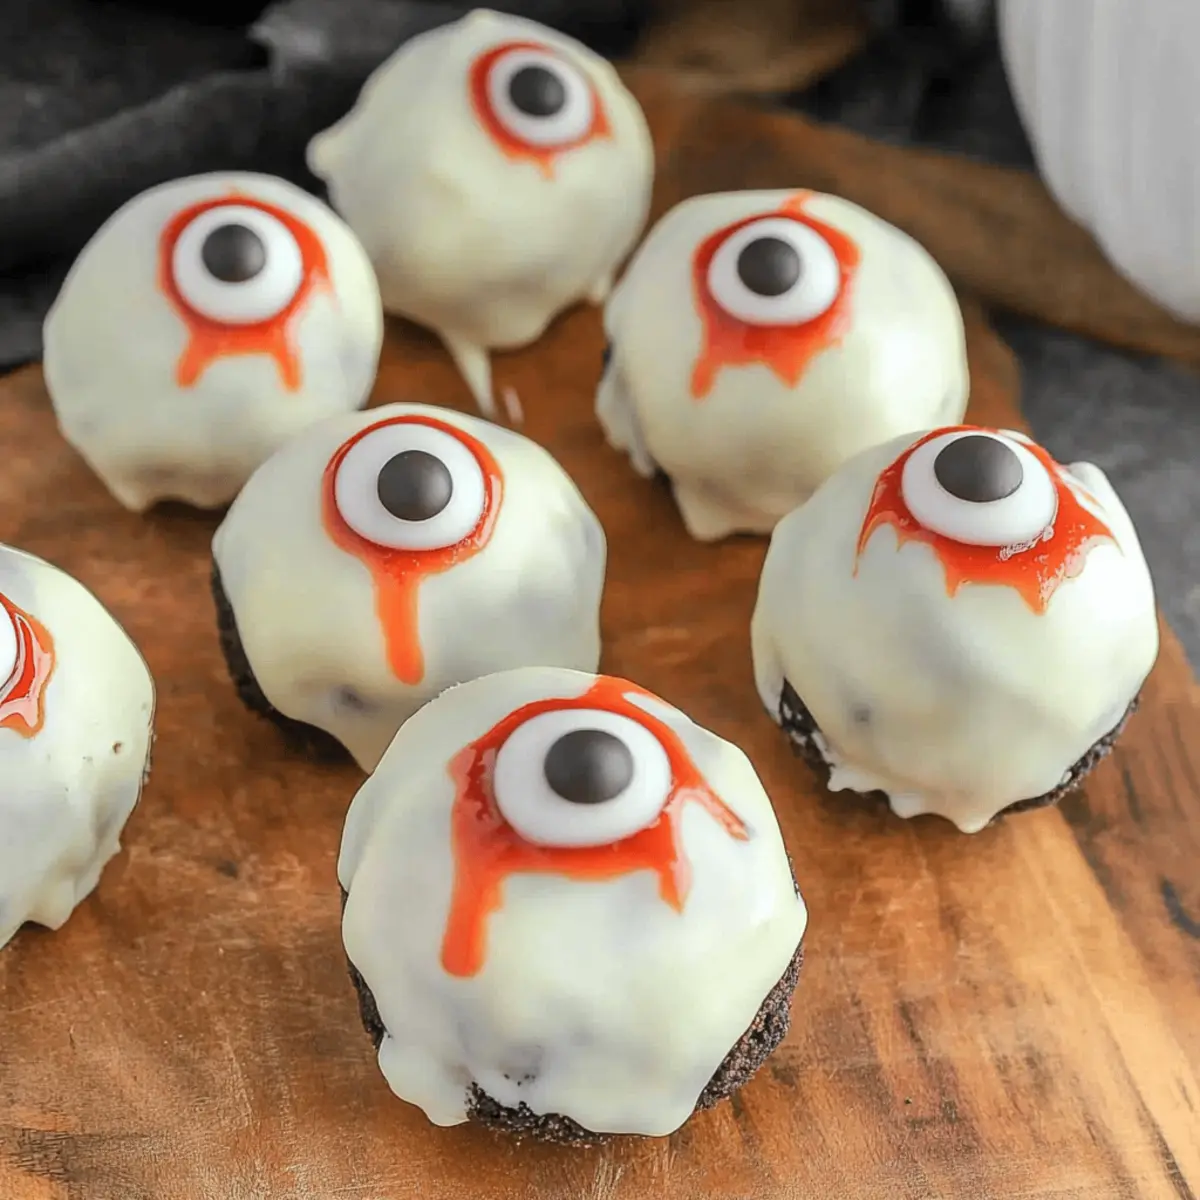
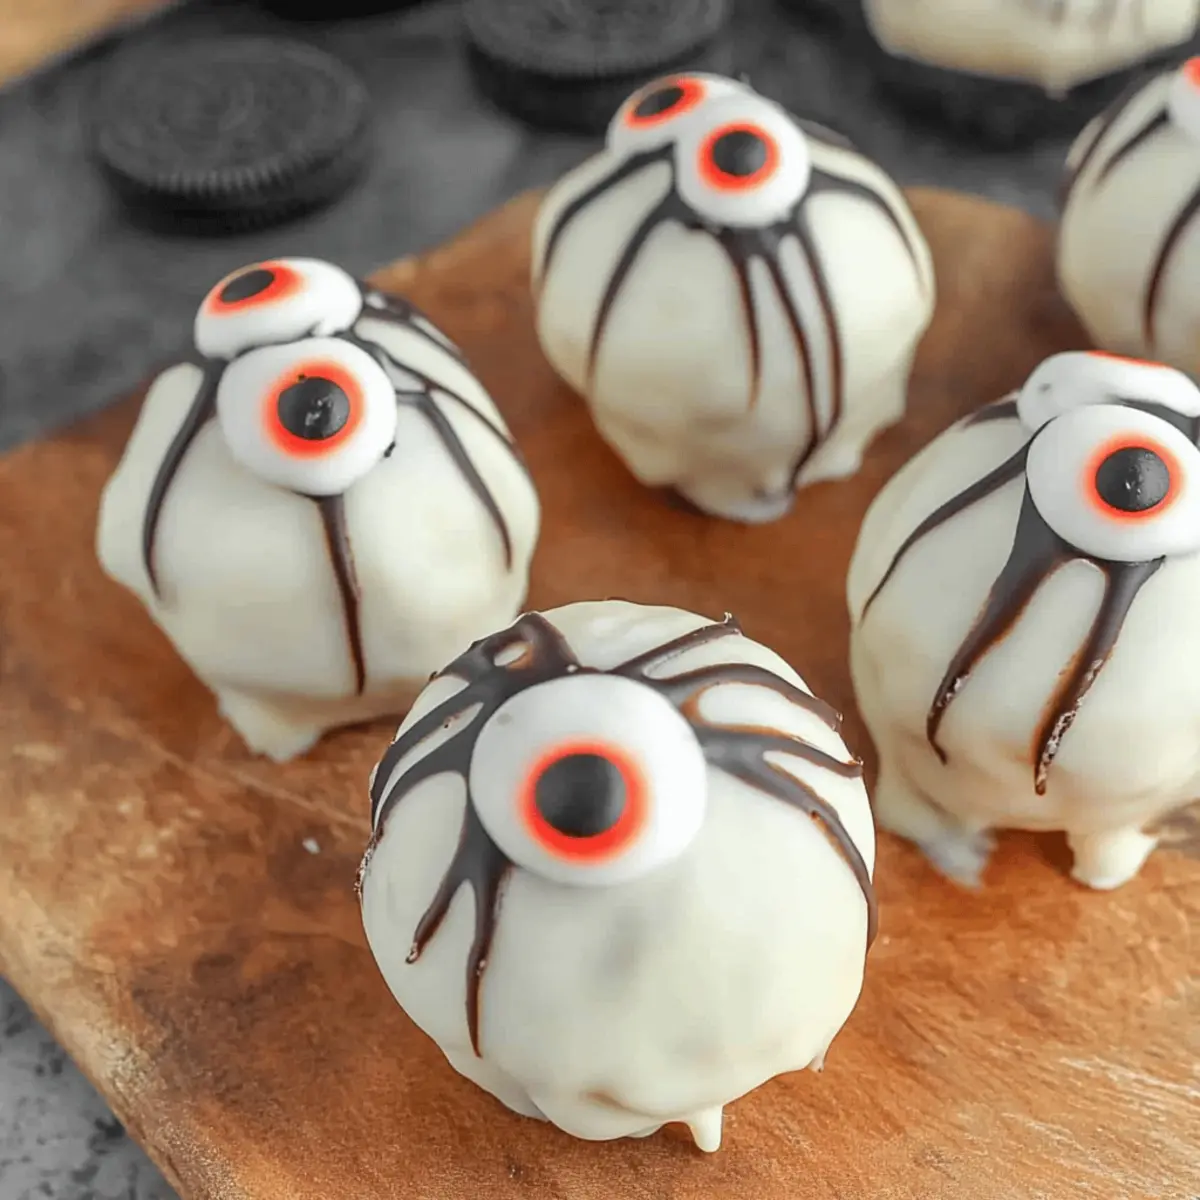
As the leaves turn crisp and the days grow shorter, a delightful transformation begins in my kitchen. Enter the world of spooky treats with these enchanting Oreo Eyeballs. This easy no-bake Halloween treat combines the classic creaminess of Oreos and cream cheese into a fun, eerie dessert that’s perfect for kids and adults alike. Not only are these creepy delights a hit at any party, but they also come together quickly, allowing you to focus on what truly matters—enjoying the festivities! With simple ingredients and endless decoration possibilities, you’ll have a frightfully good time making these for all your favorite goblins. Are you ready to whip up a batch of these hauntingly delicious sweet bites?
Why are Oreo Eyeballs a Must-Try?
Deliciously Fun: These spooky Oreo Eyeballs are not just a treat; they’re a conversation starter at any Halloween gathering. Guests will be delighted by their whimsical appearance.
No-Bake Magic: Quick and easy to prepare, this recipe eliminates the need for baking, making it perfect for busy home cooks looking for a hassle-free dessert.
Customizable Creativity: Whether you want to keep them classic or go all out with decorations, variations like using different candies or adding Rice Krispies mean there’s no limit to your creativity!
Kid-Friendly Treat: These no-bake delights are simple enough for kids to help make, creating a fun family activity that will be memorable for years to come.
Perfect Storage: Make them ahead of time! Just store your Oreo Eyeballs in an airtight container for up to 5 days, freeing you up for other Halloween fun.
Dive into the fun world of Halloween desserts and check out more spook-tacular ideas in our Halloween Treat Recipes!
Oreo Eyeballs Ingredients
For the Base
- Oreo Cookies – The star flavor of these treats, providing that beloved creamy crunch. Can also use gluten-free Oreos for a delicious alternative!
- Cream Cheese – This binds the mixture and adds a rich creaminess; make sure it’s softened for easy blending.
For the Coating
- White Candy Melts – Perfect for creating a smooth coating; can substitute with white chocolate chips for a sweeter twist.
- Candy Eyes – Essential for that spooky flair; if you can’t find these, M&M’s or dark chocolate drops work just as nicely!
For Decoration
- Red Decorating Gel – Adds that bloodshot effect for extra creepiness; optional, but a great touch! You can also use red licorice if that’s what you have on hand.
These ingredients come together beautifully to create the whimsical and delightful Oreo Eyeballs, perfect for your upcoming Halloween festivities!
Step‑by‑Step Instructions for Oreo Eyeballs
Step 1: Crush the Cookies
Start by placing 15 Oreo cookies into a sealable plastic bag. Use a rolling pin to crush them into fine crumbs, or pulse them in a food processor for about 30 seconds. The texture should resemble sand, ensuring that the cookie flavor infuses the base of your Oreo Eyeballs perfectly.
Step 2: Mix the Base
In a large mixing bowl, combine the crushed Oreos with 8 ounces of softened cream cheese. Using a spatula or your hands, mix thoroughly until the mixture is well integrated and smooth, about 2-3 minutes. The cream cheese should be completely blended, creating a sticky yet cohesive base for forming your spooky treats.
Step 3: Form the Balls
Using a cookie scoop or a tablespoon, portion out the mixture and roll it into 1-inch balls. Place each ball onto a parchment-lined baking sheet, ensuring they are spaced apart to allow for easy dipping later on. This step should yield about 20-25 Oreo Eyeballs, perfect for your Halloween party.
Step 4: Chill the Balls
Refrigerate the formed balls for at least 1 hour. This chilling process helps the Oreo Eyeballs firm up, making them easier to dip in the melted coating later. After sitting in the fridge, they should be firm to the touch but still slightly soft inside, maintaining that delicious creamy texture.
Step 5: Melt the Coating
In a microwave-safe bowl, add 1 cup of white candy melts. Microwave them in 30-second intervals, stirring between each, until completely melted and smooth, which should take about 1-2 minutes total. Be careful not to overheat, as this can cause the candy melts to seize up, ruining your coating for the Oreo Eyeballs.
Step 6: Dip the Truffles
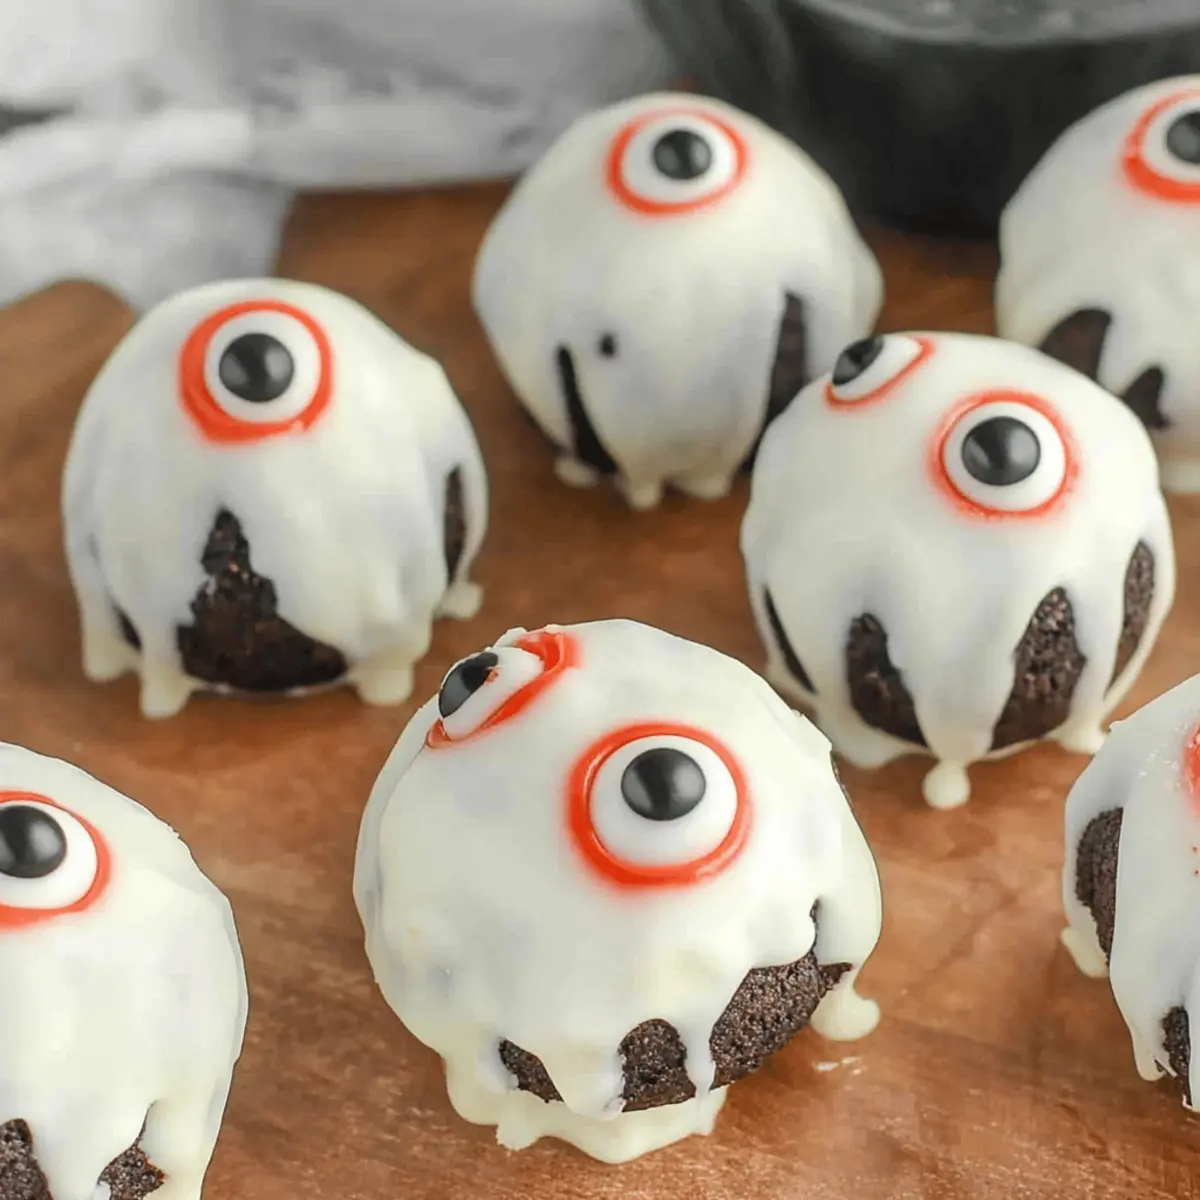
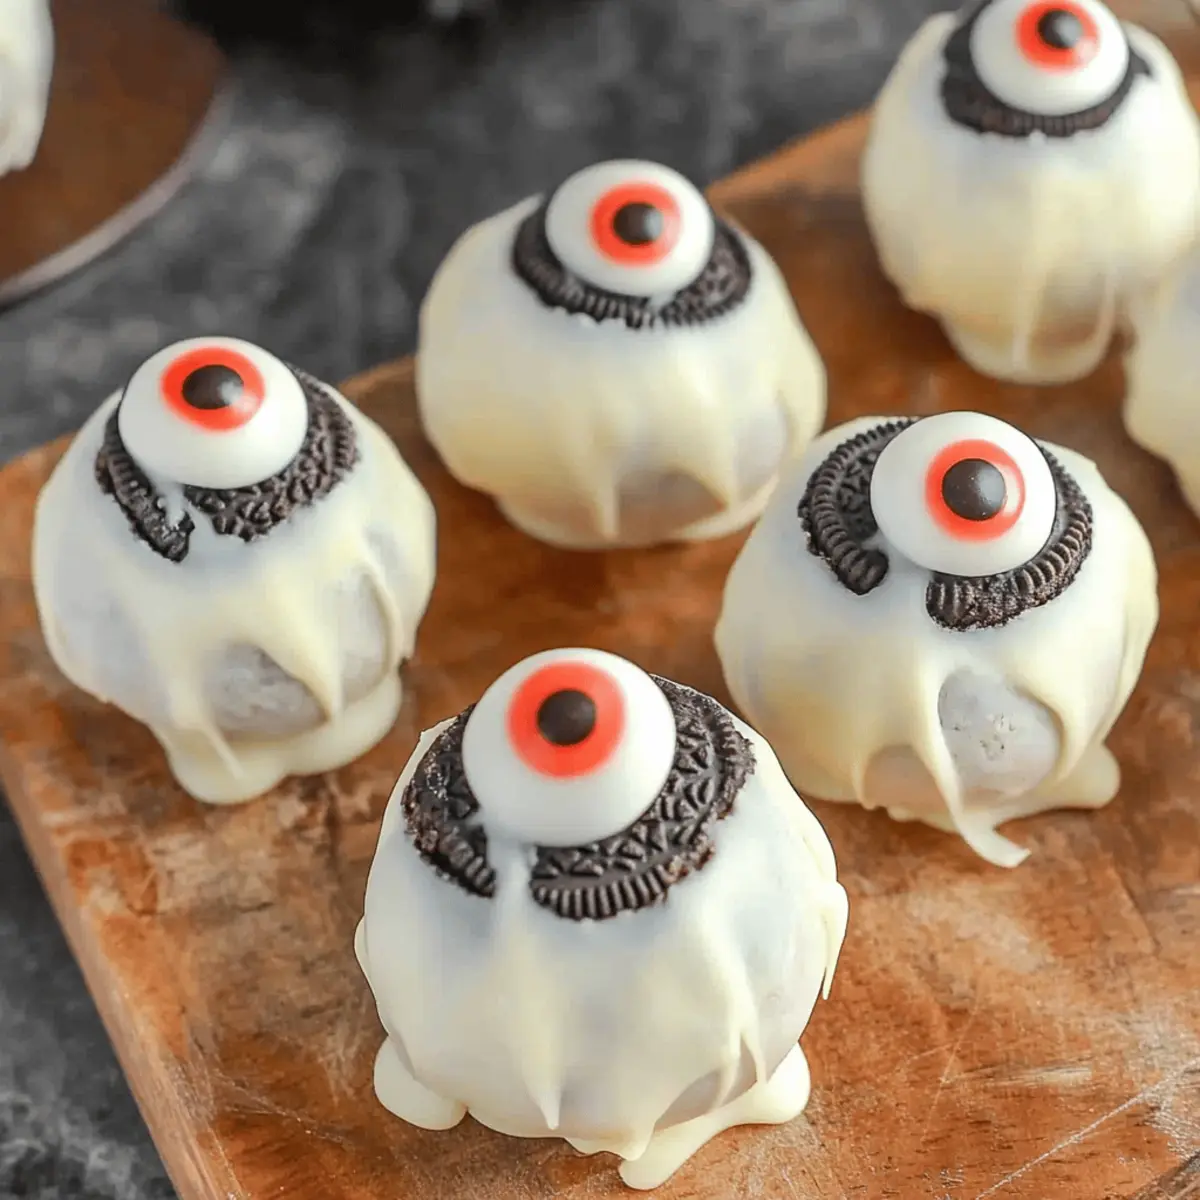
Take each chilled truffle and dip it into the melted white candy coating, ensuring it’s fully submerged. Allow any excess coating to drip back into the bowl before placing it back on the baking sheet. The finished look should be a smooth, shiny coating that encases each Oreo Eyeball.
Step 7: Set the Coating
Once all the truffles are coated, place the baking sheet back in the refrigerator for at least 30 minutes. This time allows the white candy coating to harden fully, resulting in beautifully finished Oreo Eyeballs that are ready for decoration.
Step 8: Decorate the Eyeballs
After the coating has set, take out the Oreo Eyeballs and use a small amount of red decorating gel to add a dollop on top of each truffle. Press one candy eye into the center of the gel for a spooky effect. This simple decoration adds the final, eerie touch to your Halloween treats!
Step 9: Serve and Enjoy
Finally, chill your decorated Oreo Eyeballs until you’re ready to serve. Keep them stored in the refrigerator until it’s time for your spooky celebration. These no-bake treats are sure to impress and delight with their fun and frightening appearance!
Make Ahead Options
These spooky Oreo Eyeballs are perfect for meal prep enthusiasts! You can prepare the base mixture of crushed Oreos and cream cheese up to 24 hours in advance. Simply mix the ingredients and roll them into balls, then store them in an airtight container in the refrigerator. When you’re ready to serve, just follow the melting and coating steps – this keeps them just as delicious and fresh! Additionally, these treats can stay in the fridge for up to 5 days once finished, making them an ideal time-saver for busy Halloween celebrations. Enjoy the beauty of having a captivating dessert ready to impress your guests with minimal last-minute effort!
What to Serve with Spooky No-Bake Oreo Eyeballs
Enhance your Halloween gathering with delightful accompaniments that thrill the taste buds and the imagination!
-
Witch’s Brew Punch: A vibrant, fruity drink with green food coloring and floating gummy eyeballs to match your treats, making it a thematic winner.
-
Graveyard Dirt Cups: Layered chocolate pudding and crushed cookies topped with gummy worms create a spooky dessert that pairs beautifully with the creamy textures of Oreo Eyeballs.
-
Spooky Fruit Platter: Fresh fruits like oranges and grapes arranged to resemble a haunted scene deliver refreshing contrast to the richness of the Oreo treats.
-
Cheesy Spider Breadsticks: Soft breadsticks shaped like spiders serve as a savory side, balancing the sweetness of the dessert with their fun appearance.
-
Creepy Crudité Cups: Colorful veggies served in cups with spooky dip create a fresh, crunchy alternative that contrasts with the creamy sweet Eyeballs.
-
Haunted Hot Chocolate: Rich, steaming hot chocolate topped with whipped cream ghosts provides a cozy drink option that complements the chills of Halloween.
Whichever combination you choose, your spooky spread is sure to impress and tantalize your guests!
How to Store and Freeze Oreo Eyeballs
Fridge: Store your Oreo Eyeballs in an airtight container in the refrigerator for up to 5 days, keeping them fresh and delicious for your spooky gatherings.
Freezer: For longer storage, freeze the truffles for up to 2-3 months. Make sure to use an airtight container to prevent freezer burn.
Thawing: When ready to enjoy, transfer them to the fridge to thaw overnight before serving for the best texture and flavor.
Layering: Place parchment paper between layers of Oreo Eyeballs in your storage container to avoid sticking and keep them looking festive!
Expert Tips for Oreo Eyeballs
-
Soften Cream Cheese: Ensure your cream cheese is at room temperature for smooth mixing. Cold cream cheese can cause lumps in your mixture, affecting the texture of your Oreo Eyeballs.
-
Even Coating: When dipping, allow excess candy coating to drip back into the bowl. This prevents clumping and ensures a smooth finish for each Oreo Eyeball.
-
Chill Between Steps: Proper chilling is crucial! Don’t skip the refrigeration steps; it helps the truffles firm up and makes them easier to coat later.
-
Storing Wisely: To avoid sticking, layer your Oreo Eyeballs with parchment paper in your storage container. This keeps them looking perfect for your Halloween party!
-
Get Creative: Experiment with different decorating styles! Use colored sprinkles or edible glitter to add a unique spin to your Oreo Eyeballs.
Oreo Eyeballs Variations & Substitutions
Feel free to explore your creativity and customize these spooky treats in ways that will truly satisfy your taste buds!
- Gluten-Free: Use gluten-free Oreos for a safe option that everyone can enjoy at your spooky gathering.
- Dairy-Free: Swap out cream cheese for dairy-free cream cheese to make these treats suitable for lactose-intolerant friends. The creamy texture remains intact!
- Flavor Boost: Mix in a splash of peppermint extract for a minty twist, creating a delightful contrast to the chocolatey flavor. This refreshing element is sure to surprise your guests!
- Crunchy Texture: Fold in some crushed pretzels or Rice Krispies for an added crunch, giving your Oreo Eyeballs a satisfying texture that balances the creaminess beautifully. People will love that unexpected crunchy bite!
- Chocolate Lovers: Use chocolate wafer cookies instead of Oreos for a chocolate overload, enhancing the rich flavors and making them extra indulgent. Who can resist chocolate on chocolate?
- Spooky Decor: Instead of using red decorating gel, you can melt white chocolate and drizzle it over the truffles for a web effect. This simple touch can transform your treats into haunting masterpieces!
- Variety of Eyes: Get creative with your candy eyes! Try using gummy worms or licorice laces to create creepy variations that will surely be a hit with kids and adults alike.
Explore even more ideas that can inspire you by checking out our collection of Halloween Treat Recipes and ensure your spooky season is filled with delightful surprises!
Oreo Eyeballs Recipe FAQs
What type of Oreos should I use for Oreo Eyeballs?
You can use regular Oreo cookies for this recipe, which provide the classic flavor and structure. If you or your guests are gluten-sensitive, feel free to substitute them with gluten-free Oreos!
How should I store Oreo Eyeballs for freshness?
To keep your delicious Oreo Eyeballs tasting their best, store them in an airtight container in the refrigerator for up to 5 days. This will help maintain their creamy texture and flavor. Just remember to layer them with parchment paper if you’re stacking them to prevent sticking!
Can I freeze Oreo Eyeballs for later?
Absolutely! You can freeze your Oreo Eyeballs for up to 2-3 months. To do this, place them in a single layer on a baking sheet and freeze until firm. Then, transfer them to an airtight container. When ready to enjoy, simply move them to the fridge to thaw overnight, allowing them to regain their ideal texture.
What should I do if the white candy melts are too thick?
If your white candy melts seem too thick after heating, add a tiny amount of vegetable oil or shortening to thin it out. Stir thoroughly to achieve a smooth consistency for easier dipping. If they become too hot, let them cool slightly before attempting to dip your Oreo Eyeballs.
Are there any allergen considerations for Oreo Eyeballs?
Yes! If anyone has dairy allergies, you might consider using dairy-free alternatives like vegan cream cheese and dairy-free chocolate for coating. Always check the labels of all ingredients to be cautious of any potential allergens.
How can I customize my Oreo Eyeballs?
The customization options are endless! You can mix in some Rice Krispies for added crunch, use colored candy melts for different coating colors, or even get creative with your decorations by adding edible glitter or sprinkles. The more, the merrier when it comes to sweet treats!
Delicious Oreo Eyeballs: A Fun No-Bake Halloween Treat
Ingredients
Equipment
Method
- Start by placing 15 Oreo cookies into a sealable plastic bag. Crush them into fine crumbs.
- In a large mixing bowl, combine the crushed Oreos with 8 ounces of softened cream cheese and mix until smooth.
- Using a cookie scoop, roll the mixture into 1-inch balls and place them on a parchment-lined baking sheet.
- Refrigerate the formed balls for at least 1 hour to firm up.
- In a microwave-safe bowl, melt 1 cup of white candy melts in 30-second intervals until smooth.
- Dip each chilled truffle into the melted coating, allowing excess to drip back into the bowl.
- Place the baking sheet back in the refrigerator for at least 30 minutes to set the coating.
- Decorate each truffle with red decorating gel and place a candy eye on top.
- Chill until ready to serve, keeping them stored in the refrigerator.