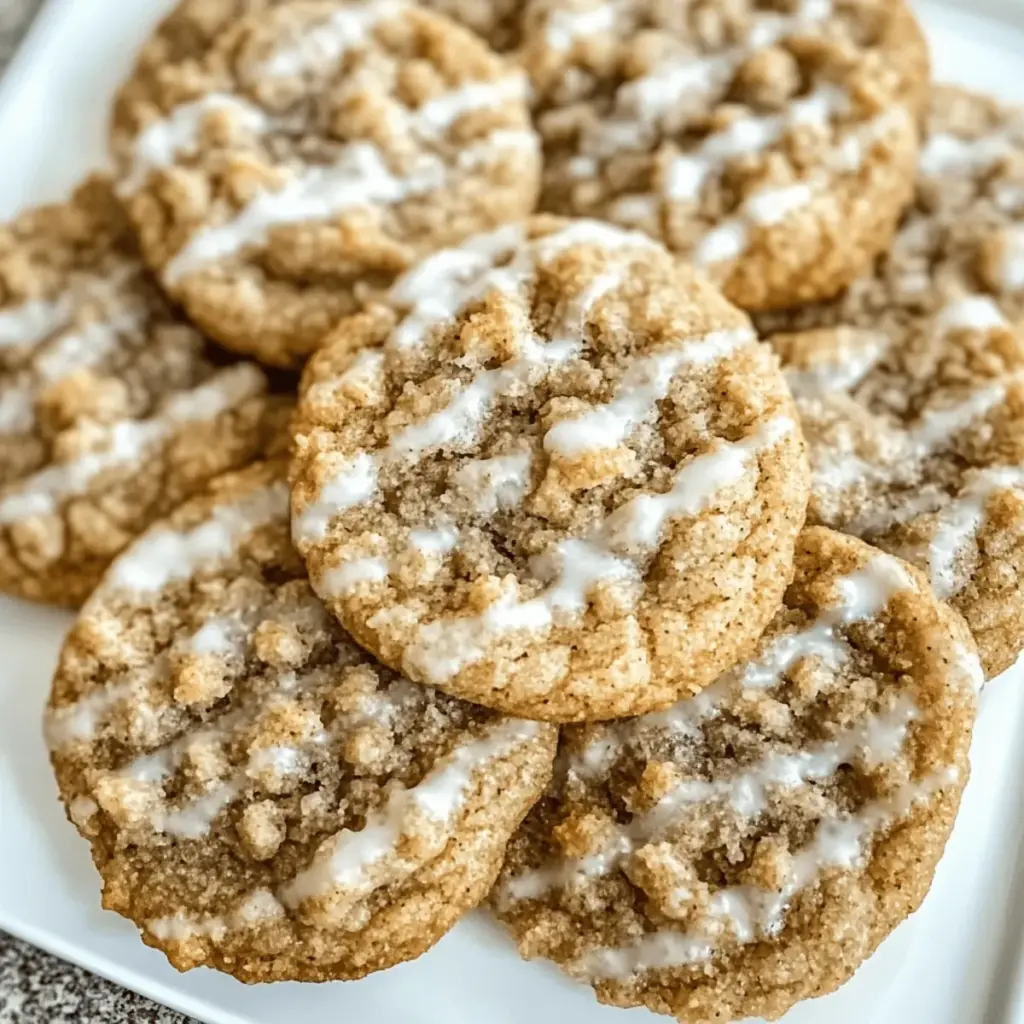
As I stood in my kitchen surrounded by the warm scent of fall spices, it struck me—there’s nothing quite like the cozy embrace of homemade pumpkin scones. These Easy Pumpkin Scones with Cinnamon Glaze are the perfect mix of tenderness and crunch, ideal for a leisurely breakfast or an afternoon treat. What I love about this recipe is how quickly they come together, allowing you to enjoy fresh-baked goodness without spending all day in the kitchen. Plus, they are freezer-friendly, making it easy to prepare for busy mornings! With just enough pumpkin flavor and a hint of spice, these scones capture the essence of Autumn in every bite. Are you ready to bring the season’s spirit into your home? Let’s dive into this delightful recipe!
Why Are Pumpkin Scones a Fall Favorite?
Warm, Cozy Vibes: The inviting aroma of cinnamon and pumpkin fills your kitchen, creating a sense of comfort that only fall brings.
Quick to Make: This recipe can be whipped up in just 30 minutes, making it perfect for those busy mornings.
Freezer-Friendly: Bake a batch ahead of time and store them—simply reheat for a speedy breakfast option!
Versatile Treat: Enjoy them as breakfast, a snack, or even dessert—pair perfectly with your favorite coffee or tea.
Delicious Texture: Each bite offers a delightful combination of a crisp exterior and a tender, moist interior that’s simply irresistible!
Embark on your fall baking journey with this delightful recipe and let your kitchen sparkle with the joy of homemade goodness.
Pumpkin Scone Ingredients
• Gather these ingredients to bring the cozy flavors of fall to your kitchen!
For the Scones
- All-purpose flour – Provides structure and a soft crumb; a gluten-free blend can be an alternative.
- Baking powder – Essential for giving the scones their lovely lift and texture; no substitutions recommended.
- Fine sea salt – Enhances sweetness and balances flavors; regular salt can be used if necessary.
- Baking soda – Works with the pumpkin to help the scones rise; this ingredient is crucial for achieving the right height.
- Ground cinnamon – Infuses the scones with warm spice; feel free to swap with pumpkin pie spice for a twist.
- Ground ginger – Adds a zesty flair to the scones; allspice is a good alternative if needed.
- Ground nutmeg – Complements pumpkin’s flavor with warmth; cloves or extra cinnamon make excellent substitutes.
- Ground cloves – Deepens the spices; allspice can also work well.
- Light brown sugar – Sweetens and adds moisture; granulated sugar can be replaced but may alter the flavor slightly.
- Unsalted butter (cold and cubed) – Creates a flaky texture throughout; margarine is a substitute, though it changes flavor and texture.
- Canned pure pumpkin puree – Essential for moisture and that classic pumpkin flavor; homemade puree can work too.
- Buttermilk or heavy cream – Adds richness; milk mixed with vinegar can mimic buttermilk’s tang in a pinch.
- Large eggs – Binds ingredients together and adds richness; flax eggs can substitute for a vegan option.
For the Glaze
- Powdered sugar – Key for achieving a smooth, sweet glaze; no substitutes advised.
- Milk – Thins the glaze for pourability; alternatives like cream or nut-milk can work well.
- Cinnamon (for glaze) – Reinforces the spice profile of the scones; feel free to add a pinch of extra for enhanced flavor.
With these simple yet essential ingredients, you’ll be on your way to mastering the art of baking homemade pumpkin scones that are sure to delight!
Step‑by‑Step Instructions for Pumpkin Scones
Step 1: Prepare the Dry Ingredients
In a large mixing bowl, whisk together 2 cups of all-purpose flour, 1 tablespoon of baking powder, ½ teaspoon of fine sea salt, ½ teaspoon of baking soda, and your aromatic spices: 1 teaspoon of ground cinnamon, ½ teaspoon of ground ginger, ½ teaspoon of ground nutmeg, and ¼ teaspoon of ground cloves. Ensure the ingredients are well combined and light, giving the pumpkin scones a solid foundation for flavor and texture.
Step 2: Incorporate the Butter
Cut 6 tablespoons of cold, cubed unsalted butter into the flour mixture using a pastry cutter or your fingertips until it resembles coarse crumbs. You should see small pea-sized pieces of butter scattered throughout the mix. This step is key for achieving the flaky texture of your pumpkin scones, so work quickly to keep the butter cold.
Step 3: Mix the Wet Ingredients
In a separate measuring cup, combine ½ cup of canned pure pumpkin puree, ½ cup of buttermilk (or heavy cream), and 1 large egg, whisking together until smooth. The vibrant orange color of the pumpkin will blend beautifully with the other ingredients. This creamy mix adds moisture and flavor to the scones, elevating their cozy profile.
Step 4: Combine Mixtures
Create a well in the center of your dry ingredients and pour in the wet mixture. Gently stir with a fork just until combined, ensuring not to overmix. The dough should be slightly sticky but hold together well—this is crucial for making soft, tender pumpkin scones. If necessary, add a touch more flour to manage stickiness.
Step 5: Shape the Dough
Transfer the dough onto a lightly floured surface and gently pat it into a rectangle about 1 inch thick. For added flakiness, fold the dough into thirds, like a letter, keeping the surface floured to prevent sticking. Pat it out again into a rectangle, being careful not to overwork the dough. This folding technique is essential for light and airy scones.
Step 6: Cut the Scones
After shaping the dough, cut it in half and form each half into a 6-inch round. Use a sharp knife or a bench scraper to slice each round into 6 wedges. Carefully separate them on your floured surface, ensuring each piece has some space to rise during baking. For best results, freeze the cut scones for about 15 minutes while you preheat the oven.
Step 7: Preheat and Prepare for Baking
Preheat your oven to 400°F (200°C) and line a baking sheet with parchment paper. This temperature will help your pumpkin scones achieve a beautiful rise and a golden exterior. While waiting for the oven, brush the tops of the unbaked scones with an egg wash (just whisked egg) to enhance their shine and color during baking.
Step 8: Bake the Scones
Place the scones in the preheated oven and bake for around 15–18 minutes, or until they are puffed and golden brown on the top. You’ll know they’re ready when a toothpick inserted into the center comes out clean. This fragrant baking time will fill your kitchen with delightful aromas reminiscent of a cozy fall afternoon.
Step 9: Prepare the Glaze
While the pumpkin scones cool slightly on a wire rack, whisk together 1 cup of powdered sugar, 2 tablespoons of milk, and ½ teaspoon of ground cinnamon in a small bowl until smooth. Adjust the milk for consistency—aim for a drizzle-able glaze that will beautifully coat the tops of your scones.
Step 10: Glaze and Serve
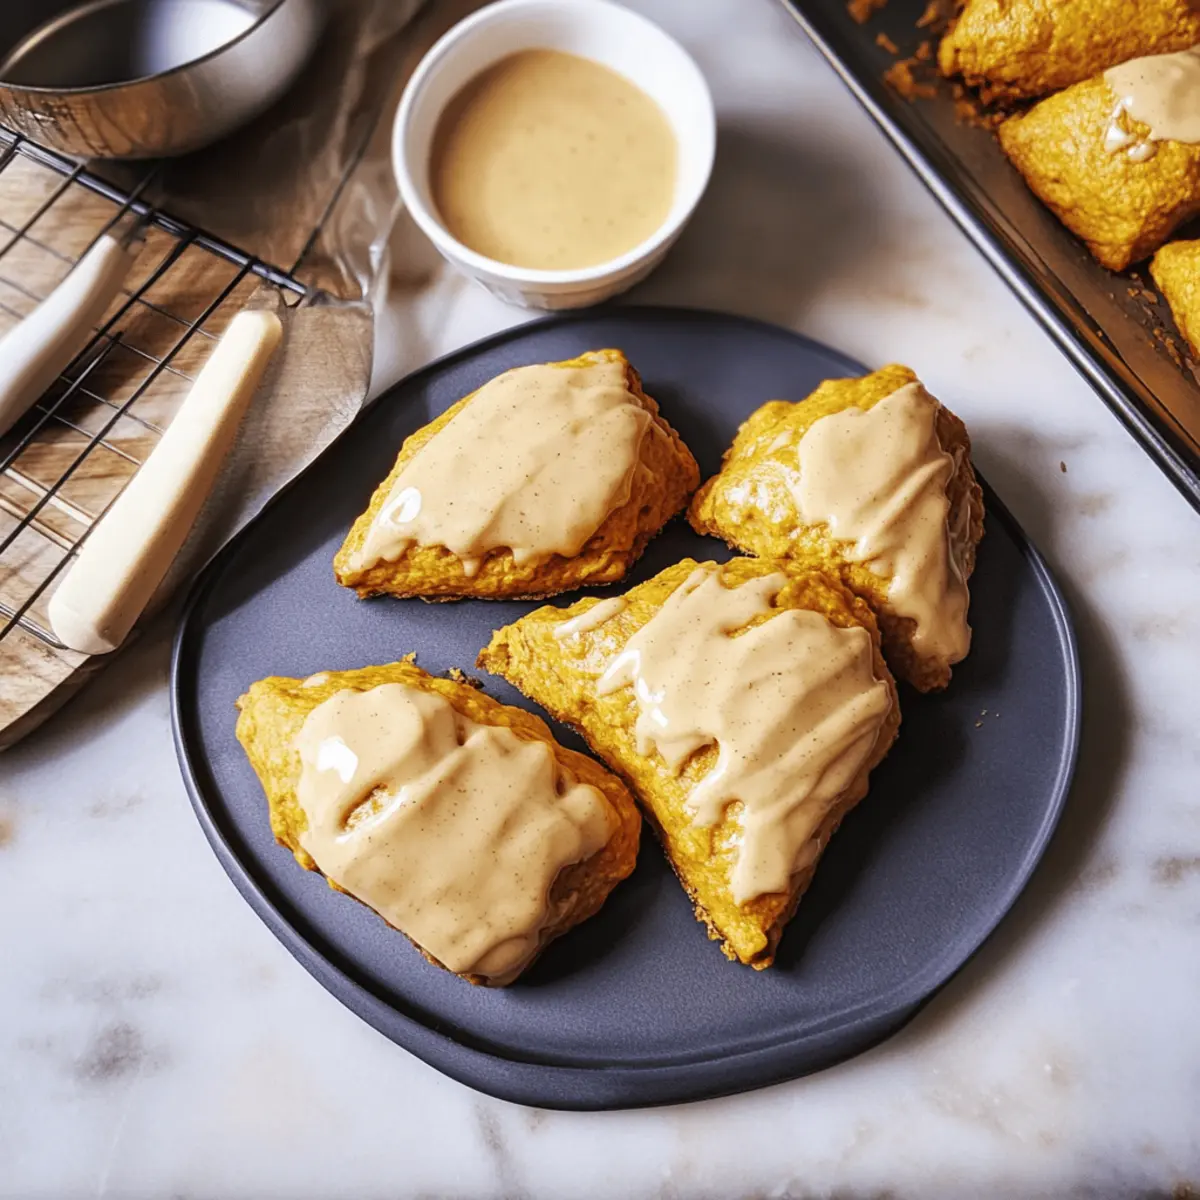
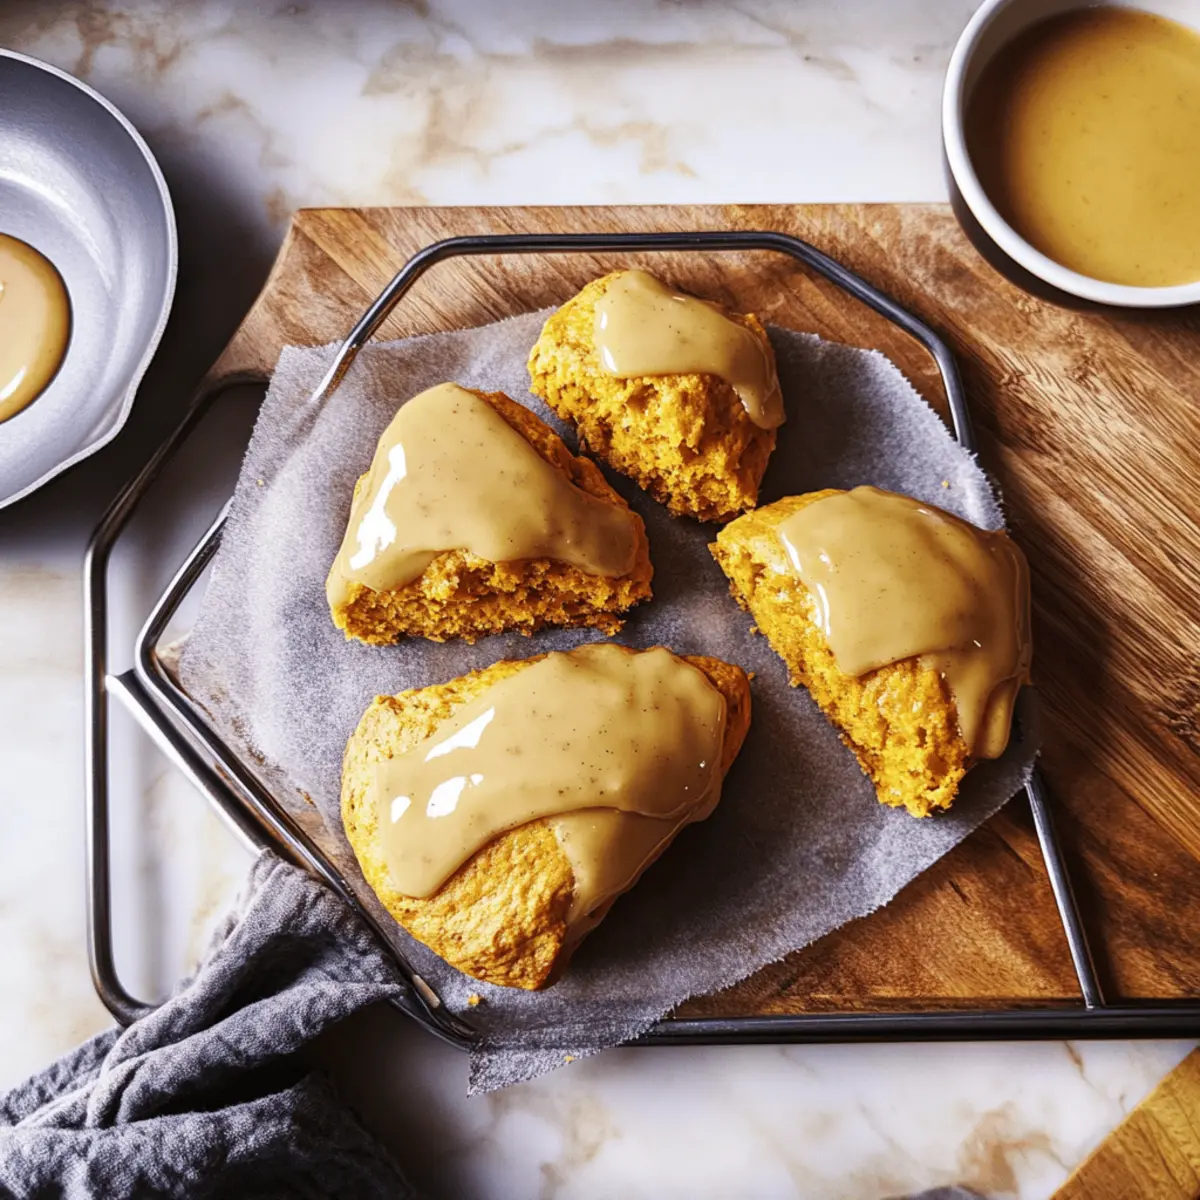
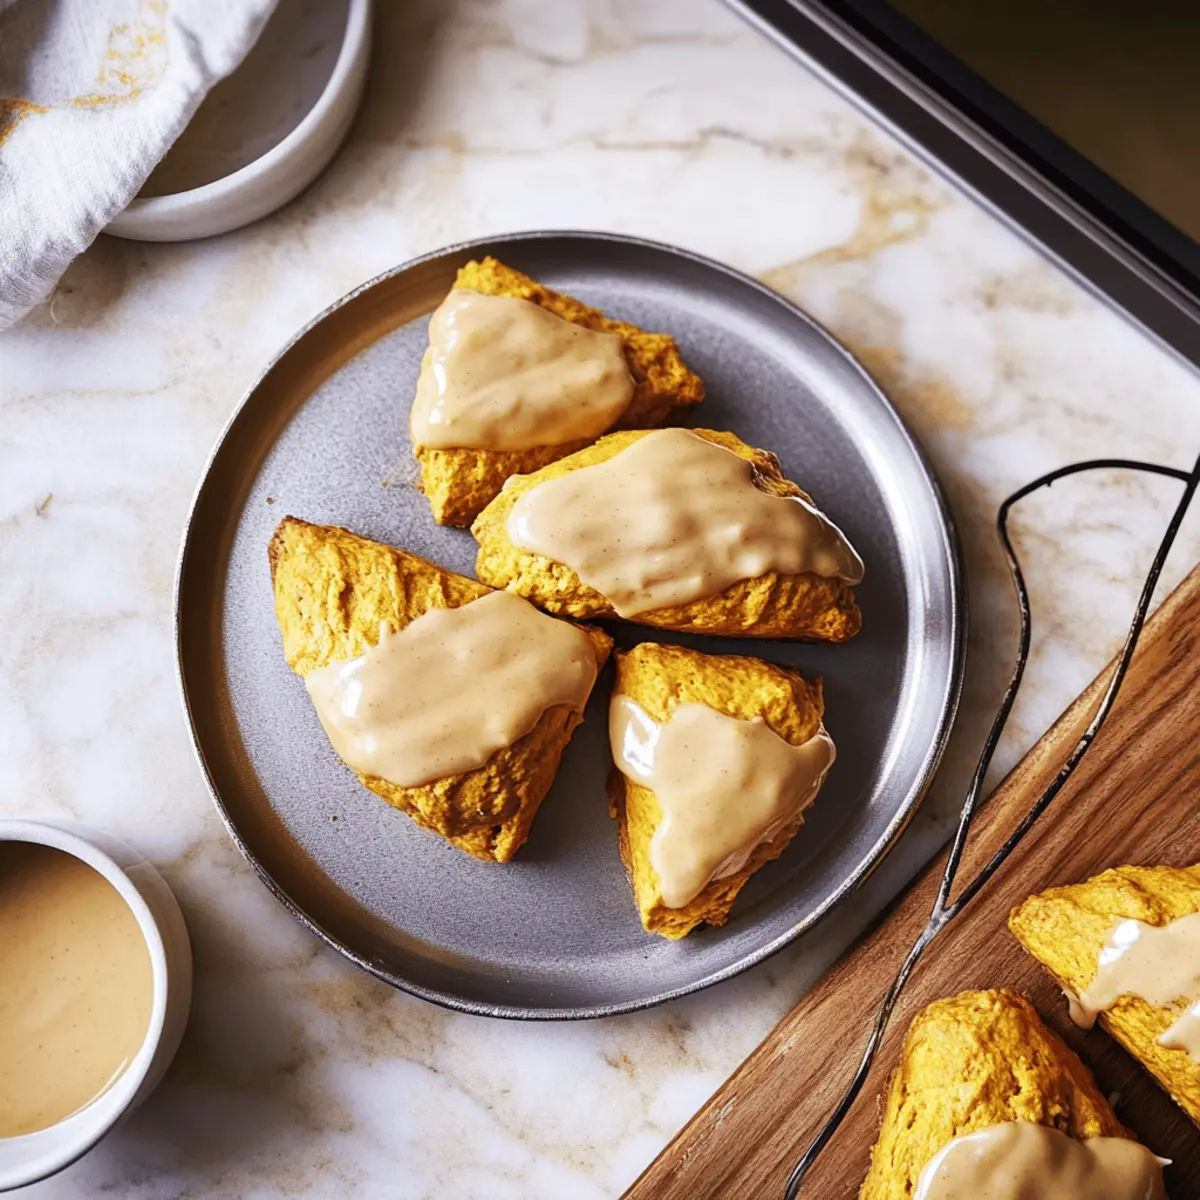
Once the scones have cooled for a few minutes, drizzle the creamy cinnamon glaze over the top using a spoon or a piping bag for artful application. Allow the glaze to set for a moment and then serve your warm and fluffy pumpkin scones with a cup of your favorite coffee or tea, creating the perfect cozy treat for any fall gathering.
Pumpkin Scones: Variations & Substitutions
Feel free to explore these delicious variations and substitutions to make this pumpkin scone recipe truly your own!
-
Gluten-Free: Swap all-purpose flour for a gluten-free blend, ensuring a similar texture without the gluten.
-
Vegan: Use flax eggs instead of large eggs and coconut oil in place of butter for a completely plant-based option. They’ll still be delightful and tender!
-
Maple Twist: Substitute the cinnamon glaze with a maple glaze by using maple syrup instead of milk—perfect for a sweet fall twist.
-
Nutty Addition: Toss in a handful of chopped walnuts or pecans for a crunchy texture that complements the softness of the scones. Their rich flavor will enhance each bite.
-
Fruit Flare: Replace some of the pumpkin puree with mashed bananas or shredded apples for an unexpected fruity addition that will bring new life to your scones.
-
Chocolaty Goodness: Fold in a scoop of chocolate chips into the dough for a sweet contrast against the spices, creating a comforting treat that’s hard to resist.
-
Zesty Lemon: Add a tablespoon of lemon zest to the dough to brighten the flavors; the citrus pairs wonderfully with the pumpkin.
-
Spicy Kick: If you enjoy heat, introduce a pinch of cayenne pepper or some finely chopped jalapeños for an exciting twist that balances with the sweet pumpkin!
These tasty options not only personalize your Pumpkin Scones, but also keep your baking exciting! If you’re looking for more inspiration, check out my recipes for Chunky Cranberry Muffins or a lovely Spiced Apple Bread to keep the cozy vibes flowing. Happy baking!
Expert Tips for Pumpkin Scones
-
Cold Ingredients Matter: Use cold butter and buttermilk to ensure your pumpkin scones are flaky. If your butter softens, chill it again before use.
-
No Overmixing: Gently combine the wet and dry ingredients. Overmixing can lead to tough scones, ruining that tender crumb you want.
-
Freezing for Freshness: Pre-cut scones can be frozen and baked straight from the freezer. Just add a few extra minutes to your baking time for perfect results!
-
Egg Wash for Shine: Brush the tops of your unbaked scones with a beaten egg for a golden, glossy finish. This small step enhances presentation significantly.
-
Embrace Variations: Don’t hesitate to mix in cranberries or nuts for added flavor and texture in your pumpkin scones. A little creativity goes a long way!
-
Use a Light Hand: When shaping the scone dough, use a light hand to keep it tender. Avoid pressing too hard to maintain that lovely, airy texture.
How to Store and Freeze Pumpkin Scones
Room Temperature: Store baked pumpkin scones in an airtight container at room temperature for up to 3 days to maintain their freshness.
Fridge: If you want to keep them for a bit longer, place them in the fridge for up to 1 week, ensuring they’re well-wrapped to prevent drying out.
Freezer: Freeze unbaked scones by placing them on a baking sheet for a few hours to harden; once frozen, transfer to a zip-top bag for up to 1 month. You can bake them from frozen, just add a few extra minutes to the baking time!
Reheating: To reheat, simply pop the scones in a warm oven (350°F) for about 10 minutes or until heated through. Enjoy the delightful aroma of freshly baked pumpkin scones!
What to Serve with Easy Pumpkin Scones with Cinnamon Glaze
These delightful pastries invite you to create a cozy breakfast experience, perfect for sipping your favorite warm drink.
- Fresh Fruit Medley: Juicy apples and pears add a refreshing contrast, balancing the warmth of the scones with a hint of fall brightness.
- Spiced Chai Latte: The aromatic spices in chai complement the pumpkin scones seamlessly, turning your morning into a comforting ritual.
- Maple Butter: Slather a bit of maple-infused butter on your scones for an indulgent touch that celebrates the essence of autumn flavors.
- Creamy Yogurt: A dollop of Greek yogurt drizzled with honey provides a creamy, tangy element that perfectly offsets the sweetness of the scones.
- Nutty Granola: Serve a side of homemade granola for an added crunch, offering a lovely textural contrast to the tender scones.
- Coffee with Cream: Enjoy a warm cup of coffee splashed with cream, creating a harmonious pairing that embraces those cozy mornings.
- Apple Cider: A warm mug of spiced apple cider captures the season’s spirit, enhancing the flavors of the pumpkin scones beautifully.
- Chocolate Hazelnut Spread: Add a spread of chocolate hazelnut for a dessert-like twist, making your pumpkin scones even more irresistible!
- Vanilla Ice Cream: For an indulgent treat, pair with a scoop of vanilla ice cream, transforming your scones into a delightful dessert experience.
Make Ahead Options
These easy pumpkin scones are perfect for busy home cooks who want to savor the flavors of fall without spending all morning in the kitchen! You can prepare the scone dough up to 24 hours in advance by mixing the dry and wet ingredients separately and refrigerating them. When you’re ready to bake, simply combine them and proceed with cutting the scones. Alternatively, you can freeze individual scones for up to 3 months before baking. Place them on a baking sheet to freeze, then transfer them to a zip-top bag. When ready to enjoy, bake from frozen, adding a few extra minutes to the baking time. With these make-ahead options, you’ll enjoy warm, freshly baked pumpkin scones with minimal effort on busy mornings!

Pumpkin Scones Recipe FAQs
How do I select the right pumpkin for my scones?
Absolutely! For the best flavor, choose a pumpkin that feels heavy for its size with a smooth, rich color. Look for pumpkins with a hard shell and no dark spots or blemishes. Canned pure pumpkin puree is also a great option and is often more convenient!
How should I store my baked pumpkin scones?
Store your baked pumpkin scones in an airtight container at room temperature for up to 3 days. If you’re looking to keep them fresh longer, you can refrigerate them for up to 1 week. Just make sure to wrap them well to avoid drying out!
Can I freeze pumpkin scones?
Absolutely! To freeze unbaked pumpkin scones, first place them on a baking sheet and freeze for a few hours until solid. Then, transfer them to a zip-top freezer bag, where they can be stored for up to 1 month. When ready to bake, just pop them in the oven straight from the freezer, and add a few extra minutes to the baking time.
What can I do if my scone dough is too sticky?
If you find your dough is sticky, don’t worry! You can sprinkle a bit of flour over the surface and gently knead it in. Just remember not to overwork the dough, as this can make the scones tough. Aim for a slightly sticky texture that holds together.
Are pumpkin scones safe for my pets?
It’s best to keep pumpkin scones away from pets. While pumpkin itself (without spices or sweeteners) is good for pets in moderation, the sugar and certain spices in scone recipes can be harmful. Stick to rewarding your furry friends with plain pumpkin!
Can I make substitutions for a gluten-free version?
Very much so! You can substitute the all-purpose flour with a gluten-free blend suitable for baking. Just make sure it contains xanthan gum, which helps mimic the gluten structure in scones, ensuring they maintain a nice, tender texture when baked.
Warm and Fluffy Pumpkin Scones Perfect for Fall Mornings
Ingredients
Equipment
Method
- In a large mixing bowl, whisk together all-purpose flour, baking powder, fine sea salt, baking soda, and spices until well combined.
- Cut cold cubed butter into the flour mixture until it resembles coarse crumbs.
- In a separate measuring cup, combine pumpkin puree, buttermilk, and egg, whisking until smooth.
- Create a well in the center of the dry ingredients and pour in the wet mixture, stirring gently until just combined.
- Transfer the dough to a floured surface and pat into a rectangle about 1 inch thick, folding it into thirds.
- Cut the dough in half and form each half into a 6-inch round, slicing each round into 6 wedges.
- Preheat the oven to 400°F (200°C) and brush unbaked scones with egg wash.
- Bake for 15–18 minutes until puffed and golden brown.
- While cooling, whisk together powdered sugar, milk, and ground cinnamon for the glaze.
- Drizzle the glaze over the cooled scones and serve.