“Who knew dirt could be so delightful?” As I watched my niece giggle while digging into her bowl of Oreo Dirt Dessert, I realized this playful treat is the ultimate no-bake dessert for kids and adults alike. It combines creamy pudding, rich cream cheese, and light Cool Whip, all layered with crispy crushed Oreos, taking dessert presentations to a fun new level. No more last-minute runs for fast food when you can whip up this crowd-pleaser in just minutes. This easy-to-make dessert not only offers a deliciously creamy texture but also encourages creativity with its customizable toppings, making it perfect for parties or family gatherings. Ready to learn how to create this fun and indulgent Oreo Dirt Dessert that will have everyone laughing and enjoying every bite? Let’s dig in!
Why Is This Dessert So Fun?
Irresistible Fun: The playful presentation of Oreo Dirt Dessert makes it a guaranteed hit for any gathering, captivating the attention of both kids and adults.
Quick and Easy: You can whip this dessert up in just a few minutes with minimal effort—perfect for busy weeknights or spontaneous parties!
Customizable Delight: With endless topping options, including gummy worms or seasonal candies, you can tailor it to fit any theme or occasion, much like our delicious Pineapple Rings Dessert.
No-Bake Convenience: Skip the oven! This no-bake recipe lets you spend more time enjoying the festivities instead of being stuck in the kitchen.
Rich, Creamy Layers: Each spoonful offers a delightful mix of creamy pudding, smooth cream cheese, and crunchy Oreos, creating a fun texture that your guests will love!
Before serving, consider adding some themed decorations or candies for a personal touch, turning dessert into a delightful centerpiece!
Oreo Dirt Dessert Ingredients
• Let’s gather what you need for this fun treat!
For the Cream Mixture
- Cream Cheese – Adds richness and a creamy texture; you can substitute it with vanilla Greek yogurt for a lighter version.
- Cool Whip – Provides lightness and fluffiness; feel free to use any whipped topping or homemade whipped cream.
- Instant Vanilla Pudding – Acts as a thickening agent and enhances flavor; be sure to use instant pudding for proper setting.
- Milk – Hydrates the pudding mix; non-dairy options like almond or oat milk work well too.
For the Crunch
- Oreo Cookies – Gives the dessert its delightful “dirt” appearance; chocolate Oreos make a richer flavor.
For the Topping
- Gummy Worms – Fun decorative element that enhances the playful aspect of the dessert; you can switch to other candies to fit different themes.
Step‑by‑Step Instructions for Oreo Dirt Dessert
Step 1: Blend Cream Mixture
In a large mixing bowl, combine the instant vanilla pudding mix and 2 cups of cold milk. Using a hand mixer, blend on medium speed for about 2 minutes or until the mixture is smooth and lightly thickened. Next, add the softened cream cheese and continue mixing until fully incorporated, creating a luscious and creamy filling for your Oreo Dirt Dessert.
Step 2: Fold in Cool Whip
Carefully fold in 8 ounces of Cool Whip into the cream mixture using a spatula. Gently combine until the mixture is light and fluffy, taking care not to deflate the whipped topping. Once combined, cover the bowl with plastic wrap and refrigerate it for 15 to 30 minutes to help the flavors meld and the mixture firm slightly before layering.
Step 3: Prepare Oreo Crumbs
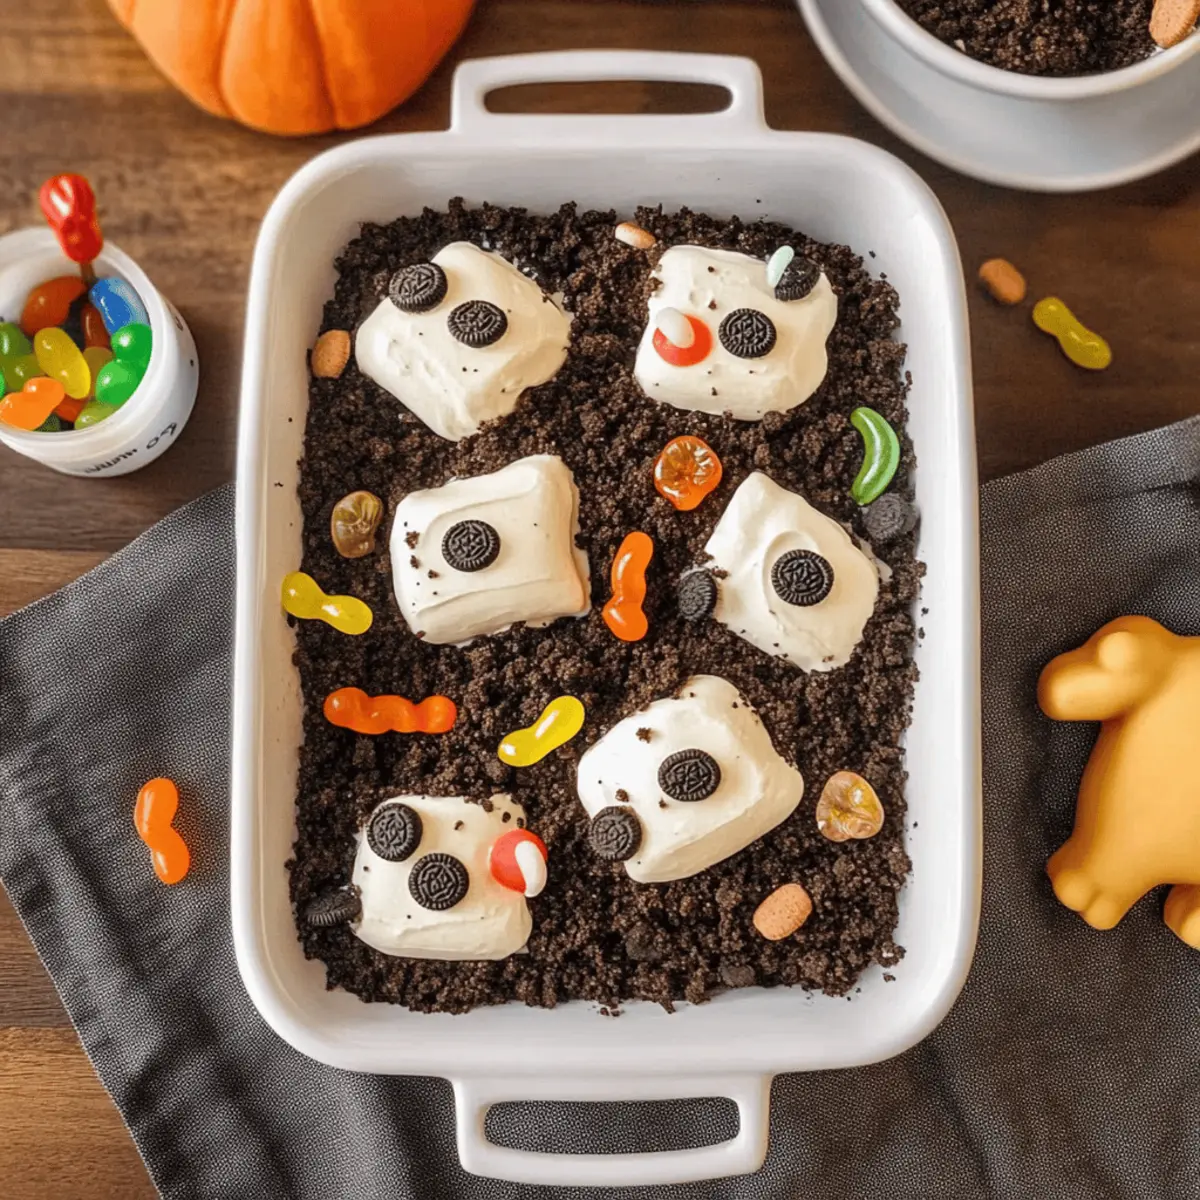
While the cream mixture is chilling, take 15 to 20 Oreo cookies and place them in a resealable plastic bag. Using a rolling pin, crush the cookies until they resemble coarse crumbs, similar to dirt. Alternatively, you can use a food processor for a quicker method. Set these crumbs aside, as they will provide the delicious “dirt” layer in your Oreo Dirt Dessert.
Step 4: Assemble Layers
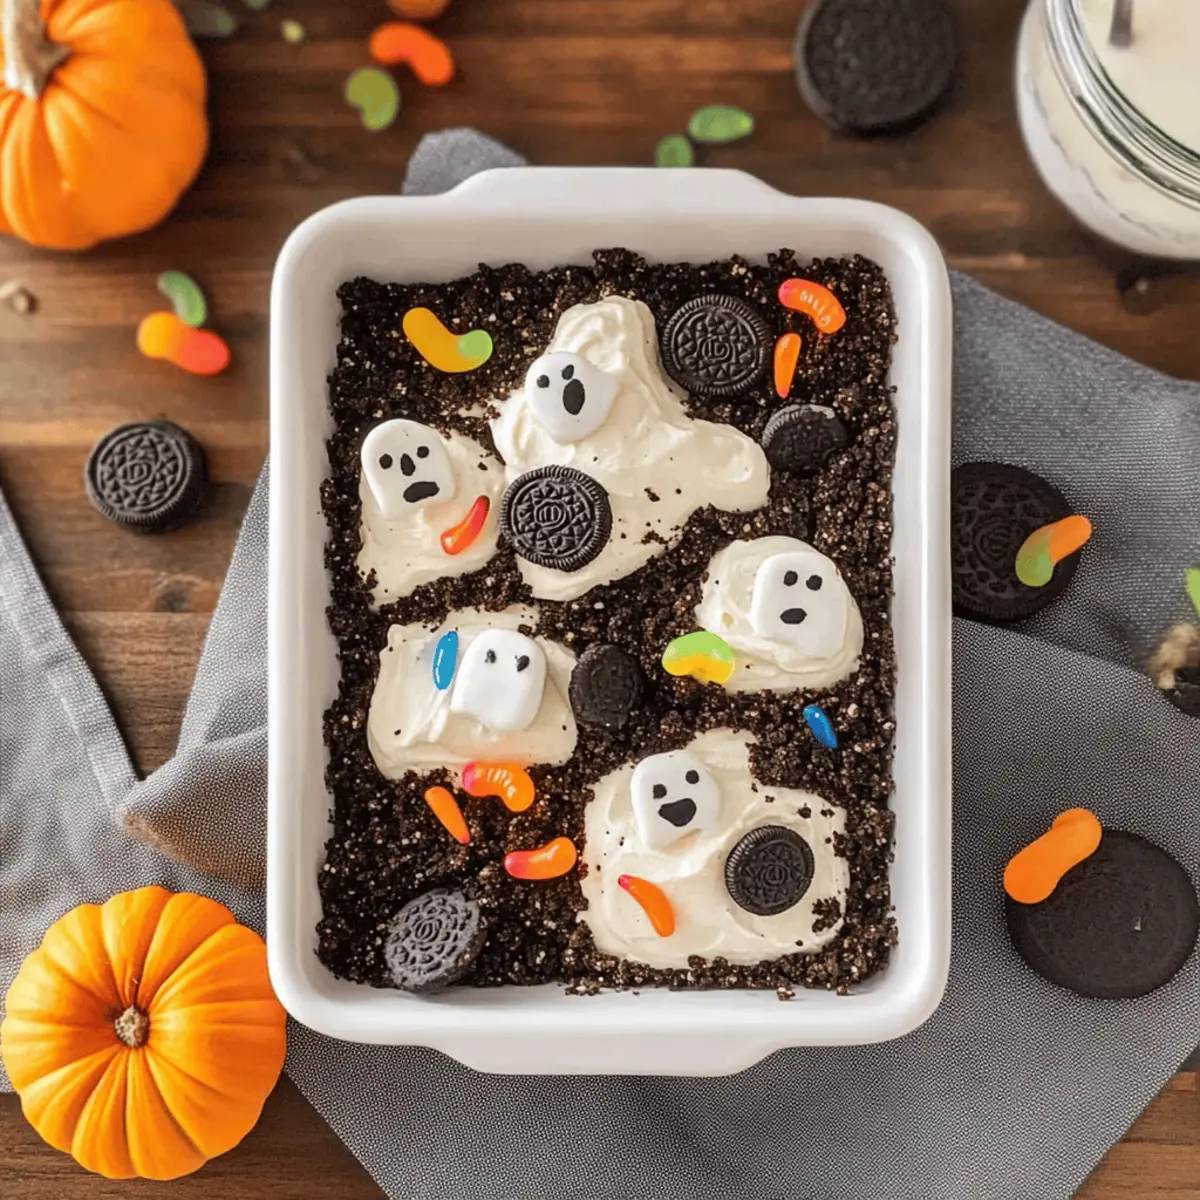
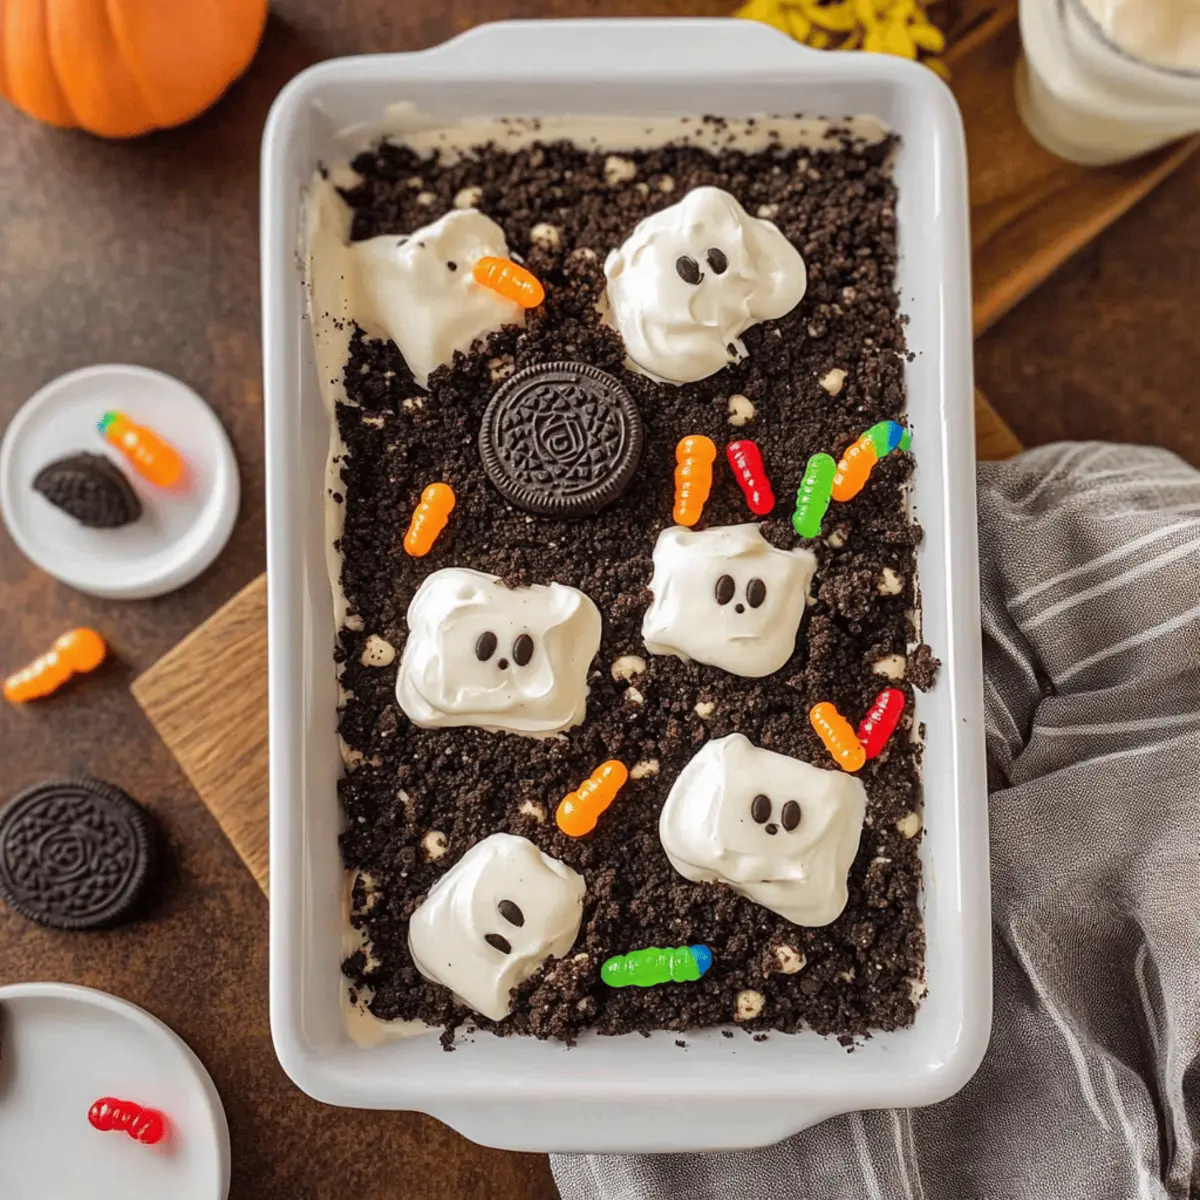
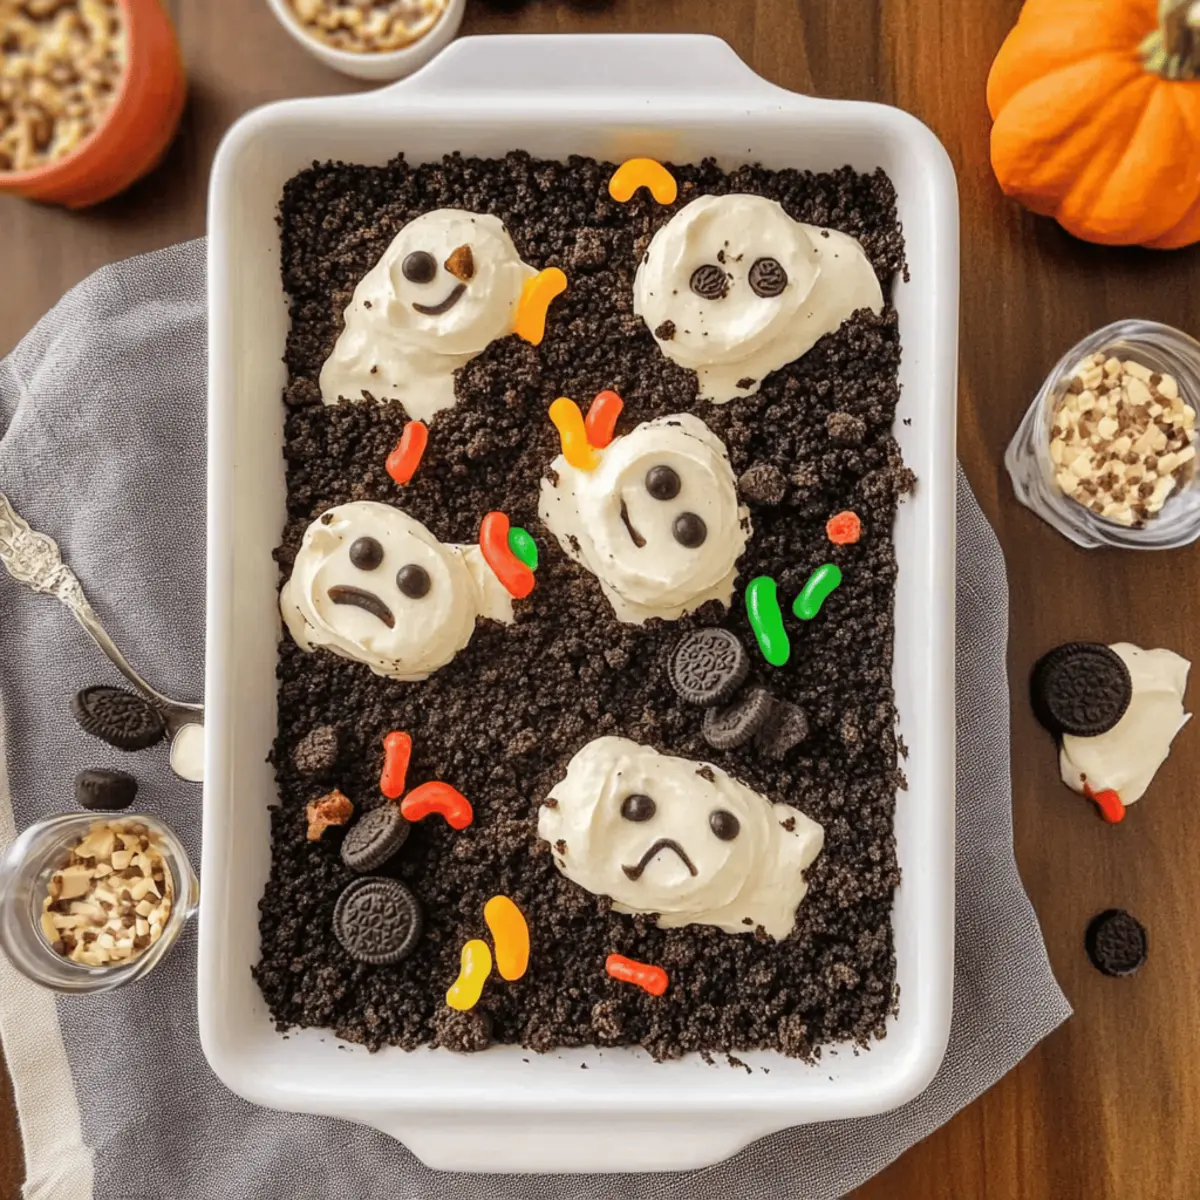
In a trifle bowl or a large casserole dish, start layering the dessert. Spoon half of the cream mixture into the bottom of the bowl, smoothing it out evenly. Next, sprinkle half of your prepared Oreo crumbs over the cream layer. Repeat the layers, finishing with a top layer of Oreo crumbs that mimics the look of dirt in the final presentation of your Oreo Dirt Dessert.
Step 5: Add Toppings
Just before serving, get creative with your toppings! Decorate the top of your final layer with gummy worms or seasonal candies for a fun touch. This step not only enhances the visual appeal but also adds an interactive nature to your dessert. Serve immediately or refrigerate for up to 2 hours, being sure to keep an eye on the Oreo crumbs to prevent them from becoming too soggy.
Make Ahead Options
These Oreo Dirt Dessert options are perfect for busy home cooks looking to save time and still impress at their gatherings! You can prepare the cream mixture (cream cheese, pudding, and Cool Whip) up to 24 hours in advance; simply store it in an airtight container in the refrigerator to ensure it stays fresh and delicious. Additionally, you can crush the Oreo cookies and keep them in a separate airtight container for up to 3 days without worrying about sogginess. When you’re ready to serve, just layer the prepared cream mixture and Oreo crumbs, decorating with gummy worms right before presentation. This way, you’ll have a delightful, stress-free dessert ready to enjoy whenever you need it!
What to Serve with Oreo Dirt Dessert
Bring the joy of dessert time to life with these delightful pairings that will create a memorable meal!
-
Fruity Popsicles: Fresh fruit popsicles offer a refreshing contrast to the rich Oreo Dirt Dessert, adding a burst of natural flavor.
-
Whipped Cream Topping: A dollop of homemade whipped cream adds a light, airy touch that complements the dense layers of the dessert beautifully.
-
Chocolate Chip Cookies: The classic crunch and sweetness of chocolate chip cookies create a familiar flavor that pairs wonderfully with this no-bake treat.
-
Fruit Salad: A bright and colorful fruit salad introduces a fresh, juicy element to your dessert spread, balancing the richness of the Oreo layers perfectly.
-
Ice Cream: Serve with a scoop of vanilla or mint chocolate chip ice cream for a twist on a sundae, enhancing both flavor and texture.
-
Sparkling Lemonade: A fizzy, citrusy drink like sparkling lemonade provides a refreshing contrast, elevating the experience of enjoying your Oreo Dirt Dessert.
-
Caramel Sauce: Drizzle warm caramel sauce over the top for an indulgent sweet experience that pairs beautifully with the chocolatey goodness.
These pairings will not only enhance your dessert party but will also transform a simple gathering into a memorable feast that everyone will adore!
Expert Tips for Oreo Dirt Dessert
-
Use Instant Pudding: Ensure you use instant pudding for the best texture. Regular pudding won’t set properly and may lead to a runny dessert.
-
Chill Before Serving: Refrigerate the assembled dessert for 15–30 minutes to let flavors meld and ensure a firmer consistency, but avoid making it soggy by not exceeding 2 hours in the fridge.
-
Mix Gently: When folding in the Cool Whip, use a spatula and be gentle to retain the light and fluffy texture essential to your Oreo Dirt Dessert.
-
Customize Wisely: While gummy worms are traditional, consider fruit or chocolate decor based on the occasion to make your dessert visually exciting and thematic.
-
Check Serving Dishes: If using themed containers like flower pots, make sure they are food-safe to keep your dessert hygienic and enjoyable for every guest!
How to Store and Freeze Oreo Dirt Dessert
Fridge: Store leftover Oreo Dirt Dessert in an airtight container in the refrigerator for up to 2 days. This keeps it fresh, but remember the Oreos may lose their crunch over time.
Freezer: While it’s not ideal for freezing due to the creamy texture, you can freeze any remaining dessert for up to 1 month. Thaw in the fridge overnight before serving.
Preparation Ahead: If making ahead of time, prepare the cream mixture and Oreo crumbs separately, and layer just before serving for the best texture.
Reheating: This dessert is best enjoyed cold and should not be reheated. Just serve chilled and enjoy the delightful layers of your Oreo Dirt Dessert!
Oreo Dirt Dessert Variations & Substitutions
Customize your Oreo Dirt Dessert for a fun twist that’ll surprise everyone at the table!
-
Greek Yogurt: Swap cream cheese for vanilla Greek yogurt for a lighter, tangy flavor while keeping that creamy texture.
-
Chocolate Oreos: Use chocolate Oreos instead of regular ones for an even richer and more decadent dessert that chocolate lovers will adore.
-
Vanilla Oreos Beach Theme: Switch to vanilla Oreos to create a whimsical beach-themed treat; add edible candies like beach balls or seashells for extra flair.
-
Plant-Themed Additions: Use potted plants instead of standard bowls for serving, and feature mint leaves as a decorative touch for a lovely aesthetic that reminds us of nature.
-
Seasonal Toppings: Decorate for the occasion with themed gummies like pumpkin worms for Halloween or red and green candies for Christmas, making every bite festive and fun!
-
Nutty Treats: Consider adding crushed nuts or granola on top for a delightful crunch that contrasts beautifully with the creamy layers.
-
Fruit Infusion: Toss in some chopped strawberries or raspberries between layers for a fruity burst of flavor that lightens the dessert while adding vibrant color.
-
Spicy Kick: If you’re adventurous, sprinkle a small amount of chili powder on top before serving; it adds an unexpected kick that balances the sweetness perfectly!
Don’t forget to check out our delicious Bake Banana Desserts for another delightful treat!
Oreo Dirt Dessert Recipe FAQs
What type of Oreos should I use?
You can use regular Oreos for that classic “dirt” taste, but if you want something richer, chocolate Oreos are a great alternative. For a beach-themed take, try using vanilla Oreos. Both options will deliver a deliciously fun dessert!
How long can I store leftovers?
Store any leftover Oreo Dirt Dessert in an airtight container in the refrigerator for up to 2 days. This ensures it stays fresh, but be mindful that the Oreos may become less crunchy during storage. Enjoy it soon for the best texture!
Can I freeze Oreo Dirt Dessert?
While freezing is not ideal due to the creamy texture, you can freeze the dessert for up to 1 month. To do this, place it in an airtight container. When you’re ready to enjoy it, simply thaw in the fridge overnight. Keep in mind that the texture may change slightly once frozen.
What if my Cool Whip deflates while mixing?
No worries! If you find that your Cool Whip is deflating during mixing, try folding it in more gently using a spatula instead of an electric mixer. This will help retain its airiness, giving your Oreo Dirt Dessert the light texture you desire.
Can my pets eat any of these ingredients?
It’s best to keep this dessert away from pets. Ingredients like chocolate (in Oreos), cream cheese, and certain toppings like gummy worms can be harmful to them. Always enjoy your Oreo Dirt Dessert yourself, and treat your furry friends to pet-safe snacks!
Is it necessary to use instant pudding for this recipe?
Absolutely! Using instant pudding is crucial for achieving the right consistency in this dessert. Regular pudding won’t set properly, which can result in a runny, less enjoyable treat. Stick with instant for the best results!
Oreo Dirt Dessert: The Fun No-Bake Treat Everyone Loves
Ingredients
Equipment
Method
- In a large mixing bowl, combine the instant vanilla pudding mix and 2 cups of cold milk. Blend on medium speed for about 2 minutes until smooth and lightly thickened. Add the softened cream cheese and continue mixing until fully incorporated.
- Carefully fold in 8 ounces of Cool Whip into the cream mixture using a spatula. Cover the bowl with plastic wrap and refrigerate for 15 to 30 minutes.
- Crush 15 to 20 Oreo cookies in a resealable plastic bag using a rolling pin. Set these crumbs aside.
- In a trifle bowl or large casserole dish, spoon half of the cream mixture and sprinkle half of the Oreo crumbs. Repeat the layers, finishing with a top layer of Oreo crumbs.
- Decorate with gummy worms or seasonal candies just before serving.