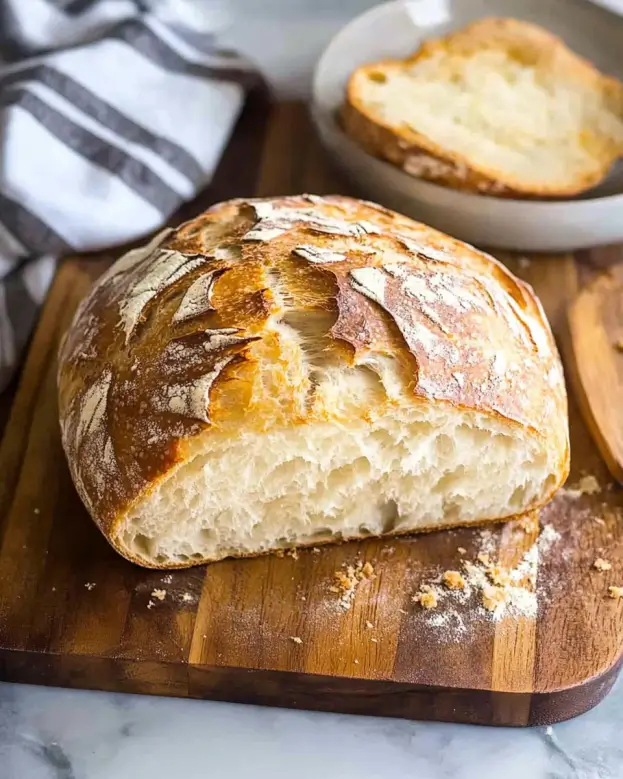
Introduction to No-Knead Artisan Bread Recipe
No-Knead Artisan Bread Recipe is here to save the day! This simple yet delicious recipe allows you to create a crusty, flavorful loaf without the need for extensive kneading. It’s perfect for both beginners and seasoned bakers alike.
What Makes No-Knead Artisan Bread Unique?
No-knead bread is unique because it relies on time rather than effort. The long resting period allows the dough to develop flavor and texture naturally. This method uses a high hydration dough, which means it contains more water than traditional bread recipes. As a result, the bread has a lovely open crumb and a crispy crust. The best part? You don’t need any special equipment or skills to make it!
Benefits of Making No-Knead Artisan Bread at Home
Making no-knead artisan bread at home comes with several benefits:
- Easy Preparation: With just a few ingredients and minimal effort, you can whip up a delicious loaf.
- Cost-Effective: Baking at home saves money compared to buying artisan bread from a bakery.
- Customizable: You can easily add your favorite herbs, spices, or even cheese to create a unique flavor.
- Healthier Option: Homemade bread allows you to control the ingredients, making it a healthier choice.
- Freshness: There’s nothing quite like the smell of freshly baked bread wafting through your home!
So, if you’re ready to embark on a baking adventure, gather your ingredients and let’s dive into the world of no-knead artisan bread!
Ingredients for No-Knead Artisan Bread Recipe
No-Knead Artisan Bread Recipe, you’ll need just a handful of simple ingredients. Each one plays a crucial role in developing the bread’s flavor and texture. Here’s what you’ll need:
- 3 cups all-purpose flour: This is the base of your bread. All-purpose flour provides the right balance of protein and gluten for a great rise.
- 1 ½ teaspoons salt: Salt enhances the flavor of the bread and helps control yeast activity, ensuring a perfect rise.
- ½ teaspoon instant yeast: Instant yeast is a fast-acting yeast that helps the dough rise without the need for kneading.
- 1 ½ cups warm water: Warm water (about 110°F) activates the yeast and hydrates the flour, creating a sticky dough.
These four ingredients are all you need to get started. However, feel free to experiment with different types of flour or add-ins to make the bread your own. For instance, using whole wheat flour can add a nutty flavor, while adding herbs can elevate the taste even further. The possibilities are endless!
Step-by-Step Preparation of No-Knead Artisan Bread Recipe
No-Knead Artisan Bread Recipe. This process is simple and requires minimal effort, making it perfect for anyone looking to bake delicious bread at home.
Step 1: Mixing the Dough
Start by taking a large mixing bowl. Combine the 3 cups of all-purpose flour, 1 ½ teaspoons of salt, and ½ teaspoon of instant yeast. Stir these dry ingredients together until they are well mixed. Next, gradually add in 1 ½ cups of warm water. Use a wooden spoon or spatula to mix until a shaggy dough forms. Don’t worry about making it perfect; it should look a bit messy!
Step 2: First Rise
Once your dough is mixed, it’s time for the first rise. Cover the bowl with plastic wrap or a clean kitchen towel. Let it rest at room temperature for 12 to 18 hours. During this time, the dough will become bubbly and double in size. This long resting period is what gives the bread its unique flavor and texture.
Step 3: Shaping the Dough
After the dough has risen, it’s time to shape it. Lightly flour your work surface to prevent sticking. Gently turn the dough out onto the floured surface. With floured hands, shape the dough into a ball. Be careful not to deflate it too much; you want to keep those air bubbles that formed during the rise!
Step 4: Second Rise
Now, place the shaped dough seam side down on a piece of parchment paper. Cover it with a kitchen towel and let it rest for another 1 to 2 hours. This second rise allows the dough to relax and expand further, ensuring a light and airy loaf.
Step 5: Baking the Bread
About 30 minutes before your dough is ready, preheat your oven to 450°F. Place a Dutch oven (with the lid) inside the oven to heat up. Once the oven is preheated, carefully remove the hot Dutch oven. Lift the parchment paper with the dough and place it into the pot. Cover it with the lid and bake for 30 minutes. After that, remove the lid and bake for an additional 15-20 minutes, or until the bread is golden brown and crusty. Finally, remove the bread from the pot and let it cool on a wire rack before slicing.
And there you have it! Your very own no-knead artisan bread, ready to be enjoyed. The process is straightforward, and the results are simply delicious!
Variations of No-Knead Artisan Bread Recipe
No-Knead Artisan Bread Recipe, it’s time to get creative! There are countless ways to customize your bread to suit your taste. Here are some delightful variations to try:
Adding Herbs and Spices
Herbs and spices can elevate your no-knead bread to a whole new level. Consider adding 1 tablespoon of dried herbs like rosemary, thyme, or oregano to the dry ingredients. These herbs will infuse the bread with wonderful flavors. You can also experiment with spices like garlic powder or onion powder for an extra kick. Just remember to mix them well with the flour before adding the water!
Incorporating Cheese or Olives
If you love cheese, why not add some to your bread? Shredded cheese, such as cheddar or mozzarella, can be mixed into the dough during the initial mixing stage. For a Mediterranean twist, consider adding chopped olives. Just fold them into the dough gently to avoid deflating it. Both options will create a savory loaf that pairs perfectly with soups or salads.
Sweet Variations: Cinnamon Raisin No-Knead Artisan Bread
For those with a sweet tooth, a cinnamon raisin variation is a must-try! To make this delightful bread, add 1 tablespoon of ground cinnamon and ½ cup of raisins to the dry ingredients. You can also sprinkle a bit of sugar for added sweetness. This sweet bread is perfect for breakfast or as a snack. Just imagine the aroma of cinnamon wafting through your kitchen!
These variations not only enhance the flavor but also make your no-knead artisan bread unique. Feel free to mix and match ingredients to create your own signature loaf!
Cooking Note for No-Knead Artisan Bread Recipe
No-Knead Artisan Bread Recipe, a few cooking notes can help ensure your success. These tips will guide you through the process and help you achieve that perfect loaf every time.
First, pay attention to the temperature of your ingredients. The warm water should be around 110°F. This temperature is crucial for activating the yeast. If the water is too hot, it can kill the yeast, preventing your bread from rising. On the other hand, if it’s too cold, the yeast will not activate properly, leading to a dense loaf.
Next, consider the humidity in your kitchen. If it’s particularly humid, you may need to adjust the amount of flour slightly. Start with the recommended 3 cups, but be prepared to add a little more if the dough feels too sticky. The goal is to achieve a shaggy, but manageable dough.
Another important note is to avoid overworking the dough. The beauty of no-knead bread lies in its simplicity. Once you mix the ingredients, let the dough rest and rise without excessive handling. This allows the gluten to develop naturally, resulting in a light and airy texture.
Lastly, don’t skip the preheating of your Dutch oven. A hot pot is essential for creating that crispy crust we all love. When you place the dough into the hot Dutch oven, the steam created will help the bread rise and form a beautiful crust. So, be patient and let your oven do its magic!
By keeping these cooking notes in mind, you’ll be well on your way to baking a delicious loaf of no-knead artisan bread. Happy baking!
Serving Suggestions for No-Knead Artisan Bread Recipe
No-Knead Artisan Bread Recipe, it’s time to enjoy it! This bread is incredibly versatile and can be paired with a variety of dishes. Here are some delightful serving suggestions to enhance your bread experience.
Pairing with Dips and Spreads
No-knead artisan bread is perfect for dipping! Consider serving it with a selection of dips and spreads. Here are a few ideas:
- Olive Oil and Balsamic Vinegar: A classic combination! Drizzle some high-quality olive oil and balsamic vinegar on a plate for dipping. The flavors complement the bread beautifully.
- Hummus: This creamy spread is a fantastic match. Try different flavors like roasted red pepper or garlic for a tasty twist.
- Spinach and Artichoke Dip: Warm, cheesy dips are always a hit. Serve your bread alongside this rich dip for a crowd-pleasing appetizer.
- Guacamole: For a fresh and zesty option, pair your bread with homemade guacamole. The creamy texture and flavors will make your taste buds dance!
These dips and spreads not only enhance the flavor of your bread but also make for a delightful snack or appetizer at gatherings.
Serving with Soups and Salads
No-knead artisan bread is also a fantastic accompaniment to soups and salads. Here are some delicious pairings:
- Tomato Soup: A warm bowl of tomato soup and a slice of crusty bread is a comforting classic. The bread is perfect for dipping!
- Chicken Noodle Soup: This hearty soup pairs wonderfully with your artisan bread. Enjoy a slice alongside your bowl for a satisfying meal.
- Caesar Salad: The crunchy texture of a Caesar salad complements the soft interior of the bread. Use the bread to scoop up the salad for a delightful bite.
- Mixed Green Salad: A light salad with vinaigrette dressing is a refreshing option. The bread adds substance and makes the meal more filling.
These serving suggestions will elevate your no-knead artisan bread experience. Whether you’re enjoying it as a snack or as part of a meal, this bread is sure to impress!
Tips for Perfecting Your No-Knead Artisan Bread Recipe
No-Knead Artisan Bread Recipe, a few tips can make a big difference. These insights will help you refine your technique and create a loaf that’s not only delicious but also visually appealing.
Choosing the Right Flour
The type of flour you use can significantly impact the texture and flavor of your bread. While all-purpose flour is a great choice, consider experimenting with different types:
- Whole Wheat Flour: This flour adds a nutty flavor and increases the nutritional value of your bread. However, it may require a bit more water due to its higher absorption rate.
- Bread Flour: With a higher protein content, bread flour can create a chewier texture and better rise. It’s perfect for those who enjoy a heartier loaf.
- Gluten-Free Flour: If you need a gluten-free option, look for a blend specifically designed for bread. This will help mimic the texture of traditional bread.
When choosing flour, always check the packaging for specific instructions. Each type may require slight adjustments in hydration or rising time. Don’t hesitate to try different combinations to find your perfect mix!
Importance of Hydration in the Dough
Hydration is key to achieving that lovely open crumb and crispy crust in your no-knead bread. A higher hydration dough means more water, which helps create steam during baking. Here are some tips to manage hydration:
- Adjust Water Amount: If your dough feels too dry or crumbly, add a little more water, a tablespoon at a time. Conversely, if it’s too sticky, sprinkle in a bit more flour.
- Use Warm Water: Always use warm water (around 110°F) to activate the yeast effectively. This helps the dough rise properly and develop flavor.
- Monitor Humidity: In humid conditions, you may need to reduce the water slightly. Conversely, in dry conditions, you might need to increase it. Trust your instincts!
By paying attention to the hydration levels, you’ll create a dough that’s easier to work with and yields a beautiful loaf. Remember, practice makes perfect, so don’t be afraid to experiment!
Breakdown of Time for No-Knead Artisan Bread Recipe
No-Knead Artisan Bread Recipe is essential for planning your baking day. This recipe involves several stages, each requiring different amounts of time. Here’s a breakdown to help you manage your schedule effectively.
Prep Time
The prep time for this no-knead artisan bread is quite minimal. You’ll spend about 15 minutes mixing the ingredients. This includes measuring out the flour, salt, yeast, and warm water, and stirring them together to form the dough. After that, you simply cover the bowl and let it rest. So, the total prep time is approximately 15 minutes.
Cooking Time
Once your dough has risen and is ready to bake, the cooking time is about 45 to 50 minutes. This includes:
- 30 minutes: Baking with the lid on the Dutch oven, which helps create steam and a beautiful crust.
- 15-20 minutes: Baking with the lid off to achieve that golden-brown finish.
So, the total cooking time is around 45 to 50 minutes.
Total Time
When you combine the prep time and cooking time, the total time for making your no-knead artisan bread is approximately:
- Prep Time: 15 minutes
- First Rise: 12 to 18 hours (this is passive time)
- Second Rise: 1 to 2 hours
- Cooking Time: 45 to 50 minutes
In total, you’re looking at about 13 to 20 hours from start to finish, but most of that time is just letting the dough rise. The actual hands-on time is quite short, making this recipe perfect for busy bakers!
Nutritional Information for No-Knead Artisan Bread Recipe
No-Knead Artisan Bread Recipe is essential for those who are mindful of their diet. This bread is not only delicious but also provides a good balance of nutrients. Here’s a breakdown of the key nutritional components per serving:
Calories
Each serving of this delightful no-knead artisan bread contains approximately 150 calories. This makes it a great option for a snack or as part of a meal without overwhelming your daily caloric intake. The bread’s satisfying texture and flavor can help curb cravings while keeping your energy levels steady.
Protein
In terms of protein, each serving offers about 4 grams. While this may not seem like a lot, it contributes to your daily protein needs. Pairing the bread with protein-rich toppings, like hummus or cheese, can enhance its nutritional value and make for a more balanced meal.
Sodium
The sodium content in each serving is around 0.5 grams. This is relatively low, making it a heart-healthy choice. However, if you are watching your sodium intake, be mindful of what you pair with the bread. Opt for low-sodium dips and spreads to keep your meal healthy.
No-Knead Artisan Bread Recipe is a wholesome addition to your diet. It provides essential nutrients while allowing for creativity in your meals. Enjoy it as part of a balanced diet, and feel free to experiment with different toppings and pairings!
FAQs about No-Knead Artisan Bread Recipe
Can I use whole wheat flour for No-Knead Artisan Bread?
No-Knead Artisan Bread Recipe. However, keep in mind that whole wheat flour absorbs more water than all-purpose flour. You may need to adjust the amount of water in your recipe. Start with the same amount of water, but be prepared to add a little more if the dough feels too dry. Whole wheat flour will give your bread a nutty flavor and a denser texture, which many people enjoy!
How long can I store No-Knead Artisan Bread?
No-Knead Artisan Bread can be stored at room temperature for about 2 to 3 days. To keep it fresh, wrap it in a clean kitchen towel or place it in a paper bag. Avoid using plastic wrap, as it can make the crust soft. If you want to store it for a longer period, consider freezing it. Slice the bread before freezing, and wrap it tightly in plastic wrap and then in aluminum foil. It can last up to 3 months in the freezer. When you’re ready to enjoy it, simply thaw it at room temperature or toast the slices directly from the freezer!
What if my dough is too sticky?
If your dough feels too sticky, don’t worry! This can happen, especially if you’re in a humid environment. First, try to sprinkle a little more flour onto your work surface and your hands while shaping the dough. However, be cautious not to add too much flour, as it can affect the texture of your bread. Remember, a slightly sticky dough is normal for no-knead bread and can lead to a great crust and airy crumb. If it’s excessively sticky, you might need to adjust the water next time you make it. Practice makes perfect, so keep experimenting!
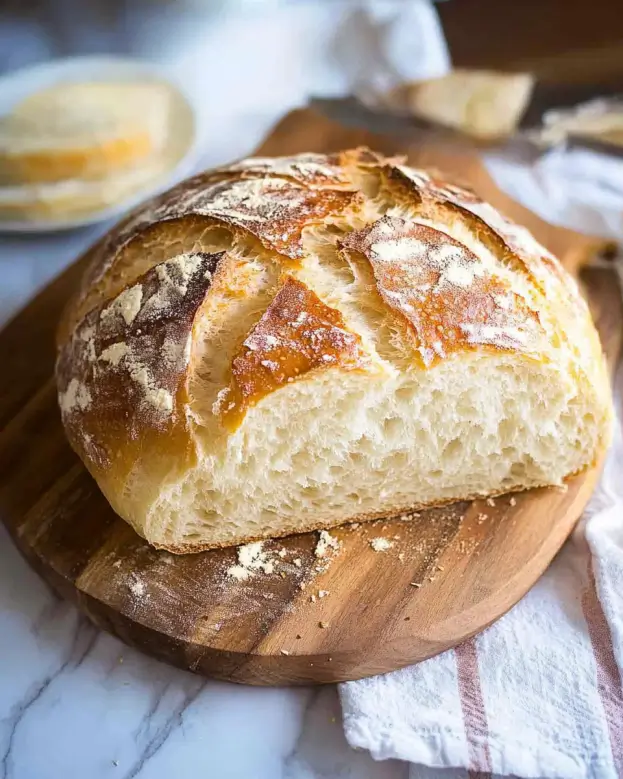
Conclusion on No-Knead Artisan Bread Recipe
No-Knead Artisan Bread Recipe is a fantastic way to enjoy homemade bread without the fuss of traditional kneading. This method allows anyone, regardless of baking experience, to create a delicious loaf with a crispy crust and soft interior. The long resting times work wonders, developing rich flavors and textures that are simply irresistible.
As you’ve seen, the ingredients are minimal, and the steps are straightforward. With just a little patience, you can produce a beautiful loaf that will impress your family and friends. Plus, the variations you can explore make this recipe even more exciting. Whether you prefer savory herbs, cheesy additions, or sweet cinnamon raisin bread, the possibilities are endless!
Remember to keep the cooking notes and tips in mind as you bake. They will help you achieve the best results and refine your technique over time. Baking bread can be a rewarding experience, filling your home with delightful aromas and creating a sense of accomplishment.
So, gather your ingredients, roll up your sleeves, and embark on this baking adventure. Your kitchen will soon be filled with the warm, comforting scent of freshly baked no-knead artisan bread. Enjoy every slice, and don’t forget to share with loved ones. Happy baking!