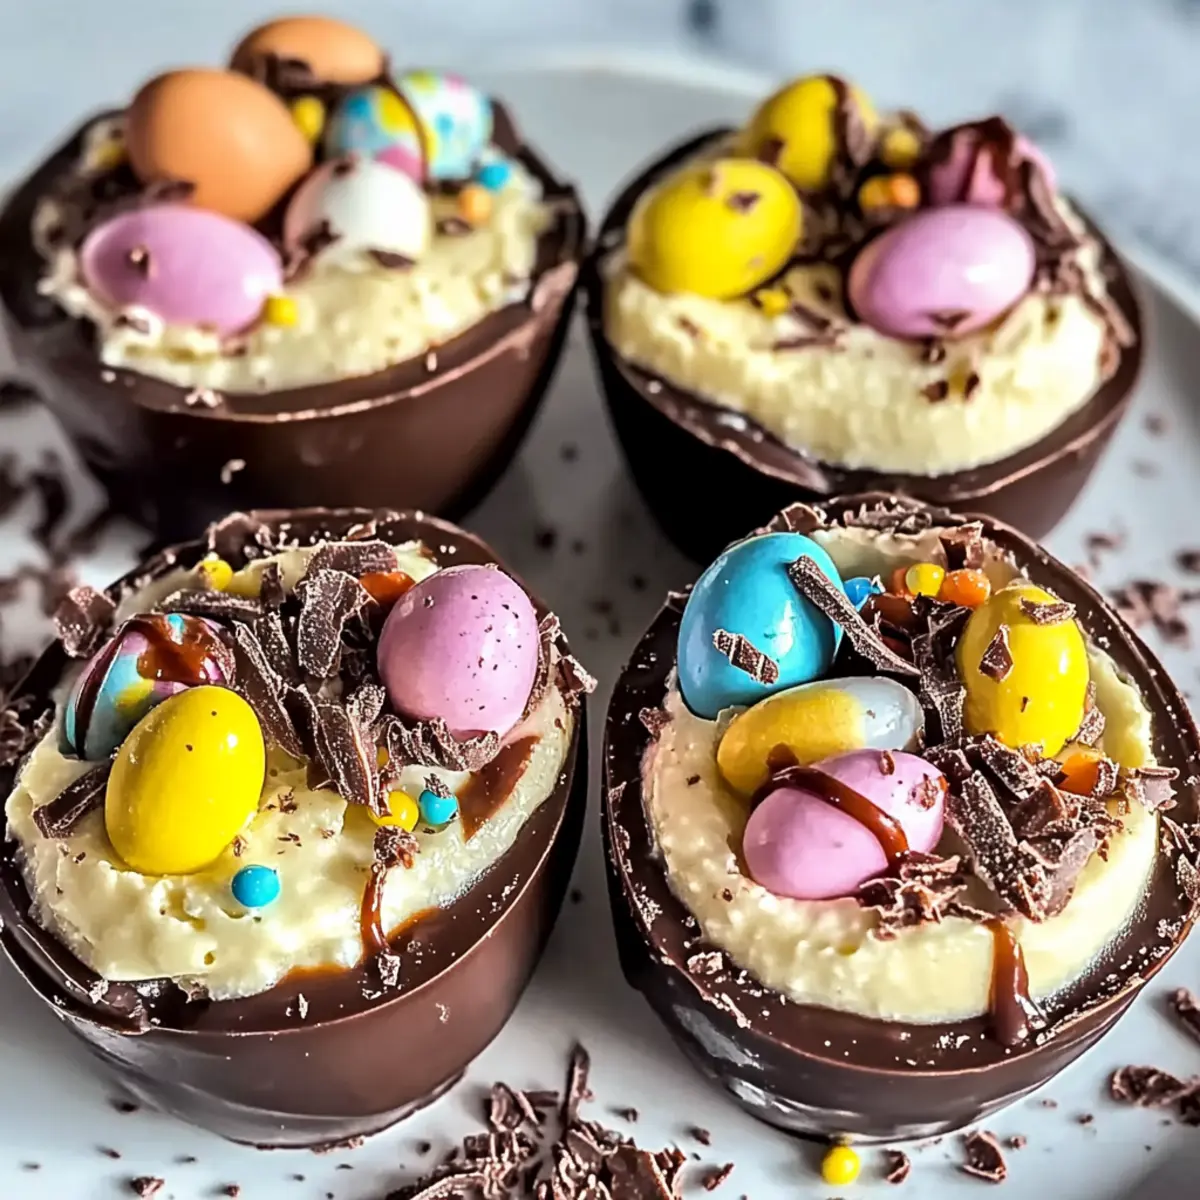
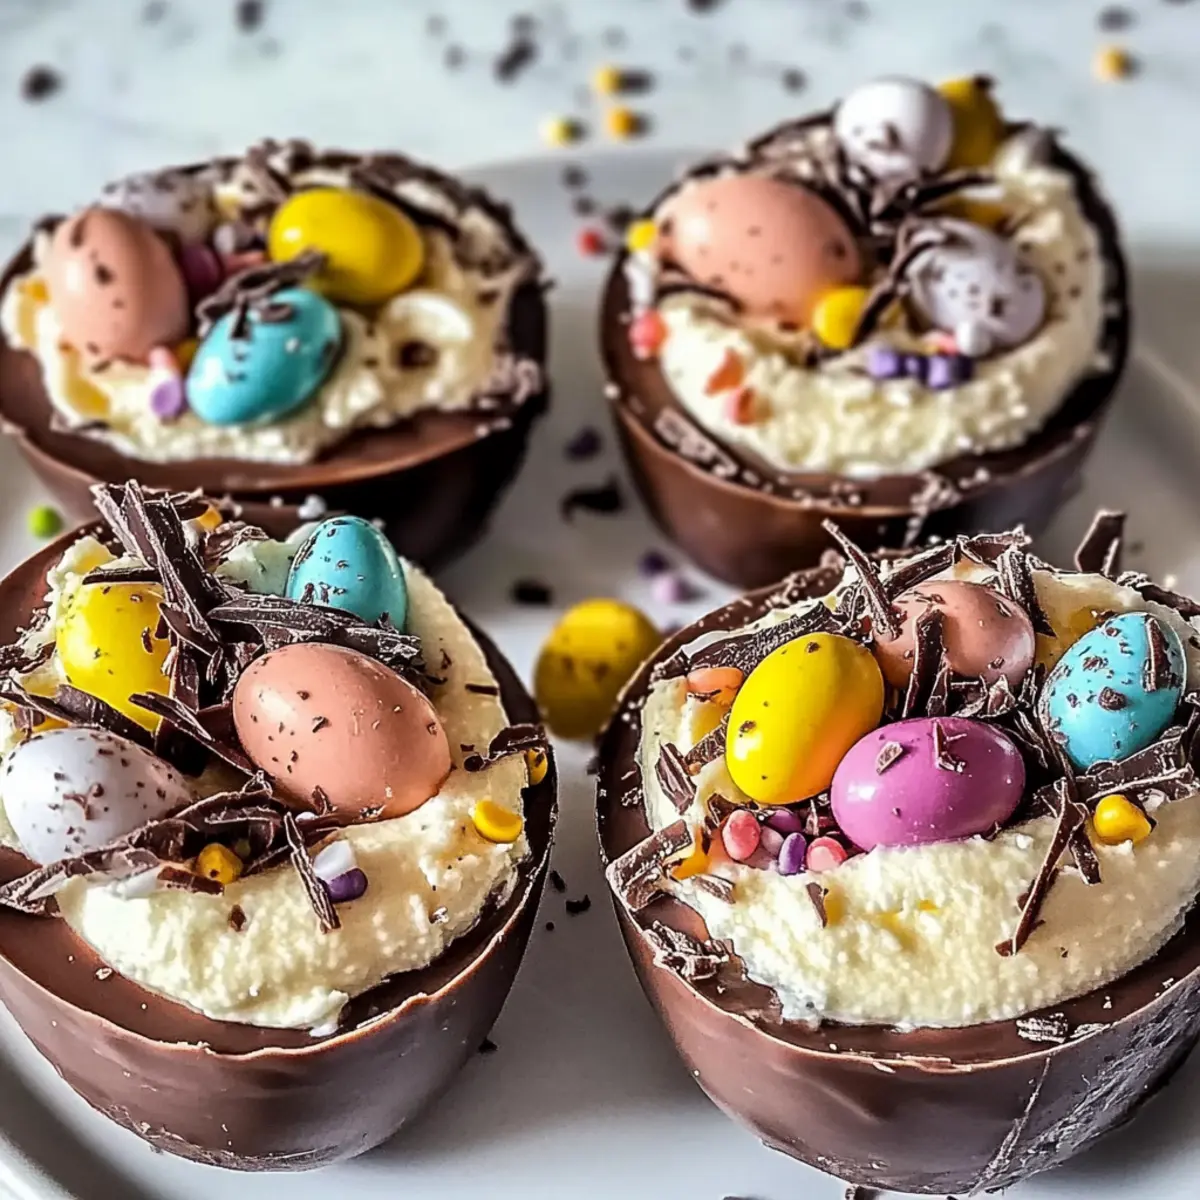
As I pulled the delicate hollow Easter eggs from the fridge, I couldn’t help but feel a childlike excitement bubbling within me. This No-Bake Easter Egg Cheesecake is a whimsical delight that transforms ordinary gatherings into unforgettable celebrations. Combining the creamy richness of cheesecake with playful chocolate shells, it’s a crowd-pleaser that even the busiest home chef can whip up with ease. Plus, its versatility allows for endless customization—think dairy-free options and flavor twists that will keep your desserts fresh and fun. Best of all, you can prepare this show-stopping dessert in advance, giving you more time to enjoy the festivities and less time worrying about the kitchen. Are you ready to add a touch of magic to your Easter celebrations?
Why is this cheesecake a must-try?
Simplicity at its finest: The no-bake process makes this cheesecake incredibly easy, perfect for home chefs of any skill level.
Irresistible flavor: The creamy filling paired with crunchy chocolate shells creates a delectable dessert experience.
Customizable for every palate: Whether you prefer dairy-free options or different flavor twists, you can easily personalize this cheesecake to fit your taste.
Ideal for gatherings: Its whimsical presentation is sure to be a hit at any party or celebration, delighting both kids and adults alike.
Need some refreshing accompaniment? Pair it with fresh strawberries or Easter Punch Seasonal for an extra festive touch!
No-Bake Easter Egg Cheesecake Ingredients
For the Cheesecake Filling
- Cream Cheese – Provides smooth, rich creaminess essential for cheesecake; substitute with vegan cream cheese for a dairy-free version.
- Caster Sugar – Sweetens the filling evenly, creating a balanced flavor; you can use granulated sugar as a substitute.
- Milk – Adds moisture to the filling; almond milk works well for a dairy-free option.
- Vanilla Extract – Enhances the flavor profile of the cheesecake; almond extract can be utilized for a unique twist.
- Whipping Cream – Adds lightness and airiness to the filling; opt for coconut cream for a dairy-free alternative.
For the Crust
- Hollow Easter Eggs – Acts as a whimsical “shell” for the cheesecake; ensure they’re intact and at room temperature before filling.
- Cookies – Forms the base crust, providing texture and flavor; you can use Graham crackers or any similar cookie.
- Unsalted Butter – Binds the crust together by adding moisture; make sure it’s melted before mixing with cookie crumbs.
For the Topping
- Melted Dark Chocolate – Used for drizzling on top, providing a rich chocolatey finish; feel free to substitute with milk chocolate.
- Mini Eggs – Fun decorative topping to enhance the festive presentation and make your no-bake Easter egg cheesecake even more enticing.
Step‑by‑Step Instructions for No-Bake Easter Egg Cheesecake
Step 1: Prepare the Crust
Start by crushing your cookies into fine crumbs using a food processor or a rolling pin in a zip-top bag. Combine the crumbs with melted unsalted butter until the mixture resembles wet sand. Carefully press the cookie mixture firmly into the hollow Easter egg shells, creating an even layer. Place the filled shells in the refrigerator for about 30 minutes to set.
Step 2: Make the Filling
In a large mixing bowl, beat the softened cream cheese with an electric mixer on medium speed until smooth and creamy, which should take about 2-3 minutes. Gradually add caster sugar, milk, and vanilla extract, mixing until all ingredients are well-combined and luscious. The filling should be smooth and free of lumps, perfect for your No-Bake Easter Egg Cheesecake.
Step 3: Whip the Cream
In a separate bowl, use a clean mixer to whip the cold whipping cream on high speed until soft peaks form, approximately 3-5 minutes. Be careful not to over-whip, as you want it to remain light and airy. Once whipped, gently fold this fluffy cream into the cream cheese mixture until fully incorporated, creating a light and airy filling.
Step 4: Fill the Eggs
Now it’s time to spoon your creamy filling into the prepared Easter egg shells! Using a spatula, smoothly fill each shell, making sure the tops are level for a neat finish. You can tap the filled eggs lightly on the counter to eliminate any air bubbles. Once filled, return them to the fridge for a final chill.
Step 5: Decorate
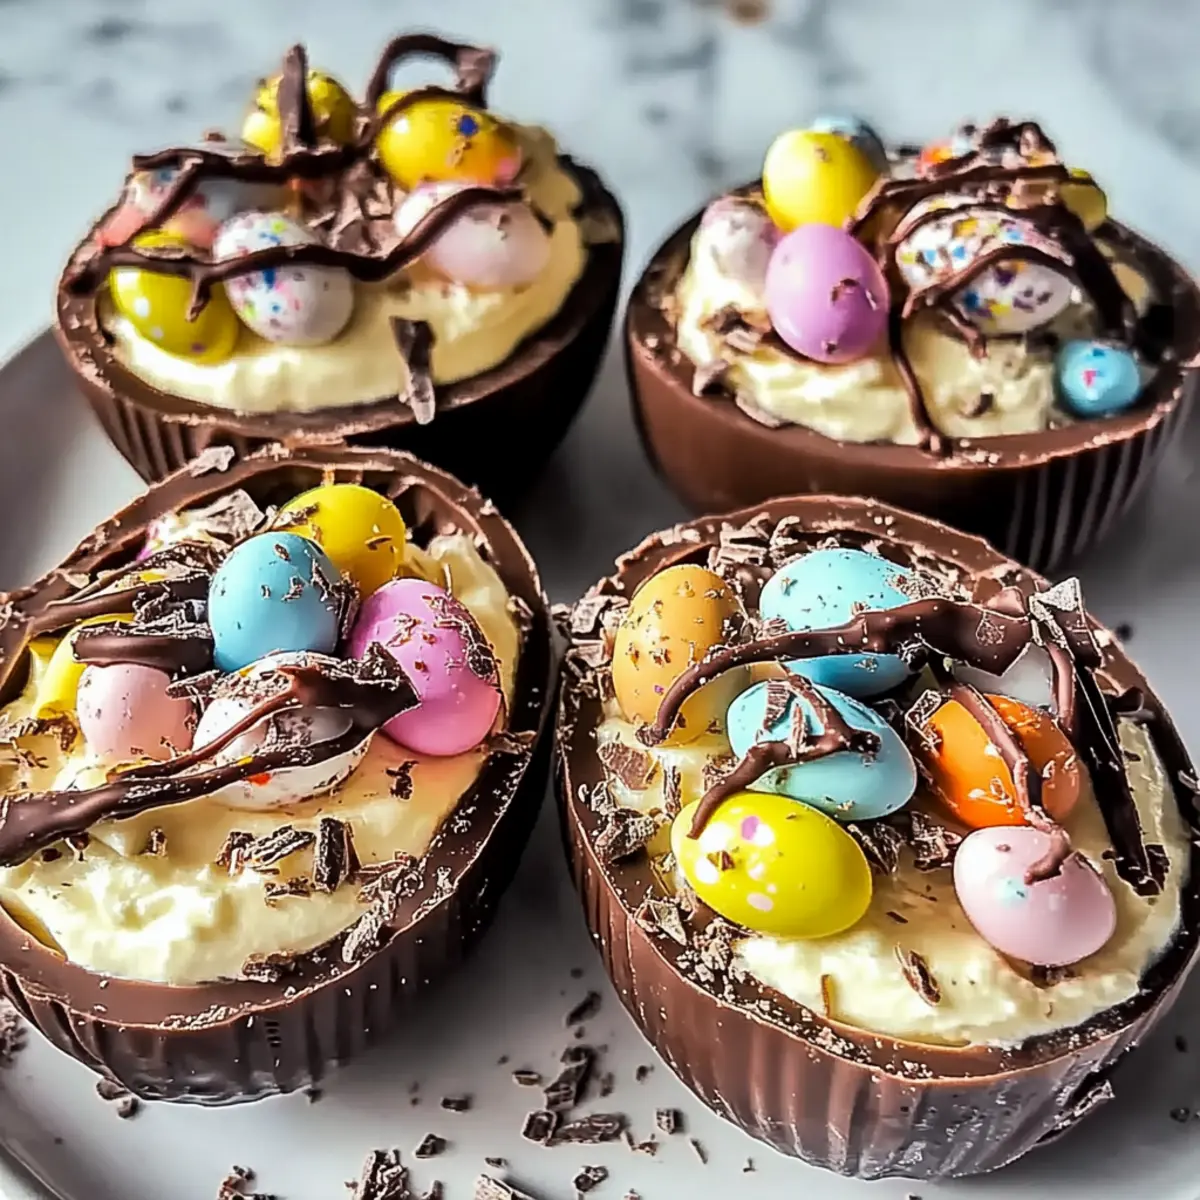
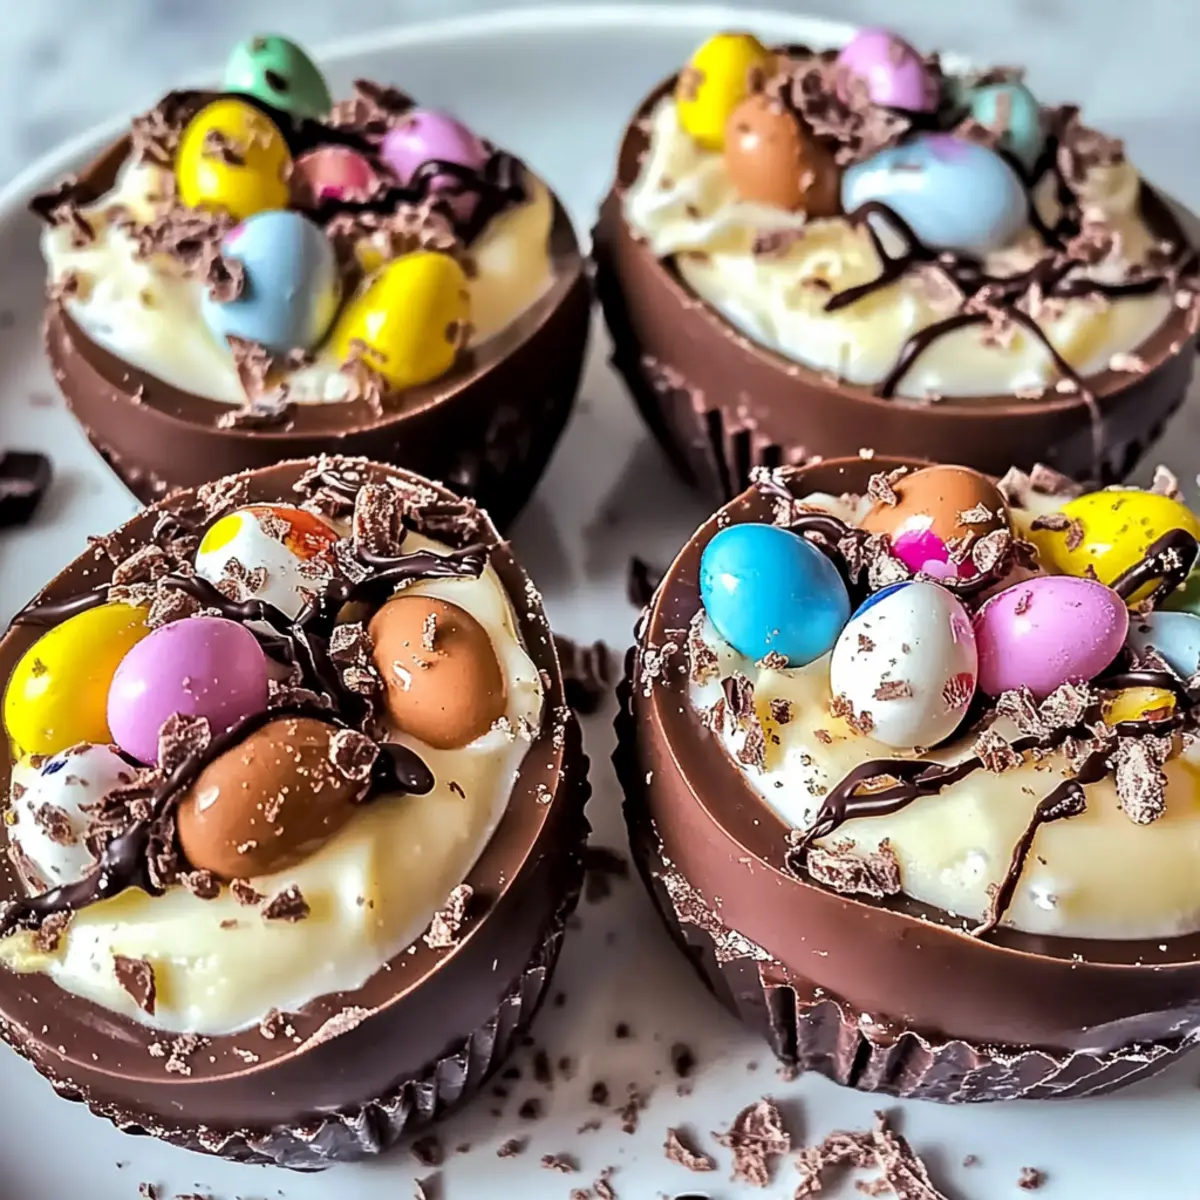
While the filled egg shells chill, melt your dark chocolate in a microwave-safe bowl in 20-30 second intervals until smooth. Once cool slightly, drizzle the melted chocolate over the tops of the cheesecake-filled eggs to create a gorgeous, glossy finish. For an extra festive touch, sprinkle mini eggs on top right after drizzling, before the chocolate hardens.
Step 6: Chill
To ensure your No-Bake Easter Egg Cheesecake reaches its optimal texture, refrigerate the filled and decorated shells for at least 2-3 hours, or preferably overnight. This chilling allows the filling to set perfectly, making it easy to enjoy these delightful treats. When ready to serve, carefully remove the egg shells and present them for a stunning treat.
What to Serve with No-Bake Easter Egg Cheesecake
Elevate your celebration with these delightful pairings that perfectly complement the whimsical charm of your cheesecake.
-
Fresh Berries: Juicy strawberries, raspberries, or blueberries offer a vibrant burst of flavor and freshness, balancing the rich creaminess of the cheesecake.
-
Mint Chocolate Chip Ice Cream: A scoop of this creamy, refreshing treat will add a cool minty twist that pairs beautifully with the decadent cheesecake.
-
Lemon Sorbet: Light and zesty, this sorbet provides a refreshing cleanse to the palate, enhancing the overall dessert experience with a bright contrast to the cheesecake.
-
Whipped Cream: A dollop of airy whipped cream adds extra creaminess and elegance; it’s a classic accompaniment that pairs harmoniously with the rich flavors.
-
Chocolate-Covered Strawberries: For a touch of romance and indulgence, these sweet bites echo the chocolate drizzled on the cheesecake, creating a delightful theme.
-
Easter Punch: This festive drink combines fruity flavors and sparkling bubbles, adding a fun and celebratory vibe to your dessert table, perfect for family gatherings.
Make your no-bake Easter egg cheesecake the star of the show! Each of these pairings invites a symphony of flavors and textures that invites smiles and sweet memories at your table.
Make Ahead Options
These No-Bake Easter Egg Cheesecakes are a fantastic option for meal prep, allowing you to enjoy a stunning dessert with minimal last-minute fuss! You can prepare the crust by pressing the cookie mixture into the hollow Easter egg shells up to 24 hours in advance—just keep them covered in the fridge to maintain freshness. The cheesecake filling can also be made and stored in an airtight container for up to 3 days before you fill the eggs. When you’re ready to serve, simply fill the chilled shells with the creamy mixture, drizzle with melted chocolate, and add the mini eggs just before serving for that festive touch. This way, your No-Bake Easter Egg Cheesecake will be just as delicious and impressive, leaving you more time to celebrate!
No-Bake Easter Egg Cheesecake Variations
Feel free to explore these delightful twists that will enhance your No-Bake Easter Egg Cheesecake experience!
-
Dairy-Free: Substitute cream cheese and whipping cream with plant-based options for a delicious dairy-free treat. You’ll still achieve that creamy consistency!
-
Flavor Infusion: Add lemon or orange zest to your filling for a bright and zesty flavor that perfectly complements the chocolate. It’s a cheerful addition that awakens the senses!
-
Crunchy Additions: Incorporate crushed nuts or oats into the cookie base for added texture. This not only brings crunch but also elevates the flavor profile beautifully.
-
Chocolate Variations: Use chocolate-flavored cream cheese for a rich chocolate experience. The intensified chocolate flavor will surely please any chocolate lover!
-
Fruit Add-ins: Mix in pureed berries to the filling for a fruity twist. This will add a burst of natural sweetness and a vibrant color that makes for a stunning presentation.
-
Gluten-Free: Opt for gluten-free cookies in the crust if you’re accommodating gluten sensitivities. The flavor will remain delightful, ensuring everyone can enjoy this treat.
-
Spiced Cream: Add a dash of cinnamon or nutmeg to the cream for a warm, spiced flavor that’s perfect for spring. It creates a lovely aroma that will fill the kitchen!
-
Mini Chocolate Chips: Fold mini chocolate chips into the filling for an extra bite of chocolate delight throughout your cheesecake. This addition will heighten the indulgence factor!
And if you’re looking for refreshing drinks to pair with your dessert, consider serving it alongside Easter Punch Seasonal or try a refreshing Keto Cobb Egg Salad Recipe for a satisfying bite before dessert. Enjoy your culinary adventure!
Expert Tips for No-Bake Easter Egg Cheesecake
• Soften Cream Cheese: Make sure your cream cheese is thoroughly softened before mixing. This ensures a smooth filling without lumps.
• Whipping Cream Care: Avoid over-whipping the cream; whip until soft peaks form for the best airy texture in your cheesecake filling.
• Check Filling Consistency: If your filling ends up too runny, simply fold in a bit more whipped cream and chill longer to achieve the right firmness.
• Keep Egg Shells Intact: Handle the hollow Easter eggs gently to avoid cracks or breaks, ensuring a beautiful presentation for your no-bake Easter egg cheesecake.
• Chill Properly: Refrigerate the filled and decorated eggs for at least 2-3 hours—or overnight for the best results—allowing the cheesecake filling to set perfectly.
How to Store and Freeze No-Bake Easter Egg Cheesecake
Fridge: Store any leftovers in an airtight container for up to 3 days to maintain freshness and flavor.
Freezer: The no-bake Easter egg cheesecake can be frozen for up to 1 month. Wrap each filled shell securely to prevent freezer burn.
Thawing: To enjoy frozen cheesecake, thaw it overnight in the fridge before serving. This method helps preserve its creamy texture.
Presentation Tip: For best results, serve chilled from the fridge, adorned with fresh mini eggs or your favorite seasonal fruits.
No-Bake Easter Egg Cheesecake Recipe FAQs
How do I choose the best cream cheese for my cheesecake?
Absolutely! Look for a full-fat cream cheese that is fresh and has a smooth consistency for the best flavor and texture. Avoid low-fat versions, as they may compromise the creaminess of your cheesecake. Make sure to check the expiration date, and remember that bringing the cream cheese to room temperature (about 30 minutes before mixing) will help you achieve a lump-free filling!
How should I store leftover No-Bake Easter Egg Cheesecake?
The more the merrier! Store any leftovers in an airtight container in the fridge for up to 3 days. If you want to keep it longer, consider freezing the filled egg shells. Just wrap each shell tightly in plastic wrap or aluminum foil to avoid freezer burn. When you’re ready to enjoy them, simply thaw overnight in the fridge.
Can I freeze the No-Bake Easter Egg Cheesecake?
Certainly! This delightful dessert can be frozen for up to 1 month, allowing you to prepare it ahead of time for gatherings. When freezing, wrap each filled Easter egg shell securely. To thaw, place them in the refrigerator overnight, so they maintain their creamy consistency when served.
What if my cheesecake filling is too runny?
Don’t worry; this can happen! If you find your filling is too runny, you can gently fold in more whipped cream to thicken it up. After incorporating it, let the filling chill in the fridge for additional 30 minutes to set properly. If the problem persists, consider adding a bit of cornstarch or gelatin when mixing in the cream cheese for extra firmness.
Are there any dietary considerations for this recipe?
Yes, very! For those who are dairy-sensitive, feel free to swap out the cream cheese and whipping cream for their dairy-free counterparts like vegan cream cheese and coconut cream. Also, check the cookie ingredients to ensure they are gluten-free, if necessary. Always read labels for any allergens, especially if serving to guests with specific dietary restrictions.
How do I know when the No-Bake Easter Egg Cheesecake is fully set?
Great question! To check if your cheesecake is fully set, gently touch the filling on top; it should feel firm to the touch without leaving any indentation. Additionally, allowing it to chill overnight in the fridge is ideal. Before serving, simply remove the shells from the fridge and enjoy!
No-Bake Easter Egg Cheesecake: A Fun Twist on Spring Treats
Ingredients
Equipment
Method
- Start by crushing your cookies into fine crumbs using a food processor or a rolling pin in a zip-top bag. Combine the crumbs with melted unsalted butter until the mixture resembles wet sand. Carefully press the cookie mixture firmly into the hollow Easter egg shells, creating an even layer. Place the filled shells in the refrigerator for about 30 minutes to set.
- In a large mixing bowl, beat the softened cream cheese with an electric mixer on medium speed until smooth and creamy, which should take about 2-3 minutes. Gradually add caster sugar, milk, and vanilla extract, mixing until all ingredients are well-combined and luscious.
- In a separate bowl, use a clean mixer to whip the cold whipping cream on high speed until soft peaks form, approximately 3-5 minutes. Once whipped, gently fold this fluffy cream into the cream cheese mixture until fully incorporated.
- Spoon your creamy filling into the prepared Easter egg shells! Using a spatula, fill each shell, making sure the tops are level. Tap the filled eggs lightly on the counter to eliminate air bubbles. Return them to the fridge for a final chill.
- Melt your dark chocolate in a microwave-safe bowl in 20-30 second intervals until smooth. Drizzle the melted chocolate over the tops of the cheesecake-filled eggs to create a gorgeous finish. Sprinkle mini eggs on top right after drizzling.
- Refrigerate the filled and decorated shells for at least 2-3 hours, or preferably overnight. This chilling allows the filling to set perfectly, making it easy to enjoy these delightful treats.