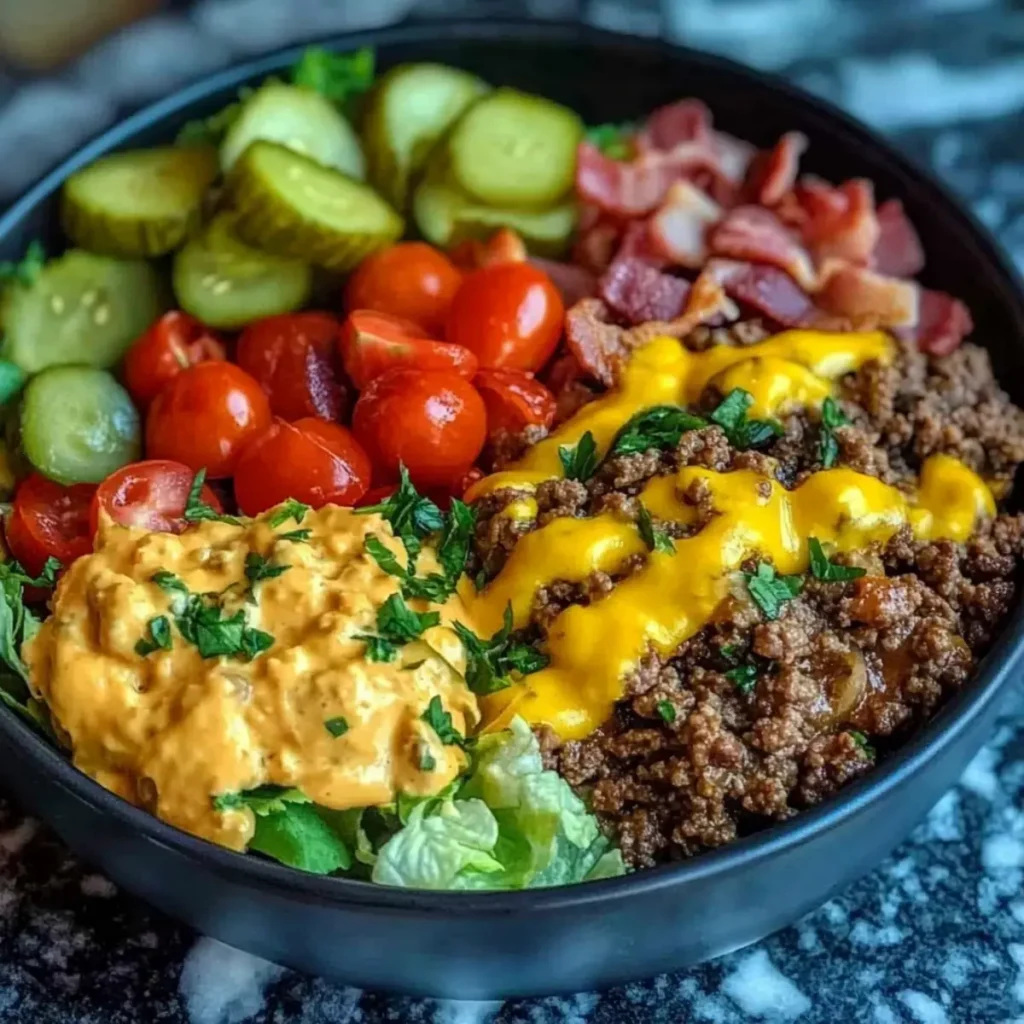
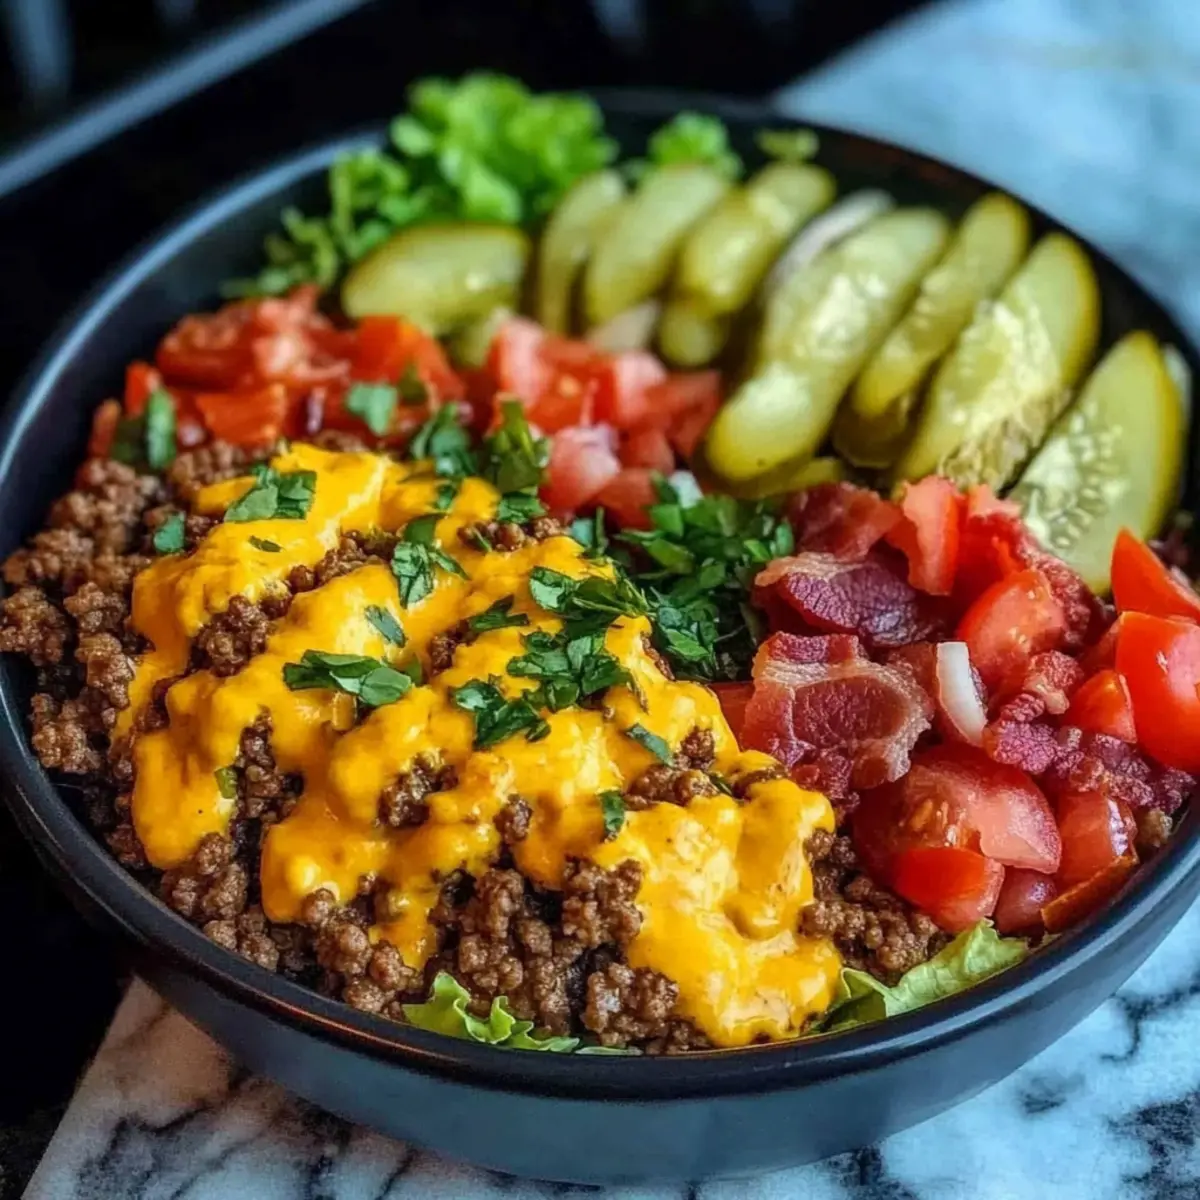
The sizzling sound of beef hitting a hot skillet always brings a smile to my face, especially when I’m about to whip up my High Protein Cheeseburger Bowls. This dish hits that sweet spot where convenience meets deliciousness, perfect for anyone in need of a quick meal prep option. With each bowl packing a whopping 35 grams of protein, these cheeseburger bowls are not just a treat for the taste buds but also a healthy, low-carb alternative to a traditional burger. Plus, when you see the mixture of fresh veggies, crunchy bacon, and creamy cheese come together, you’ll feel a wave of delight that pulls you back to backyard barbecues without the extra carbs weighing you down. Curious to see how you can bring this satisfying, colorful bowl to life in your kitchen? Let’s dive in!
Why Will You Love These Bowls?
Protein Powerhouse: You’ll love that each serving packs 35 grams of protein, ideal for fueling your active lifestyle or post-workout recovery.
Low-Carb Goodness: Satisfy burger cravings without the carbs! These bowls offer all the classic flavors of a cheeseburger without the heaviness of a bun.
Meal Prep Friendly: Perfect for busy weekdays, these bowls store well and can be enjoyed cold or reheated, making your meal prep a breeze.
Customizable: Add your favorite toppings like sliced avocados or jalapeños to personalize each bowl exactly to your taste.
Crowd-Pleaser: Serve these at dinner and watch as your family devours them—especially those picky teens! They’ll never miss the traditional burger.
Discover more ideas with dishes like our Garlic Parmesan Cheeseburger or for a healthy dessert, check out our Chocolate Protein Pudding to keep things balanced!
High Protein Cheeseburger Bowls Ingredients
For the Beef
• Ground Beef (90/10 or leaner) – This provides the flavorful, protein-packed base for your bowls; consider using ground turkey for a lighter option.
• Olive Oil – Essential for cooking the beef and onions; it adds moisture and facilitates browning.
• Diced Yellow Onion – This adds a sweet depth of flavor; cook it until translucent for the best results.
For the Toppings
• Diced Pickles – Adds a tangy crunch that elevates your bowl; dill pickles are highly recommended for flavor.
• Shredded Cheddar Cheese – Infuses creaminess and a bold taste; opt for sharp cheddar for an extra layer of flavor.
• Shredded Lettuce (Romaine or Iceberg) – Provides freshness and crunch; romaine holds up best and is perfect for meal prep.
• Diced Tomatoes – Enhances color and juiciness; use fresh tomatoes to maximize flavor.
• Diced Red Onion – Offers a bite; for a milder taste, soak in cold water before use.
• Cooked Bacon (crumbled) – Brings umami and crunch to your bowl; crispy bacon creates a delightful texture contrast.
For the Sauce
• Mayonnaise – The base for your creamy sauce; opt for avocado oil mayo for a healthier twist.
• Ketchup – Adds sweetness and tang; choose a sugar-free version to keep things low-carb.
• Yellow Mustard – Adds acidity and a zesty punch to the flavor profile.
• Worcestershire Sauce – Provides depth; use sparingly for the best taste.
• Garlic Powder – A key seasoning to enrich your sauce; it complements the burger flavors beautifully.
• Salt and Pepper – Essential for seasoning; adjust to taste for the perfect flavor balance.
With these high-protein cheeseburger bowl ingredients, you’re just one step away from a wholesome and delightful meal that satisfies!
Step‑by‑Step Instructions for High Protein Cheeseburger Bowls
Step 1: Cook the Bacon
Preheat your oven to 400°F (200°C). Line a baking sheet with parchment paper and lay the bacon strips flat. Bake for 15-18 minutes until crispy and golden, keeping an eye on them to prevent burning. Once done, remove from the oven and let cool before crumbling into bite-sized pieces.
Step 2: Prep the Vegetables
While the bacon is baking, wash and chop your vegetables. Dice the tomatoes, red onion, and pickles, then set them aside. In a large skillet, heat 1 tablespoon of olive oil over medium-high heat until it shimmers, indicating it’s ready for the next ingredient.
Step 3: Cook the Beef and Onions
Add 1 pound of ground beef and the diced yellow onion to the hot skillet. Cook for 5-7 minutes, breaking up the meat with a spatula, until the beef is browned and the onions are translucent. Stir occasionally for even cooking, draining excess fat if necessary to keep your High Protein Cheeseburger Bowls light.
Step 4: Season the Beef Mixture
Once the beef and onions are cooked through, season the mixture generously with salt and pepper while it’s still warm. This ensures that the flavors meld beautifully. Set the skillet aside to cool slightly while you prepare the sauce.
Step 5: Make the Burger Sauce
In a small bowl, combine ¼ cup mayonnaise, 2 tablespoons ketchup, 1 teaspoon yellow mustard, 1 teaspoon Worcestershire sauce, and ½ teaspoon garlic powder. Mix until smooth and creamy, adjusting seasoning to your preference. This burger sauce will elevate your High Protein Cheeseburger Bowls with its delightful flavor.
Step 6: Assemble the Bowls
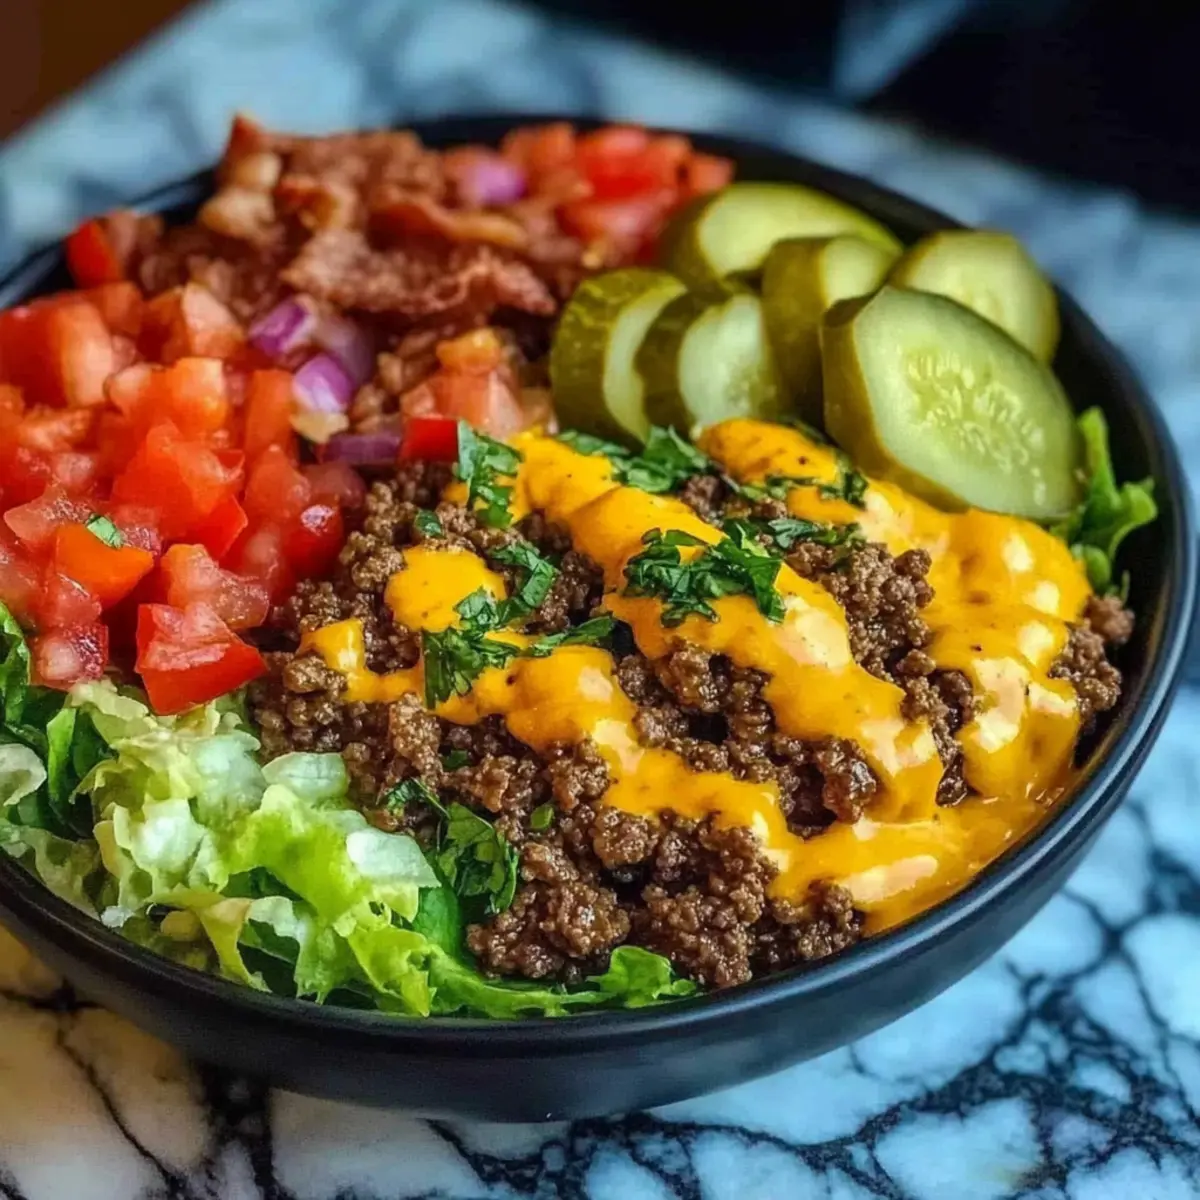
In meal prep containers, start with a generous layer of shredded lettuce as a base, then add equal portions of the beef mixture on top. Follow with diced tomatoes, red onion, pickles, and a sprinkle of shredded cheddar cheese. Finish by adding crumbled bacon for that extra crunch, and store the burger sauce separately to keep your bowls fresh.
Step 7: Store or Serve
Seal the meal prep containers with lids and store in the refrigerator for up to 4 days. When you’re ready to eat, you can enjoy your High Protein Cheeseburger Bowls cold or warm up the beef if preferred. Just remember to add the sauce just before serving to keep your bowls delightful and crisp!
Make Ahead Options
These High Protein Cheeseburger Bowls are a fantastic choice for busy weeknights, allowing you to enjoy a delicious, healthy meal without the last-minute fuss. You can prepare the beef mixture and bacon up to 3 days in advance, storing them separately in airtight containers to maintain their flavors. Additionally, all the chopped vegetables (lettuce, tomatoes, onions, pickles) can be prepped and refrigerated overnight for easy assembly. When you’re ready to serve, simply reheat the beef mixture and bacon if desired, then layer the components in a bowl, adding your burger sauce just before enjoying. With these make-ahead tips, you’ll have wholesome meals ready to go at a moment’s notice!
What to Serve with High Protein Cheeseburger Bowls
Creating the perfect meal around your cheeseburger bowls can elevate any dining experience and satisfy every craving.
- Crispy Sweet Potato Fries: These sweet potatoes add a delightful sweetness and crunchy texture, perfectly complementing the savory bowl.
- Classic Coleslaw: A refreshing and crunchy side with a creamy dressing that balances the richness of the bowls beautifully.
- Garlic Roasted Broccoli: Tender, slightly charred broccoli delivers a nutritious bite, enhancing the overall flavor profile with a hint of garlic.
- Cucumber and Tomato Salad: This light, zesty salad brings freshness and acidity, cutting through the richness of the cheeseburger bowls.
- Air Fryer Zucchini Fries: Crispy on the outside and tender on the inside, these veggie fries add a healthy twist that pairs well with the bowls.
- Sparkling Water with Lime: A refreshing drink to cleanse the palate, the fizz enhances your meal without adding extra calories.
- Chocolate Protein Pudding: For a sweet finish, this creamy dessert offers a guilt-free end to your meal while keeping with the healthy theme.
- Baked Beans: Sweet and tangy, baked beans provide a comforting touch that combines well with the bold flavors of your cheeseburger bowls.
- French Onion Soup: A warm, savory soup can serve as an impressive starter, setting a cozy tone for the meal.
- Fruit Salad: A colorful blend of seasonal fruits adds a sweet and refreshing note, making it a delightful way to cleanse the palate.
High Protein Cheeseburger Bowls Variations
Feel free to get creative and customize your High Protein Cheeseburger Bowls to suit your taste and dietary needs!
-
Turkey Swap: Replace ground beef with ground turkey or chicken for a leaner, lower-fat option that still packs protein.
Enjoy the lighter taste while still satisfying your cheeseburger cravings! -
Spice It Up: Add sliced jalapeños for some heat, or sprinkle in red pepper flakes to elevate the flavor profile.
A little kick can make this dish even more exciting and memorable! -
More Veggies: Add bell peppers, mushrooms, or zucchini to the beef mixture for extra nutrition and flavor.
These fresh veggies blend beautifully, making your bowls vibrant and healthy. -
Crunchy Toppings: Top your bowls with crushed pork rinds or tortilla strips for added texture and crunch.
This twist brings an exciting contrast to the hearty beef and creamy ingredients. -
Dairy-Free Option: For a dairy-free version, use dairy-free cheese and mayonnaise without sacrificing flavor.
You can still indulge in a comforting bowl that everyone can enjoy. -
Sauce Variations: Experiment with different sauces like a spicy mayo, chipotle ranch, or even a tangy BBQ for a flavorful twist.
Each sauce can transform your bowl into a brand new experience! -
Side Pairings: Serve alongside air fryer sweet potato fries or crisp roasted broccoli for a balanced meal.
These sides are not only delicious but add nutritional value to your dish. -
Garnish with Herbs: Fresh herbs like cilantro or green onions can brighten up the bowl and enhance the overall experience.
A little herbaceous flair truly ties together all those rich, hearty flavors.
Explore these variations and feel the freedom to create your ideal High Protein Cheeseburger Bowl!
How to Store and Freeze High Protein Cheeseburger Bowls
Fridge: Store your assembled High Protein Cheeseburger Bowls in airtight containers for up to 4 days. Keep the burger sauce separate until ready to serve to maintain freshness.
Freezer: You can freeze the cooked beef mixture for up to 3 months. Cardboard trays or freezer-safe bags work well—just thaw in the fridge overnight before reheating.
Reheating: If you prefer your cheeseburger bowls warm, reheat the beef mixture in the microwave or skillet until heated through. Remember to keep the toppings and sauce separate until you’re ready to enjoy!
Serving Suggestions: Serve the bowls cold for a fresh meal or warm them up and mix in the toppings for a comforting dinner experience.
Expert Tips for High Protein Cheeseburger Bowls
-
Keep It Fresh: Store the burger sauce separately until ready to serve. This prevents the lettuce from wilting and maintains the dish’s crispness.
-
Customize Your Ingredients: Feel free to swap ground beef for turkey or chicken if you’re looking to reduce fat. It keeps your High Protein Cheeseburger Bowls light and healthy.
-
Bacon Tips: Bake your bacon for even cooking. If you’re in a hurry, microwave it, but watch closely to avoid overcooking. Crispy bacon enhances flavor tremendously!
-
Vegetable Prep: Soak diced red onions in cold water for 10 minutes before adding to tame their bite and make them more palatable for those sensitive to strong flavors.
-
Batch Cooking: Making a double batch? These bowls can be stored in the fridge for up to 4 days, making them perfect for meal prep without sacrificing freshness.
High Protein Cheeseburger Bowls Recipe FAQs
How do I select the right ground beef for these bowls?
Absolutely! For the best flavor and texture, use ground beef with a fat content of 90/10 or leaner. This ensures you get rich beefy taste while keeping the fat content manageable. If you’re looking for an even lighter option, ground turkey or chicken can be wonderful substitutes that still deliver on protein.
How should I store my High Protein Cheeseburger Bowls?
Very well! Store assembled bowls in airtight containers in the refrigerator for up to 4 days. To maintain freshness, keep the burger sauce separate until you’re ready to serve – this will prevent the lettuce from wilting.
Can I freeze the cheeseburger bowls?
Absolutely, you can freeze the cooked beef mixture! It freezes well for up to 3 months. Just place it in a freezer-safe container or bag. To reheat, thaw it in the refrigerator overnight before warming it up, ensuring it’s heated through for the best flavor.
What if I don’t like pickles or onions?
No worries! You can easily customize these bowls. Skip the pickles and opt for additional veggies like bell peppers or cucumbers. If onions aren’t your favorite, using roasted red peppers or avocado slices can add a tasty twist that maintains the burger essence.
How do I ensure the toppings stay fresh?
Great question! To keep your toppings fresh, add ingredients like diced tomatoes, pickles, and cheese just before serving. Store each component separately, and assemble the bowls right before eating—that way, you’ll enjoy all the delicious flavors and textures.
Can these bowls be made dairy-free?
Absolutely! For a dairy-free version of the High Protein Cheeseburger Bowls, simply swap the shredded cheese and mayonnaise for dairy-free alternatives. There are numerous brands available that maintain great flavor while catering to your dietary needs, allowing everyone to enjoy this delicious meal!

High Protein Cheeseburger Bowls You’ll Crave Every Week
Ingredients
Equipment
Method
- Preheat your oven to 400°F (200°C). Line a baking sheet with parchment paper and lay the bacon strips flat. Bake for 15-18 minutes until crispy and golden. Let cool and crumble.
- Wash and chop your vegetables. Dice the tomatoes, red onion, and pickles. In a skillet, heat 1 tablespoon of olive oil over medium-high heat.
- Add 1 pound of ground beef and diced yellow onion to the skillet. Cook for 5-7 minutes until beef is browned and onions are translucent.
- Season the mixture with salt and pepper while warm. Set aside to cool slightly.
- In a small bowl, combine ¼ cup mayonnaise, 2 tablespoons ketchup, 1 teaspoon yellow mustard, 1 teaspoon Worcestershire sauce, and ½ teaspoon garlic powder. Mix until smooth.
- In meal prep containers, layer shredded lettuce, beef mixture, diced tomatoes, red onion, pickles, and shredded cheddar. Add crumbled bacon on top and store sauce separately.
- Seal containers and store in the refrigerator for up to 4 days. Enjoy cold or warm the beef before serving.