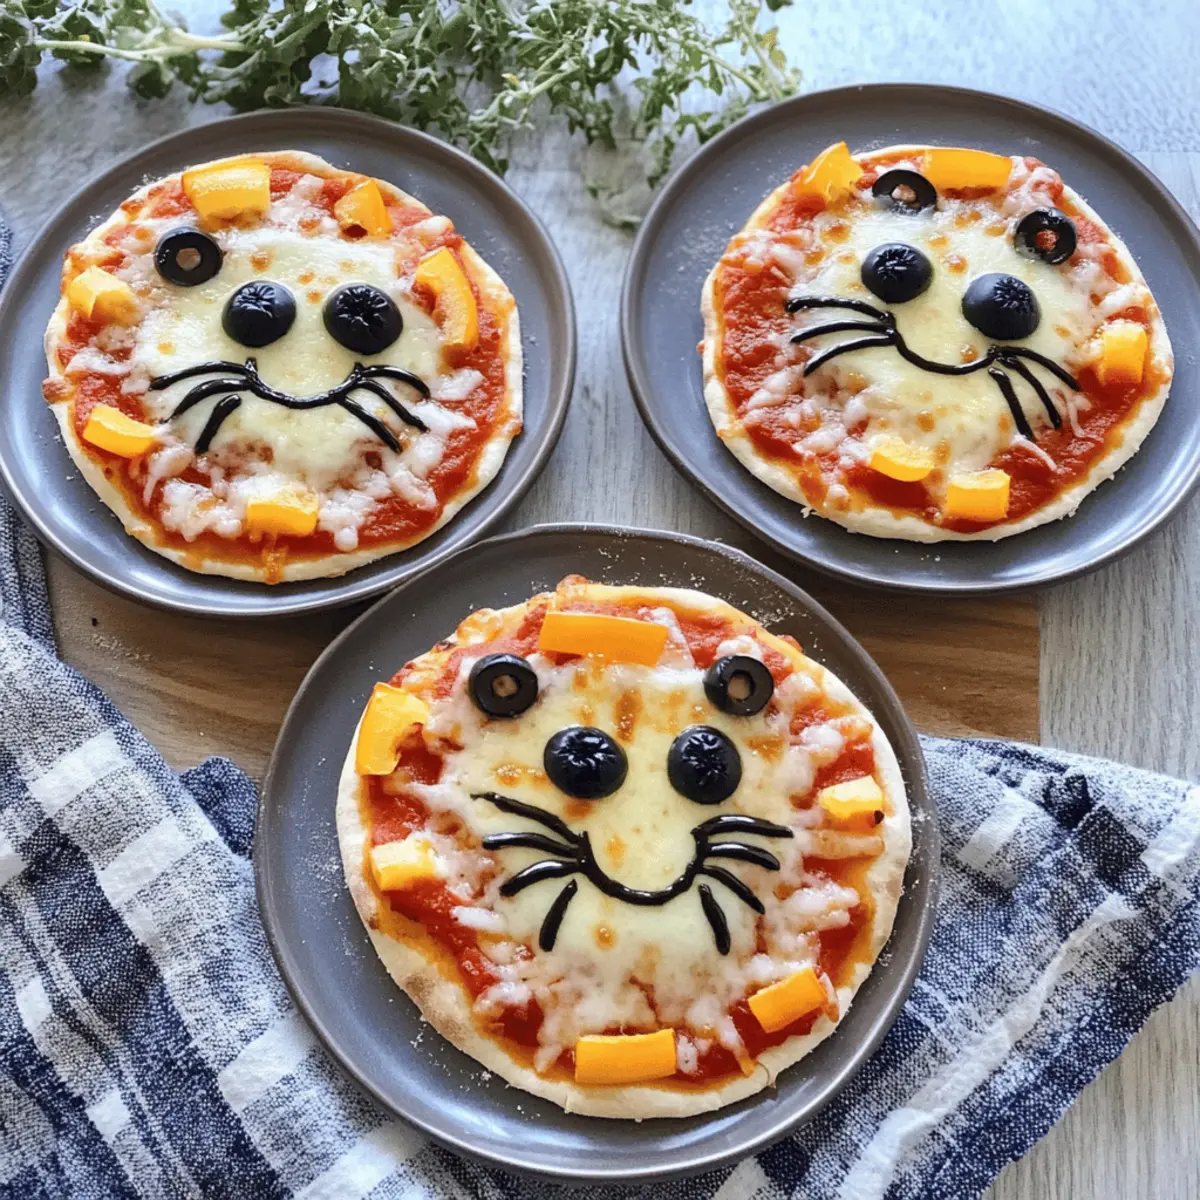
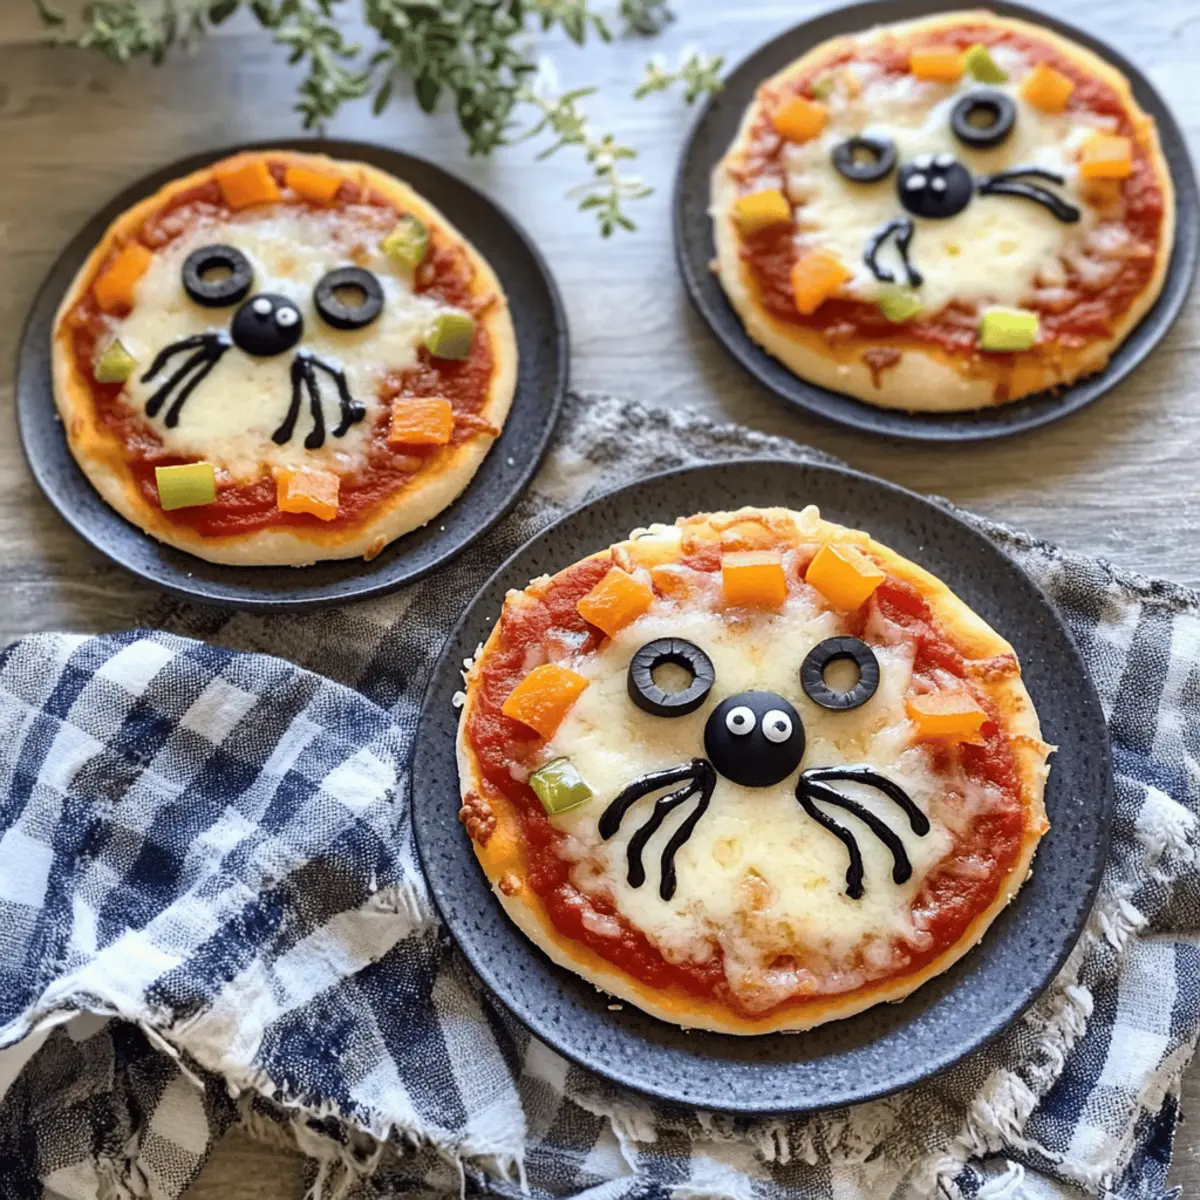
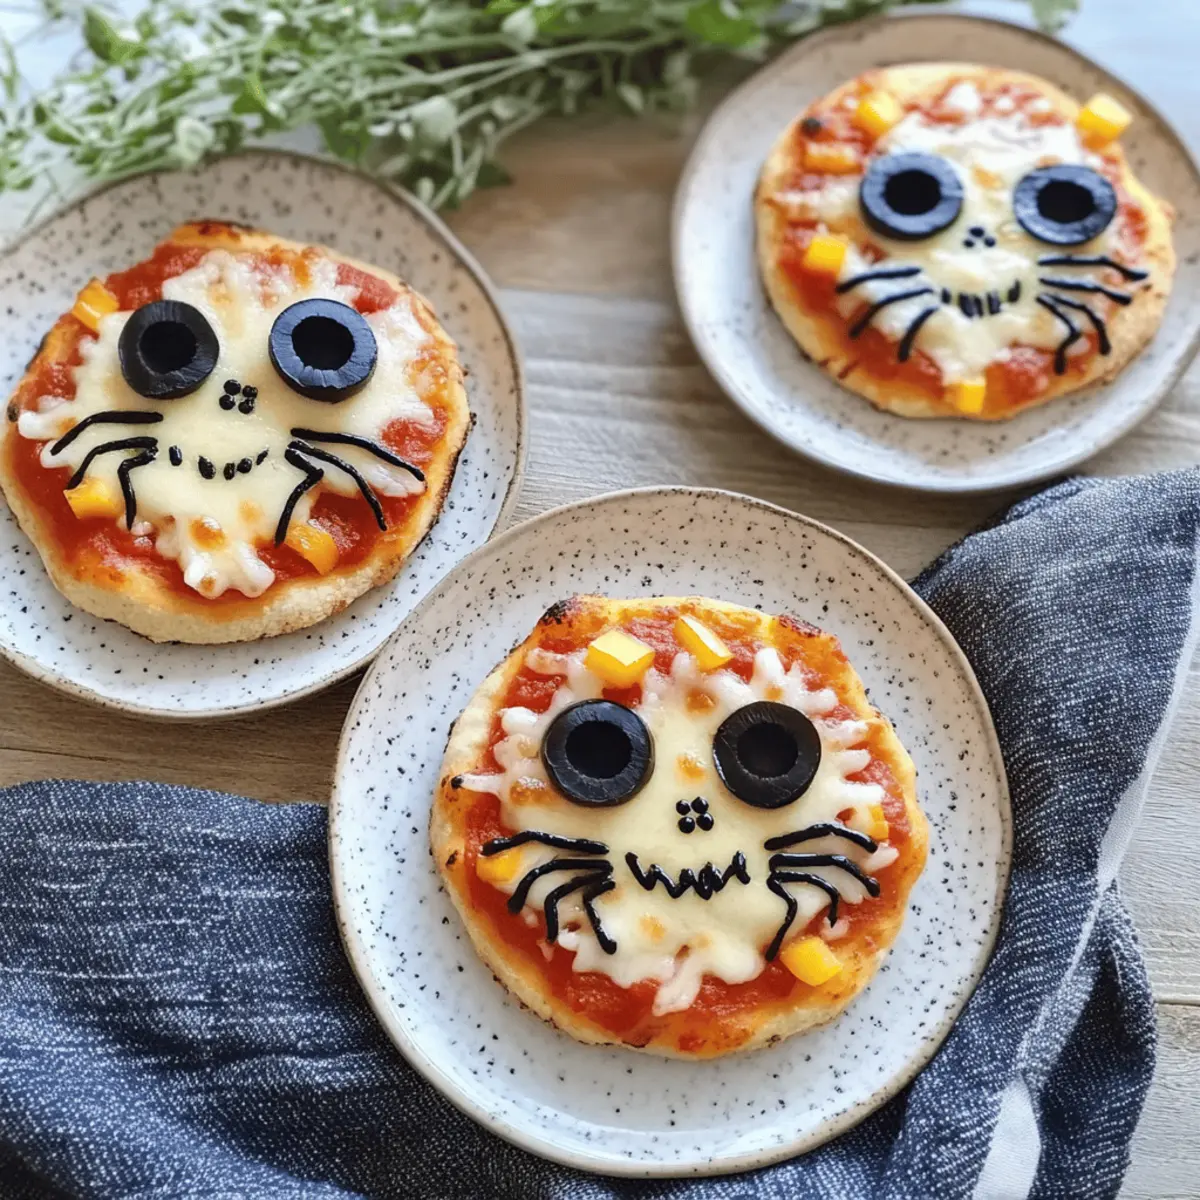
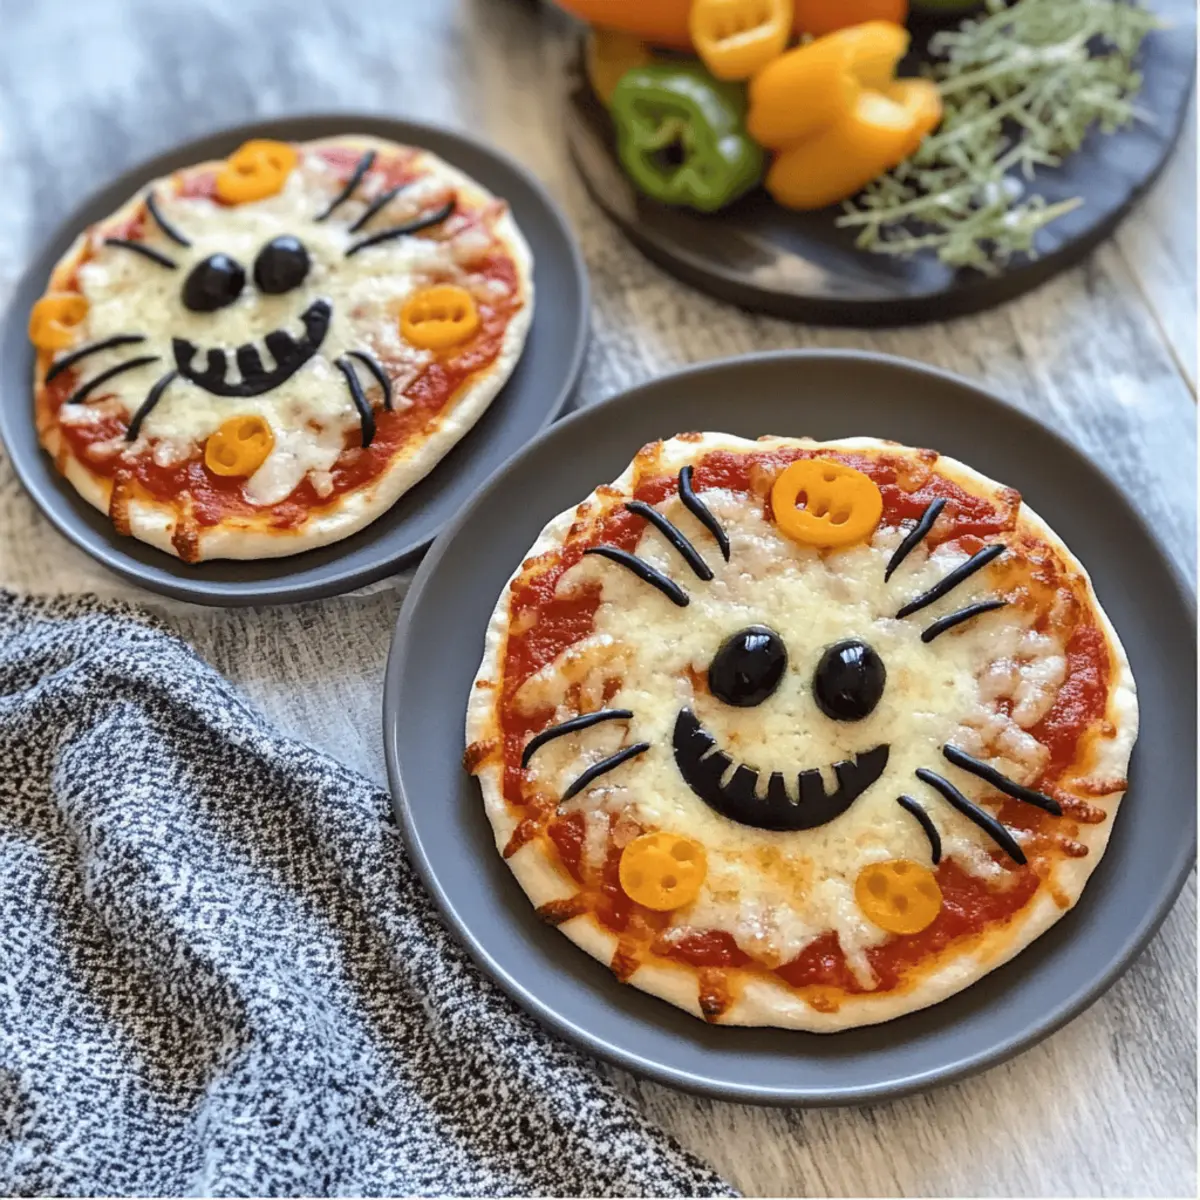
As the days grow shorter and the air takes on a crisp chill, my kitchen transforms into a bustling hub of creativity and fun. Nothing delights my little ones quite like creating their own Halloween mini pizzas, where each bite is a playful twist on this classic favorite. These kid-friendly treats not only serve up a delightful array of toppings—think olive spiders and bell pepper jack-o’-lanterns—but they also make for an engaging cooking experience for the whole family. What’s more, they can be easily customized to fit any dietary needs, so everyone can join in on the spooky snack fun. Who’s ready to dive into this scrumptious adventure and whip up some Halloween mini pizzas?
Why Are Halloween Mini Pizzas So Fun?
Engaging Activity: Involve the whole family as each person can create their own spooky designs. Everyone will love transforming simple ingredients into Halloween masterpieces!
Customization Galore: With endless topping options, these mini pizzas cater to all tastes and dietary preferences, including gluten-free choices.
Quick to Make: This recipe is perfect for busy nights, taking only 30 minutes from start to finish, ensuring you can serve up delightful snacks without hassle.
Perfect for Parties: Ideal for Halloween gatherings or movie nights, these mini pizzas offer a playful bite-sized treat that will impress guests of all ages.
Festive Vibes: They not only taste great but also look festive, bringing a cheerful ambiance to your Halloween celebrations!
Halloween Mini Pizzas Ingredients
For the Pizza Base
• Mini Pizza Crusts – Personal-sized bases make it easy for each person to create their own masterpiece.
For the Sauce and Cheese
• Pizza Sauce – Adds flavor and moisture; use your favorite brand or homemade version.
• Mozzarella Cheese – Provides that classic cheesy goodness; swap for dairy-free cheese if necessary.
For the Decorations
• Black Olives – Perfect for creating spooky spider designs; other toppings can be used as alternatives.
• Mini Pepperoni – Adds extra flavor; consider turkey or veggie options for a twist.
• Orange & Green Bell Peppers – Great for jack-o’-lantern smiles; feel free to use any color you have on hand.
• Part-Skim String Cheese – Helps portray mummy wraps; other cheeses can work as substitutes too.
• Fresh Basil – Adds a touch of freshness; dried basil is a suitable backup.
For Baking
• Olive Oil Spray – Keeps your mini pizzas from sticking; any cooking spray will do!
These Halloween mini pizzas not only tickle your taste buds but also spark creativity in the kitchen!
Step‑by‑Step Instructions for Halloween Mini Pizzas
Step 1: Preheat and Prepare
Begin by preheating your oven to 425°F (220°C). While it’s heating up, grab a baking sheet and lightly mist it with olive oil spray to prevent sticking. This will help create that perfect golden crust. Set the prepared sheet aside, and get your mini pizza crusts ready for some delicious toppings!
Step 2: Sauce It Up
Take 1–2 tablespoons of pizza sauce and spread it evenly over each mini crust, leaving a small border around the edges. This will keep your Halloween mini pizzas flavorful yet neat. Don’t be shy with the sauce—it’s crucial for that rich, satisfying taste, and makes those crusts come alive with flavor!
Step 3: Cheese Application
Next, sprinkle shredded mozzarella cheese over half of the pizzas, creating a gooey and cheesy base. For the mummy-themed designs, take part-skim string cheese and cut it into strips. Arrange these strips in criss-cross patterns over the other half of the mini pizzas, ensuring they look delightfully spooky and taste incredible.
Step 4: Get Creative with Decorations
Now comes the fun part—decorating your Halloween mini pizzas! Use black olives to create spider bodies, and add strips of orange and green bell peppers to form whimsical jack-o’-lantern smiles. If desired, sprinkle some mini pepperoni around for an extra flavor kick. Let your imagination run wild as you craft your spooky designs!
Step 5: Bake to Perfection
Carefully place your decorated mini pizzas in the preheated oven and bake for 10–12 minutes. Keep an eye on them; the pizzas are ready when the crusts turn golden brown and the cheese melts beautifully. Halfway through baking, remember to rotate the pan for even cooking to ensure all pizzas come out just right.
Step 6: Cool and Garnish
After baking, remove the mini pizzas from the oven and allow them to cool for about 2 minutes. This brief cooling period prevents burns and lets the cheesy goodness settle. Once cooled, sprinkle fresh basil on top for a hint of color and flavor before serving! Enjoy your delightful Halloween mini pizzas with family and friends.
Make Ahead Options
These Halloween mini pizzas are perfect for meal prep enthusiasts! You can assemble them up to 3 days in advance and refrigerate them in an airtight container, which keeps all the flavors intact and just as delicious. To prep, layer your sauce, cheese, and toppings, but wait until you’re ready to bake to add any delicate garnishes like fresh basil. Alternatively, par-bake the mini pizza crusts without toppings and freeze them for up to 1 month; just add toppings before baking straight from the freezer. When ready to serve, simply bake the assembled pizzas for 10–12 minutes, and enjoy restaurant-quality results with minimal effort on busy weeknights!
What to Serve with Halloween Mini Pizzas
As you whip up these playful mini pizzas, consider delightful sides and treats that will keep the Halloween spirit alive!
-
Crispy Veggie Platter:
Pair with a colorful assortment of fresh veggies like carrots, celery, and bell peppers for a crunchy, healthy contrast that invites dipping. -
Pumpkin Soup:
Warm and creamy, this seasonal favorite complements your mini pizzas beautifully, bringing comforting autumn flavors to your meal. -
Spooky Fruit Salad:
Mix seasonal fruits like oranges, apples, and grapes for a sweet, refreshing burst that balances the savory pizzas and adds a festive touch. -
Garlic Breadsticks:
These cheesy, buttery sticks are perfect for dipping in any extra pizza sauce. Their garlicky goodness pairs nicely with the pizza flavors. -
Haunted Punch:
Create a fun drink with grape juice and soda, garnished with floating gummy eyeballs or sliced oranges, to enchant both kids and adults. -
Chocolate-Covered Pretzels:
Sweet and salty, these treats offer a delightful contrast to cheesy bites, making them a perfect addition to your festive spread. -
Mini Candy Corn Parfaits:
Layer candy corn with whipped cream and crushed graham crackers for a quick, adorable dessert that echoes Halloween’s playful theme. -
Cheese and Crackers:
A simple platter adds sophistication—try pairing various cheeses with colorful crackers for a snack that guests can nibble on throughout the evening. -
Caramel Apples:
These classic autumn treats provide a fun, sticky way to complete your Halloween feast, enticing guests with their sweet, crunchy allure.
Halloween Mini Pizzas Variations & Substitutions
Customize these Halloween mini pizzas with fun and flavorful variations that suit every taste bud!
-
Gluten-Free Base: Use gluten-free pita or cauliflower crusts to cater to dietary restrictions while keeping the fun intact.
For a lighter alternative, cauliflower crust offers a veggie-packed base that pairs well with any toppings! -
Dairy-Free Cheese: Substitute mozzarella with dairy-free cheese shreds for a cheesy experience without the dairy.
This swap ensures everyone can enjoy the gooey goodness without compromising on taste or texture! -
Veggie-Packed Options: Load up with additional vegetables like mushrooms, spinach, or zucchini for added nutrition and flavor.
These add-ins not only boost the health quotient of your mini pizzas but also enhance their color and presentation. -
Spicy Kick: Sprinkle some red pepper flakes or diced jalapeños on top for a spicy twist that adult fans will love.
These fiery toppings can elevate the flavors and offer a thrilling challenge for those who enjoy a bit of heat! -
Creative Shapes: Use cookie cutters to make fun shapes out of the mini pizza crusts, perfect for adding festive flair for Halloween.
This playful twist adds a creative touch that will delight kids as they explore shapes while enjoying their meal! -
Meat Alternatives: Swap mini pepperoni with turkey slices, or try veggie sausages for a healthier, yet flavorful option.
These alternatives allow you to cater to various diets while still delivering a satisfying taste. -
Herb Infusion: Drizzle some garlic olive oil or add fresh herbs like oregano or thyme on top to infuse even more flavor.
These aromatic additions make the mini pizzas captivating not only visually but also in terms of taste! -
Themed Toppings: Change up the decorations according to different holidays, using seasonal fruits or colorful vegetables.
This keeps the excitement alive in the kitchen while embracing the spirit of various celebrations.
Feel free to explore and amplify the flavors of your Halloween mini pizzas! For more exciting ideas and tips, don’t forget to check out our suggestions for family-friendly toppings and make-ahead pizza strategies!
Tips for the Best Halloween Mini Pizzas
• Experiment with Toppings: Customize each mini pizza with your favorite ingredients to suit personal tastes—don’t hesitate to get creative!
• Involve the Kids: Making pizza is a wonderful family bonding activity; let the kids design their own spooky creations for added fun!
• Crispy Crust Alert: For a crispy crust, avoid overloading toppings. Too many ingredients can make the base soggy.
• Even Baking: Remember to rotate the baking sheet halfway through cooking to ensure all Halloween mini pizzas turn golden and evenly cooked.
• Make-Ahead Magic: Assemble the pizzas ahead of time; just refrigerate for up to 3 days or freeze par-baked crusts for longer storage without sacrificing taste.
• Shorten Reheating Time: When reheating leftover pizzas, opt for the oven or air fryer instead of the microwave to maintain that tasty crispy texture.
How to Store and Freeze Halloween Mini Pizzas
Fridge: Keep assembled Halloween mini pizzas in an airtight container in the fridge for up to 3 days for the best freshness.
Freezer: For longer storage, freeze par-baked crusts separately wrapped in plastic wrap and aluminum foil for up to 1 month.
Reheating: When ready to serve, reheat in the oven or air fryer at 350°F (175°C) for about 10 minutes until heated through and crispy. Avoid using a microwave to maintain that delightful texture.
Make-Ahead Tips: Prepare pizzas ahead of time and refrigerate them unbaked, ensuring a fun family activity while allowing for tasty last-minute snacks.
Halloween Mini Pizzas Recipe FAQs
How do I choose the best mini pizza crusts?
Absolutely! Look for mini pizza crusts that are fresh and have no dark spots or signs of mold. You can choose whole wheat for added fiber or gluten-free options for dietary needs. Check the packaging date to ensure freshness, as newer crusts will yield a better texture.
What’s the best way to store leftover Halloween mini pizzas?
Very well! Store any leftover assembled mini pizzas in an airtight container in the refrigerator for up to 3 days. If you have unbaked ones, they can be refrigerated as well. Make sure they are well-wrapped to prevent them from drying out!
Can I freeze Halloween mini pizzas?
Certainly! To freeze, prepare your mini pizzas but don’t bake them yet. Instead, individually wrap the unbaked mini pizzas tightly in plastic wrap, then in aluminum foil. This method allows them to stay fresh for up to 1 month. When ready to enjoy, just bake directly from the freezer, adding a few extra minutes to the cooking time.
What if my mini pizzas turn out soggy?
Don’t worry! If you find your mini pizzas soggy, it might be due to too many toppings. For the future, try to keep toppings moderate and stick to drier options like vegetables. Also, ensure your baking sheet is well-greased and preheat your oven properly. Rotating the pan halfway during baking helps cook them evenly too!
Are there any allergy considerations for Halloween mini pizzas?
Very important to check! If entertaining kids with allergies, be mindful of toppings such as cheese or pepperoni that may contain allergens. Use dairy-free cheese alternatives and check ingredient labels if using pre-packaged sauces or crusts. Always ask your guests if there are any dietary restrictions to ensure everyone can indulge in the fun!
How long does it take to prepare Halloween mini pizzas?
I recommend a total preparation time of about 30 minutes. This includes gathering your ingredients, decorating the pizzas, and baking them to crispy perfection! It’s a fun and quick activity for the family to enjoy together, especially on a chilly Halloween night.
Halloween Mini Pizzas: Fun & Festive Bites for All Ages
Ingredients
Equipment
Method
- Preheat your oven to 425°F (220°C) and lightly mist a baking sheet with olive oil spray. Set aside.
- Spread 1-2 tablespoons of pizza sauce evenly over each mini crust, leaving a small border.
- Sprinkle shredded mozzarella over half of the pizzas and arrange string cheese strips in criss-cross patterns on the other half.
- Use black olives for spider bodies and bell pepper strips for jack-o'-lantern smiles; add mini pepperoni as desired.
- Place the pizzas in the oven and bake for 10-12 minutes until crusts are golden and cheese melts.
- Remove from oven and cool for 2 minutes, then garnish with fresh basil before serving.