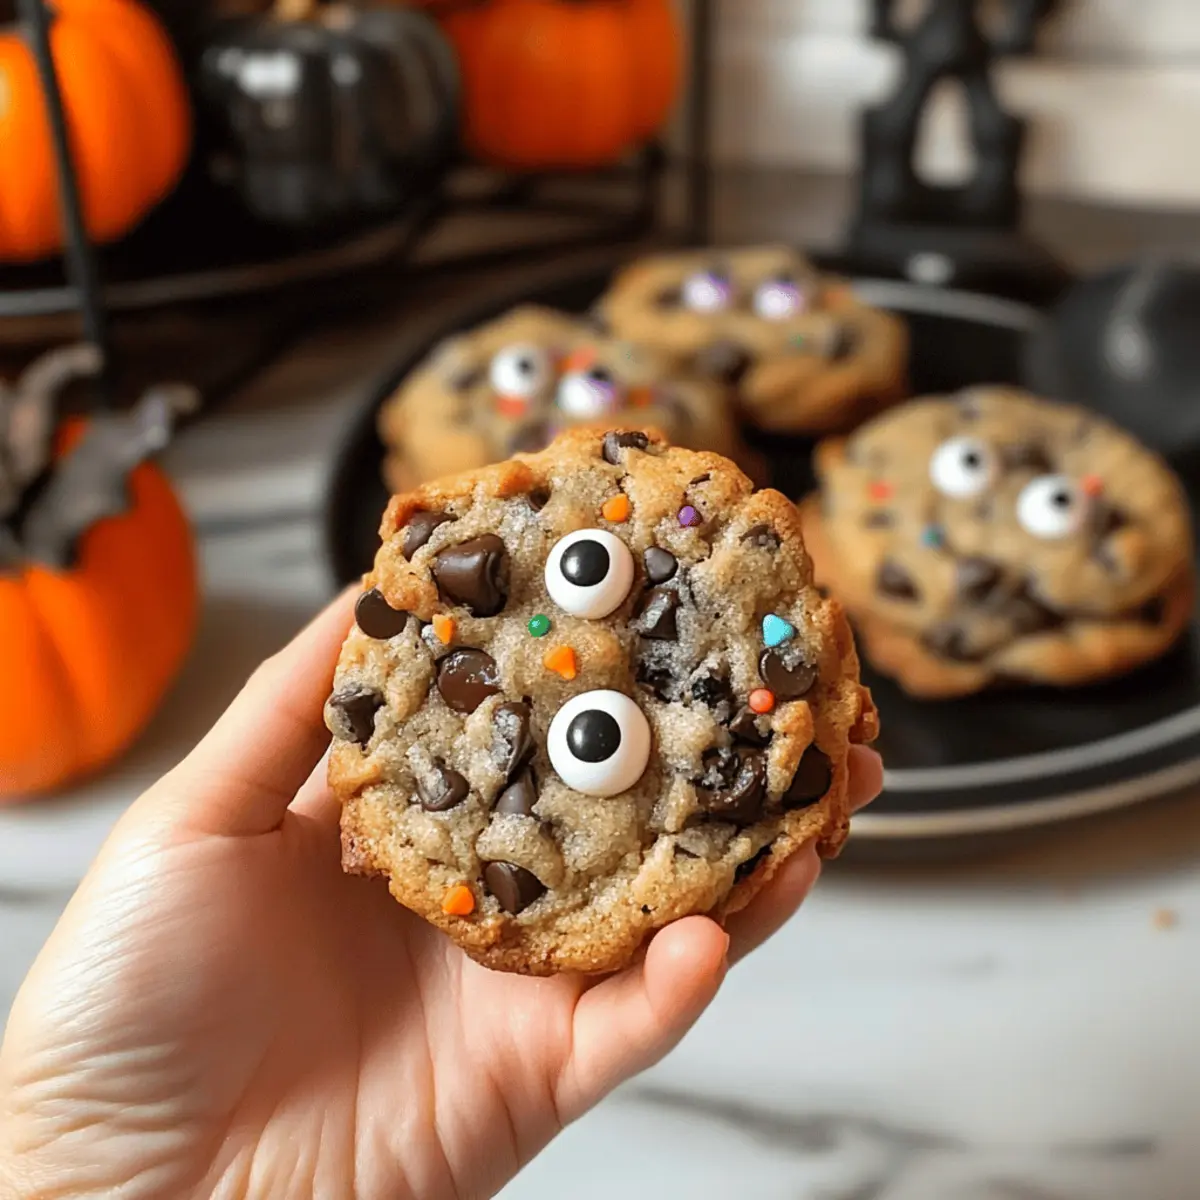
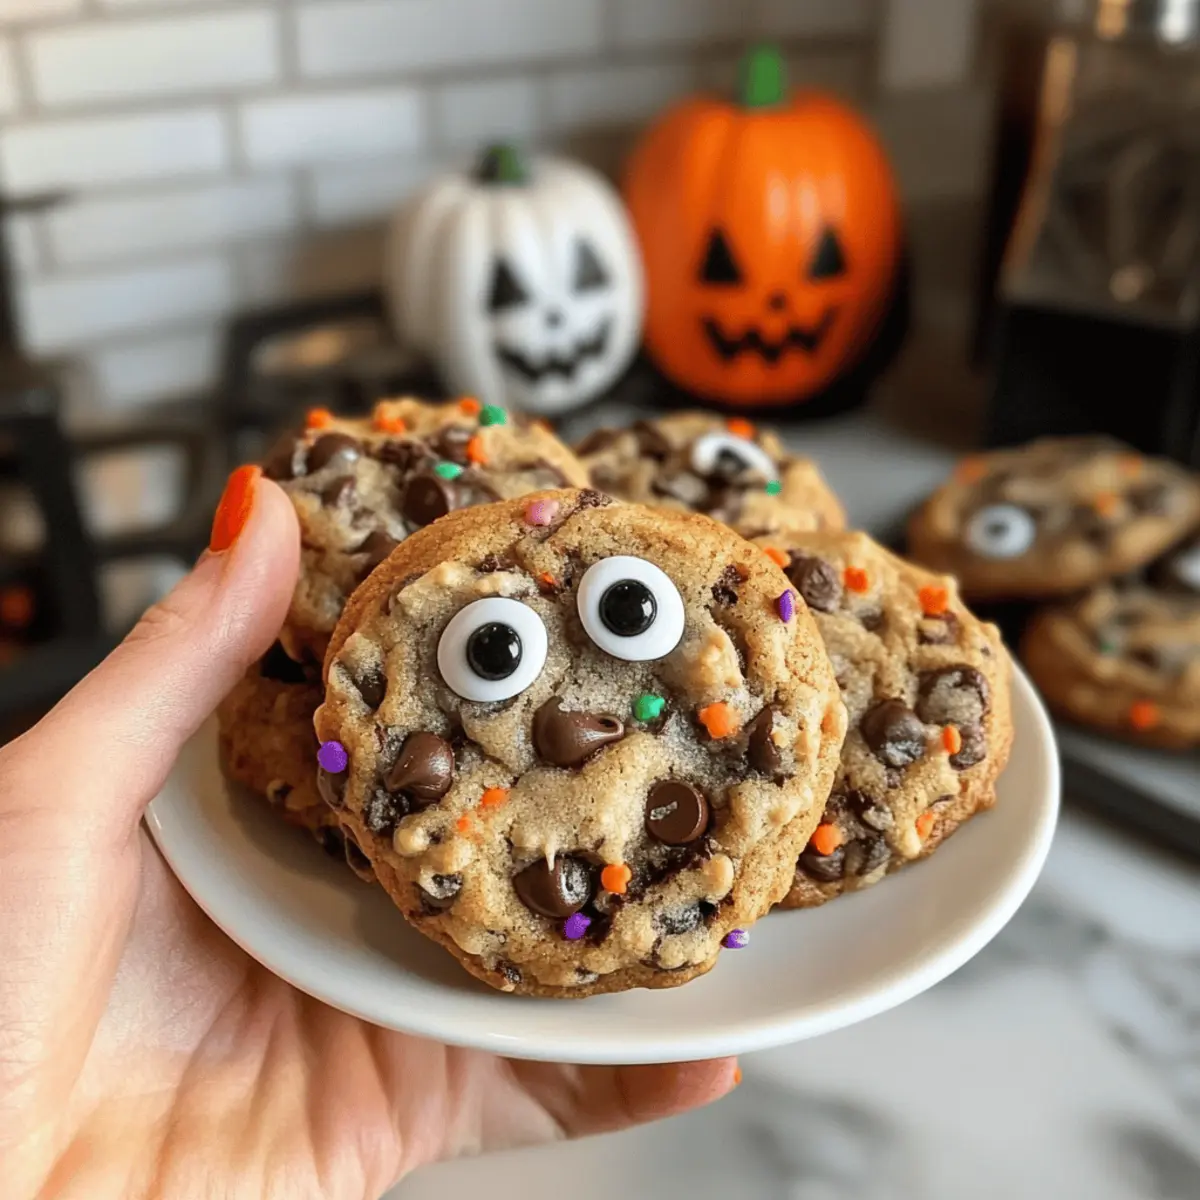
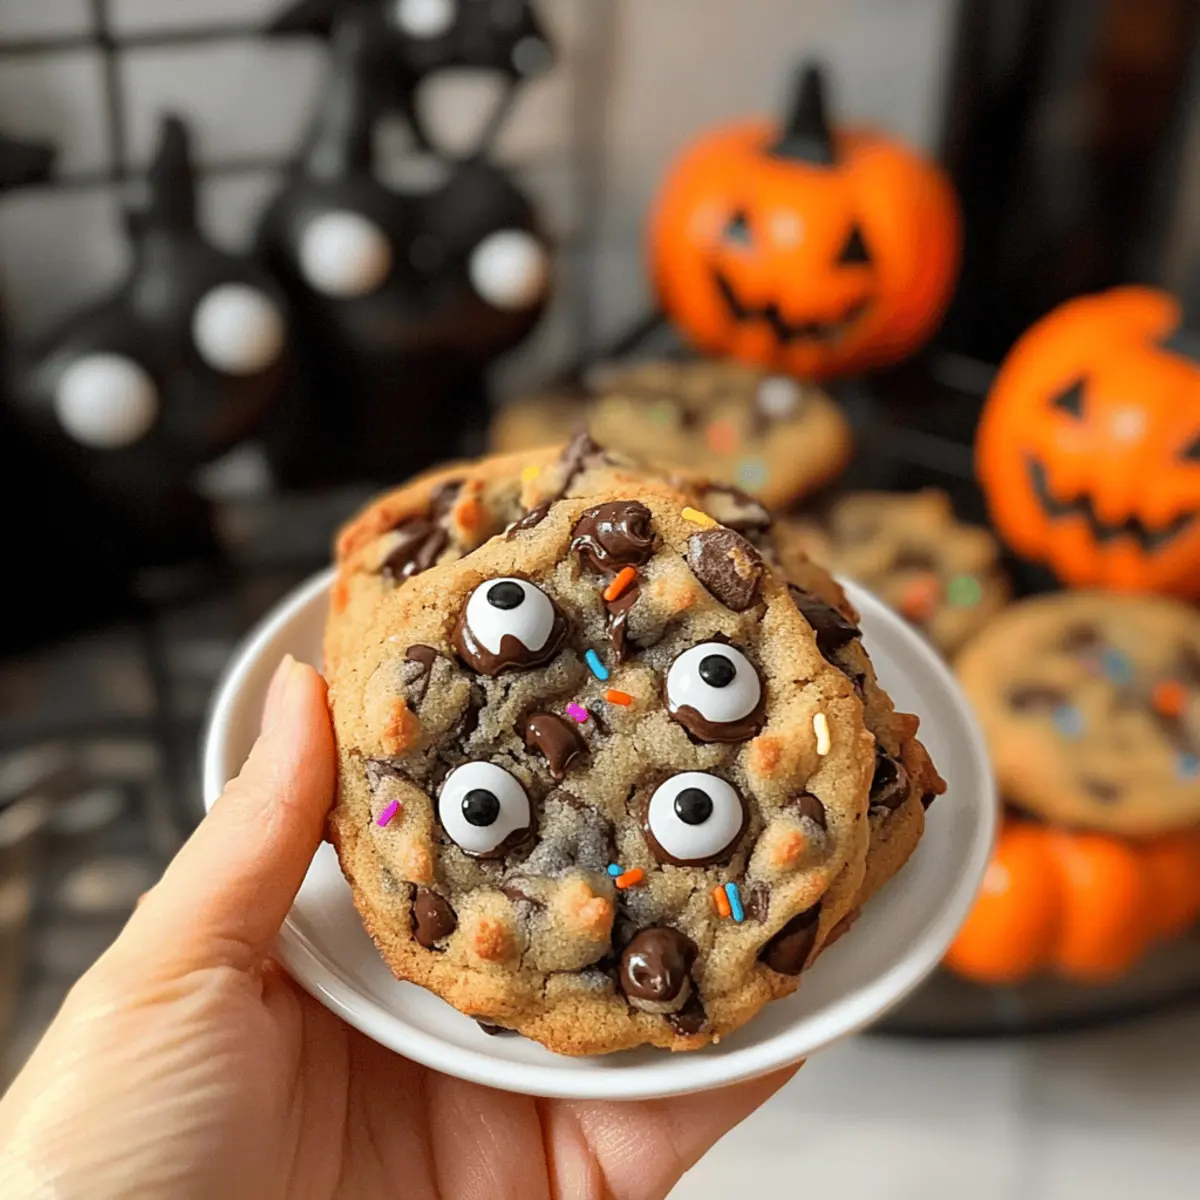
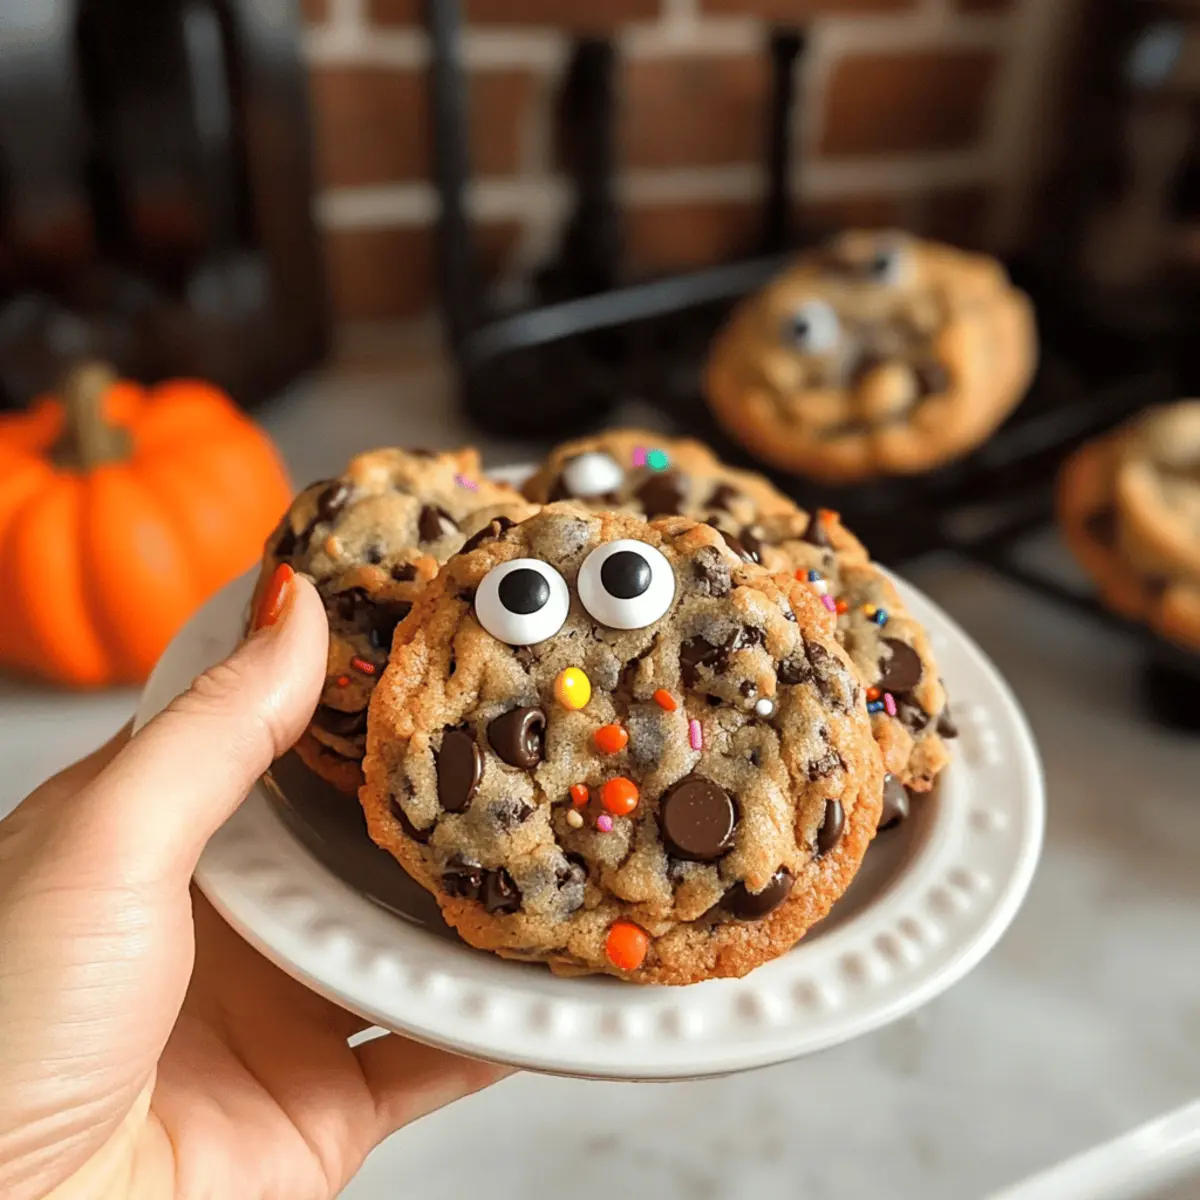
As I sifted through vibrant Halloween decorations, a thought struck me—what’s a spooky celebration without a batch of Halloween Chocolate Chip Cookies? With just ten minutes of prep time, these cookies transform into a delightful festive treat that’s both fun and easy to whip up. Imagine a chewy cookie packed with rich chocolate chips, adorned with colorful sprinkles and playful candy eyes that will have everyone at the party grinning ear to ear. Not only are these cookies a crowd-pleaser, but they also give a charming twist to the traditional chocolate chip delight. If you’re searching for a sweet way to celebrate Halloween, your cravings are about to be satisfied! Are you ready to unleash some cookie magic in your kitchen?
Why are Halloween Chocolate Chip Cookies a must-try?
Festive Fun: These cookies bring holiday spirit right to your kitchen with their colorful sprinkles and candy eyes. They’re not just treats; they’re a fun activity to enjoy with family and friends during the spooky season.
Quick Prep Time: With only 10 minutes for prep, you’ll be in and out of the kitchen in no time, perfect for busy days filled with Halloween festivities.
Chewy Perfection: Enjoy the delightful texture—slightly crisp edges with a luscious, chewy center that melts in your mouth.
Customizable Options: Versatile enough to swap chocolate chips for butterscotch or white chocolate, or add nuts for extra flair! Plus, they can be paired with other delightful snacks or Chewy Chocolate Chip cookies for a dessert spread.
Crowd-Pleasing Appeal: Guaranteed to be a hit at any Halloween party, these cookies will leave everyone smiling and asking for more, making them a perfect addition to your festive table alongside Chipotle Lime Shrimp for a savory touch!
Halloween Chocolate Chip Cookies Ingredients
For the Batter
- Unsalted Butter – 1/2 cup, melted for rich flavor; ensure it’s melted but not overheated.
- Granulated Sugar – 1/3 cup, adds sweetness and helps with cookie spread; substitute with coconut sugar for a healthier option.
- Light Brown Sugar – 1/2 cup, packed for moisture and a caramel-like flavor; dark brown sugar can deepen the flavor.
- Egg – 1 whole, acts as a binder for the ingredients; use 1/4 cup applesauce for an egg-free version.
- Vanilla Extract – 1 teaspoon, enhances flavor; opt for pure vanilla for a richer taste.
- All-Purpose Flour – 1 1/2 cups, spooned & leveled for cookie structure; a gluten-free blend works if needed.
- Salt – 1/2 teaspoon, balances sweetness and boosts flavor.
- Baking Soda – 1/2 teaspoon, a leavening agent that promotes rising; ensure freshness for the best cookies.
For the Chocolatey Goodness
- Chocolate Chips – 1 1/2 cups, vital for that delicious chocolate flavor; swap for semi-sweet or dark chocolate varieties.
- Halloween Sprinkles – 1/2-3/4 cup, for a festive touch; any colorful sprinkles can work for non-Halloween occasions.
- Candy Eyes (optional) – Fun decorations for a spooky flair; feel free to omit if not available.
These Halloween Chocolate Chip Cookies come together with ease, making them a festive delight to share (or savor alone) throughout the season!
Step‑by‑Step Instructions for Halloween Chocolate Chip Cookies
Step 1: Preheat and Prepare
Begin by preheating your oven to 350°F (175°C). While it warms up, line a baking sheet with parchment paper to ensure your Halloween Chocolate Chip Cookies bake evenly and don’t stick. This preparation sets you up for success, making sure your cookies have a perfect release after baking.
Step 2: Mix Wet Ingredients
In a large mixing bowl, combine 1/2 cup of melted unsalted butter, 1/3 cup of granulated sugar, and 1/2 cup of packed light brown sugar. Whisk these together until smooth and creamy, which should take about 2-3 minutes. Next, add in 1 whole egg and 1 teaspoon of vanilla extract, mixing thoroughly until all ingredients are well combined and the mixture appears glossy.
Step 3: Combine Dry Ingredients
In a separate bowl, whisk together 1 1/2 cups of all-purpose flour, 1/2 teaspoon of salt, and 1/2 teaspoon of baking soda. Gradually add this dry mixture to the wet ingredients, folding gently with a spatula until just combined. Be careful not to over-mix, as this will keep your Halloween Chocolate Chip Cookies tender and chewy, perfect for that delightful texture you want.
Step 4: Incorporate Chocolate and Sprinkles
Now it’s time to elevate your dough! Gently fold in 1 1/2 cups of chocolate chips and 1/2 to 3/4 cup of colorful Halloween sprinkles. The chocolate will melt slightly as they bake, while the sprinkles bring a festive touch. Make sure the add-ins are evenly distributed throughout the dough for that perfect burst of flavor in every cookie.
Step 5: Chill Dough
Using a cookie scoop or tablespoon, portion out 2-tablespoon sized balls of dough onto the lined baking sheet, ensuring space between each to allow for spreading. Cover the sheet with plastic wrap and chill the dough in the refrigerator for 1.5 to 2 hours. Chilling is crucial; it helps to firm up the dough and prevents your Halloween Chocolate Chip Cookies from spreading too much while baking.
Step 6: Bake
Once chilled, remove the dough from the refrigerator and arrange the cookie balls on the baking sheet, spaced about 2 inches apart. Bake in the preheated oven for 11-13 minutes, or until the edges are golden and the centers appear set but still soft. The delicious aroma of melting chocolate will fill your kitchen!
Step 7: Decorate
Immediately after taking the cookies out of the oven, sprinkle in some candy eyes on top of each cookie for an extra spooky touch. The heat from the cookies will slightly melt the candy, helping them stick beautifully. This whimsical decoration will surely make your Halloween Chocolate Chip Cookies a delightful sight!
Step 8: Cool and Enjoy
Let the cookies cool on the baking sheet for about 5-10 minutes before transferring them to a wire rack to cool completely. This step is vital to achieving the ideal chewy texture. Once cooled, gather your family and friends to indulge in these festive treats that are sure to bring smiles and joy to your Halloween celebrations!
Halloween Chocolate Chip Cookies Customizations
Feel free to let your creativity shine as you tailor these festive cookies to fit your preferences and dietary needs!
-
Dairy-Free: Substitute butter with coconut oil for a rich, dairy-free option that still delivers on flavor.
Coconut oil adds a delightful hint of tropical taste, making your cookies both unique and suitable for dairy-free diets. -
Gluten-Free: Use a 1:1 gluten-free flour blend instead of all-purpose flour for a delightful gluten-free treat.
Many blends on the market work well, ensuring no one misses out on the fun of these festive cookies. -
Nuts Galore: Add 1/2 cup of chopped nuts, such as walnuts or pecans, for a delightful crunch.
The contrast between the chewy cookie and the crunch of the nuts creates a satisfying texture in every bite. -
Flavor Boost: Mix in 1 teaspoon of cinnamon or pumpkin spice for a warm, seasonal twist.
This little addition can create a delightful aroma that perfectly complements the Halloween atmosphere. -
Candy Corn: Toss in a handful of candy corn for a colorful and sweet surprise in each cookie.
It brings that nostalgic Halloween flavor and a pop of color that everyone will love. -
Fruit Fusions: Try adding 1/2 cup of dried cranberries or cherries for a fruity contrast to the rich chocolate.
The tartness of the fruit pairs beautifully with the sweetness of the chocolate, elevating your cookie game. -
Chocolate Variety: Experiment with white chocolate or peanut butter chips instead of chocolate chips for a delightful twist.
Both options add their own unique sweetness, creating a whole new flavor profile for your Halloween treat! -
Spice it Up: For those who enjoy heat, mix in 1/4 teaspoon of cayenne pepper for a subtle spicy kick.
This unexpected twist will surprise and delight those who crave a little heat in their sweet treats!
The possibilities are endless! Let your imagination run wild, and be sure to enjoy every moment of your baking adventure. Pair these cookies with a delightful glass of milk or alongside a bowl of Chocolate Protein Pudding for a perfectly balanced Halloween spread!
Make Ahead Options
These Halloween Chocolate Chip Cookies are ideal for meal prep enthusiasts! You can prepare the cookie dough up to 24 hours in advance, making them a fantastic option for busy schedules. To do this, simply mix all your ingredients up to the chilling step, then portion the dough into balls and cover them with plastic wrap before refrigerating. For best results, ensure the dough is properly chilled to prevent excess spreading during baking. When you’re ready to enjoy them, just pop the chilled dough onto a baking sheet and bake as directed, and you’ll have fresh, delicious cookies waiting to delight your family and friends!
Expert Tips for Halloween Chocolate Chip Cookies
-
Chill the Dough: This is essential to prevent your cookies from spreading too much during baking. Don’t skip this step for the best results!
-
Even Sizing: Use an ice cream scoop to portion the dough for consistently sized Halloween Chocolate Chip Cookies—this helps them bake evenly.
-
Fresh Ingredients: Ensure your baking soda is fresh for optimal rise. Stale baking soda can lead to flat cookies, so check the expiration date!
-
Decorate Quickly: Add candy eyes right after baking while the cookies are still warm. This will help them stick for that adorable spooky effect.
-
Storage Matters: Keep leftovers in an airtight container for 3-5 days, or freeze dough balls for up to 3 months to have fresh cookies anytime!
How to Store and Freeze Halloween Chocolate Chip Cookies
Room Temperature: Store cookies in an airtight container for up to 3 days to maintain their chewy goodness. Keep them away from direct sunlight to prevent drying out.
Fridge: If you want to keep them fresh even longer, store them in the fridge for up to 5 days. Just make sure to use an airtight container to prevent any unwanted odors from seeping in.
Freezer: To freeze, pack the Halloween Chocolate Chip Cookies in a freezer-safe bag or container, separating layers with parchment paper. They can last up to 3 months.
Reheating: Let frozen cookies thaw at room temperature for a few hours, then warm them in a preheated oven at 350°F for about 5-7 minutes for that just-baked taste!
What to Serve with Halloween Chocolate Chip Cookies
Let your imagination run wild as you create a delightful spread to accompany these festive treats, perfect for celebrating the spooky season!
-
Glass of Milk: The classic pairing! Cold milk brings out the rich chocolate flavors, complementing the chewy texture deliciously.
-
Pumpkin Spice Hot Chocolate: Embrace the essence of fall with a warm, cozy twist on hot chocolate that adds a festive flair.
-
Ghostly Fruit Cups: Fresh fruits like bananas and grapes served in whimsical ghost cups provide a light contrast to the sweetness of cookies.
-
Whipped Cream Dip: A light, fluffy dip with a hint of vanilla offers a delightful balance to the rich chocolate in the cookies for dipping.
-
Caramel Sauce: Drizzle warm caramel over your cookies for an indulgent surprise that elevates the dessert experience with luscious flavor.
-
Spiced Apple Cider: A warm, spiced apple cider transforms your cookie treat into a comforting experience, perfect for chilly fall nights.
-
Miniature Pumpkin Pies: Add a touch of tradition with tiny pumpkin pies; the flavors complement chocolate cookies beautifully and create an appealing dessert table.
-
Candy Corn Parfaits: Layer candy corn with whipped cream and cookies for a festive, visually enticing dessert that screams Halloween fun.
-
Chocolate Chip Cookie Dough Truffles: Serve these sweet bites alongside for a double dose of chocolatey goodness, appealing to true cookie lovers!
Halloween Chocolate Chip Cookies Recipe FAQs
How do I choose ripe ingredients for Halloween Chocolate Chip Cookies?
For best results, ensure your ingredients are fresh! Make sure your butter is unsalted and softened to room temperature but not melted; this adds the perfect richness. When selecting chocolate chips, opt for high-quality semi-sweet or dark chocolate for intense flavor. If you’re using eggs, pick ones that are organic or free-range for better texture and taste.
What’s the best way to store Halloween Chocolate Chip Cookies, and how long will they last?
Store your Halloween Chocolate Chip Cookies in an airtight container at room temperature for up to 3 days. For longer freshness, you can refrigerate them for up to 5 days in a sealed container. If you want to keep them for an extended period, freeze the cookies; they’ll remain good for up to 3 months!
Can I freeze Halloween Chocolate Chip Cookies? If so, how?
Absolutely! To freeze your Halloween Chocolate Chip Cookies, let them cool completely. Then, place them in freezer-safe bags or containers, separating the layers with parchment paper to prevent sticking. For portioned dough, scoop out balls and freeze them on a baking sheet before transferring to bags—this keeps them from clumping together! When you’re ready to bake, simply bake straight from the freezer, adding a few extra minutes to the baking time.
What should I do if my Halloween Chocolate Chip Cookies spread too much while baking?
If your cookies spread too much, it could be due to warmer dough, which is why chilling the dough is crucial. Next time, ensure your dough is thoroughly chilled for a minimum of 1.5 hours. You can also try adding a bit more flour, but be careful not to overdo it, as this can dry out the cookies. Finally, check the temperature of your oven with an oven thermometer; it should be at the correct temperature for the best baking results!
Are there any dietary considerations I should be aware of when making Halloween Chocolate Chip Cookies?
If you’re making these cookies for friends or family with dietary restrictions, you can make a few adaptations. For a dairy-free option, substitute the butter with coconut oil or vegan butter. You can also use a flax egg (1 tablespoon ground flaxseed mixed with 3 tablespoons water) as a substitute for the egg. Moreover, if anyone has nut allergies, ensure you’re using nut-free chocolate chips or sprinkles.
Delicious Halloween Chocolate Chip Cookies for Spooky Fun
Ingredients
Equipment
Method
- Preheat your oven to 350°F (175°C) and line a baking sheet with parchment paper.
- In a large mixing bowl, combine melted unsalted butter, granulated sugar, and packed light brown sugar. Whisk until smooth and creamy, then add the egg and vanilla extract, mixing thoroughly.
- In a separate bowl, whisk together all-purpose flour, salt, and baking soda. Gradually add this dry mixture to the wet ingredients, folding gently until just combined.
- Fold in chocolate chips and Halloween sprinkles until evenly distributed in the dough.
- Portion out 2-tablespoon sized balls of dough onto the lined baking sheet, cover with plastic wrap, and chill in the refrigerator for 1.5 to 2 hours.
- Bake in the preheated oven for 11-13 minutes, or until the edges are golden and centers are set but soft.
- Immediately sprinkle candy eyes on top of each cookie after removing from the oven.
- Allow cookies to cool on the baking sheet for 5-10 minutes before transferring to a wire rack to cool completely.