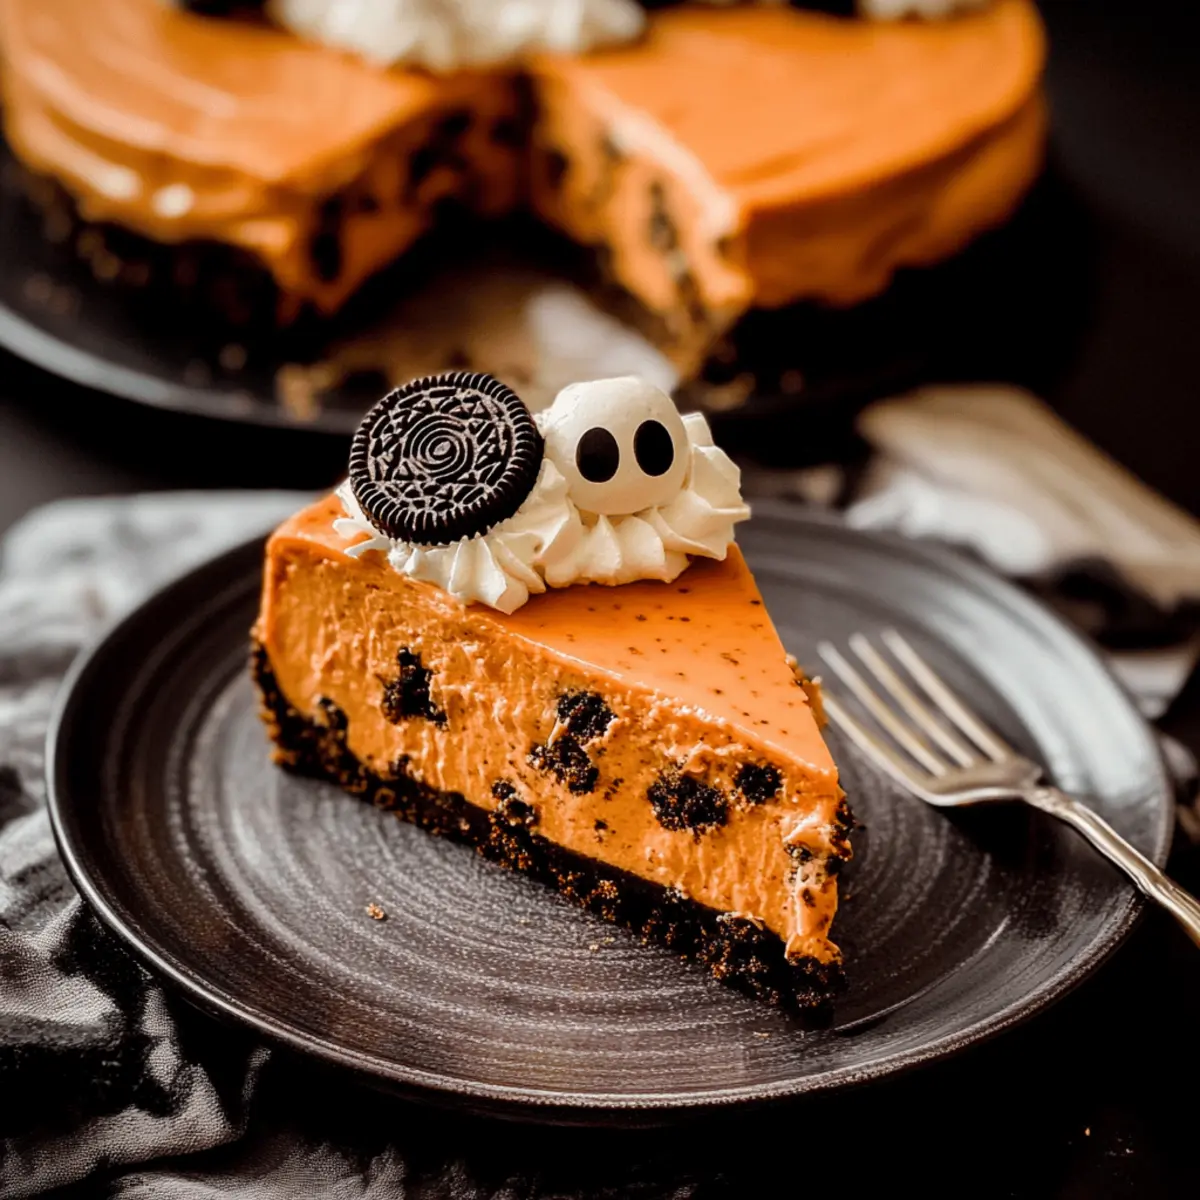
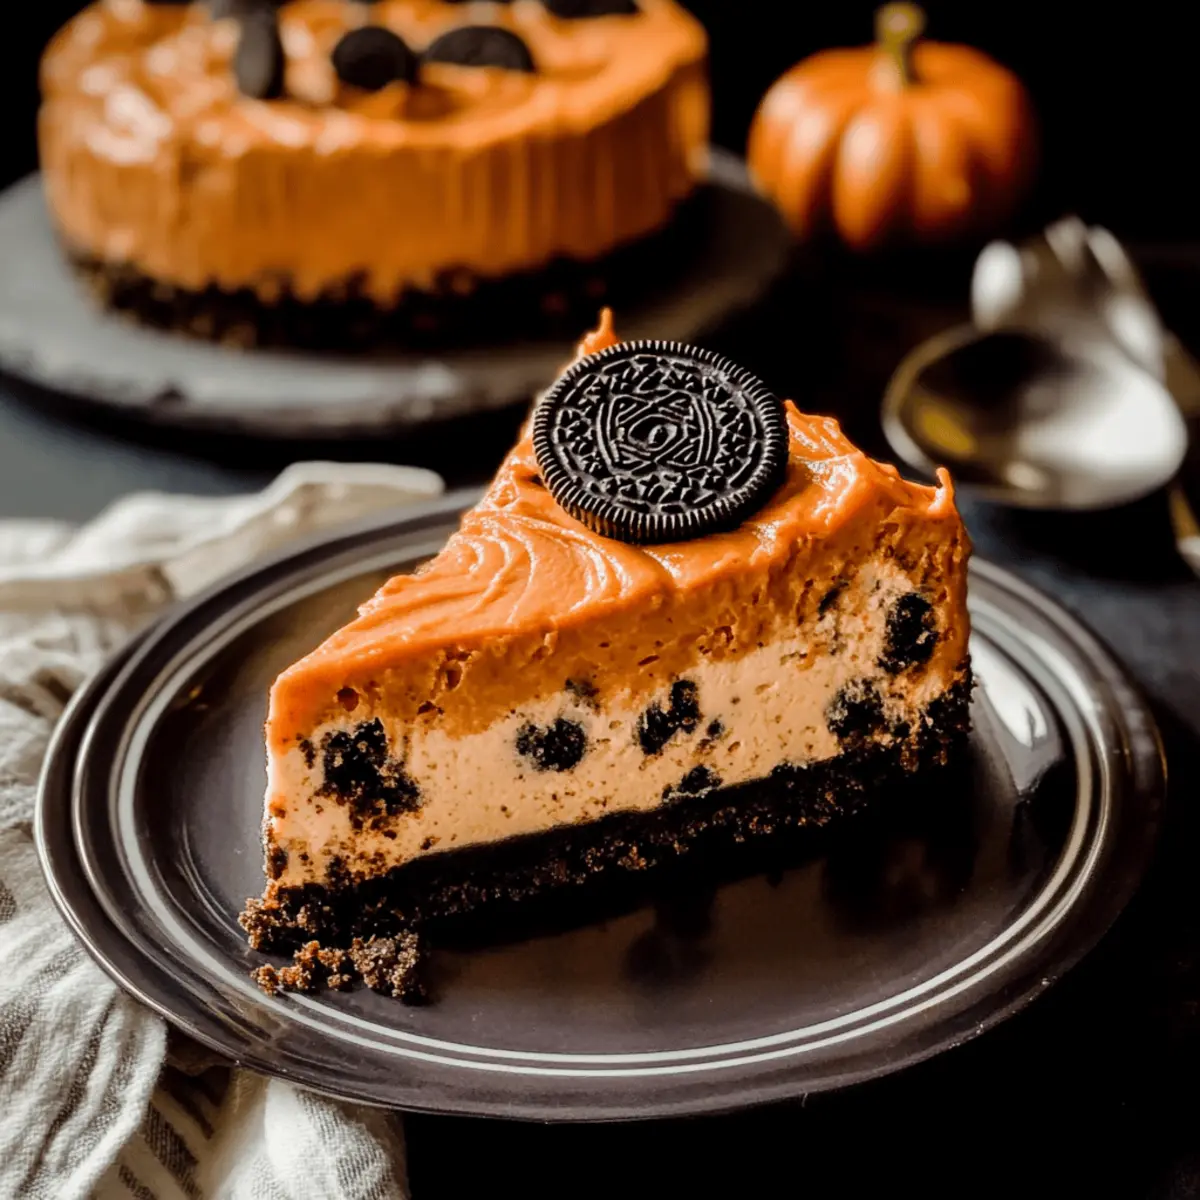
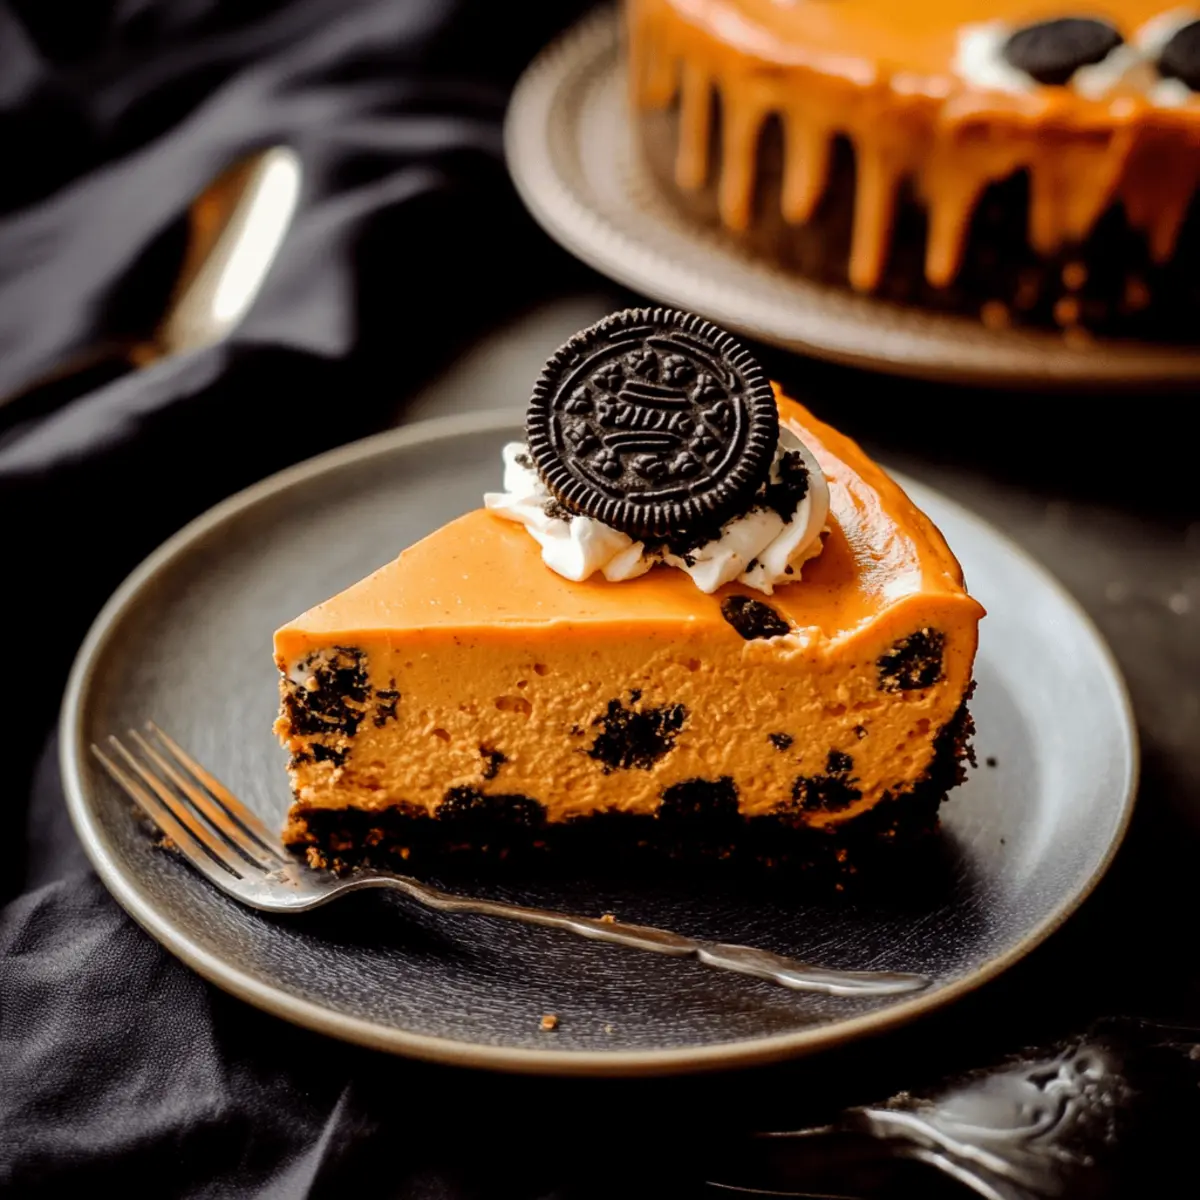
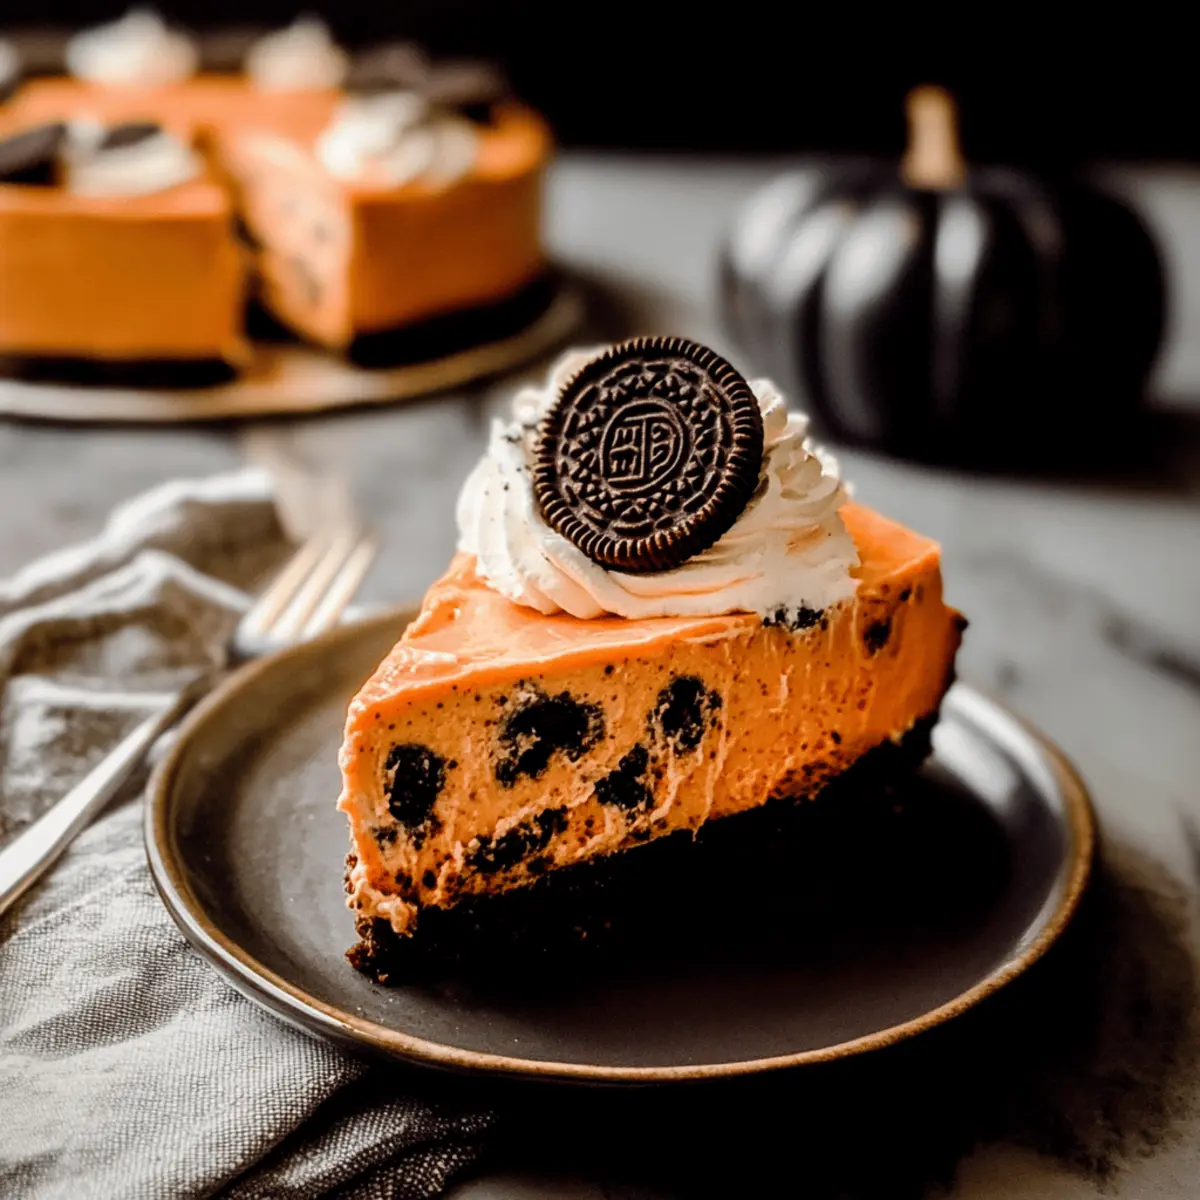
As the days grow shorter and the crisp air sets in, it’s time to embrace all things pumpkin spice and spooky! I recently found myself daydreaming about a dessert that perfectly blends Halloween fun with indulgent flavors, and that’s how my Halloween Cookies and Cream Cheesecake was born. This no-bake delight not only boasts layers of creamy full-fat cream cheese and exciting chunks of Halloween Oreos, but it also adds a festive orange hue that’ll charm your guests. With its effortless preparation and crowd-pleasing flavor, this cheesecake is the ultimate way to elevate your Halloween celebrations. Curious about how to whip up this show-stopping treat? Let’s dive in!
Why is Halloween Cheesecake so special?
Deliciously Decadent: This Halloween Cheesecake is creamy, rich, and oh-so-indulgent, making it the perfect sweet treat for any spooky gathering.
Effortless Preparation: With a no-bake formula, this recipe saves you time while delivering on taste, allowing you to focus on enjoying the festivities.
Festive Presentation: The bright orange hue not only screams Halloween but also beautifully contrasts with the dark Oreo crust, making it a stunning centerpiece.
Versatile Flair: You can easily swap ingredients like using regular Oreos for a classic twist or adapting colors for any holiday—simply perfect for every occasion!
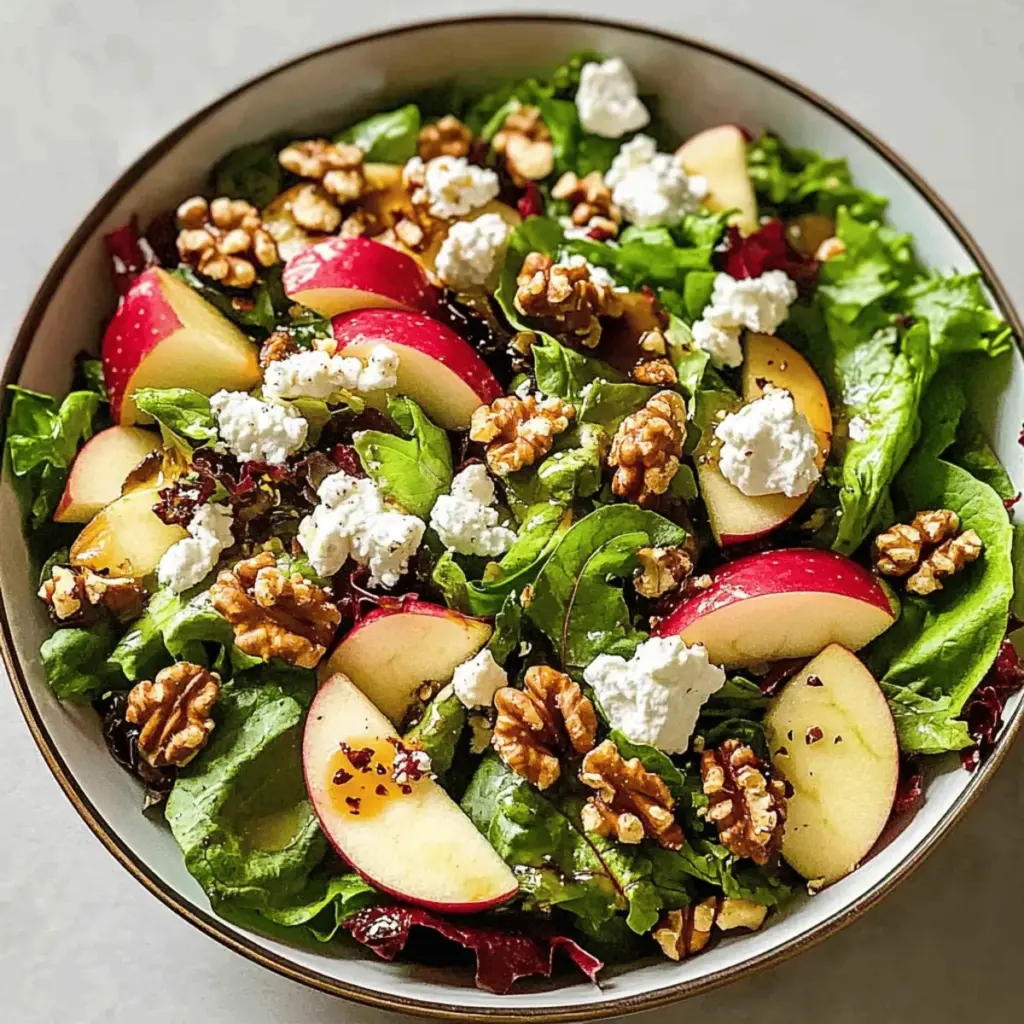
Prepare yourself for compliments as this crowd-pleaser takes center stage; you might even want to check out our guide on making homemade whipped cream for that extra touch!
Halloween Cheesecake Ingredients
For the Crust
• Crushed Oreos – These provide the foundation for a deliciously rich crust; use Halloween Oreos for a festive touch.
• Melted Butter – Acts as a binder for the crust ingredients, adding moisture and flavor.
For the Filling
• Full Fat Cream Cheese – The star of the cheesecake, ensuring a creamy texture; make sure it’s at room temperature to prevent lumps.
• Granulated Sugar – Sweetens the filling perfectly, balancing out the tanginess of the cream cheese.
• Heavy Whipping Cream – Adds richness and helps achieve that delightful smoothness in the texture.
• Greek Yogurt or Sour Cream – Provides a tangy contrast to the sweetness; any thick dairy option works as a substitute.
• Vanilla Extract – Enhances the flavor profile with a warm, inviting note.
• Orange Food Coloring – Optional yet adds a fun Halloween twist; go for gel food coloring for vibrant results.
• Large Eggs and Egg Yolks – Essential for structure; ensure they’re at room temperature for an even mix.
• Chopped Oreos – Folded into the filling for those delightful texture bursts and a cookies and cream experience.
For the Topping
• Homemade Whipped Cream – Light and airy topping that brings all the flavors together; candy eyes make it spooky and fun!
Embrace the joy of creating this Halloween Cheesecake—every layer promises sweet delight, bringing smiles to all who taste it!
Step‑by‑Step Instructions for Halloween Cheesecake
Step 1: Preheat and Prepare the Pan
Preheat your oven to 325°F (162°C) and take a moment to prepare a 9-inch springform pan. Grease the sides lightly and line the bottom with parchment paper. This setup will ensure your Halloween Cheesecake comes out beautifully and without any sticking, creating a smooth presentation for your spooky dessert.
Step 2: Make the Oreo Crust
In a mixing bowl, crush a generous amount of Oreos until they resemble fine crumbs. Mix in melted butter until the crumbs are evenly coated. Press this mixture firmly into the bottom of the prepared springform pan, forming a solid crust. Bake for 8–10 minutes, then remove from the oven and let it cool completely before adding the filling.
Step 3: Prepare the Cheesecake Filling
In a stand mixer, beat the room temperature full-fat cream cheese on medium speed until creamy and smooth, approximately 2–3 minutes. Gradually add the granulated sugar, continuing to mix until fully incorporated. Pour in the heavy whipping cream, Greek yogurt, vanilla extract, and optional orange food coloring; mix until combined and silky.
Step 4: Incorporate the Eggs
With the mixer on low speed, add the eggs one at a time, ensuring each is fully mixed in before adding the next. Scrape down the sides of the bowl as needed to avoid lumps in your Halloween Cheesecake batter. The mixture should be smooth and well combined, creating a luscious base for your dessert.
Step 5: Add Chopped Oreos
Gently fold in the chopped Oreos with a spatula, incorporating them into the cheesecake mixture without over-mixing. This step ensures those delightful cookie chunks are evenly distributed throughout, adding bursts of flavor and texture in every slice of your Halloween Cheesecake.
Step 6: Create a Water Bath
To prevent cracks while baking, create a water bath by placing the springform pan in a larger roasting pan. Pour hot water into the outer pan until it reaches halfway up the sides of the springform pan. Carefully slide both pans into the oven and bake for 1–1.5 hours, until the center of the cheesecake slightly jiggles when shaken.
Step 7: Cooling the Cheesecake
Once baked, turn off the oven and let the Halloween Cheesecake cool inside for 1 hour with the door ajar. This gradual cooling helps prevent cracks. Afterward, transfer it to a wire rack to cool completely for an additional 2 hours before refrigerating it for at least 6 hours or overnight for the best flavor and texture.
Step 8: Serve and Decorate
Once chilled, carefully remove the cheesecake from the springform pan. Top it off with homemade whipped cream and arrange some adorable candy eyes for a fun, spooky presentation. Slice your Halloween Cheesecake and watch as the layers tempt everyone—ready to enjoy your festive, creamy delight!
Make Ahead Options
These Halloween Cheesecake preparations are perfect for busy home cooks looking to save time! You can prepare the Oreo crust and cheesecake filling up to 24 hours in advance. Simply follow the instructions to make the crust and filling, then layer them into the springform pan and cover it tightly with plastic wrap before refrigerating. To maintain the creamy texture, ensure your cream cheese is at room temperature before mixing. When you’re ready to serve, bake the cheesecake after chilling it overnight, and top it with homemade whipped cream and candy eyes just before presentation. This way, you’ll have a show-stopping treat without any last-minute stress!
Storage Tips for Halloween Cheesecake
Fridge: Store your Halloween Cheesecake tightly covered with plastic wrap or in an airtight container for up to 5 days, ensuring it retains its fresh flavor and creamy texture.
Freezer: If you want to keep your cheesecake longer, wrap it well in plastic wrap and aluminum foil before placing it in the freezer. It will last for up to 3 months without losing its delightful essence.
Thawing: To enjoy frozen cheesecake, simply move it to the refrigerator to thaw overnight. Serve it chilled for the best experience, and feel free to add fresh toppings.
Reheating: There’s no need to reheat the cheesecake, as it’s best enjoyed cold. Just slice, serve, and watch it disappear!
Halloween Cheesecake Variations & Substitutions
Feel free to get creative with this Halloween Cheesecake and make it your own with these fun twists!
- Classic Cheesecake: Omit the orange food coloring and Halloween Oreos to create a timeless cookies and cream version that’s still super delightful.
- Dairy-Free Option: Substitute with vegan cream cheese and coconut cream for a luscious texture, giving everyone the chance to indulge!
- Flavor Boost: Add a hint of peppermint extract for a fresh, festive touch. It’ll add a lovely twist that pairs well with chocolate!
- No-Bake Variation: Skip the baking step entirely by chilling the cheesecake mixture in the fridge for a delightful no-bake alternative. Just a few hours in the fridge, and you’re good to go!
- Nutty Crust: Swap Oreos for crushed nuts like almonds or pecans mixed with a bit of dates for a healthier, crunchy base that’s full of flavor.
- Spicy Kick: Mix in a dash of cinnamon or nutmeg into the filling for a seasonal spice that’s perfect for autumn gatherings.
- Fruit Topping: Top with fresh raspberries or pumpkin puree for a fruity contrast that adds fun colors and flavors to your dish.
- Customization Made Easy: Adjust the coloring for different occasions—be it green for St. Patrick’s Day or red for Valentine’s. Your cheesecake can shine for any celebration!
With all these variations, your Halloween Cheesecake can go from spooky to simply scrumptious all year round. Don’t forget, you can always enhance your treat with some delicious homemade whipped cream for that extra layer of indulgence!
What to Serve with Halloween Cheesecake
Indulging in this creamy delight opens up a world of delicious pairings that will elevate your autumn gatherings.
- Spiced Apple Cider: Perfectly warms the soul with notes of cinnamon and nutmeg, balancing the richness of the cheesecake.
- Ginger Snap Cookies: Their crunchy texture and spicy kick add a festive crunch that complements the creamy cheesecake seamlessly.
- Whipped Cream Topping: Light and airy, it enhances the cheesecake’s flavor while adding a delightful visual contrast to the spookiness.
Pairing your Halloween Cheesecake with something warm or crunchy brings harmony to each bite. Consider serving alongside fresh fruits like apple slices to add a refreshing crispness.
- Chocolate Sauce Drizzle: A rich drizzle of chocolate sauce over the cheesecake provides an irresistible sweetness that ties everything together.
These delicious accompaniments will create a truly spectacular Halloween dessert experience for your friends and family!
Tips for the Best Halloween Cheesecake
-
Room Temperature Cream Cheese: Ensure your cream cheese is at room temperature for a silky texture and to avoid lumps in your Halloween Cheesecake.
-
Don’t Skip the Water Bath: This is crucial for preventing cracks by maintaining humidity during baking. Pour hot water halfway up the sides of the springform pan.
-
Cool Gradually: Allow cheesecakes to cool slowly in the oven to prevent sinking or cracking. A door ajar for about an hour does wonders!
-
Use Gel Food Coloring: If opting for vibrant orange hue, choose gel food coloring instead of liquid for better results and a richer color.
-
Don’t Overmix: When adding the eggs and folding in chopped Oreos, mix gently. Overmixing can create air bubbles and cause cracks.
-
Chill Well: For the best flavor and texture, chill your Halloween Cheesecake in the refrigerator for at least 6 hours, preferably overnight.
Halloween Cheesecake Recipe FAQs
What type of Oreos should I use for the crust?
You can use Halloween-themed Oreos for a festive touch, but regular Oreos work just as well if they’re not available. Just be sure to crush them finely for a good crust texture.
How long can I store leftovers?
Store your Halloween Cheesecake tightly covered with plastic wrap or in an airtight container in the refrigerator for up to 5 days. This ensures the creamy texture remains fresh, allowing you to savor each slice!
Can I freeze my Halloween Cheesecake?
Absolutely! For freezing, wrap your cheesecake thoroughly in plastic wrap and then in aluminum foil to prevent freezer burn. It can stay good for up to 3 months. When you’re ready to enjoy it, simply transfer it to the refrigerator to thaw overnight.
I noticed cracks on my cheesecake. What went wrong?
Cracks can occur if your cheesecake bakes too quickly or the temperature fluctuates. To avoid this, always use a water bath while baking. This humid environment prevents cracks by keeping the cheesecake moist and helps it bake evenly. Also, cooling it gradually in the oven with the door ajar is essential.
Are there any dietary considerations for this cheesecake?
Yes! This recipe contains dairy and eggs, so it’s not suitable for vegans. For those with allergies, be cautious of gluten in Oreos and dairy in cream cheese and whipped cream. If needed, you can experiment with dairy-free alternatives, but this may alter the final texture and flavor.
How can I achieve the best texture for my cheesecake?
For a silky smooth texture, ensure that all dairy ingredients, especially cream cheese, are at room temperature before mixing. Mix on medium speed to incorporate air, but avoid overmixing once you add the eggs—gently fold in ingredients instead. This method will create a creamy consistency without lumps.
Indulge in Halloween Cheesecake: Spooky & Creamy Delight
Ingredients
Equipment
Method
- Preheat the oven to 325°F (162°C) and prepare a 9-inch springform pan by greasing the sides and lining the bottom with parchment paper.
- In a mixing bowl, crush Halloween Oreos and mix with melted butter. Press into the bottom of the prepared pan and bake for 8-10 minutes. Cool completely.
- In a stand mixer, beat room temperature cream cheese until creamy. Gradually add sugar, then pour in whipping cream, Greek yogurt, vanilla, and food coloring. Mix until smooth.
- Add eggs one at a time while mixing on low speed, ensuring each is mixed in before adding the next.
- Fold in chopped Oreos gently with a spatula.
- Create a water bath by placing the springform in a larger pan, adding hot water halfway up. Bake for 1-1.5 hours until the center jiggles slightly.
- Cool the cheesecake in the oven with the door ajar for 1 hour, then transfer to a wire rack for 2 hours. Chill in the refrigerator for at least 6 hours.
- Remove from springform pan, top with whipped cream and candy eyes, slice, and serve.