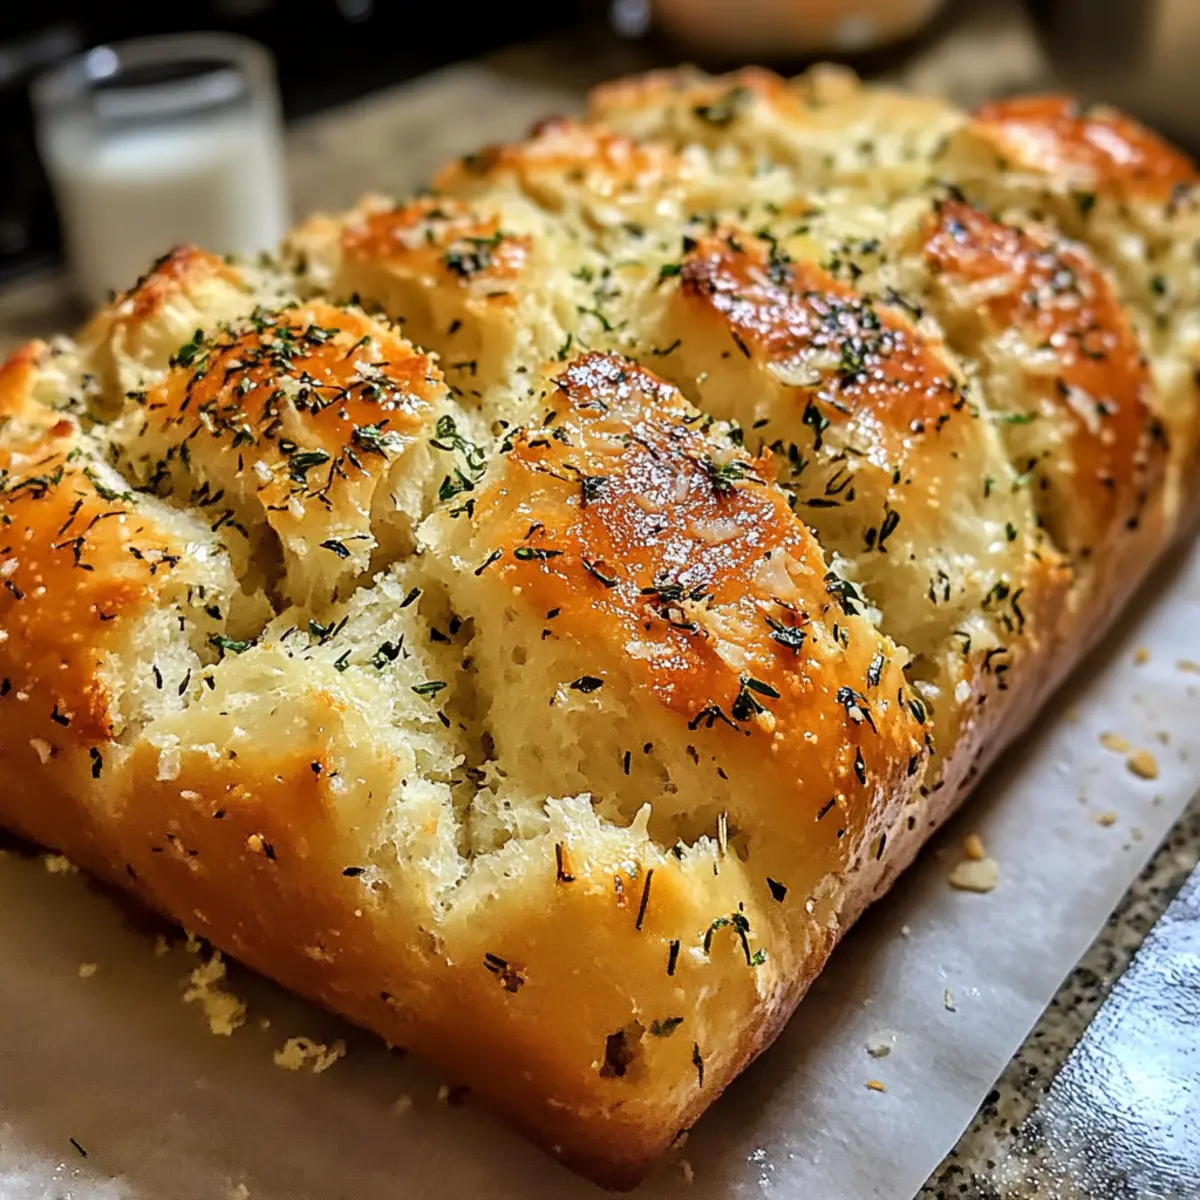
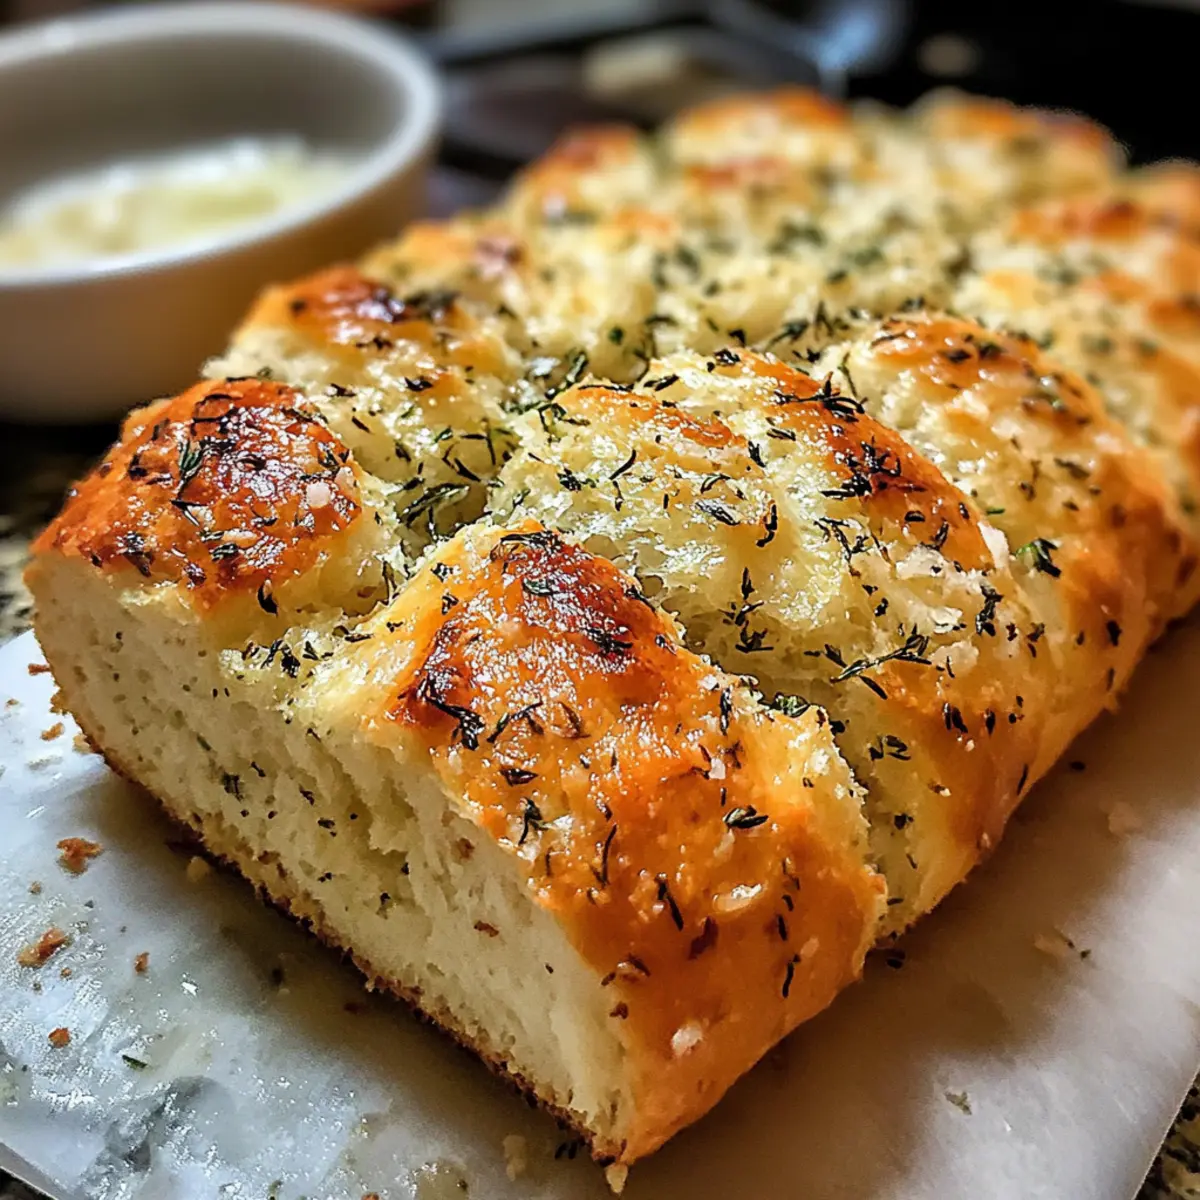
As I knead the dough for my Garlic Parmesan Herb Bread, I can almost hear the comforting symphony of sizzling garlic and melted cheese in my kitchen. This recipe has become my go-to for impressing family and friends, and it’s perfect for anyone tired of the fast food frenzy. Not only is this homemade bread easy to whip up, but its versatility allows you to customize with your favorite herbs and cheeses. Whether served alongside a warm bowl of soup or as a delectable addition to dinner, it’s sure to become a staple in your home. Curious about how to transform simple ingredients into an irresistible loaf? Let’s get baking!
Why Is This Bread So Special?
Simplicity at Its Finest: This Garlic Parmesan Herb Bread boasts a straightforward method that even novice bakers can master with ease.
Flavor Explosion: The gentle balance of garlic, parmesan, and fresh herbs results in a loaf that’s bursting with savory flavor, making every bite a delightful experience.
Customization Options: Feel free to swap in your favorite cheeses or herbs, giving you an endless variety of delicious choices each time you bake.
Versatile Serving: Whether paired with a cozy soup, served alongside a fresh salad, or enjoyed as a stand-alone snack, this bread is sure to impress.
Quick Prep Time: In under two hours, you can create a gourmet-quality bread that rivals bakeries, saving you time and money on takeout.
Get ready to add this delightful recipe to your rotation and impress your loved ones with an easy-to-make artisan-style bread!
Garlic Parmesan Herb Bread Ingredients
For the Dough
• Warm Water – Activates yeast; ensure temperature is between 100-110°F for best results.
• Granulated Sugar – Feeds yeast to promote rising; can be reduced if preferred.
• Instant Dry Yeast – Leavens the bread to create a light texture; substitute with active dry yeast if needed, but proofing time will change.
• Salt – Enhances flavor and strengthens dough structure; don’t skip it!
• Minced Garlic – Infuses the bread with aromatic garlic goodness; adjust the amount based on your preference.
• Dried Herbs – Adds aromatic notes; feel free to swap with fresh herbs (use three times the amount).
• All-Purpose Flour – Provides structure for the bread; alternative flours may yield different textures.
• Grated Parmesan Cheese – Delivers cheesy flavor and richness; swap with mozzarella or provolone for a different twist.
• Melted Butter – Used for brushing, adds a rich golden color and extra flavor.
With this mix of simple yet impactful ingredients, your Garlic Parmesan Herb Bread is set to become a beloved addition to your kitchen repertoire!
Step‑by‑Step Instructions for Garlic Parmesan Herb Bread
Step 1: Activate Yeast
In a large mixing bowl, combine warm water, granulated sugar, and instant dry yeast. Stir gently to dissolve, then let sit for about 5 minutes until the mixture becomes frothy. This indicates that your yeast is active, setting the stage for the delicious Garlic Parmesan Herb Bread you’re about to make.
Step 2: Mix Ingredients
Once the yeast is foamy, add salt, minced garlic, dried herbs, and all-purpose flour to the bowl. Stir the mixture until it forms a sticky dough that pulls away from the sides. This step is crucial for integrating all the flavors into your bread; let the aroma of garlic and herbs inspire your baking journey.
Step 3: Knead the Dough
Flour your countertop generously to prevent sticking, then turn the dough out onto the surface. Knead the dough for 8 to 10 minutes, adding more flour as necessary, until it feels smooth and elastic. You will know it’s ready when it springs back lightly when pressed. This step ensures your Garlic Parmesan Herb Bread has that delightful texture.
Step 4: First Rise
Place the kneaded dough into a lightly oiled bowl, covering it with a clean kitchen towel. Set the bowl in a warm area and let the dough rise for about 1 hour. When it has doubled in size, it’s ready for the next step. The dough should feel light and airy, hinting at the tasty bread to come.
Step 5: Shape Loaves
After the first rise, gently punch down the dough to release excess air. Divide it into two equal pieces and shape each into a smooth ball. Place the formed loaves on a greased baking sheet, ensuring they have space to expand. The shaping process creates that lovely artisan look you desire for your Garlic Parmesan Herb Bread.
Step 6: Second Rise
Cover the shaped loaves loosely with a towel and let them rise for another 15 to 20 minutes. During this time, preheat your oven to 375°F. The loaves should puff up slightly, creating just the right amount of airiness for your final bake.
Step 7: Prepare for Baking
Once the loaves have risen, brush the tops generously with melted butter, ensuring an even coverage. This adds a beautiful golden hue while baking and enhances the flavor. As you prepare the Garlic Parmesan Herb Bread for the oven, the aroma of the garlic will fill the air.
Step 8: Bake
Place the baking sheet in the preheated oven and bake for 18 to 20 minutes. Keep a close eye on the loaves; they are done when they are golden brown and sound hollow when tapped on the bottom. The transformation from dough to delicious bread is nearly complete!
Step 9: Cool
After baking, remove your Garlic Parmesan Herb Bread from the oven and let it cool on a wire rack for a few minutes. This step allows the steam to escape, keeping the crust crisp while the inside remains fluffy. Allowing the bread to cool slightly makes slicing a joy and enhances the flavors even further.
Storage Tips for Garlic Parmesan Herb Bread
Room Temperature: Store leftover Garlic Parmesan Herb Bread in an airtight container at room temperature for up to 3 days. This helps maintain its soft texture and flavor.
Freezer: For longer storage, wrap individual slices in plastic wrap and place them in a resealable freezer bag. This allows you to enjoy the bread for up to 3 months without sacrificing taste.
Reheating: To reheat, simply thaw slices overnight in the fridge and warm them in the oven at 350°F for about 10 minutes, or until heated through.
Avoiding Staleness: Keep the bread away from light and moisture to prevent it from becoming stale or developing mold. Proper storage is key to enjoying your delicious Garlic Parmesan Herb Bread for days to come!
What to Serve with Garlic Parmesan Herb Bread?
Imagine transforming a simple meal into a cozy feast with the perfect sides that elevate your homemade bread experience.
-
Creamy Tomato Soup: The rich, tangy flavors of this classic soup perfectly complement the savory notes of your bread, creating a heartwarming pairing. Dip and savor each bite for pure comfort.
-
Simple Green Salad: A light mix of fresh greens and vibrant veggies adds a refreshing crunch, balancing the richness of the Garlic Parmesan Herb Bread. Toss in a zesty vinaigrette for added zing!
-
Savory Roasted Vegetables: Caramelized root vegetables or seasonal greens bring a roasted melody of flavors that harmonize beautifully with the bread’s herbaceous profile. Their textures create delightful contrast on your plate.
-
Classic Pasta Dishes: Pair with spaghetti marinara or fettuccine alfredo for an Italian-inspired feast. The bread is perfect for mopping up sauces and adds a delightful touch!
-
Garlic Herb Olive Oil Dip: For a palate-pleasing starter, whip up a dip with olive oil infused with garlic and herbs. It’s a delightful way to enjoy the bread right from the oven!
-
Wine Pairing: A chilled Sauvignon Blanc or a hearty Chianti can elevate the meal, enhancing the flavors of your Garlic Parmesan Herb Bread while providing a pleasant contrast.
Indulge in these pairings and watch your dining experience transform, making every meal feel like a special occasion!
Garlic Parmesan Herb Bread Variations
Get creative with your Garlic Parmesan Herb Bread and transform your baking adventure into something extraordinary!
-
Fresh Herbs: Substitute dried herbs with fresh ones like basil, oregano, or thyme for a vibrant flavor boost. Fresh herbs bring a lively essence to your bread that dried herbs simply can’t match.
-
Different Cheeses: Swap out Parmesan with mozzarella or provolone for a gooey and melty twist. Mixing cheeses can create a delightful escape from the traditional cheese flavors, opening up new taste possibilities!
-
Add-ins: Toss in chopped sun-dried tomatoes or black olives to introduce new flavors and unexpected bites. These little additions can elevate your bread’s character, making each slice a surprise.
-
Whole Wheat Option: Use whole wheat flour instead of all-purpose flour for a hearty and nutritious alternative. You will enjoy a nutty taste while sneaking in some whole grains, making it a bit healthier!
-
Herb Butter Topping: Consider using a garlic herb butter to brush on top before baking for extra flavor. A drizzle of herbed goodness is like a warm hug, pampering your bread and bringing all the flavors to life.
-
Add Spice: Incorporate red pepper flakes or jalapeños for a kick of heat. If you enjoy a little spice in your cooking, this twist will leave your taste buds dancing!
-
Sweet Twist: For a unique touch, sprinkle a little honey on top before baking; it transforms the bread into a sweet-savory delight. This unexpected sweetness can pair beautifully with cheese and spreads, creating a unique experience.
As you explore these variations, let the aroma of your baking bring joy to your home, much like the comforting scents from those cherished recipes, such as Honey Garlic Pork or Garlic Butter Chicken. Enjoy the journey of creating your own version of this delightful bread!
Expert Tips for Garlic Parmesan Herb Bread
• Water Temperature Matters: Ensure the water is between 100-110°F; too hot can kill the yeast, preventing your bread from rising.
• Don’t Rush the Rise: Always allow the dough to rise until it doubles in size. Skipping this step will yield dense bread instead of fluffy Garlic Parmesan Herb Bread.
• Knead to Perfection: Knead until smooth and elastic. This hands-on process helps develop gluten, crucial for that perfect airy texture.
• Let It Cool: Allow the bread to cool slightly before slicing. This keeps the moisture in and enhances the flavors, making every bite delicious.
• Experiment with Herbs: Feel free to swap in fresh herbs or different cheese types. This recipe’s versatility means you can tailor it to your taste buds!
Make Ahead Options
These Garlic Parmesan Herb Bread loaves are perfect for meal prep! You can prepare the dough up to 24 hours in advance by following the first two steps: activate the yeast and mix the ingredients. Once you form the sticky dough, cover it with a towel and refrigerate it. This not only enhances the flavor but also saves you time on a busy day. When you’re ready to bake, remove the dough from the fridge, let it come to room temperature for about 30 minutes, and proceed with the kneading and rising processes. This way, you’ll have a bakery-quality loaf ready to impress without the last-minute rush!
Garlic Parmesan Herb Bread Recipe FAQs
How do I know if my ingredients are fresh enough to use?
Absolutely! When selecting ingredients like garlic and herbs, look for firm garlic bulbs without dark spots or sprouts for optimal flavor. For dried herbs, check the label for expiration dates; they should have strong aromas. Flour should be stored properly and free from any unpleasant odors.
What is the best way to store leftover Garlic Parmesan Herb Bread?
To enjoy your Garlic Parmesan Herb Bread at its best, store leftovers in an airtight container at room temperature for up to 3 days. If you won’t finish it in that time, wrap individual slices tightly in plastic wrap and store them in a resealable freezer bag to keep them fresh for up to 3 months. This ensures every bite remains delicious!
Can I freeze Garlic Parmesan Herb Bread, and what’s the process?
Yes, you can definitely freeze this bread! To do so, after it has cooled completely, slice the bread into individual portions. Wrap each slice tightly in plastic wrap to prevent freezer burn, then place them in a resealable freezer bag. You can enjoy this bread for up to 3 months! To reheat, simply thaw overnight in the fridge, then warm in the oven at 350°F for about 10 minutes.
What should I do if my bread doesn’t rise properly?
Very common! If your bread doesn’t rise, check the yeast and water temperature. Make sure the water is warm, not hot (between 100-110°F). If it’s too cool, the yeast won’t activate properly, and if it’s too hot, it can kill the yeast. Always let the dough rise in a warm, draft-free area until it doubles in size. If all else fails, don’t be discouraged—remember, practice makes perfect!
Is this Garlic Parmesan Herb Bread suitable for people with dietary restrictions?
Absolutely! This recipe is vegetarian and can be tailored to accommodate various dietary considerations. For gluten-free options, consider using a gluten-free all-purpose flour blend. If you have dairy allergies, substitute the cheese with a dairy-free option or omit it entirely—your bread will still taste amazing!
Garlic Parmesan Herb Bread: Your New Favorite Homemade Delight
Ingredients
Equipment
Method
- In a large mixing bowl, combine warm water, granulated sugar, and instant dry yeast. Stir gently to dissolve, then let sit for about 5 minutes until the mixture becomes frothy.
- Once the yeast is foamy, add salt, minced garlic, dried herbs, and all-purpose flour to the bowl. Stir until it forms a sticky dough.
- Flour your countertop generously, then turn the dough out onto the surface. Knead the dough for 8 to 10 minutes until it feels smooth and elastic.
- Place the kneaded dough into a lightly oiled bowl, cover with a clean kitchen towel, and let rise for about 1 hour.
- Gently punch down the dough, divide it into two pieces, and shape each into a smooth ball. Place on a greased baking sheet.
- Cover the loaves loosely with a towel and let them rise for another 15 to 20 minutes. Preheat your oven to 375°F.
- Brush the tops of the loaves generously with melted butter.
- Bake for 18 to 20 minutes, until golden brown and sound hollow when tapped.
- Let the bread cool on a wire rack for a few minutes before slicing.