Introduction to Cheesy Garlic Chicken Wraps
There’s something magical about a meal that comes together in a flash, especially when it’s as delicious as Cheesy Garlic Chicken Wraps. I remember those hectic weeknights when I’d rush home, exhausted from the day, yet craving something comforting. This recipe is my go-to solution, offering creamy goodness wrapped in a warm tortilla. It’s perfect for a quick lunch or a cozy dinner with loved ones. The best part? You can whip it up in under 30 minutes, making it a lifesaver for busy days. Trust me, your taste buds will thank you!
Why You’ll Love This Cheesy Garlic Chicken Wraps
These Cheesy Garlic Chicken Wraps are a game-changer for anyone juggling a busy schedule. They’re incredibly easy to make, requiring just a handful of ingredients and minimal prep time. The creamy, cheesy filling is bursting with flavor, making every bite a delight. Plus, they’re versatile enough to please even the pickiest eaters. Whether it’s a quick lunch or a satisfying dinner, these wraps are sure to become a family favorite!
Ingredients for Cheesy Garlic Chicken Wraps
Gathering the right ingredients is the first step to creating these mouthwatering Cheesy Garlic Chicken Wraps. Here’s what you’ll need:
- Cooked chicken: Shredded chicken is the star of this dish. You can use rotisserie chicken for convenience or leftover chicken from a previous meal.
- Shredded mozzarella cheese: This adds a melty, gooey texture that makes the wraps irresistible. Feel free to mix in other cheeses like cheddar for extra flavor.
- Cream cheese: Softened cream cheese brings a rich creaminess to the filling, making it smooth and decadent.
- Mayonnaise: A touch of mayo enhances the creaminess and adds a subtle tang. You can substitute it with Greek yogurt for a healthier twist.
- Garlic: Fresh minced garlic and garlic powder pack a flavorful punch, giving these wraps their signature taste.
- Onion powder: This adds depth to the flavor profile without the hassle of chopping onions.
- Salt and black pepper: Essential seasonings that enhance all the flavors in the filling.
- Flour tortillas: Large tortillas are perfect for wrapping up all that delicious filling. Whole wheat or spinach tortillas can be great alternatives.
- Fresh spinach leaves: These add a pop of color and a nutritious crunch. You can also use other greens like arugula or kale.
- Diced tomatoes: Fresh tomatoes bring juiciness and a burst of flavor. You can substitute with sun-dried tomatoes for a different twist.
- Chopped fresh parsley: Optional, but it adds a fresh, herby note to the wraps.
- Olive oil: A drizzle for cooking the wraps until they’re golden brown and crispy.
For exact measurements, check the bottom of the article where you can find everything listed for easy printing!
How to Make Cheesy Garlic Chicken Wraps
Step 1: Prepare the Chicken Mixture
Let’s kick things off by making the creamy filling. In a large mixing bowl, combine the shredded chicken, mozzarella cheese, cream cheese, and mayonnaise. Add the minced garlic, garlic powder, onion powder, salt, and black pepper. Mix everything together until it’s well combined and creamy. This step is crucial; the creaminess is what makes these Cheesy Garlic Chicken Wraps so delightful. If you want to spice things up, consider adding some diced jalapeños to the mixture for an extra kick!
Step 2: Assemble the Wraps
Now that your chicken mixture is ready, it’s time to assemble the wraps. Lay out your flour tortillas on a clean surface. Spread an equal amount of the creamy chicken mixture onto each tortilla, leaving about an inch border around the edges. This ensures that the filling doesn’t spill out when you roll them up. Next, top the chicken mixture with fresh spinach leaves and diced tomatoes. If you’re feeling fancy, sprinkle some chopped parsley on top for a fresh touch. It’s all about layering those flavors!
Step 3: Roll and Cook the Wraps
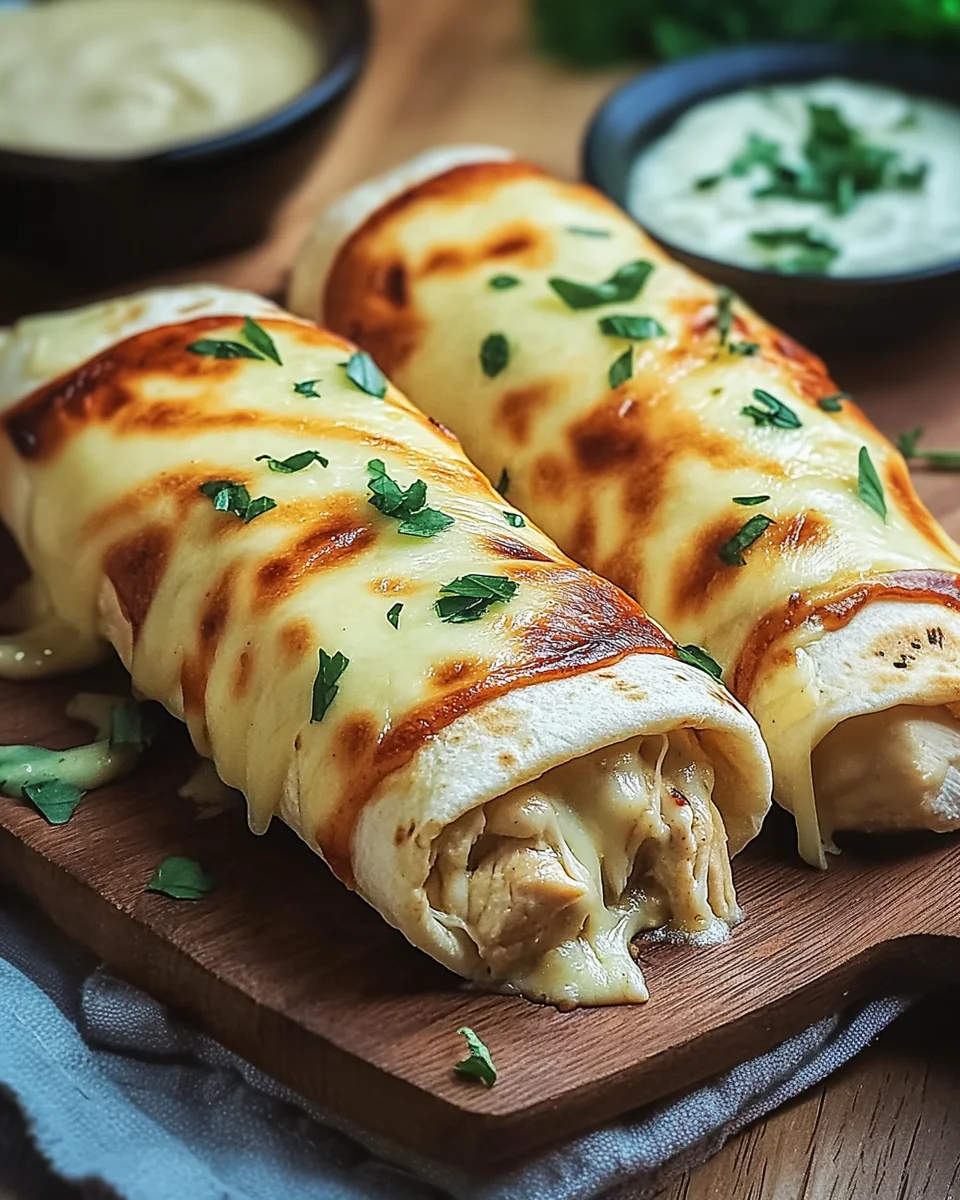
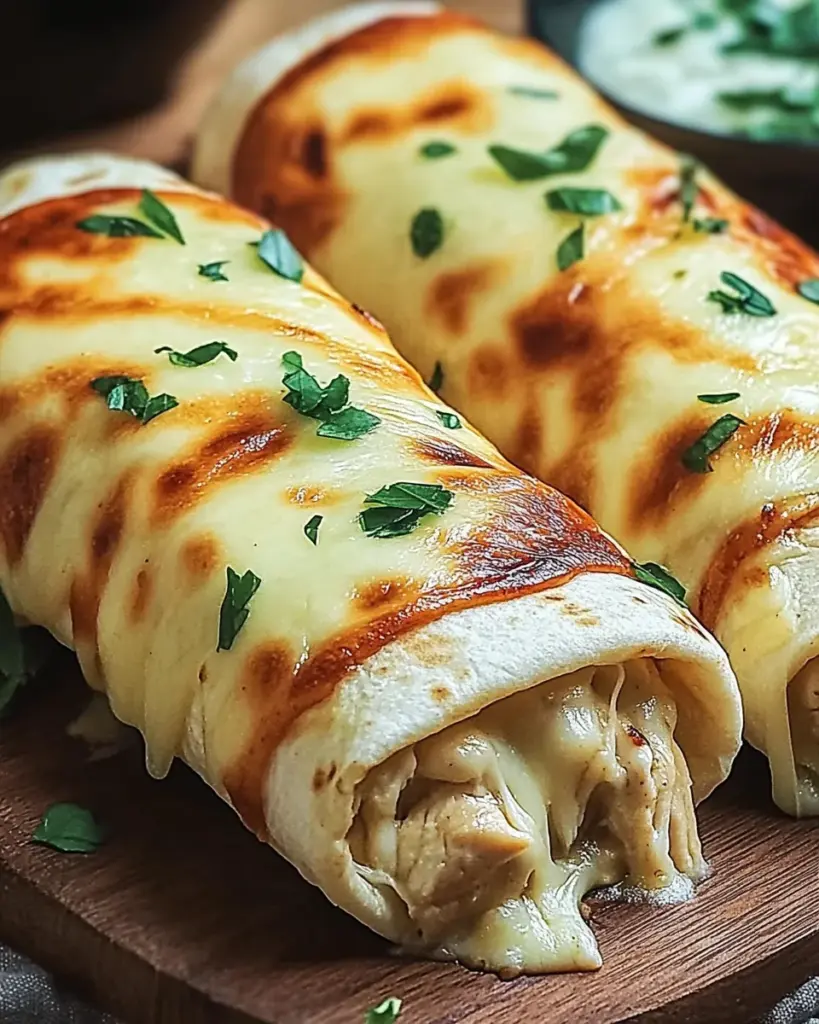
With the filling in place, it’s time to roll up those wraps! Start by folding in the sides of the tortilla, then roll it tightly from the bottom up. This secures all that delicious filling inside. Heat a skillet over medium heat and drizzle in some olive oil. Place the wraps seam-side down in the skillet and cook for about 3-4 minutes on each side, or until they’re golden brown and crispy. The sound of that sizzle is music to my ears! Once done, let them cool for a minute before slicing in half. Serve warm and enjoy!
Tips for Success
- Use rotisserie chicken for a quick and easy option.
- Don’t skip the cream cheese; it’s key for that creamy texture.
- Experiment with different cheeses for unique flavors.
- Make sure to leave space when spreading the filling to avoid spills.
- Keep the heat moderate to ensure the wraps cook evenly without burning.
Equipment Needed
- Mixing bowl: A large bowl for combining ingredients. A sturdy pot can work in a pinch.
- Skillet: A non-stick skillet is ideal for cooking. A cast-iron skillet adds a nice sear.
- Spatula: For flipping the wraps. Tongs can also do the job.
- Knife: For slicing the wraps. A pizza cutter makes quick work of it!
Variations
- Spicy Kick: Add diced jalapeños or a splash of hot sauce to the chicken mixture for a fiery twist.
- Protein Swap: Substitute the chicken with shredded turkey, cooked shrimp, or even black beans for a vegetarian option.
- Cheese Lovers: Mix in different cheeses like pepper jack for a zesty flavor or feta for a Mediterranean touch.
- Veggie Boost: Incorporate sautéed bell peppers, mushrooms, or zucchini for added nutrition and flavor.
- Gluten-Free Option: Use gluten-free tortillas to make these wraps suitable for gluten-sensitive diets.
Serving Suggestions
- Pair your Cheesy Garlic Chicken Wraps with a crisp side salad for a refreshing contrast.
- Serve with homemade potato wedges or sweet potato fries for a hearty meal.
- A chilled glass of iced tea or lemonade complements the wraps perfectly.
- For presentation, slice the wraps in half and arrange them on a platter with dipping sauces.

FAQs about Cheesy Garlic Chicken Wraps
Can I use leftover chicken for these wraps?
Absolutely! Leftover chicken is perfect for these Cheesy Garlic Chicken Wraps. It saves time and adds great flavor. Just shred it up and mix it in!
How can I make these wraps healthier?
To lighten up the recipe, consider using Greek yogurt instead of mayonnaise. You can also add more veggies or use whole wheat tortillas for added fiber.
Can I freeze the wraps for later?
Yes, you can freeze the assembled wraps before cooking. Just wrap them tightly in plastic wrap and store them in a freezer bag. When you’re ready to eat, thaw and cook as directed!
What can I serve with Cheesy Garlic Chicken Wraps?
These wraps pair wonderfully with a fresh salad, some crispy fries, or even a side of guacamole for dipping. The options are endless!
Can I make these wraps vegetarian?
Definitely! Swap the chicken for black beans or sautéed vegetables. You’ll still get that creamy goodness with a delicious twist!
Final Thoughts
Creating Cheesy Garlic Chicken Wraps is more than just cooking; it’s about bringing joy to the table. Each bite is a warm hug, a reminder of how simple ingredients can transform into something extraordinary. Whether you’re sharing them with family or enjoying a quiet night in, these wraps are sure to spark smiles and satisfy cravings. Plus, the versatility of this recipe means you can make it your own, experimenting with flavors and ingredients. So, roll up your sleeves, gather your loved ones, and dive into this creamy delight. Trust me, you’ll be making these wraps again and again!
Cheesy Garlic Chicken Wraps: A Creamy Delight to Try!
Ingredients
Method
- In a large mixing bowl, combine the shredded chicken, mozzarella cheese, cream cheese, mayonnaise, minced garlic, garlic powder, onion powder, salt, and black pepper. Mix until well combined and creamy.
- Lay out the flour tortillas on a clean surface. Spread an equal amount of the chicken mixture onto each tortilla, leaving about an inch border around the edges.
- Top the chicken mixture with fresh spinach leaves, diced tomatoes, and parsley if using.
- Roll each tortilla tightly, folding in the sides as you go to secure the filling.
- Heat a skillet over medium heat and add a drizzle of olive oil. Place the wraps seam-side down in the skillet and cook for 3-4 minutes on each side, or until golden brown and crispy.
- Remove from the skillet and let cool for a minute before slicing in half. Serve warm.
Nutrition
Notes
- For a spicy kick, add diced jalapeños or a dash of hot sauce to the chicken mixture.
- Substitute the chicken with shredded turkey or cooked shrimp for a different protein option.