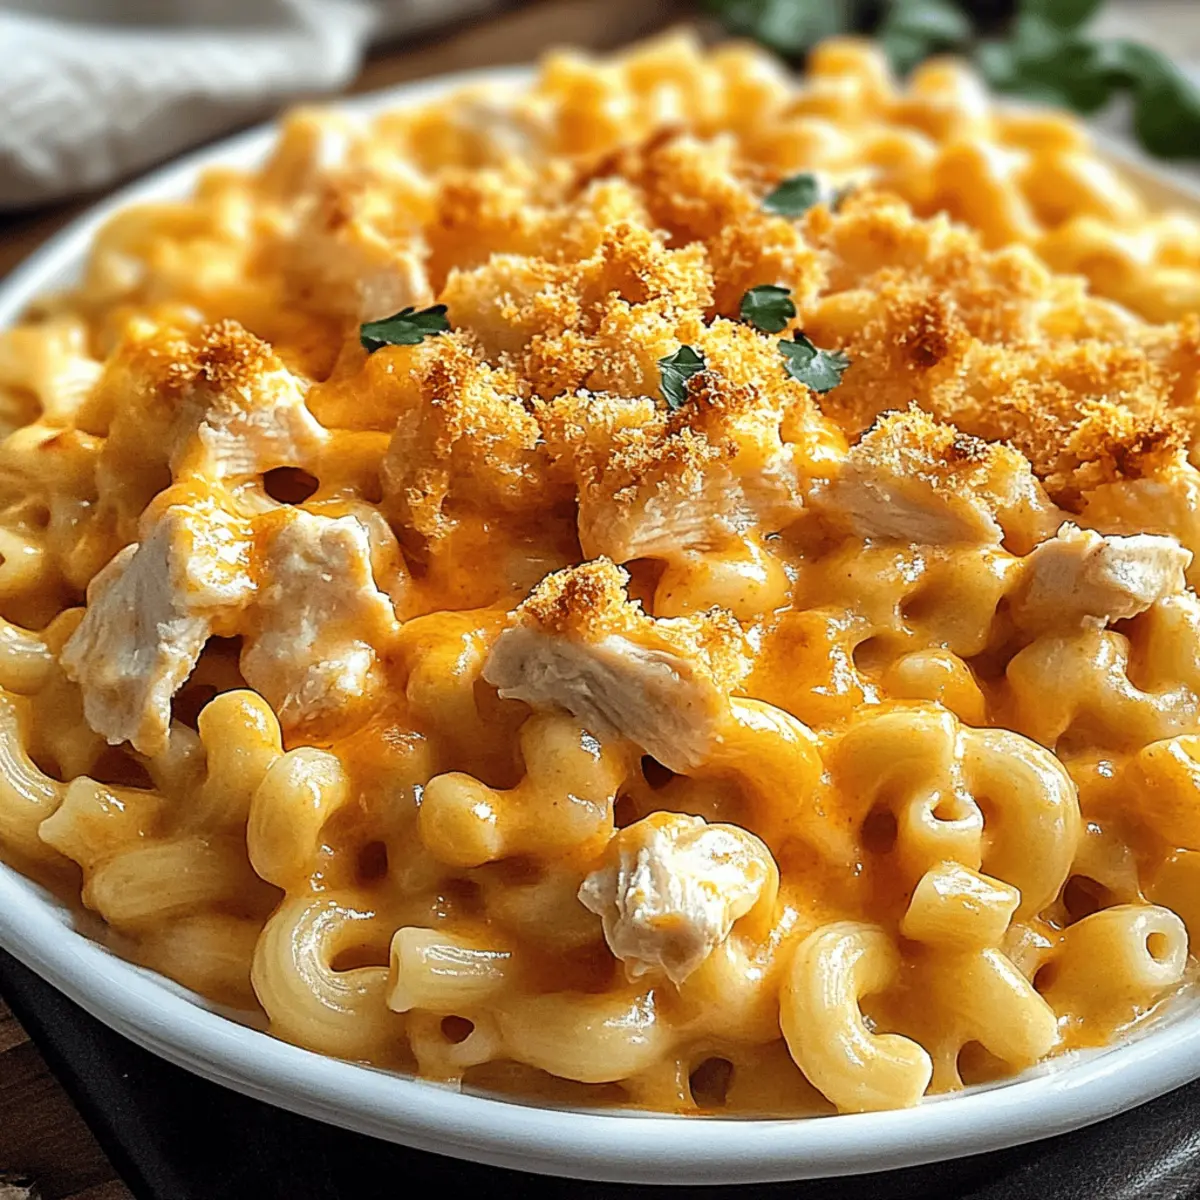
A whiff of spicy, creamy goodness fills the air as I pull this bubbling dish from the oven. My Irresistible Buffalo Chicken Mac and Cheese has become a staple in our home, effortlessly combining the warmth of comfort food with the excitement of zesty buffalo flavor. Whether you’re hosting friends or seeking a cozy night in, this dish is a true crowd-pleaser that’s quick to whip up and can even be made ahead of time. It’s an indulgent embrace on a plate, ensuring that each bite is packed with cheesy richness and tender chicken. What’s your favorite way to elevate a classic dish? Let’s dive into this delicious journey together!

Why is this Buffalo Chicken Mac and Cheese irresistible?
Comfort Food Reimagined: This Buffalo Chicken Mac and Cheese elevates the classic mac and cheese with a fiery twist, making it the ultimate comfort food.
Quick to Make: With simple steps and common ingredients, you’ll be enjoying a delicious dinner in no time.
Make Ahead Marvel: Prep it in advance and bake when ready, perfect for busy weeknights.
Crowd-Pleasing Delight: Whether for a family gathering or a cozy night in, this dish is sure to impress everyone at the table.
Flavor Explosion: The zing of the buffalo sauce perfectly complements the creamy cheeses, making each bite a rich taste sensation.
Versatile Options: Customize it by swapping chicken for veggies or experimenting with different cheeses, making it unique every time!
Buffalo Chicken Mac and Cheese Ingredients
For the Pasta
• Elbow macaroni – The base of the dish, providing structure and texture; feel free to swap in rotini or penne for a twist.
For the Chicken
• Cooked shredded chicken – Adds heartiness and protein; consider using shredded beef or tofu for a vegetarian delight.
For the Sauce
• Buffalo sauce – Infuses spice and depth; customize the heat level with mild or hot buffalo sauce based on your preference.
• Cream cheese – Brings creaminess and richness; you can substitute with sour cream or ricotta for a change in flavor.
• Cheddar cheese – The star cheese delivering sharp flavor; switch to Monterey Jack or Pepper Jack for a unique taste.
• Mozzarella cheese – Contributes that gooey, melty texture; any melty cheese can work as a replacement.
• Milk – Creates that sumptuous cheese sauce; opt for a dairy-free milk if you’re avoiding dairy.
• Garlic powder – Enhances the overall flavor; use minced fresh garlic for an extra kick if preferred.
• Onion powder – Adds depth and savory notes; swap with fresh onions for more robust flavor.
• Salt and pepper – Essential seasonings to elevate the taste; adjust according to your palate.
For the Topping
• Panko breadcrumbs – Adds a satisfying crunch on top; regular breadcrumbs can be used in a pinch.
• Green onions – For garnish, adding freshness and vibrant color; chives can be used instead if desired.
Step‑by‑Step Instructions for Buffalo Chicken Mac and Cheese
Step 1: Cook the Pasta
Begin by bringing a large pot of salted water to a boil. Once boiling, add 12 ounces of elbow macaroni and cook until al dente, about 8-10 minutes. You’ll know it’s ready when the pasta is tender but still has a slight bite. Drain the pasta and set it aside, allowing any excess moisture to evaporate.
Step 2: Prepare the Chicken
In a large skillet, heat a drizzle of oil over medium heat. Add diced chicken breasts, seasoned with salt and pepper, and sauté for 5-7 minutes. Cook until the chicken is golden brown and no longer pink in the center, ensuring it retains its juices for that tender bite. Then, remove the chicken from the heat and set aside.
Step 3: Create the Cheese Sauce
In a saucepan over medium heat, melt 2 tablespoons of butter. Once melted, whisk in 2 tablespoons of flour to form a roux, cooking for about 1 minute until bubbly. Gradually add 2 cups of milk, whisking continuously until smooth. Stir in 4 ounces of cream cheese, 1 cup of cheddar cheese, and ½ cup of buffalo sauce until fully melted and creamy.
Step 4: Combine Ingredients
In a large mixing bowl, combine the drained macaroni, melted cheese sauce, and cooked chicken. Gently stir until everything is coated in the creamy mixture, ensuring each piece is well combined. The hearty, delicious Buffalo Chicken Mac and Cheese should now start to take shape, looking rich and inviting.
Step 5: Add Toppings
Preheat your oven to 350°F (175°C). Transfer the macaroni and cheese mixture into a greased 9×13 inch baking dish. Evenly sprinkle 1 cup of panko breadcrumbs over the top, which will create a delightful crunch once baked. This step adds not only texture but also a beautiful golden finish.
Step 6: Bake
Place the dish in the preheated oven and bake for 20-25 minutes. Keep an eye on it, and look for bubbling edges and a golden, crispy topping. The aroma of your Buffalo Chicken Mac and Cheese will fill your kitchen, signaling that it’s almost ready to enjoy!

Make Ahead Options
These Buffalo Chicken Mac and Cheese are perfect for meal prep enthusiasts! You can assemble the entire dish up to 24 hours in advance, which is a game-changer for busy weeknights. Simply prepare the mac and cheese mixture, transfer it to a greased baking dish, and instead of baking, cover it tightly with plastic wrap or aluminum foil and refrigerate. This keeps it fresh and ready to go while preventing the pasta from drying out. When you’re ready to serve, just pop it in a preheated oven at 350°F (175°C) for 20-25 minutes, and you’ll enjoy this comforting dish just as delicious as if it were freshly made!
Buffalo Chicken Mac and Cheese Variations
Feel free to get creative with your Buffalo Chicken Mac and Cheese by trying out these fun variations and substitutions!
-
Vegetarian Twist: Replace chicken with roasted vegetables like bell peppers and zucchini. This adds a colorful, nutritious touch to your dish.
-
Spicy Kick: For added heat, mix in chopped jalapeños or a sprinkle of cayenne pepper. The spiciness can elevate the flavor profile, pleasing those who love a fiery feast.
-
Creamy Mushroom: Add sautéed mushrooms to the mix for an earthy flavor that balances nicely with the spiciness of the buffalo sauce, creating a rich and savory delight.
-
Cheese Lovers: Combine cheddar with smoky Gouda or creamy Fontina for a unique cheese medley. The different textures and flavors will create a truly decadent dish!
-
Herb Infusion: Mix in fresh herbs like thyme or parsley for a fragrant touch. Not only do they enhance the flavor, but they also brighten up your meal visually.
-
Buffalo Chicken Casserole: Transform it into a casserole by layering the mac and cheese with shredded chicken and sauce before baking, giving you a hearty dish that serves well for gatherings.
-
Add Crunch: Swap out the panko breadcrumbs for crushed tortilla chips or crispy fried onions. This variation adds an unexpected texture that complements the creamy cheese.
-
Meal Prep Friendly: Prepare it as a freezer meal! Assemble the dish without baking and freeze. When hunger strikes, simply thaw and bake, making dinner a breeze.
If you’re looking for more delicious chicken recipes to try, consider these Stuffed Chicken Cheese or Grilled Chicken Broccoli bowls for easy weeknight meals!
What to Serve with Buffalo Chicken Mac and Cheese
Enhance your dining experience with delightful pairings that balance the bold flavors of this creamy dish.
-
Garlic Bread: Offers a crunchy texture and buttery, garlicky flavor, perfect for scooping up any cheesy goodness that spills over.
-
Caesar Salad: Crisp romaine and tangy dressing create a refreshing contrast to the rich, creamy pasta, adding a light touch to your meal.
-
Coleslaw: The crunch and tanginess of coleslaw balance out the richness of the mac and cheese, providing a colorful and vibrant addition to the table.
-
Steamed Broccoli: Tender broccoli adds a pop of color and nutrients, while its slight bitterness beautifully offsets the creamy and spicy mac and cheese.
-
Buffalo Cauliflower Bites: For those craving an extra bite, these crispy bites of cauliflower tossed in buffalo sauce mirror the flavors of your main dish, creating delicious synergy.
-
Sparkling Lemonade: This refreshing drink adds zest and brightness, cutting through the richness of the cheese for a thirst-quenching experience.
-
Chocolate Chip Cookies: End on a sweet note with warm cookies, whose gooey center creates a comforting conclusion after a hearty meal.
How to Store and Freeze Buffalo Chicken Mac and Cheese
Fridge: Store your Buffalo Chicken Mac and Cheese in an airtight container for up to 3 days. This ensures it maintains its creamy texture and delicious flavors.
Freezer: For longer storage, freeze it in a freezer-safe container for up to 2 months. Make sure to label with the date for easy tracking.
Reheating: To reheat, thaw in the fridge overnight and bake at 350°F (175°C) for 20–25 minutes, adding a splash of milk to revive creaminess.
Make-Ahead: If you’re prepping ahead, assemble the dish but skip baking. Cover and refrigerate for up to 24 hours before baking, making mealtime a breeze!
Expert Tips for Buffalo Chicken Mac and Cheese
-
Sauté the Chicken Well: Ensure you sauté the chicken until golden brown to lock in flavors. This step elevates the dish by adding a robust taste to your Buffalo Chicken Mac and Cheese.
-
Avoid Clumping: Mix the cooked pasta with the cheese sauce thoroughly to prevent clumping. This ensures that every bite is a creamy, cheesy delight!
-
Make Ahead Easy: To prep in advance, assemble the dish without baking. Cover it and chill for up to 24 hours. When ready, simply bake and enjoy!
-
Revive Leftovers: If you have leftover Buffalo Chicken Mac and Cheese, reheat in the oven or microwave. Adding a splash of milk will help restore its creamy texture.
-
Customize Your Heat: Feel free to adjust the spice level by choosing the right buffalo sauce. A mild sauce works wonders for those who prefer less heat!
-
Get Creative with Toppings: Swap panko breadcrumbs for crushed crackers or even finely chopped nuts for a unique crunch on top of your mac and cheese.

Buffalo Chicken Mac and Cheese Recipe FAQs
How do I choose the right chicken?
Absolutely! For the best flavor and tenderness, I recommend using cooked shredded chicken. You can easily use rotisserie chicken for convenience. Be sure to check for even cooking; the chicken should be golden brown and juicy!
What is the best way to store leftovers?
Very! Store your Buffalo Chicken Mac and Cheese in an airtight container in the fridge for up to 3 days. Make sure it’s completely cooled before sealing to maintain creaminess. Reheat gently in the oven or microwave, adding a splash of milk if needed.
Can I freeze Buffalo Chicken Mac and Cheese?
Definitely! To freeze, transfer the dish to a freezer-safe container and label it with the date. It can be frozen for up to 2 months. When you’re ready to enjoy it, thaw overnight in the fridge, and bake at 350°F (175°C) for 20-25 minutes, adding a little milk to revive the creamy sauce.
What should I do if the cheese sauce is too thick?
Oh no! If you find your cheese sauce is too thick, don’t worry! Simply whisk in a little extra milk over low heat until you reach your desired consistency. This will bring back that lovely creamy texture and make it easier to coat the pasta.
Is this recipe suitable for those with allergies?
Absolutely! If you have dairy allergies, you can substitute all dairy ingredients with plant-based alternatives. For example, use dairy-free cream cheese, nutritional yeast for cheese flavor, and dairy-free milk. Always check labels to ensure there are no hidden allergens.
Can I make this dish ahead of time?
Very much! This Buffalo Chicken Mac and Cheese can be assembled in advance. Just prepare the dish without baking, cover it well, and refrigerate for up to 24 hours. When you’re ready, preheat your oven and bake it directly from the fridge for a quick and easy meal!
Creamy Buffalo Chicken Mac and Cheese for Cozy Nights
Ingredients
Equipment
Method
- Bring a large pot of salted water to a boil. Add elbow macaroni and cook until al dente, about 8-10 minutes. Drain and set aside.
- In a skillet, heat oil over medium heat. Add diced chicken, seasoned with salt and pepper, sauté for 5-7 minutes until golden brown. Remove from heat.
- In a saucepan, melt butter over medium heat, whisk in flour to form a roux, then gradually add milk until smooth. Stir in cream cheese, cheddar cheese, and buffalo sauce until creamy.
- In a bowl, combine macaroni, cheese sauce, and chicken. Stir gently to coat evenly.
- Preheat oven to 350°F (175°C). Transfer mixture to a greased baking dish and sprinkle panko breadcrumbs on top.
- Bake for 20-25 minutes until bubbling and golden on top.