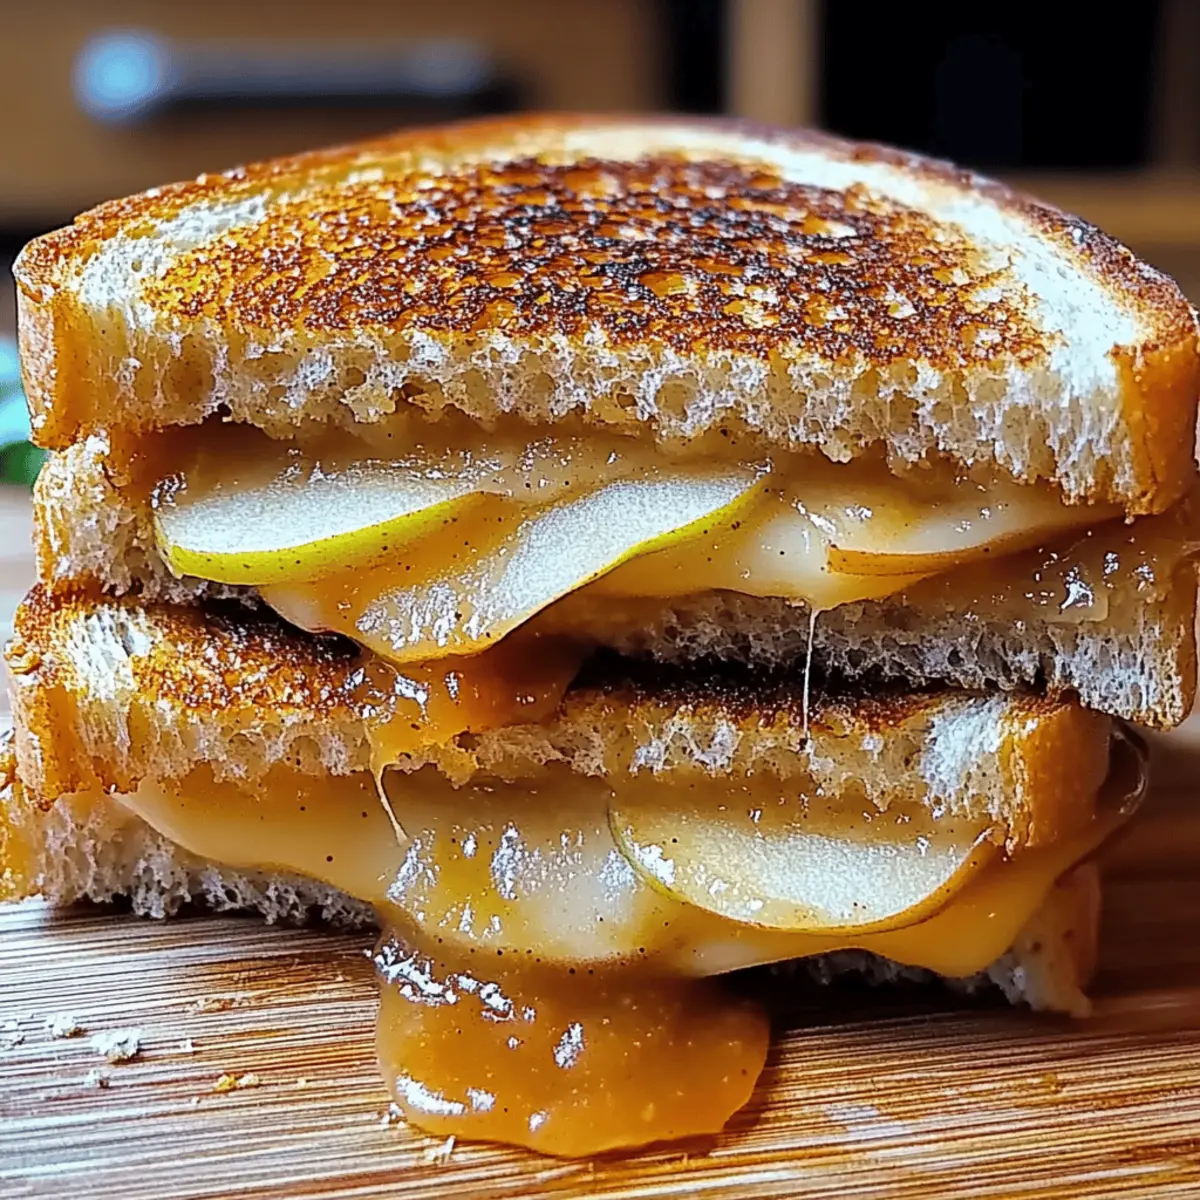
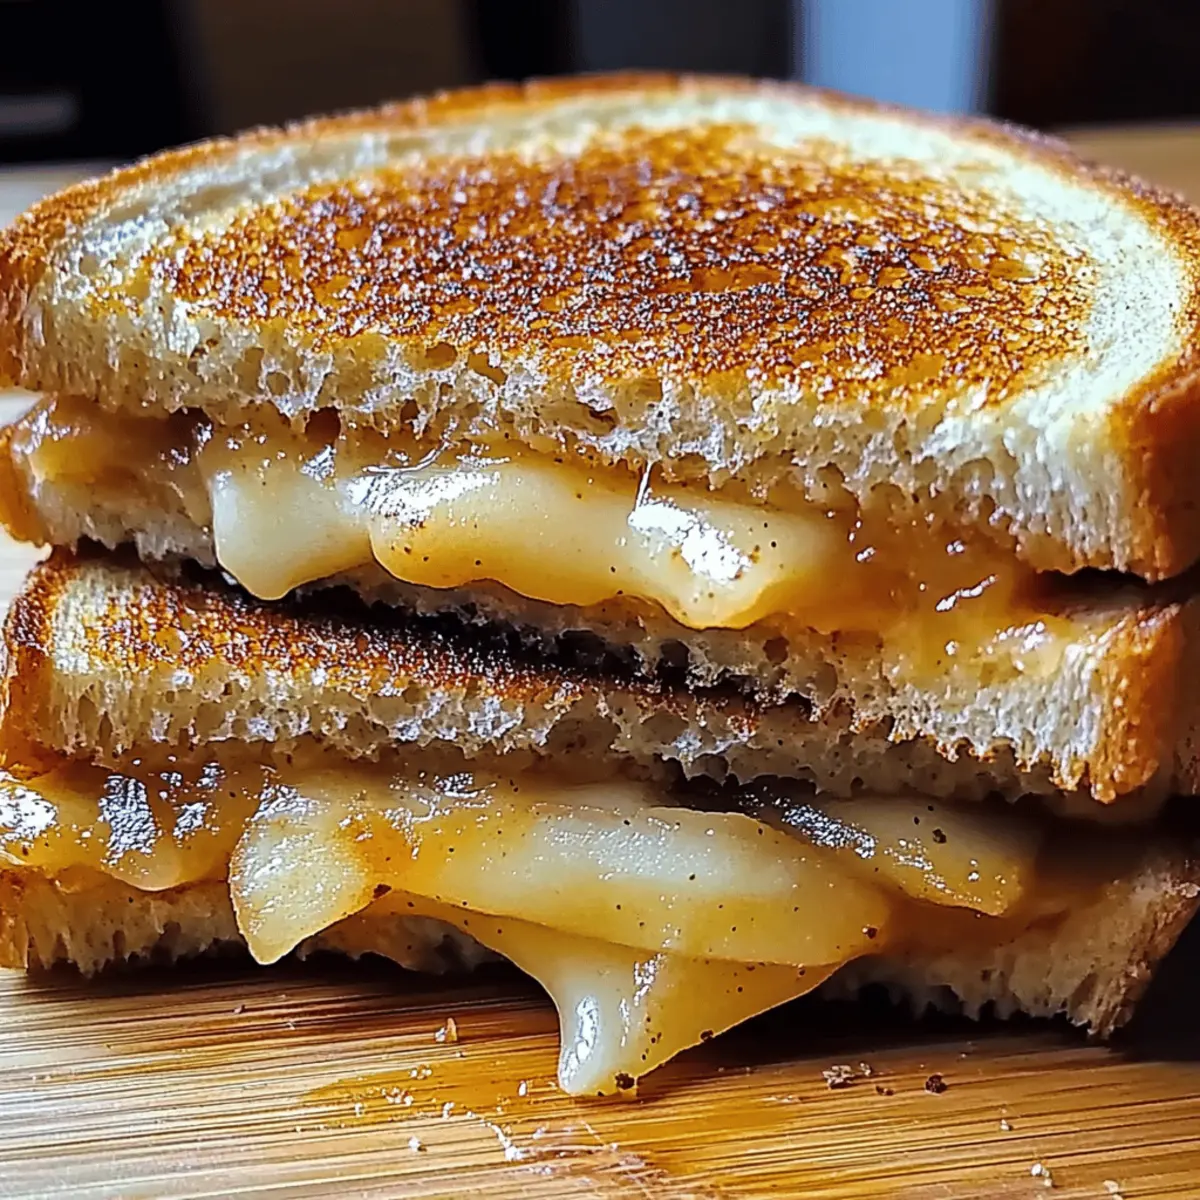
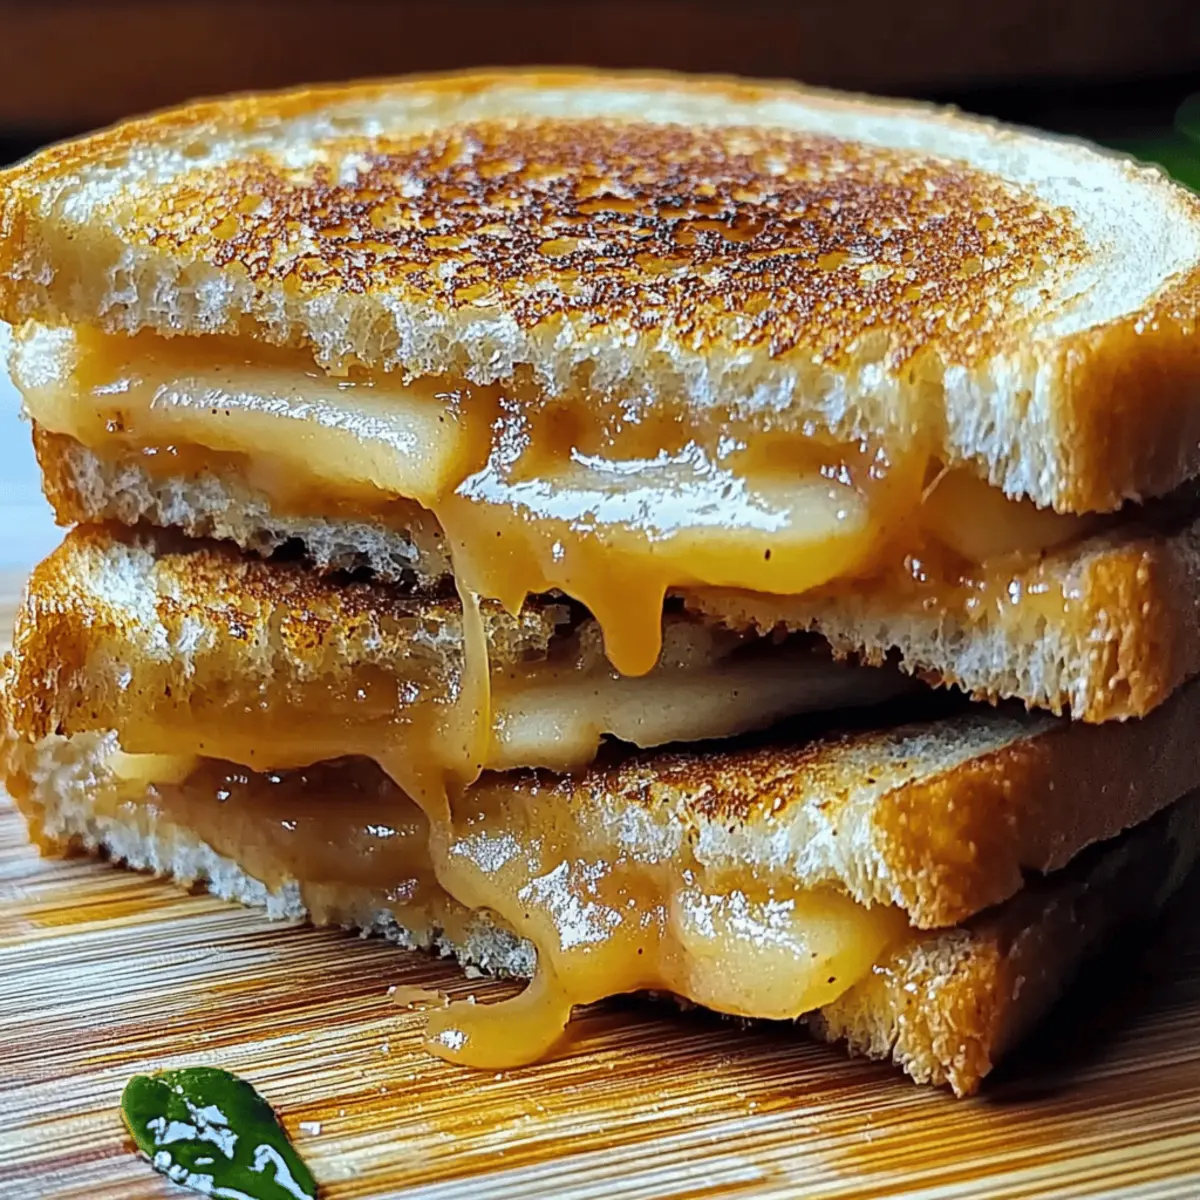
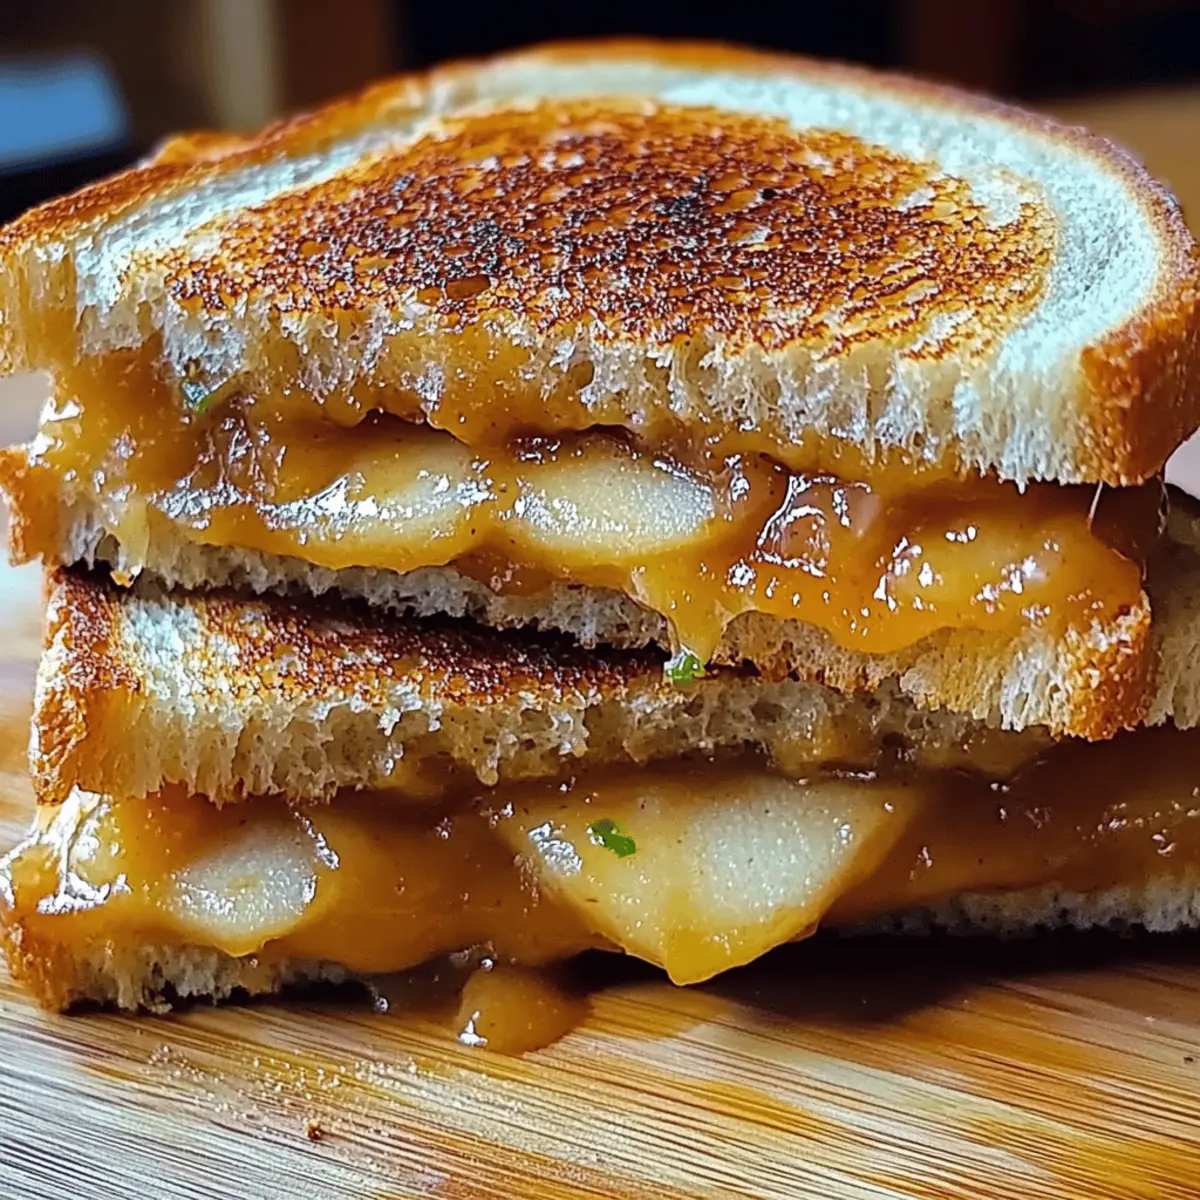
As I took a bite of this Apple Butter Grilled Cheese, the unexpected harmony of flavors whisked me back to cozy autumn days. The savory sharpness of aged cheddar pairs beautifully with the sweet, spiced notes of apple butter, creating a unique flavor combination that’s hard to resist. This recipe isn’t just comfort food at its finest; it’s a quick and easy gourmet delight that turns an ordinary lunch into something truly special. Plus, using whole-grain bread means you can indulge without any guilt! Are you ready to elevate your grilled cheese game and impress everyone at the table?
Why Is This Grilled Cheese Special?
Uniqueness: This Apple Butter Grilled Cheese blends savory and sweet like never before, offering a comforting bite that’s bursting with nostalgia.
Nostalgic Flavors: Evoke warm autumn memories with every mouthful, thanks to the delightful combination of aged cheddar and apple butter.
Healthier Twist: Made with whole-grain bread, this sandwich is a guilt-free option without compromising on flavor.
Quick and Easy: Perfect for a fast weeknight meal or a warm snack, it’s ready in just minutes!
Crowd-Pleaser: Serve it at gatherings or make it for lunch, and you’re guaranteed to impress family and friends alike.
For a complete experience, try pairing it with a bowl of warm tomato soup or enjoy it alongside a fresh arugula salad dressed with lemon vinaigrette.
Apple Butter Grilled Cheese Ingredients
• Elevate your grilled cheese with these ingredients!
For the Sandwich
- Whole-Grain Bread – Provides structure and nutty flavor; rich in fiber, offering health benefits without sacrificing taste. (Substitute with gluten-free bread if desired.)
- Apple Butter – Adds sweetness and depth; choose a brand with minimal additives or make homemade for a personal touch. (Substitute with pear butter for a unique variation.)
- Sharp Cheddar Cheese – Brings robust flavor and excellent melting properties; ideal for a creamy, savory experience. (Substitute with Gouda for nuttiness or Brie for an extra indulgent twist.)
- Unsalted Butter – Ensures even browning and crispiness of the bread; a must for that perfectly golden crust. (Use salted butter if unsalted is unavailable, just reduce added salt.)
Optional Add-Ins
- Cinnamon – Provides warmth and enhances the overall flavor; known for its health benefits. (Omit for a simpler flavor profile or substitute with nutmeg if preferred.)
- Sliced Apples – Introduces a crunchy contrast and fresh flavor; Honeycrisp or Granny Smith are excellent choices. (Omit if you’re looking for a more traditional take.)
Step‑by‑Step Instructions for Apple Butter Grilled Cheese
Step 1: Prepare the Bread
Begin by spreading 1 tablespoon of softened unsalted butter evenly on one side of each slice of whole-grain bread. Make sure the butter coats the entire surface for an even, crispy texture. This will be the outside of your sandwich, giving it that delightful golden-brown finish as it grills.
Step 2: Assemble the Sandwich
Lay one slice of bread, buttered side down, on a clean cutting board or plate. Spread 2 tablespoons of apple butter on the unbuttered side, ensuring full coverage. Next, layer on 2 slices of sharp cheddar cheese, allowing the flavors to meld beautifully in your Apple Butter Grilled Cheese.
Step 3: Add Apples (Optional)
If you choose to enhance your sandwich, add thinly sliced apples on top of the cheese, distributing them evenly for that perfect crunch. Sprinkle a pinch of cinnamon over the apples for warmth and extra flavor if desired, elevating the taste of your grilled cheese to gourmet heights.
Step 4: Close the Sandwich
Top your cheese and apple-filled slice with the second slice of bread, making sure the buttered side is facing up. Gently press down to hold the ingredients in place, allowing all those delicious flavors to combine as the sandwich starts to grill.
Step 5: Grill the Sandwich
Heat a heavy-bottomed skillet or cast-iron pan over medium heat. Once hot, carefully place the sandwich in the skillet and cook for 3-4 minutes. Keep an eye on it; you want the bottom to turn a golden brown and the cheese to begin melting.
Step 6: Flip and Finish
Using a spatula, carefully flip the sandwich over to grill the other side. Cook for another 3-4 minutes, maintaining medium heat to prevent burning while ensuring the cheese melts completely. The bread should be crispy and golden on both sides when done.
Step 7: Serve
Once cooked to perfection, remove the Apple Butter Grilled Cheese from the skillet and let it rest for about a minute. This allows the cheese to set slightly. Finally, slice the sandwich in half, revealing the beautifully melted cheese and sweet apple butter inside, and enjoy warm!
What to Serve with Apple Butter Grilled Cheese
Elevate your dining experience with delightful companions that enhance the comforting flavors of this delicious sandwich.
- Warm Tomato Soup: This classic pairing creates a delightful contrast, with the tangy soup balancing the sweetness of the apple butter.
- Fresh Arugula Salad: The peppery greens topped with a lemon vinaigrette provide a refreshing counterpoint to the rich grilled cheese.
- Sweet Potato Fries: Crispy, savory fries add texture and a slight sweetness that harmonizes beautifully with the apple butter.
- Cinnamon-Spiced Apples: A side of sautéed apples dusted with cinnamon can amplify the apple flavor and offer a cozy touch.
- Butternut Squash Soup: Creamy and slightly sweet, this soup complements the grilled cheese and creates a warming, nourishing meal.
- Herbal Iced Tea: A cool glass of herbal iced tea brings refreshing notes that cleanse the palate and balance the richness of the cheese.
Apple Butter Grilled Cheese Variations
Feel free to play with this delightful recipe and explore different flavors and textures!
-
Cheese Swap: Use Gouda or Brie instead of sharp cheddar for a different taste. Each cheese offers unique creaminess and depth, making your sandwich even more special.
-
Fruit Additions: Incorporate thinly sliced pears alongside the apples for a refreshing twist. The fruity combination will elevate the dish with a burst of sweetness.
-
Sweet Layer: Drizzle honey or add fig jam for extra sweetness. This option brings a delicious contrast that will make every bite feel gourmet.
-
Herbed Up: Mix fresh herbs like thyme or rosemary into the apple butter for an elegant touch. The earthy notes beautifully complement the sweetness of the apple butter.
-
Spice It Up: Add a sprinkle of red pepper flakes for a surprising hint of heat. This twist balances the sweetness and adds an exciting kick to your grilled cheese.
-
Savory Spin: Try incorporating crispy bacon or prosciutto for a savory addition. The crispy texture pairs well with the gooey cheese and sweet apple butter for amazing contrast.
-
Seasonal Flavors: In fall, add a pinch of pumpkin spice; in spring, switch apple butter for pear butter. These seasonal swaps will keep your sandwich feeling fresh and new!
-
Veggie Boost: Include sautéed spinach or arugula inside for a nutritious crunch. This not only enhances the flavor but also adds a healthy element to your comforting meal.
If you’re inspired by more delicious flavors, check out Garlic Butter Chicken or try Garlic Butter Pork Chops for your next meal!
Expert Tips for the Best Apple Butter Grilled Cheese
-
Use Quality Ingredients: Choose high-quality sharp cheddar and apple butter for maximum flavor. Avoid brands with added preservatives to keep your Apple Butter Grilled Cheese tasting fresh and homemade.
-
Even Buttering: Spread butter evenly on the bread to ensure a uniformly golden and crispy crust. A common mistake is to use too little butter, leading to uneven browning.
-
Control the Heat: Maintain medium heat throughout cooking to prevent burning the bread while ensuring the cheese melts perfectly. High heat may scorch the bread before the cheese melts thoroughly.
-
Flip with Care: Use a spatula to flip the sandwich gently. Press down slightly after flipping to help the cheese melt into a gooey masterpiece with every bite of your Apple Butter Grilled Cheese.
-
Experiment with Add-Ins: Don’t hesitate to add a sprinkle of cinnamon or thin apple slices inside for an extra dimension of flavor. This twist can elevate your grilled cheese experience to new heights!
Make Ahead Options
These Apple Butter Grilled Cheese sandwiches are perfect for meal prep enthusiasts! You can assemble the sandwiches up to 24 hours in advance by spreading the apple butter and layering the sharp cheddar cheese between slices of whole-grain bread. To maintain quality, wrap each sandwich tightly in plastic wrap or foil and refrigerate. Just before serving, heat a skillet over medium heat and grill the sandwiches for 3-4 minutes on each side until golden and crispy, ensuring the cheese melts perfectly. This way, you’ll have a delicious gourmet sandwich ready to savor with minimal effort, making busy weeknights a breeze!
How to Store and Freeze Apple Butter Grilled Cheese
Fridge: Store leftover Apple Butter Grilled Cheese in an airtight container for up to 3 days. To keep it as crispy as possible, consider reheating in a skillet instead of the microwave.
Freezer: For longer storage, wrap the grilled cheese tightly in plastic wrap, then aluminum foil, and freeze for up to 3 months. When ready to enjoy, thaw overnight in the fridge before reheating.
Reheating: To reheat, place the sandwich in a preheated skillet over medium heat for 3-4 minutes on each side until heated through and crispy. This method helps revive that delicious texture and flavor.
Make-Ahead Tips: If you’re preparing ahead, consider assembling the sandwich without grilling, and store it in the fridge ungrilled. Grill just before serving for the best texture.
Apple Butter Grilled Cheese Recipe FAQs
How do I choose the right apples for my grilled cheese?
Absolutely! For the perfect crunch and taste, opt for Honeycrisp or Granny Smith apples. These varieties provide a nice balance of sweetness and tartness, enhancing the overall flavor of your Apple Butter Grilled Cheese.
How do I store leftover Apple Butter Grilled Cheese?
To keep your grilled cheese delicious, store it in an airtight container in the fridge for up to 3 days. If you’re reheating, I recommend using a skillet instead of the microwave to maintain that crispy texture.
Can I freeze my grilled cheese sandwich?
Definitely! Wrap your Apple Butter Grilled Cheese tightly in plastic wrap, then in aluminum foil, and freeze it for up to 3 months. When you’re ready to enjoy, thaw it overnight in the fridge before reheating in a skillet over medium heat for 3–4 minutes on each side until heated through and crispy.
What should I do if the cheese doesn’t melt properly?
Very! If your cheese isn’t melting, it might be because your heat is too high or too low. Always maintain a medium heat while grilling. If you find it’s not melting, try covering the pan with a lid briefly; this can help trap heat and encourage the cheese to melt beautifully.
Are there any dietary considerations I should know?
Yes! If you have dietary restrictions, you can make this sandwich gluten-free by using gluten-free bread. Additionally, check the apple butter for potential allergens and opt for a dairy-free cheese alternative if you’re lactose intolerant.
How long can I make this grilled cheese ahead of time?
Certainly! You can assemble the sandwich without grilling, then store it in the fridge for up to 24 hours. Just grill it just before serving for the best texture and flavor in your Apple Butter Grilled Cheese!
Apple Butter Grilled Cheese that Will Melt Your Heart
Ingredients
Equipment
Method
- Spread 1 tablespoon of softened unsalted butter evenly on one side of each slice of whole-grain bread.
- Lay one slice of bread, buttered side down, on a clean cutting board. Spread 2 tablespoons of apple butter on the unbuttered side.
- Layer on 2 slices of sharp cheddar cheese.
- If desired, add thinly sliced apples on top of the cheese and sprinkle with cinnamon.
- Top with the second slice of bread, buttered side facing up. Gently press down.
- Heat a skillet over medium heat. Place the sandwich in the skillet and cook for 3-4 minutes until golden brown.
- Carefully flip the sandwich to grill the other side for another 3-4 minutes.
- Remove from skillet and let it rest for about a minute before slicing in half.