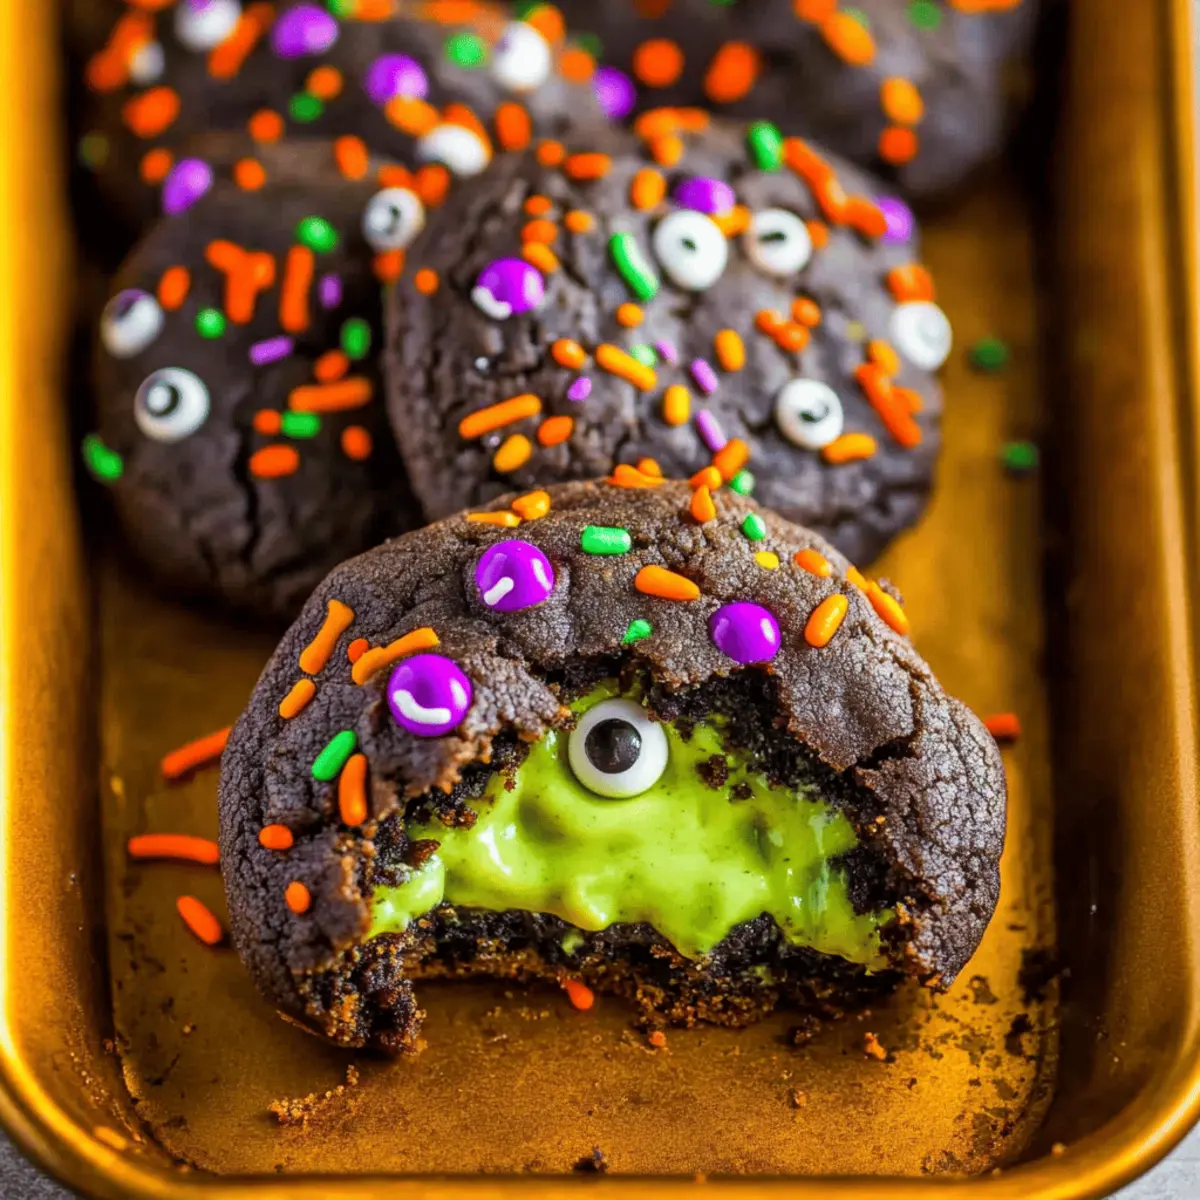
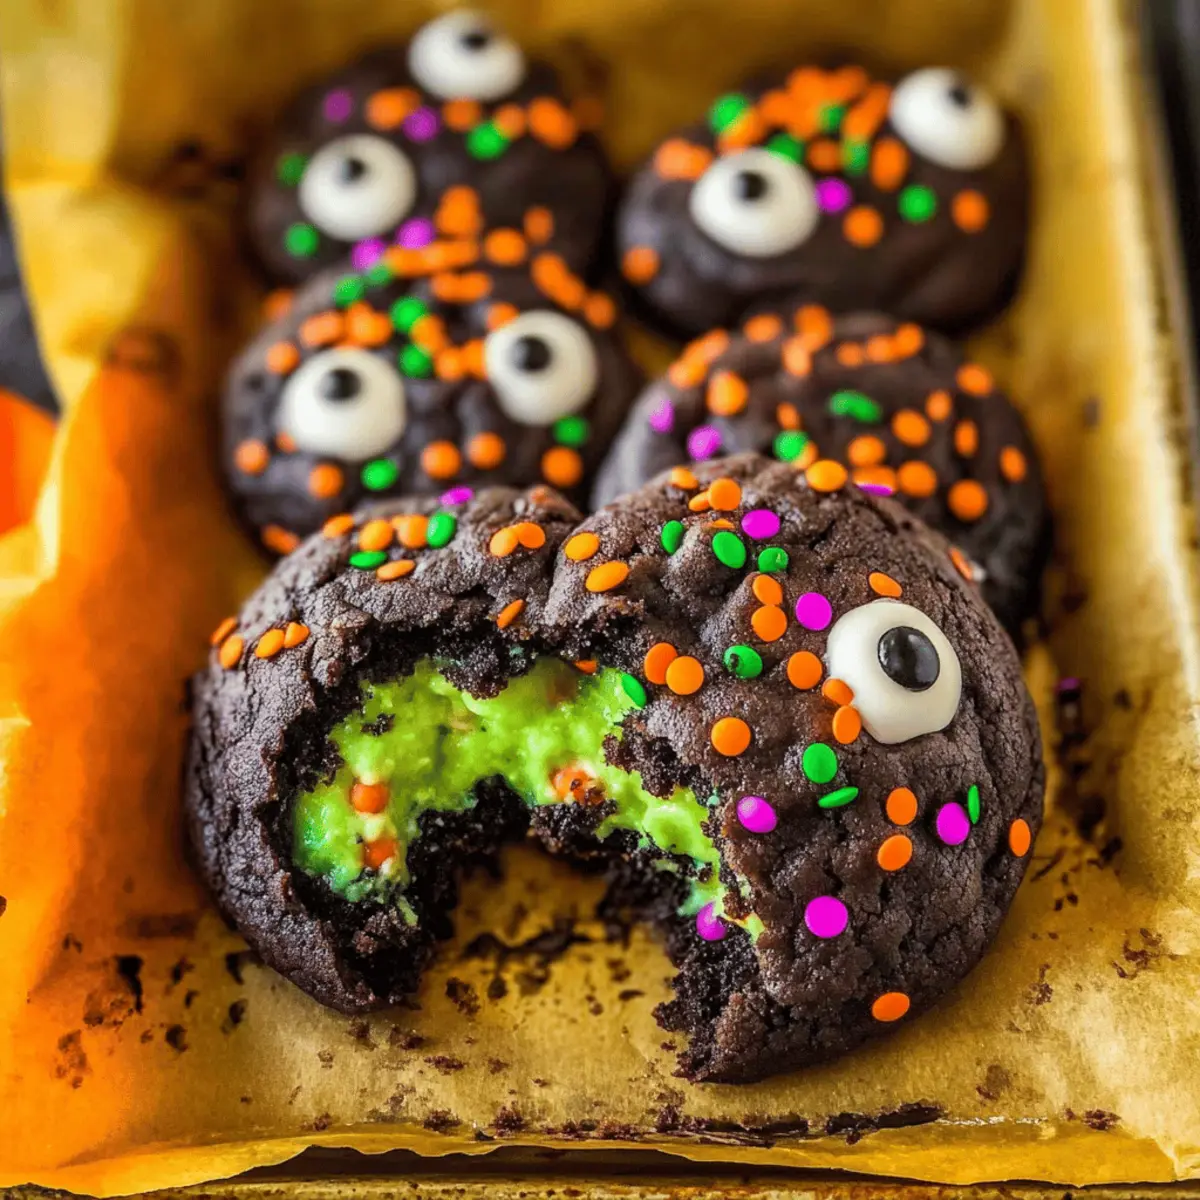
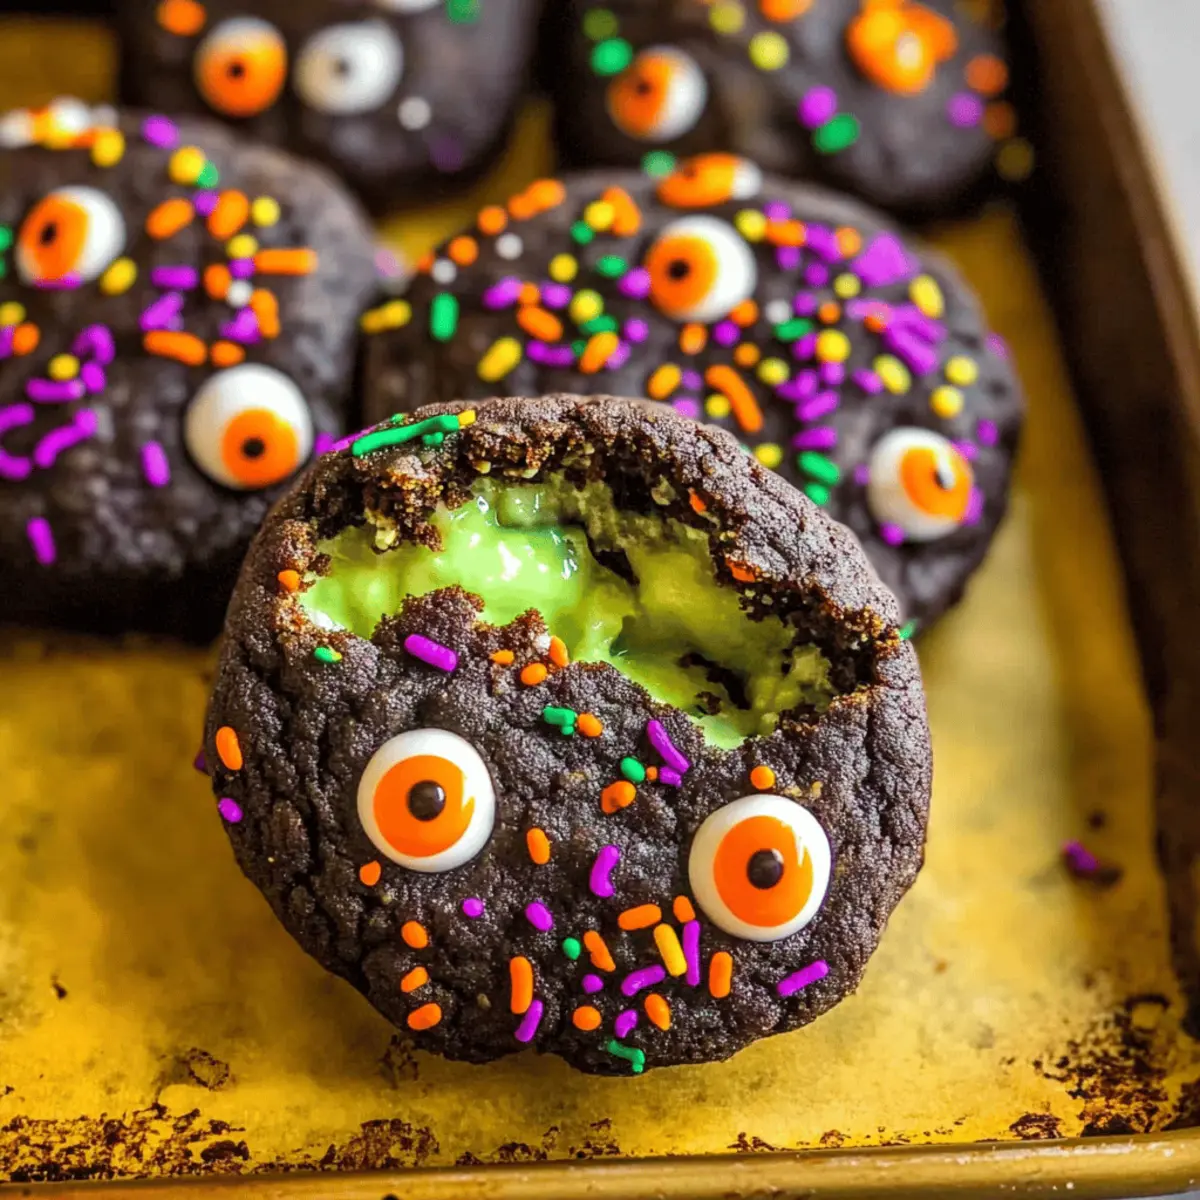
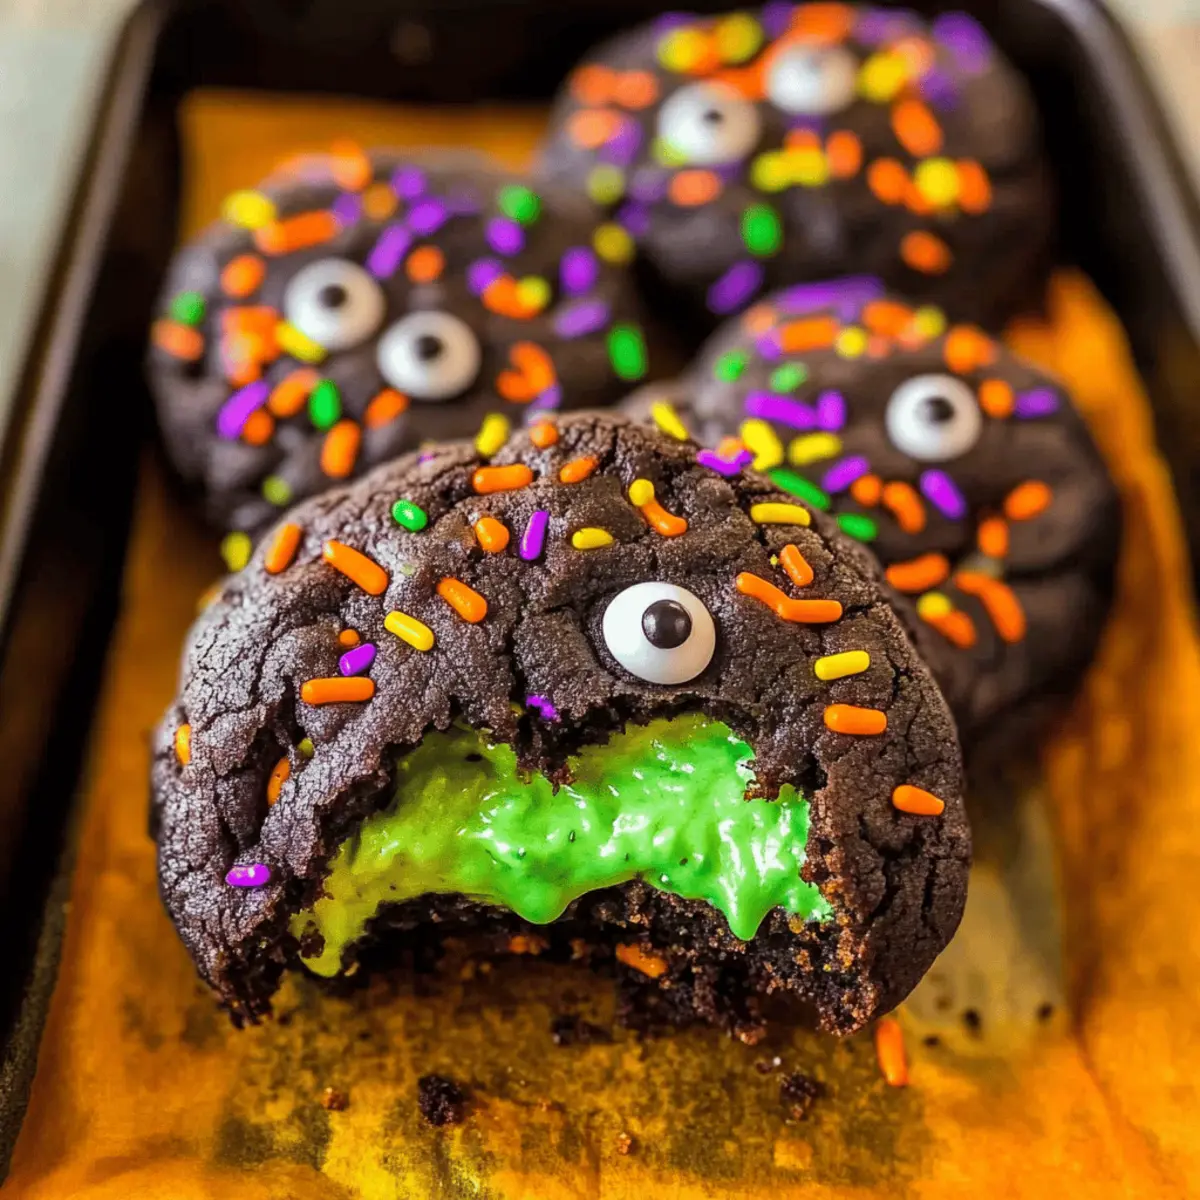
“This Halloween, let’s crank up the fun factor with a delightfully spooky treat: Slime-Filled Halloween Cookies! These rich dark chocolate delights are not just your average cookies; they hide a creamy neon green cheesecake center that will surprise and thrill your guests. What’s more, these treats are quick to whip up and practically scream ‘party pleaser,’ making them perfect for those last-minute celebrations or cozy family gatherings. I can already picture the expressions of delight when you pull one apart, revealing the oozy filling, an absolute showstopper in any cookie platter. Ready to enchant your taste buds? Let’s get baking!”
Why are these cookies a must-try?
Fun Surprise: Each cookie is a delightful treat that hides a creamy neon green cheesecake center. Your guests will be thrilled when they discover the surprise inside!
Quick & Easy: With simple steps to follow, this recipe makes baking a breeze, perfect for those last-minute Halloween gatherings!
Crowd-Pleasing: These cookies are sure to impress family and friends, making them the ultimate addition to any spooky celebration.
Adaptable: Feel free to mix in your favorite flavors or add sprinkles for extra festive flair—each batch can be uniquely your own!
Soft & Chewy: The rich dark chocolate cookie exterior complements the gooey filling beautifully, creating a mouthwatering treat that will leave everyone coming back for more.
So why wait? Dive into these slime-filled delights today and make your Halloween memorable! Don’t forget to try making some Soft Chewy Chocolate cookies for an extra sweet experience!
Slime-Filled Halloween Cookies Ingredients
For the Cheesecake Filling
- Cream Cheese – Adds creaminess to the filling; try mascarpone for a different twist.
- Confectioners Sugar – Provides sweetness for the cheesecake; granulated sugar can be used but may alter the texture.
- All-Purpose Flour – Gives structure to the cheesecake; gluten-free flour is a great substitute.
- Vanilla Extract – Enhances the flavor; almond extract also offers a wonderful profile.
- Neon Green Food Coloring – Gives the cheesecake that spooky appearance; orange works well for other holidays.
For the Cookie Dough
- Salted Butter – Combines with sugars to provide moisture; unsalted butter is also an option.
- Light Brown Sugar – Contributes moisture and caramel flavor; can be replaced with more granulated sugar.
- Granulated Sugar – Sweetness for the cookie dough; swap in coconut sugar for a healthier alternative.
- Large Egg – Binds the cookie dough; for a vegan option, use applesauce or mashed banana.
- Milk – Adds moisture; non-dairy milk can work as a substitute.
- Baking Soda – Acts as a leavening agent for the cookies; baking powder can suffice in a pinch.
- Dark Chocolate Cocoa Powder – Adds a rich chocolate flavor; unsweetened cocoa powder is a good alternative.
- Black Gel Food Coloring – Enhances the dough color; omit it if less intensity is desired.
- All-Purpose Flour (for dough) – Provides the base for the cookie structure; substitute with gluten-free flour if needed.
For Decoration
- Halloween Sprinkles – Adds festive decoration; feel free to use any themed sprinkles for extra fun!
These Slime-Filled Halloween Cookies are not just a treat; they’re a true highlight of any Halloween gathering, so gather your ingredients and let’s get baking!
Step‑by‑Step Instructions for Slime-Filled Halloween Cookies
Step 1: Prepare Cheesecake Filling
In a medium bowl, combine cream cheese, confectioners sugar, flour, vanilla extract, and neon green food coloring. Mix well until the mixture is smooth and creamy, ensuring there are no lumps. Once combined, scoop tablespoon-sized dollops of the filling onto a parchment-lined baking sheet and place them in the freezer. Freeze for at least 2 hours until completely solid to make your slime-filled centers.
Step 2: Make Cookie Dough
In a large mixing bowl, cream together the salted butter, light brown sugar, and granulated sugar until the mixture is light and fluffy, about 3-5 minutes. Beat in the large egg, milk, vanilla extract, and black gel food coloring until fully incorporated. In another bowl, whisk together baking soda, dark chocolate cocoa powder, and all-purpose flour. Gradually mix the dry ingredients into the wet mixture until a soft dough forms. Chill the dough in the refrigerator for at least 2 hours to enhance its texture.
Step 3: Assemble Cookies
Preheat your oven to 350°F (175°C). Take the chilled cookie dough from the refrigerator and scoop it into balls using a cookie scoop or your hands. Flatten each ball slightly in your palm, creating a disc. Place one frozen cheesecake filling dollop in the center of each dough disc, ensuring ample space around the edges. Cover the filling with another disc of dough and pinch the edges to seal, ensuring that the cheesecake filling is hidden inside.
Step 4: Bake Cookies
Place the assembled cookies on a baking sheet lined with parchment paper, leaving space between each cookie. Chill the baking sheet in the freezer for 30 minutes, which helps maintain the shape during baking. Bake in the preheated oven for 12-15 minutes until the edges look firm but the centers remain slightly soft. Let the cookies cool on the pan for about 10 minutes before transferring them to a wire rack to cool completely.
Step 5: Decorate and Serve
Once your Slime-Filled Halloween Cookies have cooled, it’s time to bring some festive flair! Sprinkle Halloween-themed sprinkles on top while still warm, allowing them to stick to the cookies. For an extra spooky touch, add candy eyeballs on top of the cookies. Serve them up on a fun platter and watch the delight on your friends’ faces when they reveal the creamy filling inside!
What to Serve with Slime-Filled Halloween Cookies
Elevate your spooky dessert experience with delightful pairing options that will complement these fun, ooey-gooey treats.
- Creamy Hot Chocolate: A rich, chocolatey drink topped with whipped cream enhances the sweetness of the cookies and warms the heart.
- Pumpkin Pie Ice Cream: This seasonal favorite adds a delightful contrast to the cookies with its creamy texture and spiced flavor, perfect for Halloween.
- Gooey Caramel Sauce: Drizzling warm caramel over the cookies brings a luscious, extra layer of sweetness that will thrill any dessert lover.
- Crispy Apple Slices: Fresh apple slices provide a refreshing crunch that balances the richness of the cookies, creating a delightful contrast.
- Green Mocktail: A vibrant mojito or limeade, garnished with mint, complements the neon filling’s fun factor and heightens the festive spirit.
- Chocolate-Covered Pretzels: The sweet and salty combo of these treats adds an addictive crunch that pairs perfectly with the soft cookies.
- Candy Corn and M&M Mix: A bowl of colorful candies brings a cheerful, festive touch to your dessert table and invites guests to indulge their sweet tooth.
- Spooky Themed Cupcakes: Let your creativity flow with Halloween-themed cupcakes. Each one can mirror the slime-filled surprise, creating a cohesive dessert experience!
- Vanilla Bean Milkshake: A creamy shake made from vanilla bean ice cream provides a refreshing complement, enhancing the chocolatey flavors of the cookies.
- Cinnamon Sugar Twists: These light, crispy treats add a delightful twist to the dessert table, merging soft and crunchy textures for a memorable experience.
Storage Tips for Slime-Filled Halloween Cookies
Room Temperature: Store cookies in an airtight container at room temperature for up to 3 days to maintain their soft texture and delightful flavor.
Fridge: If you want to keep them fresher longer, refrigerate for up to 5 days. Just make sure they’re well-sealed to prevent drying out.
Freezer: Freeze unbaked cookie dough for up to 3 months. When ready to bake, simply let it thaw overnight in the fridge and bake as directed.
Reheating: To enjoy your Slime-Filled Halloween Cookies warm, microwave for just a few seconds to slightly melt the gooey center, enhancing that delicious surprise!
Expert Tips for Slime-Filled Halloween Cookies
• Freeze the Filling: Ensuring the cheesecake filling is fully frozen prevents it from melting during baking, maintaining the fun surprise inside.
• Chill the Dough: If the cookie dough becomes sticky while working, refrigerate it for a bit to make it easier to handle and shape your Slime-Filled Halloween Cookies.
• Decadent Decor: Add festive sprinkles or candy eyeballs on top of the cookies while they’re still warm, helping the decorations stick for that extra spooky touch.
• Monitor Baking Time: Keep an eye on your cookies as they bake; pulling them out when the edges are firm and the centers are slightly soft achieves the perfect soft and chewy texture.
• Storage Magic: To keep your cookies soft, store them with a slice of bread in an airtight container, ensuring they remain delightful for days after baking.
Make Ahead Options
These Slime-Filled Halloween Cookies are perfect for busy home cooks looking to save time! You can prepare the cheesecake filling up to 24 hours in advance by mixing all the filling ingredients and freezing it into dollops—this way, it’s ready to melt in your cookies. The cookie dough can also be made ahead and stored in the refrigerator for up to 3 days. Simply wrap the chilled dough tightly in plastic wrap. When you’re ready to bake, just assemble the cookies and chill them for 30 minutes before baking to ensure they hold their shape. This method guarantees you’ll still enjoy delicious, eye-catching treats with minimal effort on the day of your event!
Slime-Filled Halloween Cookies Customization
Get ready to give your Slime-Filled Halloween Cookies a personal touch with these fun and tasty variations that will delight your taste buds!
-
Gluten-Free: Use a gluten-free flour blend in place of all-purpose flour for an inclusive treat without sacrificing texture.
-
Vegan-Friendly: Substitute the cream cheese with a dairy-free alternative and replace the egg with 1/4 cup of applesauce for a fabulous vegan version.
-
Flavor Explosion: Try swapping vanilla extract for mint or almond extract in the cheesecake filling for a surprising twist that will keep them guessing.
-
Colorful Cheesy Center: Instead of neon green, use vibrant orange or purple food coloring for a more festive appearance that’s perfect for Halloween parties.
-
Nutty Delight: Fold in some crushed nuts or chocolate chips into the cookie dough for added crunch and richness, elevating your little bites of heaven.
-
Spicy Surprise: Add a hint of cinnamon or even a pinch of cayenne pepper to the cookie dough for a warm kick; this will create a delightful contrast to the cool filling.
-
Bright and Cheery: Use a mix of candy sprinkles for decoration to give each cookie a unique and festive look that’s sure to make your display pop!
-
Filling Varieties: Experiment with different fillings like peanut butter or a fruity jam for an unexpected flavor profile with every bite. It’s a great way to keep everyone intrigued!
So, feel free to unleash your creativity and surprise your guests with these delicious twists! And if you’re looking for more delicious goodies, impress them with some soft, dreamy Soft Chewy Chocolate cookies on the side too!
Slime-Filled Halloween Cookies Recipe FAQs
What type of cream cheese should I use for the filling?
Absolutely! You can use regular cream cheese for that rich creaminess. If you’re feeling adventurous, try mascarpone or soft ricotta as a delightful alternative for a different texture and flavor!
How should I store leftover cookies?
To keep your Slime-Filled Halloween Cookies fresh, store them in an airtight container at room temperature for up to 3 days. For longer storage, they can be refrigerated for up to 5 days. Always make sure they’re sealed tight to prevent them from drying out!
Can I freeze the cookie dough?
Yes, you can freeze unbaked cookie dough for up to 3 months! Just scoop the dough into balls, flash freeze them on a baking sheet, then transfer the frozen balls into a freezer-safe bag. When ready to bake, let them thaw overnight in the fridge before baking as instructed.
What if my cookie dough is too sticky?
Very! If your dough is sticky, simply refrigerate it for about 30 minutes. This chilling helps to firm it up, making it much easier to shape the cookies. If it’s still troublesome, try adding an extra tablespoon of flour to help balance the texture.
Are there any allergens I should be aware of in this recipe?
Definitely! The Slime-Filled Halloween Cookies contain common allergens like dairy (cream cheese and butter), eggs, and gluten (all-purpose flour). If you have guests with allergies, consider using dairy-free cream cheese and vegan butter to keep it safe for everyone.
How do I know when the cookies are done baking?
Monitor carefully as they bake! You’ll want to pull the cookies out when the edges look firm but the centers remain a little soft. This will ensure they’re perfectly chewy and will maintain the gooey cheesecake center inside, giving that delightful surprise when you take a bite!
Slime-Filled Halloween Cookies That Will Surprise Everyone
Ingredients
Equipment
Method
- In a medium bowl, combine cream cheese, confectioners sugar, flour, vanilla extract, and neon green food coloring. Mix well until the mixture is smooth and creamy, ensuring there are no lumps. Scoop tablespoon-sized dollops of the filling onto a parchment-lined baking sheet and place them in the freezer. Freeze for at least 2 hours until completely solid.
- In a large mixing bowl, cream together the salted butter, light brown sugar, and granulated sugar until light and fluffy, about 3-5 minutes. Beat in the large egg, milk, vanilla extract, and black gel food coloring until fully incorporated. In another bowl, whisk together baking soda, dark chocolate cocoa powder, and all-purpose flour. Gradually mix the dry ingredients into the wet mixture until a soft dough forms. Chill the dough in the refrigerator for at least 2 hours.
- Preheat your oven to 350°F (175°C). Take the chilled cookie dough and scoop it into balls using a cookie scoop or your hands. Flatten each ball slightly in your palm, creating a disc. Place one frozen cheesecake filling dollop in the center, cover with another disc of dough and pinch edges to seal.
- Place the assembled cookies on a baking sheet lined with parchment paper, leaving space between each cookie. Chill in the freezer for 30 minutes. Bake in the preheated oven for 12-15 minutes until edges are firm but centers are slightly soft. Let cool on the pan for 10 minutes before transferring to a wire rack.
- Once cooled, sprinkle Halloween-themed sprinkles on top while still warm. For an extra spooky touch, add candy eyeballs on top. Serve on a fun platter and enjoy!