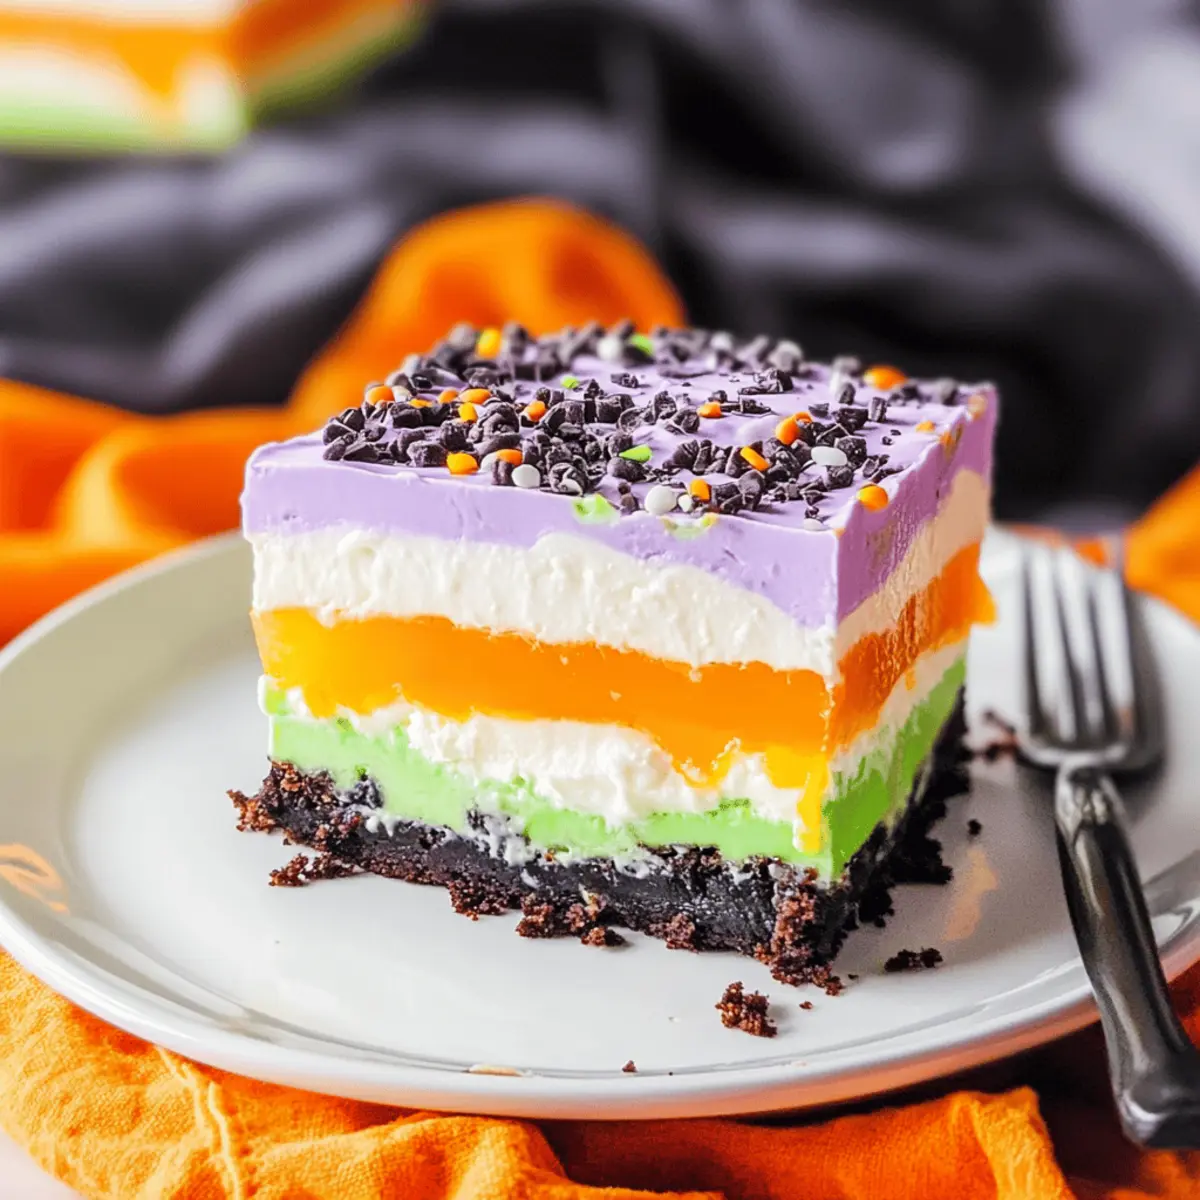
As I stood in my kitchen, surrounded by a whirlwind of orange sprinkles and spooky decor, I couldn’t help but feel the excitement bubbling up for Halloween festivities. If you’re looking to wow your friends and family with a dessert that’s as easy to prepare as it is impressive, my No Bake Layered Halloween Lush Dessert is just what you need! This delicious treat not only captures the essence of Halloween with its vibrant layers and creamy texture but also doesn’t require an oven, making it perfect for busy schedules. Plus, it’s a guaranteed crowd-pleaser that both kids and adults will adore. Ready to whip up something special that will have everyone asking for seconds? Let’s dive into this hauntingly delightful recipe!
Why is this Halloween Lush Dessert a must-try?
Crowd-Pleasing Delight: This No Bake Layered Halloween Lush Dessert is perfect for gatherings, ensuring your guests are wowed by its festive presentation.
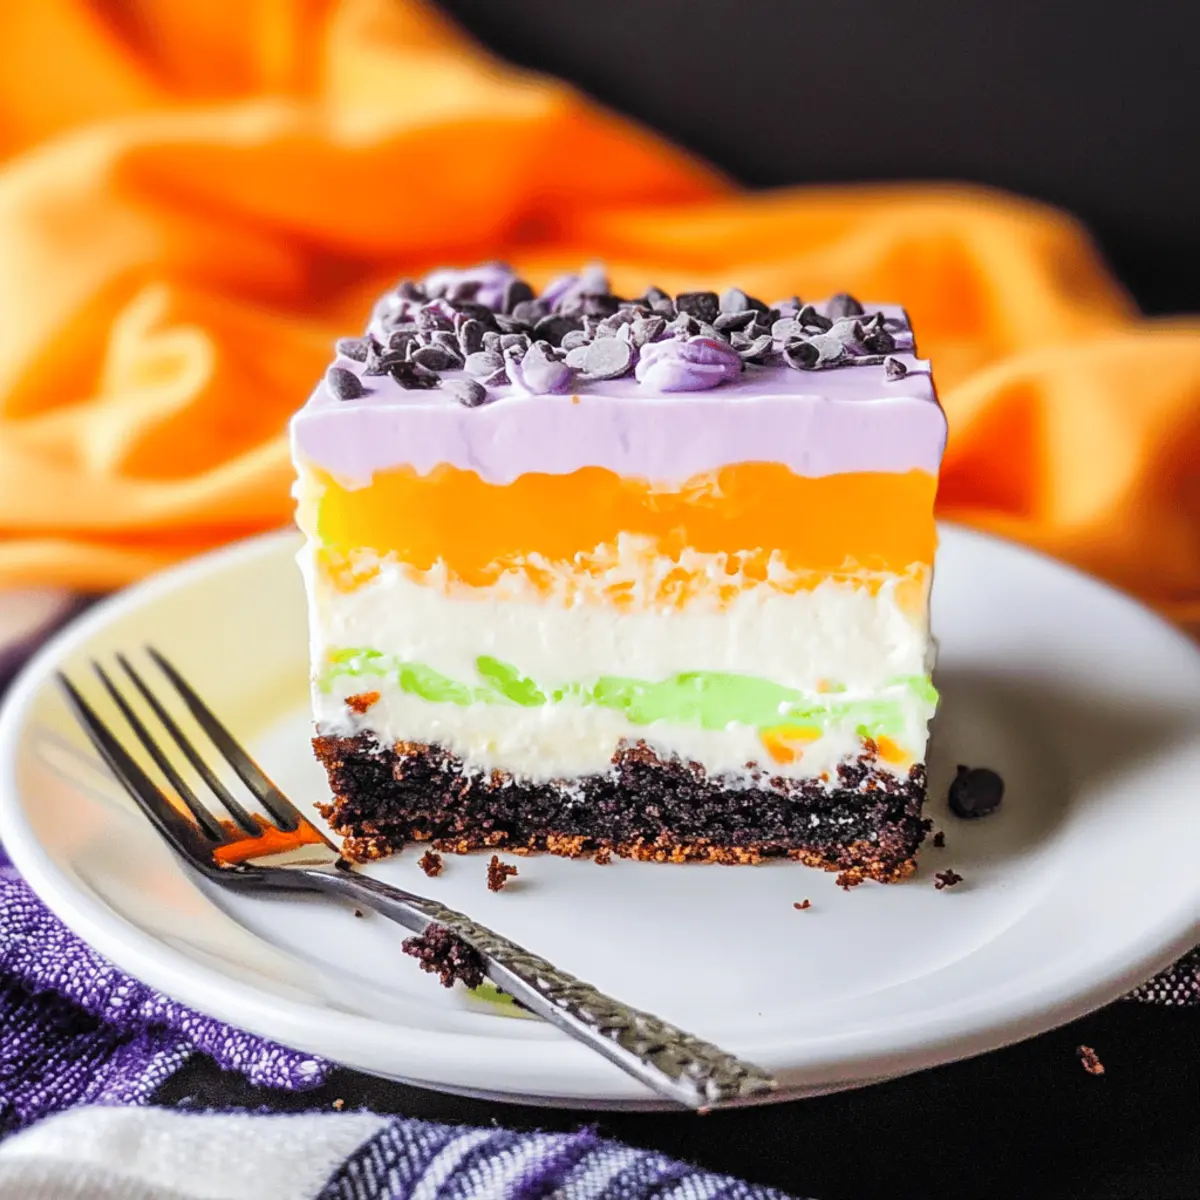
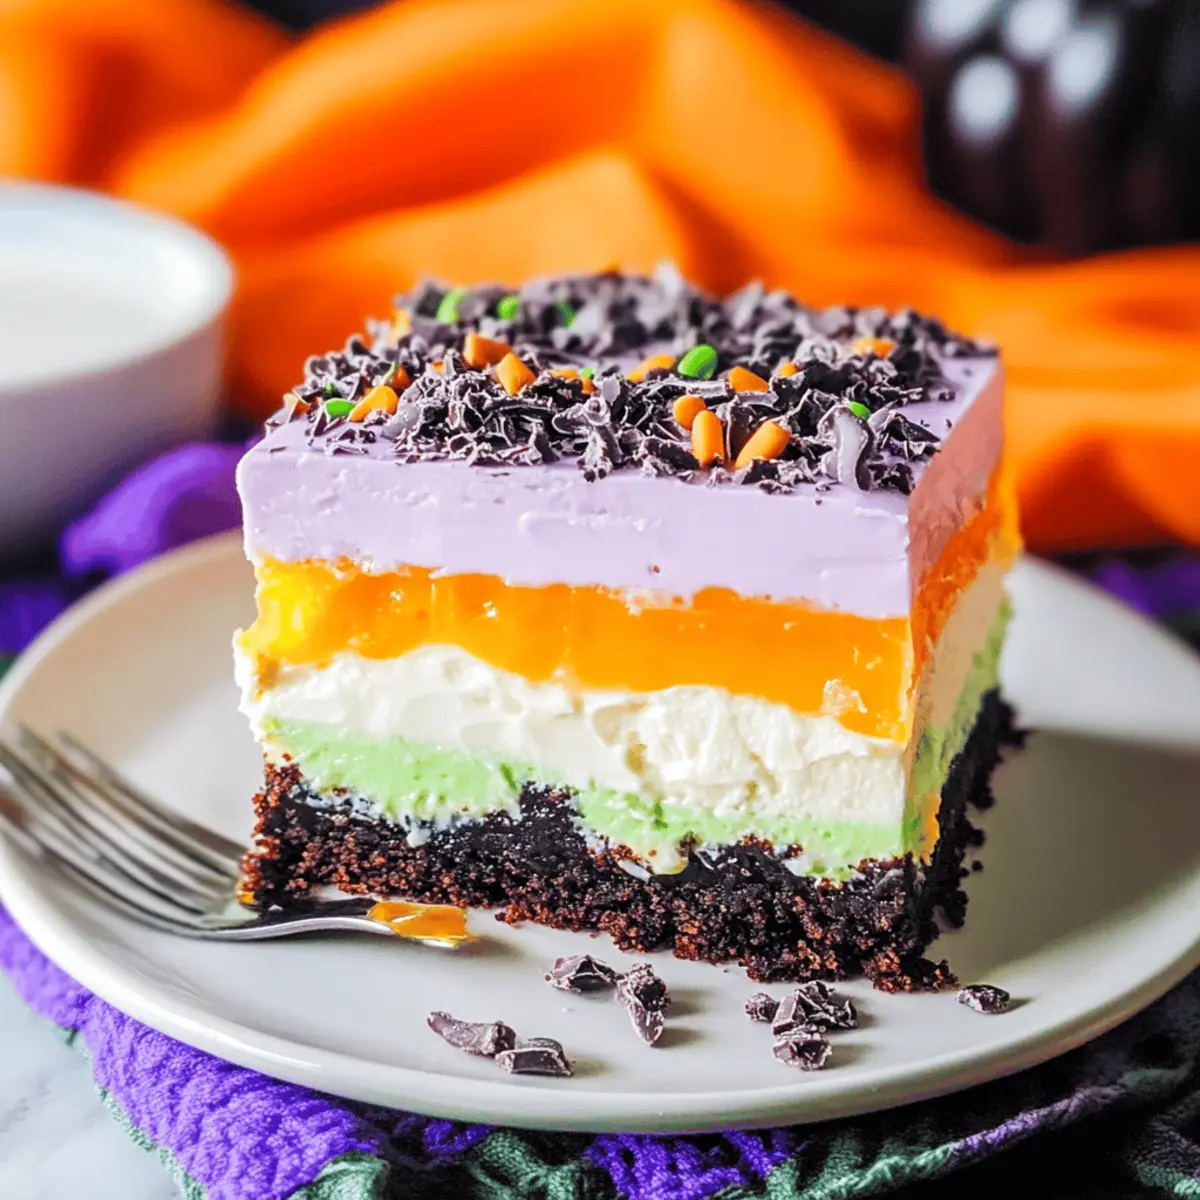
Colorful Layers: The vibrant orange and black colors bring a fun Halloween spirit to your table, making it an eye-catching centerpiece.
Super Simple: With no baking required, it’s an effortless option for those busy days when you still want to impress your guests.
Customizable: With multiple variations in flavors and decorations, you can easily adapt this dessert to suit any occasion or palate. For something refreshing afterward, check out these delightful Pineapple Rings Dessert ideas!
Rich and Creamy Texture: The blend of crunchy cookie crust and luscious creamy layers creates a delightful bite every time, similar to a dessert lasagna.
Kid-Friendly Fun: Both kids and adults will be excited about this treat, making it a perfect addition to your festive festivities—be ready for smiles and satisfied tummies!
Halloween Lush Dessert Ingredients
Get ready to create this delightful Halloween Lush Dessert with these simple ingredients!
For the Crust
- Chocolate Sandwich Cookies – The perfect crunchy base; you can swap these for any chocolate cookie if desired.
- Butter – Binds the cookie crumbs together; real butter offers the best flavor but margarine works too.
For the Gelatin Layer
- Orange Gelatin – Provides vibrant color and flavor; feel free to substitute with other gelatin colors like purple or green.
For the Pudding Layer
- Instant Vanilla Pudding – Adds creamy goodness; any pudding flavor can be used but avoid dark ones for aesthetics.
- Whole Milk – Gives richness to the pudding; you can use lower-fat milk for a lighter option.
For the Cream Cheese Layer
- Cream Cheese – Creates a smooth, rich layer; ensure it’s softened to mix easily.
- Powdered Sugar – Sweetens the cream cheese mixture; sifting helps avoid clumps.
- Whipped Topping (Cool Whip) – Lightens the cream cheese layer to airy perfection; homemade whipped cream can substitute nicely.
For Decoration
- Food Coloring – Boosts visual appeal; use it as needed to get those perfect Halloween hues.
- Halloween Sprinkles – A fun decorative touch; go for seasonal sprinkles to enhance festive vibes.
Ready to put this Halloween Lush Dessert together? Let’s move on to the step-by-step instructions!
Step‑by‑Step Instructions for No Bake Layered Halloween Lush Dessert
Step 1: Crust Preparation
Start by processing the chocolate sandwich cookies in a food processor until they resemble fine crumbs. Melt ½ cup of butter in a microwave-safe bowl, then combine with the cookie crumbs. Pour the mixture into a 9×13 glass dish, pressing it firmly to create an even crust. Refrigerate for about 10 minutes to set while you prepare the next layer.
Step 2: Orange Gelatin Layer
In a mixing bowl, dissolve one packet of orange gelatin in 1 cup of boiling water, stirring until fully dissolved. Allow it to cool for 2-3 minutes; you’ll want it to reach a slightly thickened state without solidifying. This vibrant orange gelatin layer enhances the festive appearance of your No Bake Layered Halloween Lush dessert, so set it aside for now.
Step 3: Pudding Mixture
Grab another bowl, and whisk together one packet of instant vanilla pudding mix with 2 cups of cold whole milk. Continue whisking for about 2 minutes, or until the mixture thickens to a creamy consistency. Fold in the cooled orange gelatin until everything is fully combined, ensuring that the gelatin distributes evenly within the pudding for a delightful color.
Step 4: Cream Cheese Layer
In a large mixing bowl, beat together 8 ounces of softened cream cheese and 1 cup of sifted powdered sugar until the mixture is smooth and creamy—about 3-4 minutes. Gently fold in 2 cups of whipped topping until fully integrated. If desired, add a few drops of food coloring to the mixture for a spooky hue, enhancing the visual appeal of your Halloween Lush Dessert.
Step 5: Layering
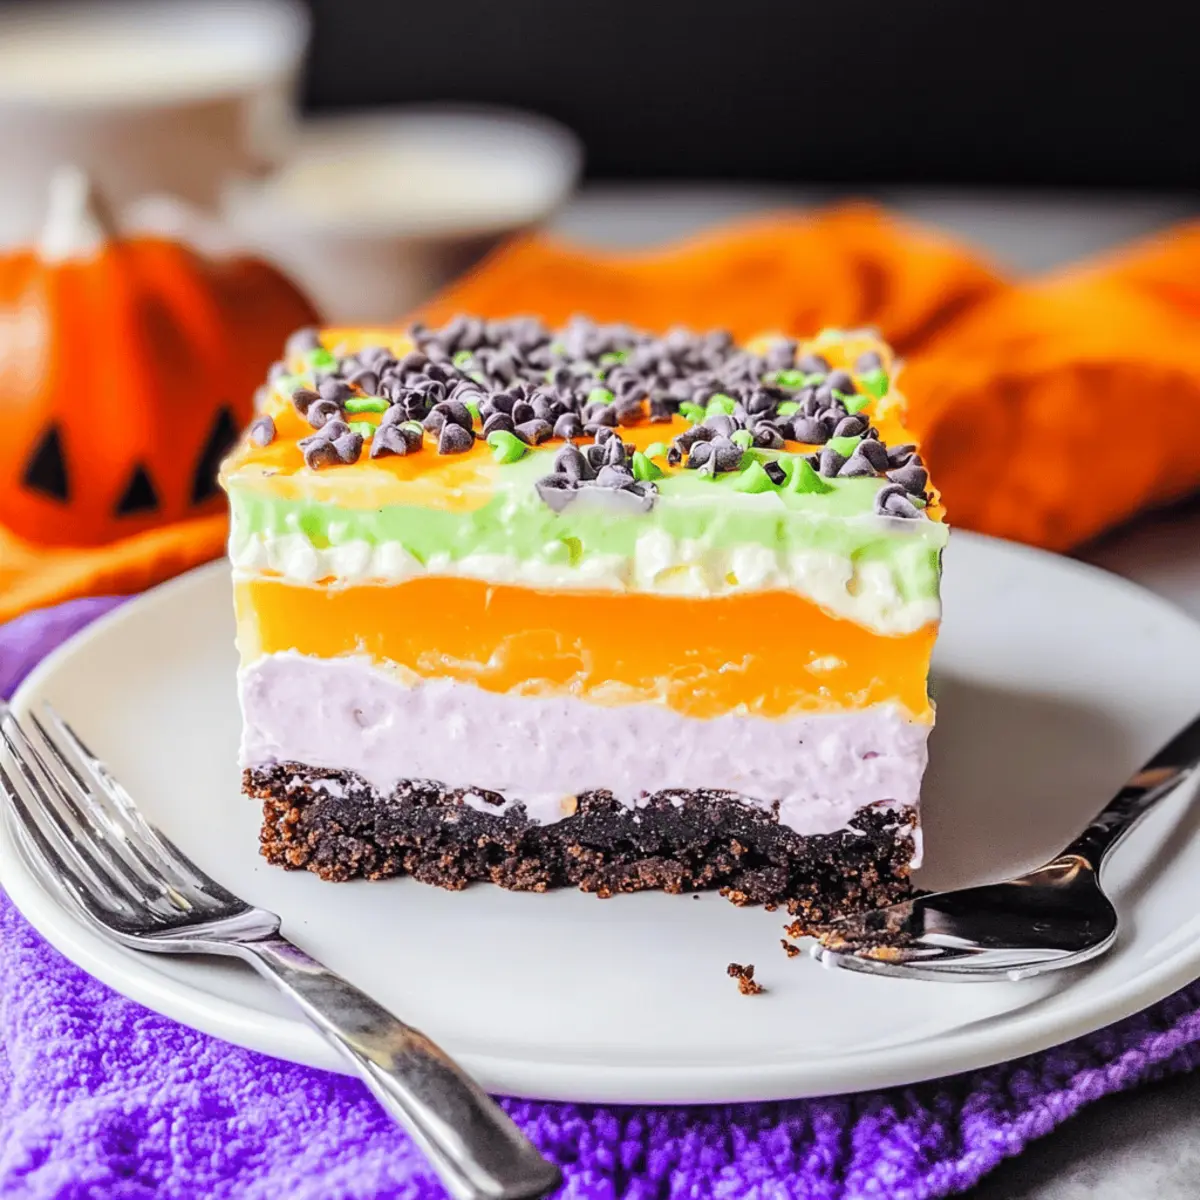
Begin creating your masterpiece by spreading the cream cheese mixture evenly over the chilled cookie crust, smoothing it out to the edges. Carefully layer the orange pudding mixture on top, ensuring it covers the cream cheese layer completely. Finally, spoon the remaining whipped topping on top for a light, fluffy finish and smooth it out for that perfect layered look.
Step 6: Chill
Cover the layered dessert with plastic wrap to prevent any odors from the fridge from affecting it. Chill in the refrigerator for at least 4 hours or overnight, allowing all the layers to set beautifully. When fully chilled, this No Bake Layered Halloween Lush Dessert will hold its shape when sliced, making it easy to serve at your spooky gatherings.
Expert Tips for Halloween Lush Dessert
-
Layer Evenly: Ensure each layer is spread evenly for a visually appealing presentation. Uneven layers can result in a messy dessert when sliced.
-
Chill Thoroughly: Allow the dessert to chill for at least 4 hours to ensure it sets correctly. This helps maintain clean slices when serving your Halloween Lush Dessert.
-
Clean Tools: Use a clean spatula between layers to avoid mixing colors; this helps achieve those gorgeous, distinct layers that make the dessert pop visually.
-
Flavor Variations: Don’t hesitate to get creative! Substitute the orange gelatin with purple or green for a unique twist that fits the Halloween theme.
-
Sprinkle Smartly: Add Halloween sprinkles right before serving to keep them vibrant and avoid them getting soggy during refrigeration.
-
Taste Test: Before serving, have a taste test! Adjust the sweetness of the cream cheese layer if desired, as everyone’s sweet preferences can vary.
Halloween Lush Dessert Variations
Feel free to unleash your creativity and personalize your No Bake Layered Halloween Lush Dessert to suit your taste and wow your guests even more!
-
Flavor Twist: Experiment with various flavored gelatins like green apple or grape for a spooky color change. A new twist can create excitement at your Halloween bash!
-
Pudding Variety: Try swapping instant vanilla pudding with chocolate or banana for a rich flavor boost. Each flavor brings a unique flair to your dessert, enticing different preferences.
-
Different Crusts: Use crushed graham crackers or even ginger snaps instead of chocolate cookies to introduce new textures and flavors. A ginger snap crust offers a delightful holiday note, perfect for fall festivities.
-
Dairy-Free Option: Substitute cream cheese with vegan cream cheese and use coconut whipped cream for a dairy-free version. This still delivers a delightful creamy texture, ensuring everyone can enjoy a slice!
-
Color Pop: Alternate food coloring in your cream cheese mixture for creative layered effects. Bright colors amplify the dessert’s fun and enhance its visual appeal for little ghosties!
-
Gummy Decorations: Top your dessert with gummy worms or eyeball candies for a fun, festive addition. Kids will love these playful touches, making it even more enticing at parties!
-
Chillin’ with Fruits: Layer in some fresh fruit toppings like blueberries or strawberries mixed in with the cream for a refreshing twist. This adds a delightful burst of flavor and a pop of color to your layers.
To complement your dessert, don’t forget to try these fantastic Pineapple Rings Dessert ideas or whip up some delightful Banana Desserts for a sweet finish!
What to Serve with No Bake Layered Halloween Lush Dessert
There’s so much joy in creating a complete Halloween feast that complements the playful flavors of this delightful dessert.
- Ghoulish Fruit Salad: Add a fresh touch with a mix of seasonal fruits; think orange slices, blackberries, and spooky melon balls. It’s healthy and delicious!
- Crispy Veggie Platter: Pair crunchy carrots, celery, and bell peppers with a creamy dip. The contrast of crunchy veggies and rich dip balances the lush dessert.
- Pumpkin Spice Cupcakes: Delightfully spiced cupcakes topped with creamy frosting will echo the flavors of fall. These add a lovely sweet treat to the table.
- Spooky Cheese Board: An assortment of cheeses, crackers, and grapes is perfect for snacking between spoons of your Halloween Lush Dessert. It adds a savory touch!
- Haunted Halloween Punch: A refreshing drink made with orange soda and a splash of ginger ale served in a spooky punch bowl will keep guests refreshed.
- Chocolate-Covered Pretzels: These combine sweet and salty flavors, which perfectly complement the sweetness of the Lush Dessert and add a fun crunchy texture.
- Candy Corn Parfaits: Layer candy corn with whipped cream in clear cups for a fun treat that mirrors the layered look of your main dessert—an eye-catching duo!
Make Ahead Options
These No Bake Layered Halloween Lush Desserts are perfect for busy home cooks looking to simplify their preparations! You can prepare the crust and the cream cheese layer up to 24 hours in advance, ensuring they stay fresh and delicious. Simply press the crust into your dish and store it covered in the refrigerator. Additionally, mix the orange gelatin layer and the pudding mixture a day ahead and refrigerate them separately. When you’re ready to serve, layer the cream cheese mixture, followed by the pudding layer, then top with whipped topping. This way, you’ll have a stunning dessert ready in no time, allowing you to enjoy the festivities without the last-minute rush!
How to Store and Freeze Halloween Lush Dessert
-
Fridge: Store your assembled Halloween Lush Dessert in a sealed container in the refrigerator for up to 3 days. This will keep the layers fresh and tasty.
-
Freezer: For longer storage, you can freeze the dessert, but it’s best to do so before adding any decorative toppings. Wrap it tightly in plastic wrap and foil for up to 2 months.
-
Thawing: When ready to enjoy, transfer the frozen Halloween Lush Dessert to the fridge to thaw overnight. This helps it regain its creamy texture without watering down the flavors.
-
Reheating: No need for reheating, simply serve chilled! This no bake treat is perfect straight from the fridge, making it an effortless dessert option for gatherings.
No Bake Layered Halloween Lush Dessert Recipe FAQs
How do I choose ripe ingredients for the Halloween Lush Dessert?
Absolutely! For your cream cheese layer, make sure to use fresh cream cheese that is not close to its expiration date. The best choice is cream cheese that is soft and easy to blend. When selecting powdered sugar, look for a brand that is fine and clump-free for a smooth result.
How should I store the Halloween Lush Dessert?
You can store the assembled Halloween Lush Dessert in a sealed container in the refrigerator for about 3 days. This keeps the layers fresh and ready to impress! If you plan to make it ahead of time, I recommend chilling it thoroughly to maintain those beautiful layers and to ensure everything stays intact.
Can I freeze the Halloween Lush Dessert?
Yes, you can freeze it! I suggest wrapping the dessert tightly in plastic wrap and then in foil to prevent freezer burn. It can be frozen for up to 2 months. However, it’s best to freeze it without any decorative toppings to keep it looking its best. When you’re ready to enjoy it, simply thaw it in the fridge overnight before serving.
What should I do if the layers mix during layering?
No worries! If you find that the layers mix while assembling, it’s an easy fix. Start by using a clean spatula to gently spread each layer. If you notice any blending, use the spatula to carefully separate them without pressing down too hard. Aim for gentle pressure as you layer to keep those colors distinct.
Are there any dietary considerations for pets or allergies?
Yes! This dessert contains cream cheese, milk, and sugar, all of which are not ideal for pets. Always keep it out of reach from your furry friends. Additionally, be cautious of allergies; for example, if someone is sensitive to dairy, you could experiment with dairy-free cream cheese and whipped topping. Always check labels on your ingredients to ensure they’re safe for everyone at your gathering!
Can I make this dessert in advance?
Very! In fact, making your No Bake Layered Halloween Lush Dessert the night before is a fantastic idea. This allows the layers to set beautifully and gives the flavors time to meld together. Plus, it takes a load off your shoulders on the day of your event, allowing you to focus on other fun Halloween activities!
Colorful Halloween Lush Dessert That Will Wow Your Guests
Ingredients
Equipment
Method
- Start by processing the chocolate sandwich cookies in a food processor until they resemble fine crumbs. Melt ½ cup of butter in a microwave-safe bowl, then combine with the cookie crumbs. Pour the mixture into a 9x13 glass dish, pressing it firmly to create an even crust. Refrigerate for about 10 minutes to set while you prepare the next layer.
- In a mixing bowl, dissolve one packet of orange gelatin in 1 cup of boiling water, stirring until fully dissolved. Allow it to cool for 2-3 minutes; you’ll want it to reach a slightly thickened state without solidifying.
- Grab another bowl, and whisk together one packet of instant vanilla pudding mix with 2 cups of cold whole milk. Continue whisking for about 2 minutes, or until the mixture thickens to a creamy consistency. Fold in the cooled orange gelatin until everything is fully combined.
- In a large mixing bowl, beat together 8 ounces of softened cream cheese and 1 cup of sifted powdered sugar until the mixture is smooth and creamy. Gently fold in 2 cups of whipped topping until fully integrated. If desired, add a few drops of food coloring.
- Spread the cream cheese mixture evenly over the chilled cookie crust. Carefully layer the orange pudding mixture on top, ensuring it covers the cream cheese layer completely. Finally, spoon the remaining whipped topping on top and smooth it out.
- Cover the layered dessert with plastic wrap to prevent any odors from the fridge from affecting it. Chill in the refrigerator for at least 4 hours or overnight.